【可视化学习】07-Three.js灯光与阴影
发表于:2023-05-21 |

灯光与阴影的关系与设置

要了解灯光与阴影的关系,我们可以通过下面这个案例来实现
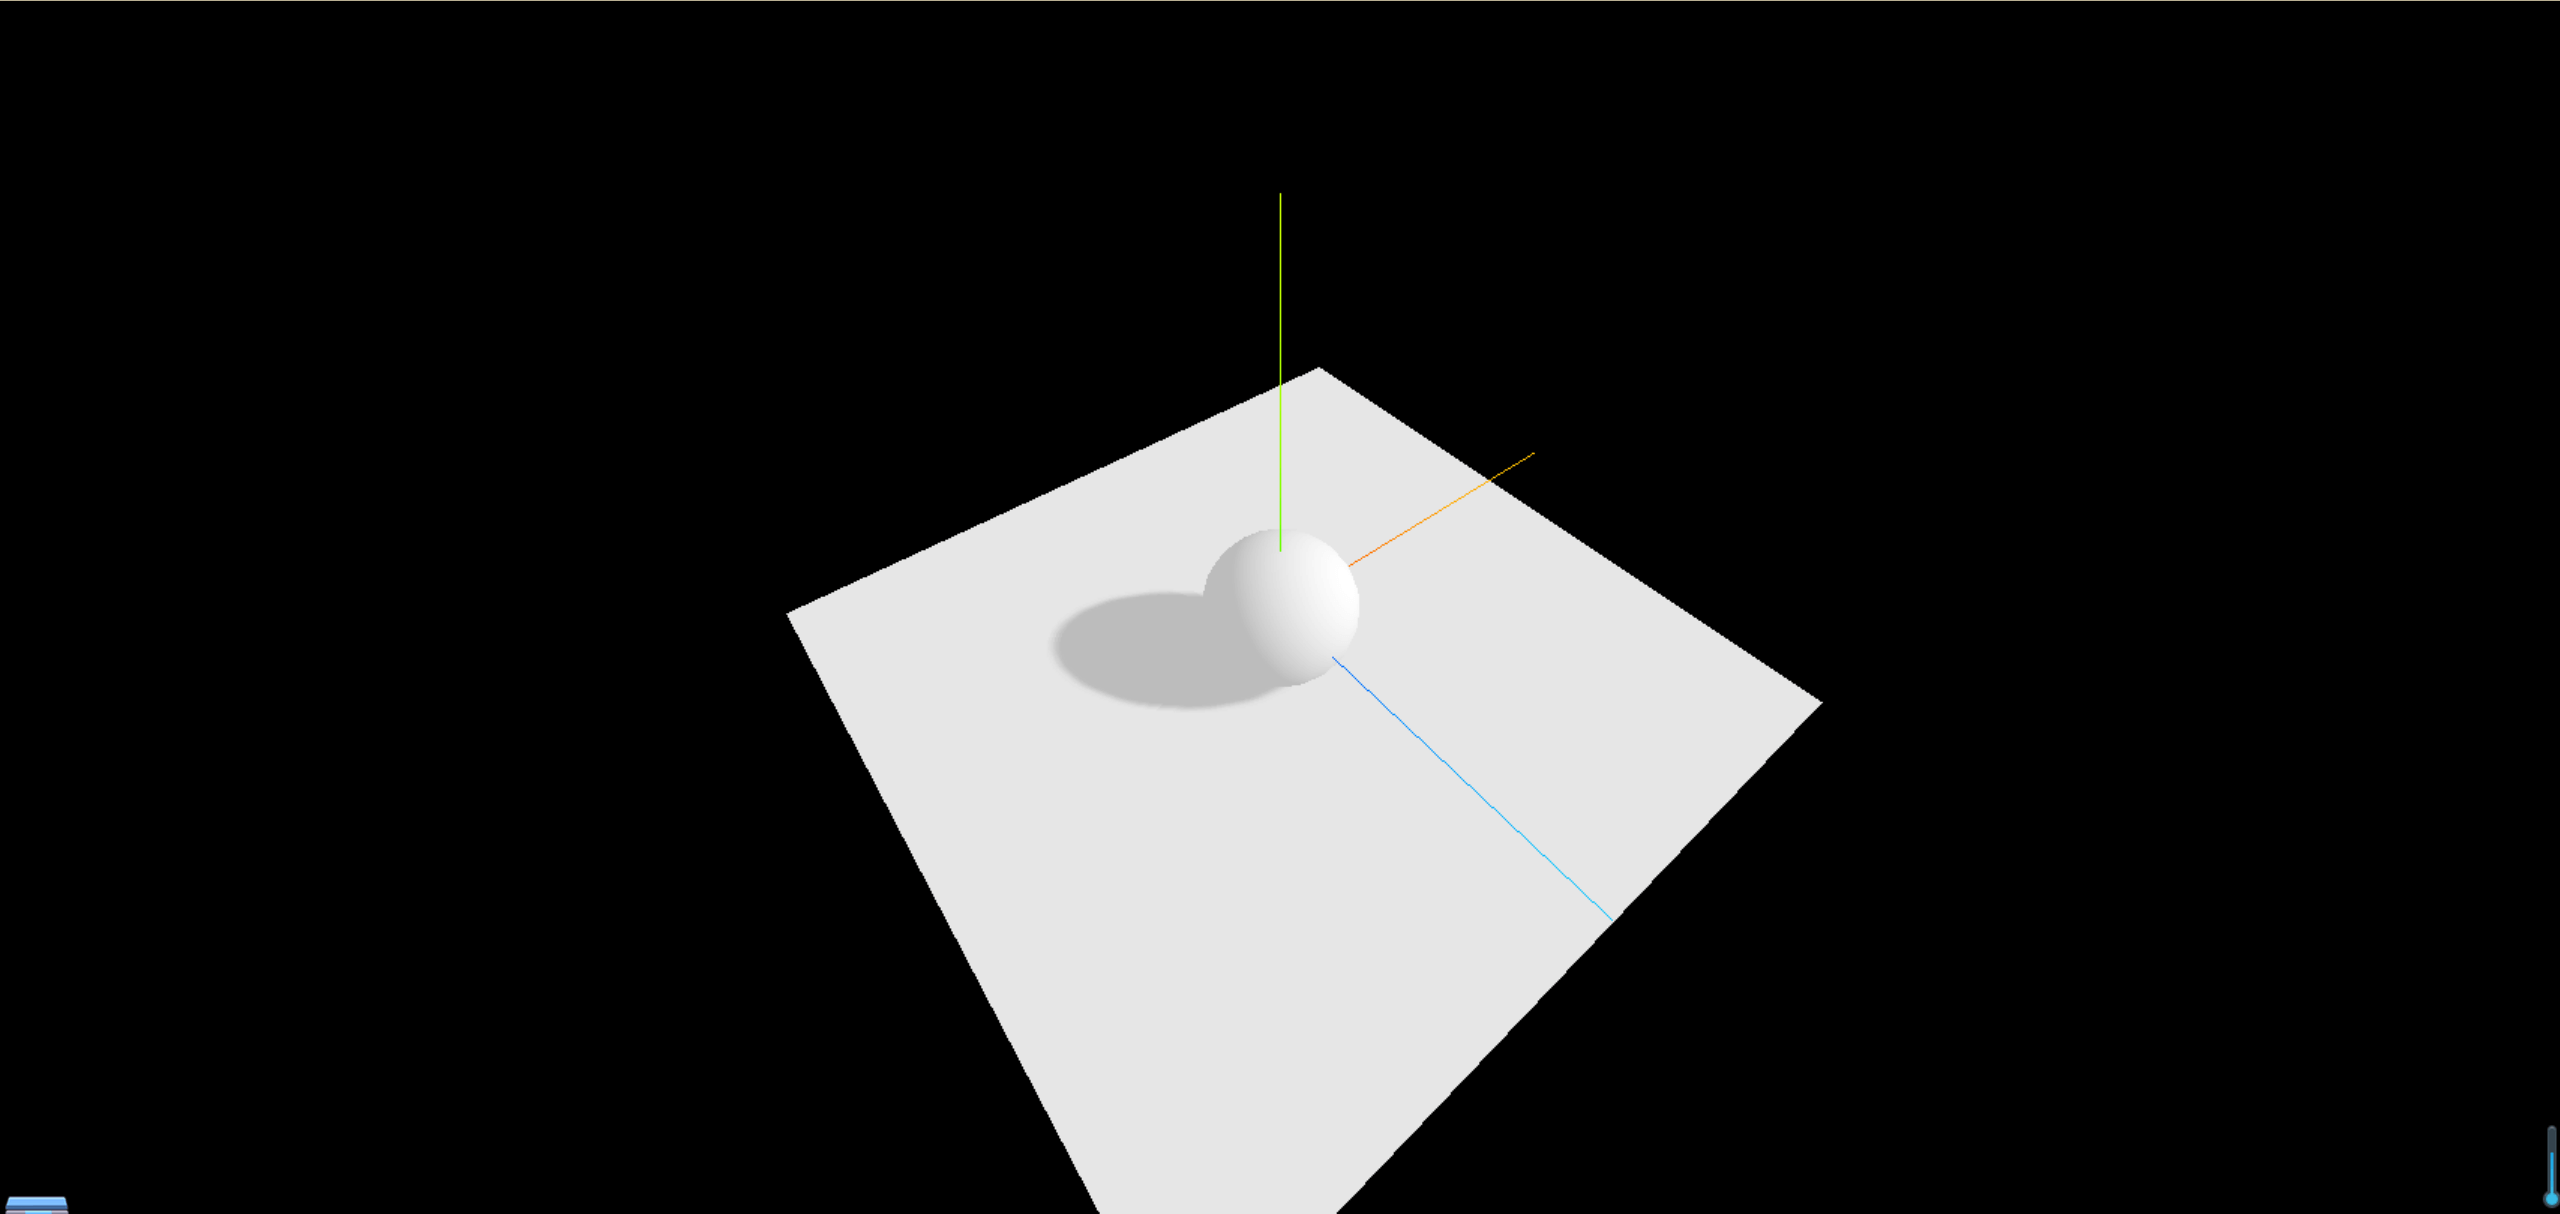
效果图
简单来说,其实就几步

平行光

  • 材质要满足能够对光照有反应
  • 设置渲染器开启阴影的计算 renderer.shadowMap.enabled = true;
  • 设置光照投射阴影 directionalLight.castShadow = true;
  • 设置物体投射阴影 sphere.castShadow = true;
  • 设置物体接收阴影 plane.receiveShadow = true;
    1
    2
    3
    4
    5
    6
    7
    8
    9
    10
    11
    12
    13
    14
    15
    16
    17
    18
    19
    20
    21
    22
    23
    24
    25
    26
    27
    28
    29
    30
    31
    32
    33
    34
    35
    36
    37
    38
    39
    40
    41
    42
    43
    44
    45
    46
    47
    48
    49
    50
    51
    52
    53
    54
    55
    56
    57
    58
    59
    60
    61
    62
    63
    64
    65
    66
    67
    68
    69
    70
    71
    72
    73
    74
    75
    76
    77
    78
    79
    80
    81
    82
    83
    84
    85
    86
    87
    88
    89
    90
    91
    92
    93
    94
    95
    96
    97
    98
    99
    100
    101
    102
    import * as THREE from "three";
    // 导入轨道控制器
    import { OrbitControls } from "three/examples/jsm/controls/OrbitControls";
    import { RGBELoader } from "three/examples/jsm/loaders/RGBELoader";
    // 1、创建场景
    const scene = new THREE.Scene();

    // 2、创建相机
    const camera = new THREE.PerspectiveCamera(
    75,
    window.innerWidth / window.innerHeight,
    0.1,
    1000
    );

    // 设置相机位置
    camera.position.set(0, 0, 10);
    scene.add(camera);

    // 创建小球
    const sphereGeometry = new THREE.SphereBufferGeometry(1, 20, 20);
    const material = new THREE.MeshStandardMaterial();
    const sphere = new THREE.Mesh(sphereGeometry, material);
    // 投射阴影
    sphere.castShadow = true;
    scene.add(sphere);

    // 创建平面
    const planeGeometry = new THREE.PlaneBufferGeometry(10, 10);
    const plane = new THREE.Mesh(planeGeometry, material);
    plane.position.set(0, -1, 0);
    plane.rotation.x = -Math.PI / 2;
    // 接收阴影
    plane.receiveShadow = true;
    scene.add(plane);

    // 灯光
    // 环境光
    const light = new THREE.AmbientLight(0xffffff, 0.5); // soft white light
    scene.add(light);
    //直线光源
    const directionalLight = new THREE.DirectionalLight(0xffffff, 0.5);
    directionalLight.position.set(5, 5, 5);
    // 设置光照投射阴影
    directionalLight.castShadow = true;

    // 设置阴影贴图模糊度
    directionalLight.shadow.radius = 20;
    // 设置阴影贴图的分辨率
    directionalLight.shadow.mapSize.set(4096, 4096);

    // 设置平行光投射相机的属性
    directionalLight.shadow.camera.near = 0.5;
    directionalLight.shadow.camera.far = 500;
    directionalLight.shadow.camera.top = 5;
    directionalLight.shadow.camera.bottom = -5;
    directionalLight.shadow.camera.left = -5;
    directionalLight.shadow.camera.right = 5;

    scene.add(directionalLight);


    // 初始化渲染器
    const renderer = new THREE.WebGLRenderer();
    // 设置渲染的尺寸大小
    renderer.setSize(window.innerWidth, window.innerHeight);
    // 开启场景中的阴影贴图
    renderer.shadowMap.enabled = true;

    // 将webgl渲染的canvas内容添加到body
    document.body.appendChild(renderer.domElement);

    // 创建轨道控制器
    const controls = new OrbitControls(camera, renderer.domElement);
    // 设置控制器阻尼,让控制器更有真实效果,必须在动画循环里调用.update()。
    controls.enableDamping = true;

    // 添加坐标轴辅助器
    const axesHelper = new THREE.AxesHelper(5);
    scene.add(axesHelper);

    function render() {
    controls.update();
    renderer.render(scene, camera);
    // 渲染下一帧的时候就会调用render函数
    requestAnimationFrame(render);
    }

    render();

    // 监听画面变化,更新渲染画面
    window.addEventListener("resize", () => {
    // 更新摄像头
    camera.aspect = window.innerWidth / window.innerHeight;
    // 更新摄像机的投影矩阵
    camera.updateProjectionMatrix();
    // 更新渲染器
    renderer.setSize(window.innerWidth, window.innerHeight);
    // 设置渲染器的像素比
    renderer.setPixelRatio(window.devicePixelRatio);
    });

聚光灯

接下来我们要实现下图的功能效果,完成聚光灯的调节,了解下聚光灯的属性阴影使用
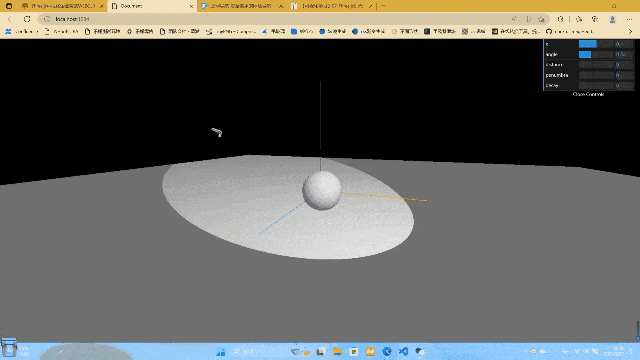
效果图

1
2
3
4
5
6
7
8
9
10
11
12
13
14
15
16
17
18
19
20
21
22
23
24
25
26
27
28
29
30
31
32
33
34
35
36
37
38
39
40
41
42
43
44
45
46
47
48
49
50
51
52
53
54
55
56
57
58
59
60
61
62
63
64
65
66
67
68
69
70
71
72
73
74
75
76
77
78
79
80
81
82
83
84
85
86
87
88
89
90
91
92
93
94
95
96
97
98
99
100
101
102
103
104
105
106
107
108
109
110
111
112
113
114
115
116
117
118
119
120
121
122
123
124
125
126
import * as THREE from "three";
// 导入轨道控制器
import { OrbitControls } from "three/examples/jsm/controls/OrbitControls";
// 导入dat.gui
import * as dat from "dat.gui";
// 创建gui用来调整(具体的参考前文有阐述)
const gui = new dat.GUI();
// 1、创建场景
const scene = new THREE.Scene();

// 2、创建相机
const camera = new THREE.PerspectiveCamera(
75,
window.innerWidth / window.innerHeight,
0.1,
1000
);

// 设置相机位置
camera.position.set(0, 0, 10);
scene.add(camera);

// 创建球
const sphereGeometry = new THREE.SphereBufferGeometry(1, 20, 20);
const material = new THREE.MeshStandardMaterial();
const sphere = new THREE.Mesh(sphereGeometry, material);
// 投射阴影
sphere.castShadow = true;

scene.add(sphere);

// // 创建平面
const planeGeometry = new THREE.PlaneBufferGeometry(50, 50);
const plane = new THREE.Mesh(planeGeometry, material);
// 平面偏移旋转
plane.position.set(0, -1, 0);
plane.rotation.x = -Math.PI / 2;
// 接收阴影
plane.receiveShadow = true;
scene.add(plane);

// 灯光
// 环境光
const light = new THREE.AmbientLight(0xffffff, 0.5); // soft white light
scene.add(light);
//直线光源
const spotLight = new THREE.SpotLight(0xffffff, 1);
spotLight.position.set(5, 5, 5);
// 设置光照投射阴影
spotLight.castShadow = true;
// 设置光线强度
spotLight.intensity = 2;

// 设置阴影贴图模糊度
spotLight.shadow.radius = 20;
// 设置阴影贴图的分辨率
spotLight.shadow.mapSize.set(512, 512);

spotLight.target = sphere;
// angle:从聚光灯的位置以弧度表示聚光灯的最大范围。应该不超过 Math.PI/2。默认值为 Math.PI/3
// distance:如果非零,那么光强度将会从最大值当前灯光位置处按照距离线性衰减到0。 缺省值为 0.0。
// penumbra:聚光锥的半影衰减百分比。在0和1之间的值。 默认值 — 0.0。
// decay:沿着光照距离的衰减量。
spotLight.angle = Math.PI / 6;
spotLight.distance = 0;
spotLight.penumbra = 0;
spotLight.decay = 0;

// 设置透视相机的属性

scene.add(spotLight);
gui.add(sphere.position, "x").min(-5).max(5).step(0.1);
gui
.add(spotLight, "angle")
.min(0)
.max(Math.PI / 2)
.step(0.01);
gui.add(spotLight, "distance").min(0).max(10).step(0.01);
gui.add(spotLight, "penumbra").min(0).max(1).step(0.01);
gui.add(spotLight, "decay").min(0).max(5).step(0.01);

// 初始化渲染器
const renderer = new THREE.WebGLRenderer();
// 设置渲染的尺寸大小
renderer.setSize(window.innerWidth, window.innerHeight);
// 开启场景中的阴影贴图
renderer.shadowMap.enabled = true;
// 开启物理计算,不然光照的decay无法生效
renderer.physicallyCorrectLights = true;

// console.log(renderer);
// 将webgl渲染的canvas内容添加到body
document.body.appendChild(renderer.domElement);

// 创建轨道控制器
const controls = new OrbitControls(camera, renderer.domElement);
// 设置控制器阻尼,让控制器更有真实效果,必须在动画循环里调用.update()。
controls.enableDamping = true;

// 添加坐标轴辅助器
const axesHelper = new THREE.AxesHelper(5);
scene.add(axesHelper);

function render() {
controls.update();
renderer.render(scene, camera);
// 渲染下一帧的时候就会调用render函数
requestAnimationFrame(render);
}

render();

// 监听画面变化,更新渲染画面
window.addEventListener("resize", () => {
// console.log("画面变化了");
// 更新摄像头
camera.aspect = window.innerWidth / window.innerHeight;
// 更新摄像机的投影矩阵
camera.updateProjectionMatrix();

// 更新渲染器
renderer.setSize(window.innerWidth, window.innerHeight);
// 设置渲染器的像素比
renderer.setPixelRatio(window.devicePixelRatio);
});

点光源

接下来我们要实现下图的功能效果,了解下点光源的属性阴影使用
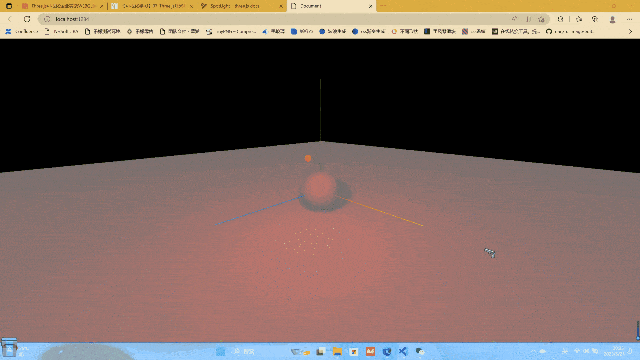
效果图

1
2
3
4
5
6
7
8
9
10
11
12
13
14
15
16
17
18
19
20
21
22
23
24
25
26
27
28
29
30
31
32
33
34
35
36
37
38
39
40
41
42
43
44
45
46
47
48
49
50
51
52
53
54
55
56
57
58
59
60
61
62
63
64
65
66
67
68
69
70
71
72
73
74
75
76
77
78
79
80
81
82
83
84
85
86
87
88
89
90
91
92
93
94
95
96
97
98
99
100
101
102
103
104
105
106
107
108
109
110
111
import * as THREE from "three";
// 导入轨道控制器
import { OrbitControls } from "three/examples/jsm/controls/OrbitControls";
// 目标:点光源的属性阴影使用
// 1、创建场景
const scene = new THREE.Scene();

// 2、创建相机
const camera = new THREE.PerspectiveCamera(
75,
window.innerWidth / window.innerHeight,
0.1,
1000
);

// 设置相机位置
camera.position.set(0, 0, 10);
scene.add(camera);

// 生成球
const sphereGeometry = new THREE.SphereBufferGeometry(1, 20, 20);
const material = new THREE.MeshStandardMaterial();
const sphere = new THREE.Mesh(sphereGeometry, material);
// 投射阴影
sphere.castShadow = true;
scene.add(sphere);

// 创建平面
const planeGeometry = new THREE.PlaneBufferGeometry(50, 50);
const plane = new THREE.Mesh(planeGeometry, material);
plane.position.set(0, -1, 0);
plane.rotation.x = -Math.PI / 2;
// 接收阴影
plane.receiveShadow = true;
scene.add(plane);

// 灯光
// 环境光
const light = new THREE.AmbientLight(0xffffff, 0.5); // soft white light
scene.add(light);

// 生成点光源小球
const smallBall = new THREE.Mesh(
new THREE.SphereBufferGeometry(0.1, 20, 20),
new THREE.MeshBasicMaterial({ color: 0xff0000 })
);
smallBall.position.set(2, 2, 2);
//直线光源
const pointLight = new THREE.PointLight(0xff0000, 1);
pointLight.castShadow = true;

// 设置阴影贴图模糊度
pointLight.shadow.radius = 20;
// 设置阴影贴图的分辨率
pointLight.shadow.mapSize.set(512, 512);
pointLight.decay = 0;

// 将点光源添加给小球,把小球放到场景中
smallBall.add(pointLight);
scene.add(smallBall);

// 初始化渲染器
const renderer = new THREE.WebGLRenderer();
// 设置渲染的尺寸大小
renderer.setSize(window.innerWidth, window.innerHeight);
// 开启场景中的阴影贴图
renderer.shadowMap.enabled = true;
renderer.physicallyCorrectLights = true;

// 将webgl渲染的canvas内容添加到body
document.body.appendChild(renderer.domElement);


// 创建轨道控制器
const controls = new OrbitControls(camera, renderer.domElement);
// 设置控制器阻尼,让控制器更有真实效果,必须在动画循环里调用.update()。
controls.enableDamping = true;

// 添加坐标轴辅助器
const axesHelper = new THREE.AxesHelper(5);
scene.add(axesHelper);
// 设置时钟
const clock = new THREE.Clock();

function render() {
// 让小球动起来,我们知道一个圆环是由一条直线扫射而成,因此,为了让光源小球绕y轴旋转,就需要设置小球的x和z轴的位置变化,而因为这个。添加y方向的变化,让小球上下运动
let time = clock.getElapsedTime();
smallBall.position.x = Math.sin(time) * 3;
smallBall.position.z = Math.cos(time) * 3;
smallBall.position.y = 2 + Math.sin(time * 10) / 2;
controls.update();
renderer.render(scene, camera);
// 渲染下一帧的时候就会调用render函数
requestAnimationFrame(render);
}

render();

// 监听画面变化,更新渲染画面
window.addEventListener("resize", () => {
// 更新摄像头
camera.aspect = window.innerWidth / window.innerHeight;
// 更新摄像机的投影矩阵
camera.updateProjectionMatrix();

// 更新渲染器
renderer.setSize(window.innerWidth, window.innerHeight);
// 设置渲染器的像素比
renderer.setPixelRatio(window.devicePixelRatio);
});

上一篇:
同步请求返回值
下一篇:
【可视化学习】06-Three.js材质和纹理