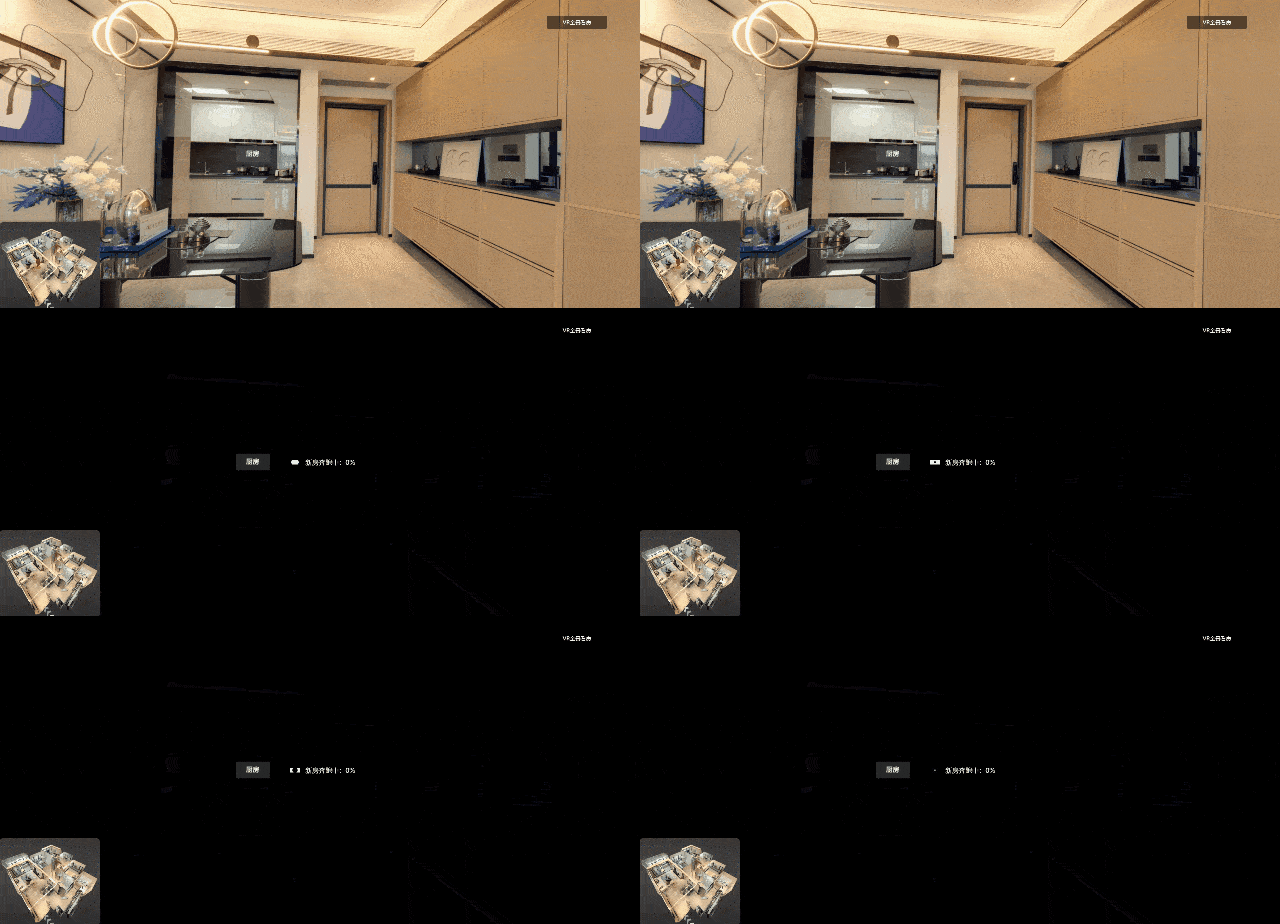
【可视化学习】23-VR全景看房
发表于:2023-06-12 |

前言

今天带大家从零开始实现一个基于vue的VR全景看房功能,大家一起做大做强

安装

vite脚手架创建项目

1
npm init vite@latest '项目名称' --template vue

使用vite脚手架创建项目

安装依赖

1
2
3
npm install three --save
npm install gsap --save
npm install

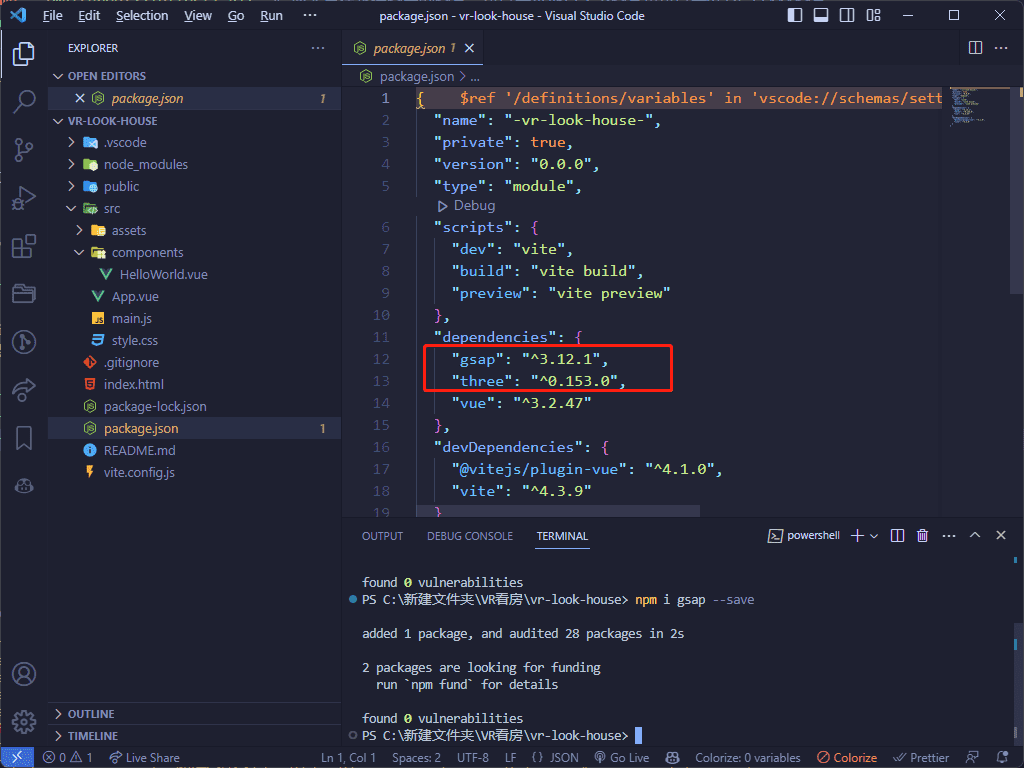
安装完依赖后,在package.json中有如下两个库即可
依赖安装

基本样式

因为我们就一个页面,那我们直接在app.vue中写我们的代码即可

1
2
3
4
5
6
7
8
9
10
11
12
13
14
<template>
<div class="container" ref="container">111</div>
</template>
<style>
* {
margin: 0;
padding: 0;
}
.container {
height: 100vh;
width: 100vw;
background-color: #f0f0f0;
}
</style>

基本样式

基础代码

1
2
3
4
5
6
7
8
9
10
11
12
13
14
15
16
17
18
19
20
21
22
23
24
25
26
27
28
29
30
31
32
33
34
35
36
37
38
39
40
41
42
43
44
45
46
47
48
49
50
51
52
53
54
55
56
57
58
59
60
61
62
63
64
65
66
67
68
69
70
71
72
73
74
75
76
77
78
<template>
<div class="container" ref="container"></div>
</template>
<script setup>
import {ref,onMounted} from "vue"
// 导入three.js
import * as THREE from "three";
// 导入轨道控制器
import { OrbitControls } from "three/examples/jsm/controls/OrbitControls";
// 1、创建场景
const scene = new THREE.Scene();
const container=ref(null)
// 2、创建相机
const camera = new THREE.PerspectiveCamera(
75,
window.innerWidth / window.innerHeight,
0.1,
300
);

// 设置相机位置
camera.position.set(0, 0, 20);
// 将相机添加到场景中
scene.add(camera);

// 初始化渲染器
const renderer = new THREE.WebGLRenderer();
// 设置渲染的尺寸大小
renderer.setSize(window.innerWidth, window.innerHeight);

// 创建轨道控制器
const controls = new OrbitControls(camera, renderer.domElement);
// 设置控制器阻尼,让控制器更有真实效果,必须在动画循环里调用.update()。
controls.enableDamping = true;

// 添加坐标轴辅助器
const axesHelper = new THREE.AxesHelper(5);
// 将坐标轴辅助器添加到场景中
scene.add(axesHelper);

// 渲染场景
function render() {
controls.update();
renderer.render(scene, camera);
// 渲染下一帧的时候就会调用render函数
requestAnimationFrame(render);
}
onMounted(() => {
// 将webgl渲染的canvas内容添加到容器中
container.value.appendChild(renderer.domElement);
render();
}),


// 监听画面变化,更新渲染画面
window.addEventListener("resize", () => {
// 更新摄像头
camera.aspect = window.innerWidth / window.innerHeight;
// 更新摄像机的投影矩阵
camera.updateProjectionMatrix();
// 更新渲染器
renderer.setSize(window.innerWidth, window.innerHeight);
// 设置渲染器的像素比
renderer.setPixelRatio(window.devicePixelRatio);
});
</script>
<style>
* {
margin: 0;
padding: 0;
}
.container {
height: 100vh;
width: 100vw;
background-color: #f0f0f0;
}
</style>

基础代码

添加环境纹理图片

上面是基于我们之前学过的基础代码改造的,只不过是将渲染环节放到了onMounted之后,接下来我们先添加我们的第一组纹理图片

创建客厅

1
2
3
4
5
6
7
8
9
10
11
12
13
14
15
16
17
18
19
20
21
22
// 添加客厅立方体
const geometry = new THREE.BoxGeometry(10, 10, 10);
// 我们的效果是要让我们处在一个房间里面,而不是要从外面看,所以比例变成-1
geometry.scale(1, 1, -1);
var arr=[
`0_l`,
`0_r`,
`0_u`,
`0_d`,
`0_b`,
`0_f`,
];
var boxMaterials =[]
arr.forEach(item=>{
let texture=new THREE.TextureLoader().load(`./https://636f-codesigner-3gyd7y6tb240bd1c-1316695488.tcb.qcloud.la/image-save-1/livingroom/${item}.jpg`);
boxMaterials.push(new THREE.MeshBasicMaterial({
map: texture,
}));
const cube=new THREE.Mesh(geometry,boxMaterials);
cube.position.set(0, 0, 0);
scene.add(cube);
})

注意:因为我们把这个cube的位置设置到了(0,0,0),因此我们相机的位置也要设置到(0,0,0),这样我们才能看到这个cube

1
2
// 设置相机位置
camera.position.set(0, 0, 0);

基础代码

让鼠标可以滑动内容(移动相机)

1
2
3
4
5
6
7
8
9
10
11
12
13
14
15
16
17
18
19
20
21
22
23
24
25
26
27
28
let isMouseDown = false;

// 监听鼠标按下事件
window.addEventListener(
"mousedown",
() => {
isMouseDown = true;
},
false
);
// 监听鼠标抬起事件
window.addEventListener(
"mouseup",
() => {
isMouseDown = false;
},
false
);
// 监听鼠标移动事件
window.addEventListener(
"mousemove",
(e) => {
if (isMouseDown) {
camera.rotation.y += (e.movementX / window.innerWidth) * Math.PI;
}
},
false
);

封装一个类

我们有多个房间需要添加渲染,那就给这个添加房间的功能封装成一个类

1
2
3
4
5
6
7
8
9
10
11
12
13
14
15
16
17
18
19
20
21
22
23
24
25
26
27
28
29
30
31
32
33
34
35
36
37
38
39
40
41
42
// name:房间名称 roomIndex:房间索引 textureUrl:房间纹理图片路径基础路径 position:房间位置 euler:房间旋转角度
class Room {
constructor(
name,
roomIndex,
textureUrl,
position = new THREE.Vector3(0, 0, 0),
euler = new THREE.Euler(0, 0, 0)
) {
this.name = name;
// 添加立方体
const geometry = new THREE.BoxGeometry(10, 10, 10);
geometry.scale(1, 1, -1);

var arr = [
`${roomIndex}_l`,
`${roomIndex}_r`,
`${roomIndex}_u`,
`${roomIndex}_d`,
`${roomIndex}_b`,
`${roomIndex}_f`,
];
var boxMaterials = [];

arr.forEach((item) => {
// 纹理加载
let texture = new THREE.TextureLoader().load(`${textureUrl}/${item}.jpg`);
// 创建材质(天和地相反了,因此搞个旋转)
if (item === `${roomIndex}_u` || item === `${roomIndex}_d`) {
texture.rotation = Math.PI;
texture.center = new THREE.Vector2(0.5, 0.5);
boxMaterials.push(new THREE.MeshBasicMaterial({ map: texture }));
} else {
boxMaterials.push(new THREE.MeshBasicMaterial({ map: texture }));
}
});
const cube = new THREE.Mesh(geometry, boxMaterials);
cube.position.copy(position);
cube.rotation.copy(euler);
scene.add(cube);
}
}

使用类创建

创建客厅

1
2
3
4
5
// 创建客厅
let livingIndex = 0;
let livingUrl = "./https://636f-codesigner-3gyd7y6tb240bd1c-1316695488.tcb.qcloud.la/image-save-1/livingroom/";
let livingPosition = new THREE.Vector3(0, 0, 0);
const living = new Room("客厅", livingIndex, livingUrl, livingPosition);

创建厨房

1
2
3
4
5
6
// 创建厨房
let kitPosition = new THREE.Vector3(-5, 0, -10);
let kitIndex = 3;
let textureUrl = "./https://636f-codesigner-3gyd7y6tb240bd1c-1316695488.tcb.qcloud.la/image-save-1/kitchen";
let kitEuler = new THREE.Euler(0, -Math.PI / 2, 0);
const room = new Room("厨房", kitIndex, textureUrl, kitPosition, kitEuler);

这时,如果我们想要从客厅移动到厨房,我们新建一个div,加上gsap动画即可

添加转移房间的按钮

写一个点击的类方法

1
2
3
4
5
6
7
8
9
10
11
12
13
14
15
16
17
18
19
20
21
22
23
24
25
26
27
28
29
30
31
32
33
34
35
36
37
38
39
40
41
42
43
44
45
46
47
48
49
50
51
52
53
54
55
56
57
58
59
60
61
62
63
64
65
import * as THREE from "three";

export default class SpriteCanvas {
constructor(
camera,
text = "helloworld",
position = new THREE.Vector3(0, 0, 0),
euler = new THREE.Euler(0, 0, 0)
) {
this.fns = [];
// 创建canvas对象
const canvas = document.createElement("canvas");
canvas.width = 1024;
canvas.height = 1024;
const context = canvas.getContext("2d");
this.context = context;
context.fillStyle = "rgba(100,100,100,1)";
context.fillRect(0, 256, 1024, 512);
context.textAlign = "center";
context.textBaseline = "middle";
context.font = "bold 200px Arial";
context.fillStyle = "rgba(255,255,255,1)";
context.fillText(text, canvas.width / 2, canvas.height / 2);

let texture = new THREE.CanvasTexture(canvas);

const material = new THREE.SpriteMaterial({
map: texture,
color: 0xffffff,
alphaMap: texture,
side: THREE.DoubleSide,
transparent: true,
});
this.mesh = new THREE.Sprite(material);
this.mesh.scale.set(0.5, 0.5, 0.5);
this.mesh.position.copy(position);

// 创建射线
this.raycaster = new THREE.Raycaster();
this.mouse = new THREE.Vector2();

// 事件的监听
window.addEventListener("click", (event) => {
this.mouse.x = (event.clientX / window.innerWidth) * 2 - 1;
this.mouse.y = -((event.clientY / window.innerHeight) * 2 - 1);

this.raycaster.setFromCamera(this.mouse, camera);

event.mesh = this.mesh;
event.spriteCanvas = this;

// 检验碰撞
const intersects = this.raycaster.intersectObject(this.mesh);
// console.log(intersects);
if (intersects.length > 0) {
this.fns.forEach((fn) => {
fn(event);
});
}
});
}
onClick(fn) {
this.fns.push(fn);
}
}

使用这个类创建文字精灵

1
2
3
4
5
6
7
8
9
10
11
12
13
 // 创建文字精灵
const text = new SpriteCanvas(camera, "厨房", new THREE.Vector3(-1, 0, -3));
// text.mesh.rotation.y = Math.PI / 3;
scene.add(text.mesh);
text.onClick(() => {
gsap.to(camera.position, {
x: kitPosition.x,
y: kitPosition.y,
z: kitPosition.z,
duration: 1,
});
moveTag("厨房");
});

基础代码

添加厨房回客厅的文字精灵

1
2
3
4
5
6
7
8
9
10
11
12
13
14
15
16
// 创建客厅文字精灵
const textLiving = new SpriteCanvas(
camera,
"客厅",
new THREE.Vector3(-4, 0, -6)
);
scene.add(textLiving.mesh);
textLiving.onClick(() => {
console.log("客厅");
gsap.to(camera.position, {
x: livingPosition.x,
y: livingPosition.y,
z: livingPosition.z,
duration: 1,
});
});

创建所有房间和文字精灵

同样的,我们复制以上代码创建所有房间和文字精灵,这里的位置什么的需要自己一点点尝试

1
2
3
4
5
6
7
8
9
10
11
12
13
14
15
16
17
18
19
20
21
22
23
24
25
26
27
28
29
30
31
32
33
34
35
36
37
38
39
40
41
42
43
44
45
46
47
48
49
50
51
52
53
54
55
56
57
58
59
60
61
62
63
64
65
66
67
68
69
70
71
72
73
74
75
76
77
78
79
80
81
82
83
84
85
86
87
88
89
90
91
92
93
94
95
96
97
98
99
100
101
102
103
104
105
106
107
108
109
110
111
112
113
114
115
116
117
118
119
120
121
122
123
124
125
126
127
128
129
130
131
132
133
134
135
136
137
138
// 创建阳台
let balconyPosition = new THREE.Vector3(0, 0, 15);
let balconyIndex = 8;
let balconyUrl = "./https://636f-codesigner-3gyd7y6tb240bd1c-1316695488.tcb.qcloud.la/image-save-1/balcony";
let balconyEuler = new THREE.Euler(0, Math.PI / 16, 0);
const balcony = new Room(
"阳台",
balconyIndex,
balconyUrl,
balconyPosition,
balconyEuler
);

// 创建阳台文字精灵
const textBalcony = new SpriteCanvas(
camera,
"阳台",
new THREE.Vector3(0, 0, 3)
);
scene.add(textBalcony.mesh);
textBalcony.onClick(() => {
console.log("阳台");
gsap.to(camera.position, {
x: balconyPosition.x,
y: balconyPosition.y,
z: balconyPosition.z,
duration: 1,
});
});

// 创建阳台回客厅文字精灵
const textBalconyToLiving = new SpriteCanvas(
camera,
"客厅",
new THREE.Vector3(-1, 0, 11)
);
scene.add(textBalconyToLiving.mesh);
textBalconyToLiving.onClick(() => {
console.log("客厅");
gsap.to(camera.position, {
x: livingPosition.x,
y: livingPosition.y,
z: livingPosition.z,
duration: 1,
});
});

// 创建走廊
let hallwayPosition = new THREE.Vector3(-15, 0, 0);
let hallwayIndex = 9;
let hallwayUrl = "./https://636f-codesigner-3gyd7y6tb240bd1c-1316695488.tcb.qcloud.la/image-save-1/corridor";
let hallwayEuler = new THREE.Euler(0, -Math.PI + Math.PI / 16, 0);
const hallway = new Room(
"走廊",
hallwayIndex,
hallwayUrl,
hallwayPosition,
hallwayEuler
);

// 走廊文字精灵
const textCorridor = new SpriteCanvas(
camera,
"走廊",
new THREE.Vector3(-4, 0, 0.5)
);
scene.add(textCorridor.mesh);
textCorridor.onClick(() => {
console.log("走廊");
gsap.to(camera.position, {
x: hallwayPosition.x,
y: hallwayPosition.y,
z: hallwayPosition.z,
duration: 1,
});
});

// 创建走廊回客厅文字精灵
const textCorridorToLiving = new SpriteCanvas(
camera,
"客厅",
new THREE.Vector3(-11, 0, 0)
);
scene.add(textCorridorToLiving.mesh);
textCorridorToLiving.onClick(() => {
console.log("客厅");
gsap.to(camera.position, {
x: livingPosition.x,
y: livingPosition.y,
z: livingPosition.z,
duration: 1,
});
});

// 创建主卧
let mainPosition = new THREE.Vector3(-25, 0, 2);
let mainIndex = 18;
let mainUrl = "./https://636f-codesigner-3gyd7y6tb240bd1c-1316695488.tcb.qcloud.la/image-save-1/bedroom";
// let mainEuler = new THREE.Euler(0, -Math.PI / 2, 0);
const main = new Room(
"主卧",
mainIndex,
mainUrl,
mainPosition
// mainEuler
);
// 主卧文字精灵
const textMain = new SpriteCanvas(
camera,
"主卧",
new THREE.Vector3(-19, 0, 2)
);
scene.add(textMain.mesh);
textMain.onClick(() => {
console.log("主卧");
gsap.to(camera.position, {
x: mainPosition.x,
y: mainPosition.y,
z: mainPosition.z,
duration: 1,
});
});
// 创建主卧回走廊文字精灵
const textMainToCorridor = new SpriteCanvas(
camera,
"走廊",
new THREE.Vector3(-23, 0, -2)
);
scene.add(textMainToCorridor.mesh);
textMainToCorridor.onClick(() => {
console.log("走廊");
gsap.to(camera.position, {
x: hallwayPosition.x,
y: hallwayPosition.y,
z: hallwayPosition.z,
duration: 1,
});
});

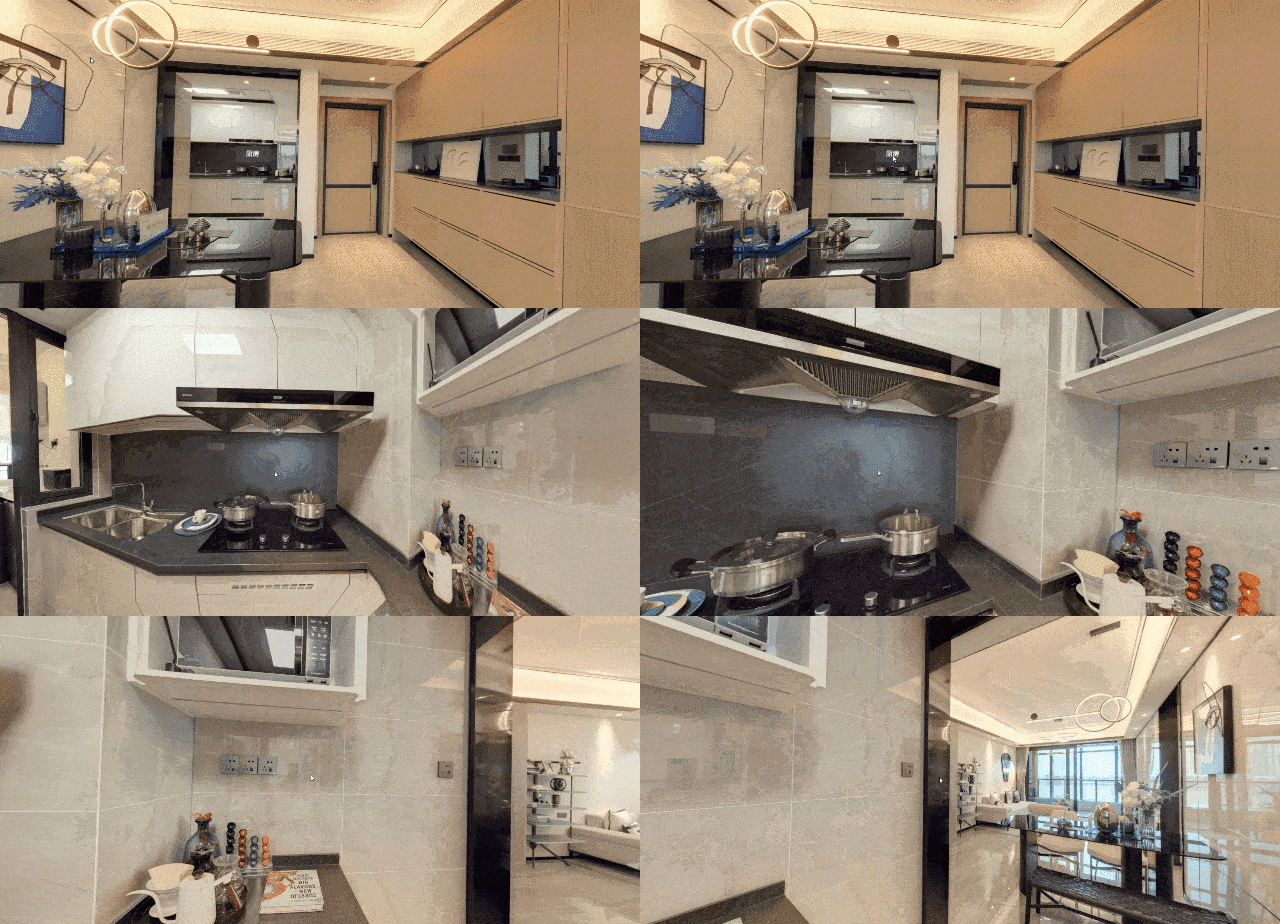
效果图

添加加载动画

1
2
3
4
5
6
7
8
9
10
11
12
13
14
15
16
17
18
19
20
21
22
23
24
25
26
27
28
29
30
31
32
33
34
35
36
37
38
39
40
41
42
43
44
45
46
47
48
49
50
51
52
53
54
55
56
57
58
59
60
61
62
63
64
65
66
67
68
69
70
71
72
73
74
75
76
77
78
79
80
81
82
83
84
85
86
87
88
89
90
91
92
93
94
95
96
97
98
99
100
101
102
103
104
105
<template>
<div class="loading" v-if="progress != 100"></div>
<div class="progress" v-if="progress != 100">
<img src="./assets/loading.gif" alt="" />
<span>新房奔跑中:{{ progress }}%</span>
</div>
<div class="title">VR全景看房</div>
</template>
<style>
.loading {
position: fixed;
top: 0;
left: 0;
width: 100vw;
height: 100vh;
background-image: url(./assets/loading.png);
background-size: cover;
filter: blur(50px);
z-index: 100;
}
.progress {
position: absolute;
top: 0;
left: 0;
width: 100vw;
height: 100vh;
z-index: 101;
display: flex;
justify-content: center;
align-items: center;
font-size: 20px;
color: #fff;
}
.progress > img {
padding: 0 15px;
}

.title {
width: 180px;
height: 40px;
position: fixed;
right: 100px;
top: 50px;
background-color: rgba(0, 0, 0, 0.5);
line-height: 40px;
text-align: center;
color: #fff;
border-radius: 5px;
z-index: 110;
}
</style>
<script setup>
class Room {
constructor(
name,
roomIndex,
textureUrl,
position = new THREE.Vector3(0, 0, 0),
euler = new THREE.Euler(0, 0, 0)
) {
this.name = name;
// 添加立方体
const geometry = new THREE.BoxGeometry(10, 10, 10);
geometry.scale(1, 1, -1);
// const material = new THREE.MeshBasicMaterial({ color: 0x00ff00 });
// const cube = new THREE.Mesh(geometry, material);
// scene.add(cube);

// 4_b,
var arr = [
`${roomIndex}_l`,
`${roomIndex}_r`,
`${roomIndex}_u`,
`${roomIndex}_d`,
`${roomIndex}_b`,
`${roomIndex}_f`,
];
var boxMaterials = [];

arr.forEach((item) => {
// 纹理加载
let texture = new THREE.TextureLoader().load(`${textureUrl}/${item}.jpg`);
// 创建材质
if (item === `${roomIndex}_u` || item === `${roomIndex}_d`) {
texture.rotation = Math.PI;
texture.center = new THREE.Vector2(0.5, 0.5);
boxMaterials.push(new THREE.MeshBasicMaterial({ map: texture }));
} else {
boxMaterials.push(new THREE.MeshBasicMaterial({ map: texture }));
}
});
const cube = new THREE.Mesh(geometry, boxMaterials);
cube.position.copy(position);
cube.rotation.copy(euler);
// cube.geometry.scale(1, 1, -1);
scene.add(cube);

// 新增进度方法
THREE.DefaultLoadingManager.onProgress = function (item, loaded, total) {
console.log(item, loaded, total);
progress.value = new Number((loaded / total) * 100).toFixed(2);
};
}
}
</script>

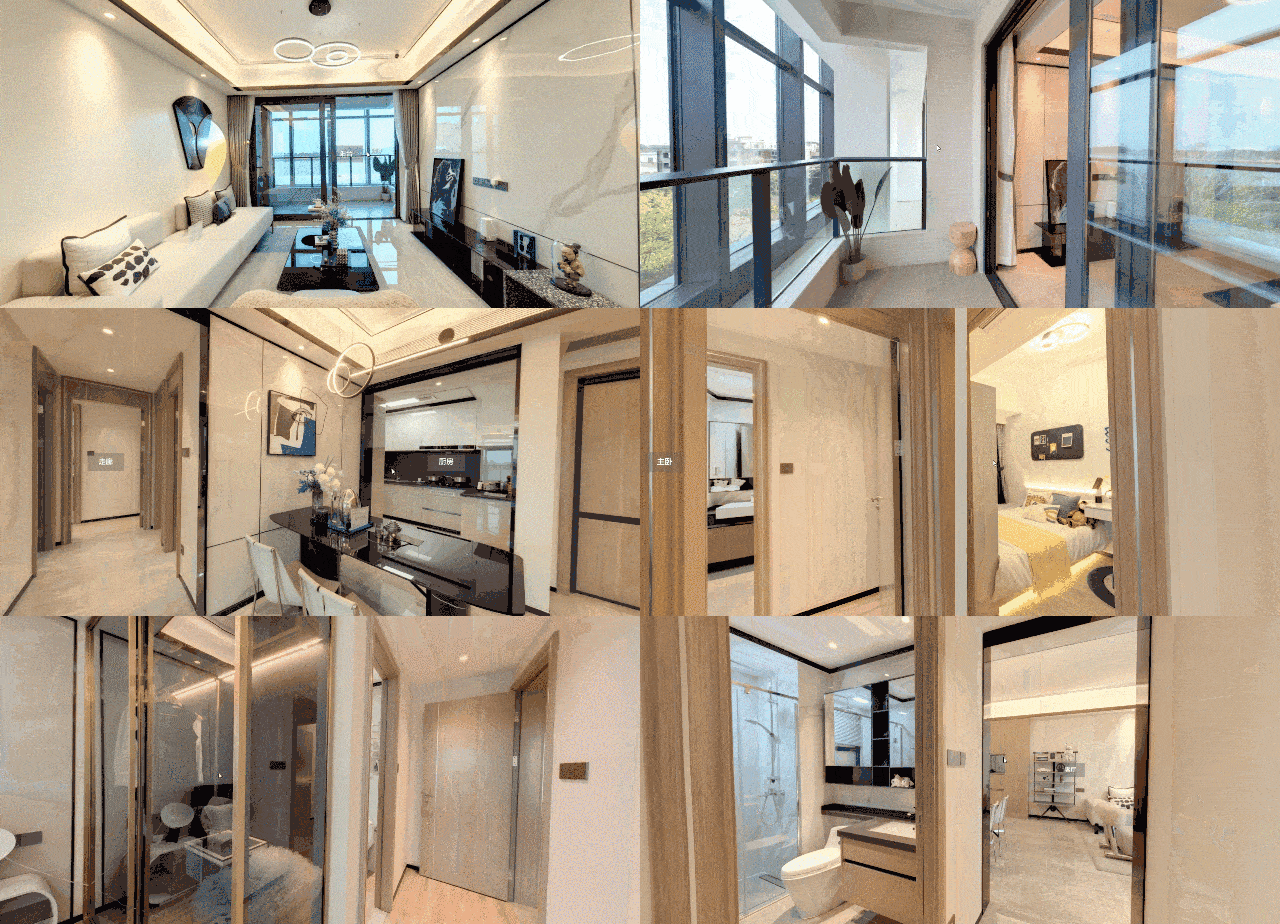
效果图

上一篇:
iframe内嵌网页keep-alive不生效以及手动刷新iframe页面
下一篇:
uni-app如何启动