前言
从本篇开始,我们就开始进入智慧城市效果添加的环节了
添加模型渐变效果
首先,因为我之前的天一广场的模型海拔区分不是很大,展示效果就不是很好,所以我就换了个模型使用
了解更换的模型
模型效果如下

了解材质内部代码
我们新建一个文件modifyCityMaterial.js,在这里面写我们的修改城市材质的代码
在createMesh.js中将物体传进去
1
2
3
4
5
6
7
8
9
10
11
12
13
14
15
16
17
18
19
20
| import { GLTFLoader } from "three/examples/jsm/loaders/GLTFLoader";
import * as THREE from "three";
import scene from "../scene";
import modifyCityMaterial from "../modify/modifyCityMaterial";
export default function createCity() {
const gltfLoader = new GLTFLoader();
gltfLoader.load("./model/city.glb", (gltf) => {
gltf.scene.traverse((item) => {
if (item.type == "Mesh") {
const cityMaterial = new THREE.MeshBasicMaterial({
color: new THREE.Color(0x0c0e33),
});
item.material = cityMaterial;
modifyCityMaterial(item);
}
});
scene.add(gltf.scene);
});
}
|
我们知道,这个物体模型已经被我们修改成了标准材质,因此很多其他材质有的效果我们都用不了,最好的就是我们自己修改shader,此时就用到了我们之前学过的一个用法,onBeforeCompile,我们在这里面修改shader
1
2
3
4
5
6
7
| import * as THREE from "three";
export default function modifyCityMaterial(mesh) {
mesh.material.onBeforeCompile = (shader) => {
console.log(shader.vertexShader);
console.log(shader.fragmentShader);
};
}
|
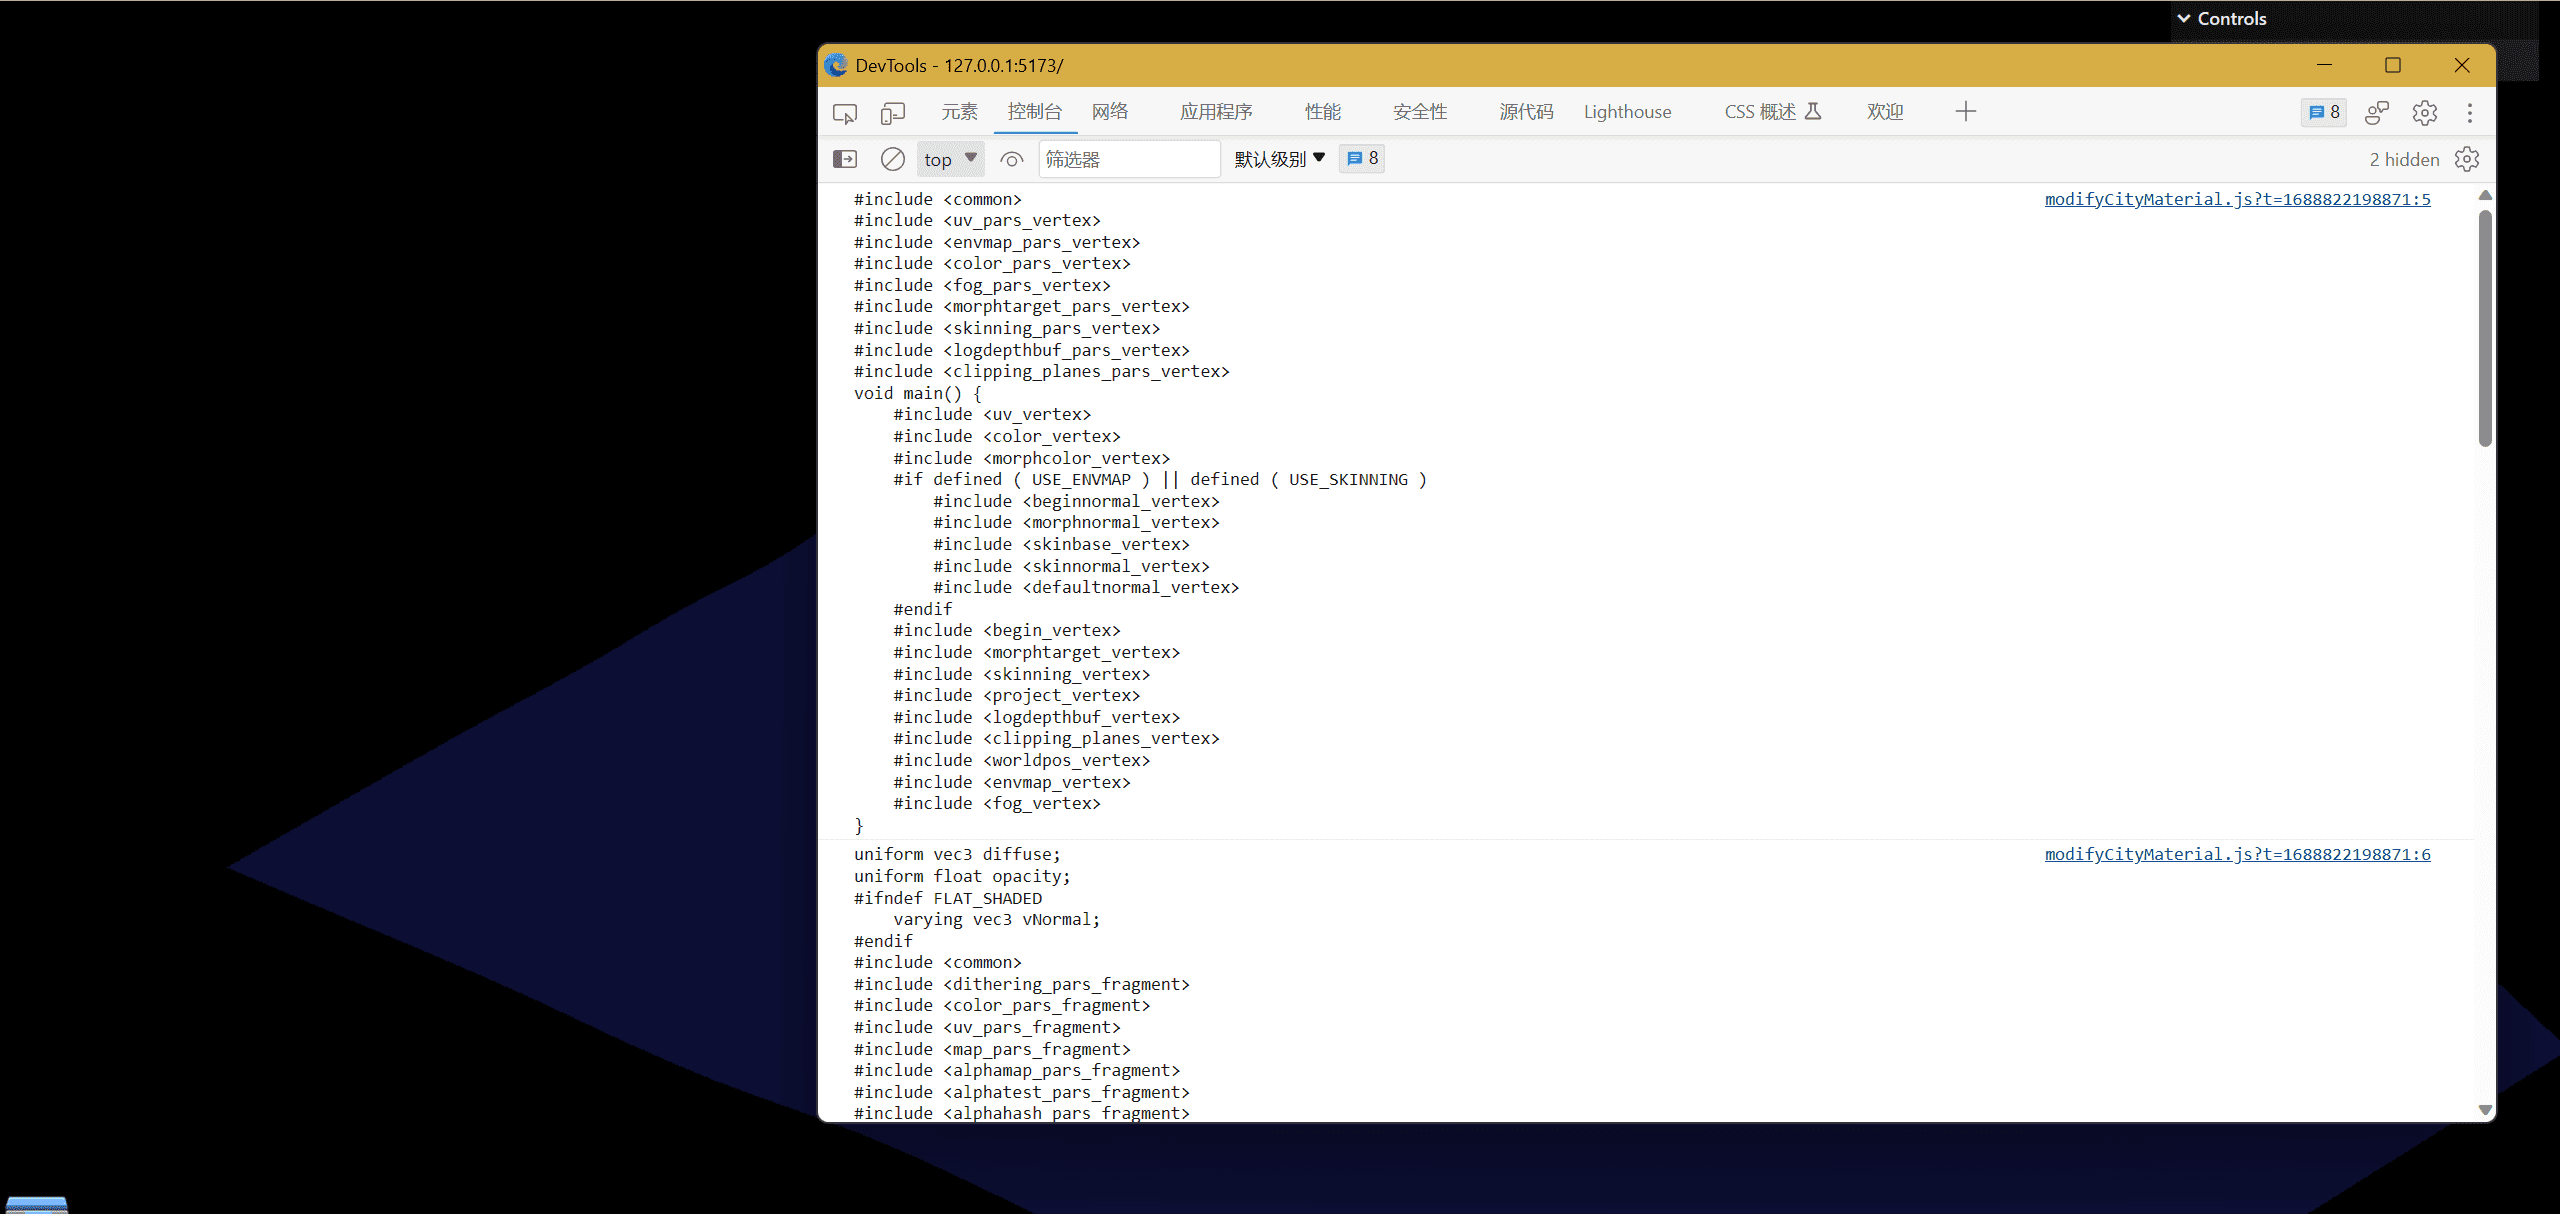
实现渐变效果
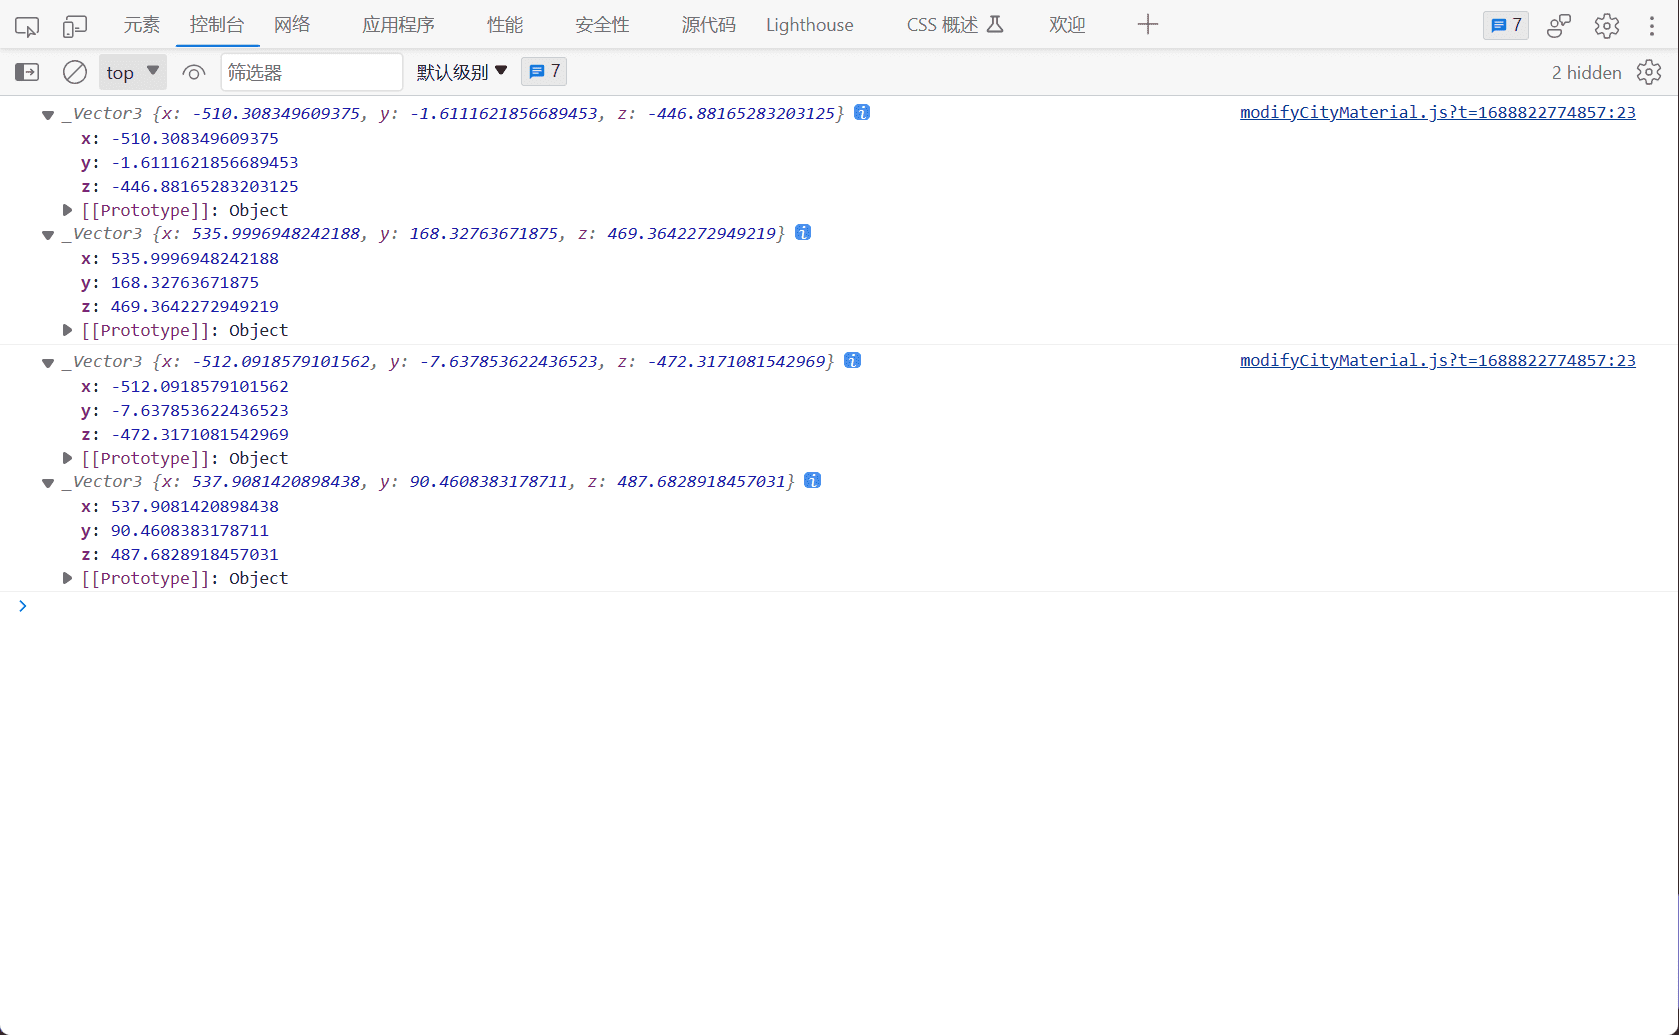
既然想实现这样的效果,我们至少得知道这个模型的最大值和最小值,然后通过混合百分比的方法来实现
那如何来得到最大值和最小值呢,这个其实很简单,我们之前介绍小黄鸭外立方体的时候说过,可以通过boundingBox来获取,实现代码如下
,其他地方都好理解,我着重讲一下这一行代码的问题
1
| float gradMix = (vPosition.y+uHeight/2.0)/uHeight;
|
这是因为我们uHeight是最大值减去最小值,而因为最小值是负值,比如这个最大值是86,最小值是-86,要将这个转换成0%-100%,那么就可以理解这段代码了
还有这个
这个是我们用来追加着色器效果使用的,每一次用end来标记,这样我们就可以在这个标记后面追加我们的着色器代码了
1
2
3
4
5
6
7
8
9
10
11
12
13
14
15
16
17
18
19
20
21
22
23
24
25
26
27
28
29
30
31
32
33
34
35
36
37
38
39
40
41
42
43
44
45
46
47
48
49
50
51
52
53
54
55
56
57
58
59
60
61
62
63
64
65
66
67
68
69
70
| export default function modifyCityMaterial(mesh) {
mesh.material.onBeforeCompile = (shader) => {
shader.fragmentShader = shader.fragmentShader.replace(
"#include <dithering_fragment>",
`
#include <dithering_fragment>
//#end#
`
);
addGradColor(shader, mesh);
};
}
export function addGradColor(shader, mesh) {
mesh.geometry.computeBoundingBox();
let { min, max } = mesh.geometry.boundingBox;
let uHeight = max.y - min.y;
shader.uniforms.uTopColor = {
value: new THREE.Color("#aaaeff"),
};
shader.uniforms.uHeight = {
value: uHeight,
};
shader.vertexShader = shader.vertexShader.replace(
"#include <common>",
`
#include <common>
varying vec3 vPosition;
`
);
shader.vertexShader = shader.vertexShader.replace(
"#include <begin_vertex>",
`
#include <begin_vertex>
vPosition = position;
`
);
shader.fragmentShader = shader.fragmentShader.replace(
"#include <common>",
`
#include <common>
uniform vec3 uTopColor;
uniform float uHeight;
varying vec3 vPosition;
`
);
shader.fragmentShader = shader.fragmentShader.replace(
"//#end#",
`
vec4 distGradColor = gl_FragColor;
// 设置混合的百分比
float gradMix = (vPosition.y+uHeight/2.0)/uHeight;
// 计算出混合颜色
vec3 gradMixColor = mix(distGradColor.xyz,uTopColor,gradMix);
gl_FragColor = vec4(gradMixColor,1);
//#end#
`
);
}
|
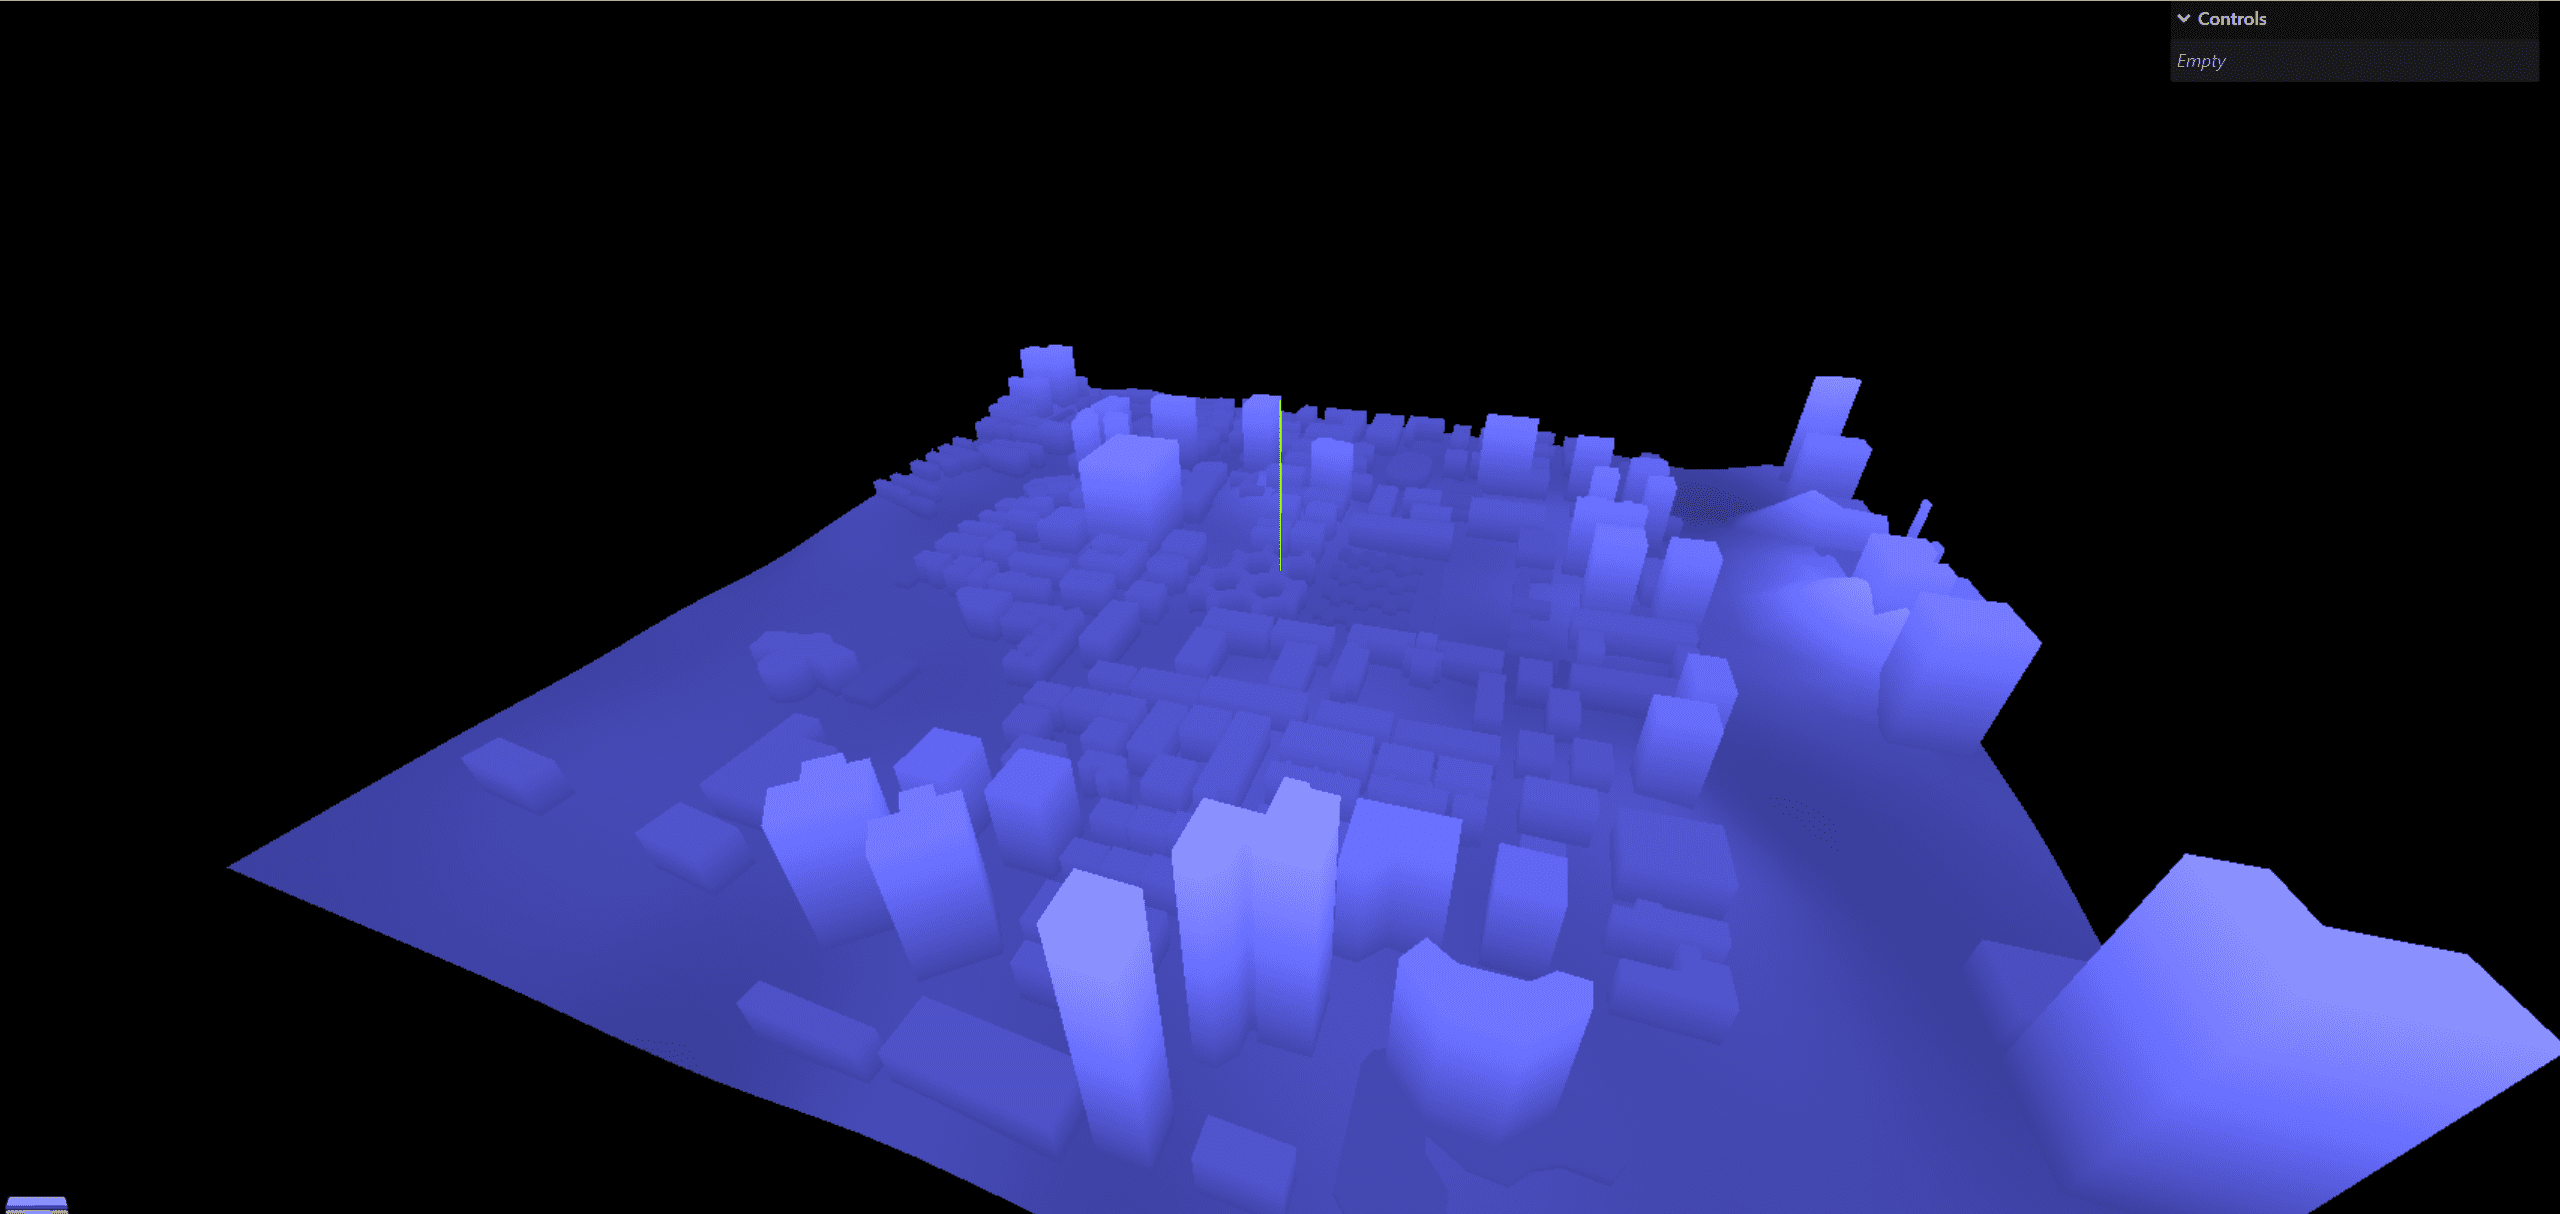
城市光圈扩散效果
我们设置初始的中心点uSpreadCenter,以及time:uSpreadTime,宽度uSpreadWidth
以下代码我们着重讲解一下这三行代码
1
2
3
4
5
6
7
| float spreadRadius = distance(vPosition.xz,uSpreadCenter);
float spreadIndex = -(spreadRadius-uSpreadTime)*(spreadRadius-uSpreadTime)+uSpreadWidth;
if(spreadIndex>0.0){
gl_FragColor = mix(gl_FragColor,vec4(1,1,1,1),spreadIndex/uSpreadWidth);
}
|
我们的扩散光圈打到建筑物上面,是需要和建筑物原有的颜色进行叠加的,那么我们可以知道,越扩散的时候,光圈就会越来,我们打到建筑物的位置也会不同,而混合需要一个0%-100%的值,那么首先得保证扩散函数的值可以大于0,那么我们就想到了负的一个一元二次方程,如果再加一个值,那么就是一个抛物线,且有值大于y===0的时候,那么我们就可以通过这个值来计算出混合的百分比了,这样就可以实现光圈扩散的效果了
1
2
3
4
5
6
7
8
9
10
11
12
13
14
15
16
17
18
19
20
21
22
23
24
25
26
27
28
29
30
31
32
33
34
35
36
37
38
39
40
41
42
|
export function addSpread(shader, center = new THREE.Vector2(0, 0)) {
shader.uniforms.uSpreadCenter = { value: center };
shader.uniforms.uSpreadTime = { value: -2000 };
shader.uniforms.uSpreadWidth = { value: 40 };
shader.fragmentShader = shader.fragmentShader.replace(
"#include <common>",
`
#include <common>
uniform vec2 uSpreadCenter;
uniform float uSpreadTime;
uniform float uSpreadWidth;
`
);
shader.fragmentShader = shader.fragmentShader.replace(
"//#end#",
`
 float spreadRadius = distance(vPosition.xz,uSpreadCenter);
//  扩散范围的函数
float spreadIndex = -(spreadRadius-uSpreadTime)*(spreadRadius-uSpreadTime)+uSpreadWidth;

if(spreadIndex>0.0){
    gl_FragColor = mix(gl_FragColor,vec4(1,1,1,1),spreadIndex/uSpreadWidth);
}
//#end#
`
);
gsap.to(shader.uniforms.uSpreadTime, {
value: 800,
duration: 3,
ease: "none",
repeat: -1,
});
}
|
直线光带掠过城市效果
上面的如果看懂了,那么下面的就很简单了,我们只需要设置一个直线的方程,然后计算出直线的距离,然后计算出混合的百分比就可以了,代码如下
1
2
3
4
5
6
7
8
9
10
11
12
13
14
15
16
17
18
19
20
21
22
23
24
25
26
27
28
29
30
31
32
33
34
35
36
37
38
| export function addLightLine(shader) {
shader.uniforms.uLightLineTime = { value: -1500 };
shader.uniforms.uLightLineWidth = { value: 200 };
shader.fragmentShader = shader.fragmentShader.replace(
"#include <common>",
`
#include <common>
uniform float uLightLineTime;
uniform float uLightLineWidth;
`
);
shader.fragmentShader = shader.fragmentShader.replace(
"//#end#",
`
float LightLineMix = -(vPosition.x+vPosition.z-uLightLineTime)*(vPosition.x+vPosition.z-uLightLineTime)+uLightLineWidth;
if(LightLineMix>0.0){
gl_FragColor = mix(gl_FragColor,vec4(0.8,1.0,1.0,1),LightLineMix /uLightLineWidth);
}
//#end#
`
);
gsap.to(shader.uniforms.uLightLineTime, {
value: 1500,
duration: 5,
ease: "none",
repeat: -1,
});
}
|
从下到上扫描城市特效
以此类推,这个只需要将x,z改成y就可以了,代码如下
1
2
3
4
5
6
7
8
9
10
11
12
13
14
15
16
17
18
19
20
21
22
23
24
25
26
27
28
29
30
31
32
33
34
35
36
37
38
| export function addToTopLine(shader) {
shader.uniforms.uToTopTime = { value: 0 };
shader.uniforms.uToTopWidth = { value: 40 };
shader.fragmentShader = shader.fragmentShader.replace(
"#include <common>",
`
#include <common>
uniform float uToTopTime;
uniform float uToTopWidth;
`
);
shader.fragmentShader = shader.fragmentShader.replace(
"//#end#",
`
float ToTopMix = -(vPosition.y-uToTopTime)*(vPosition.y-uToTopTime)+uToTopWidth;
if(ToTopMix>0.0){
gl_FragColor = mix(gl_FragColor,vec4(0.8,0.8,1,1),ToTopMix /uToTopWidth);
}
//#end#
`
);
gsap.to(shader.uniforms.uToTopTime, {
value: 500,
duration: 3,
ease: "none",
repeat: -1,
});
}
|
实现飞线效果
首先我们按照如下结构生成一个flyLine的文件
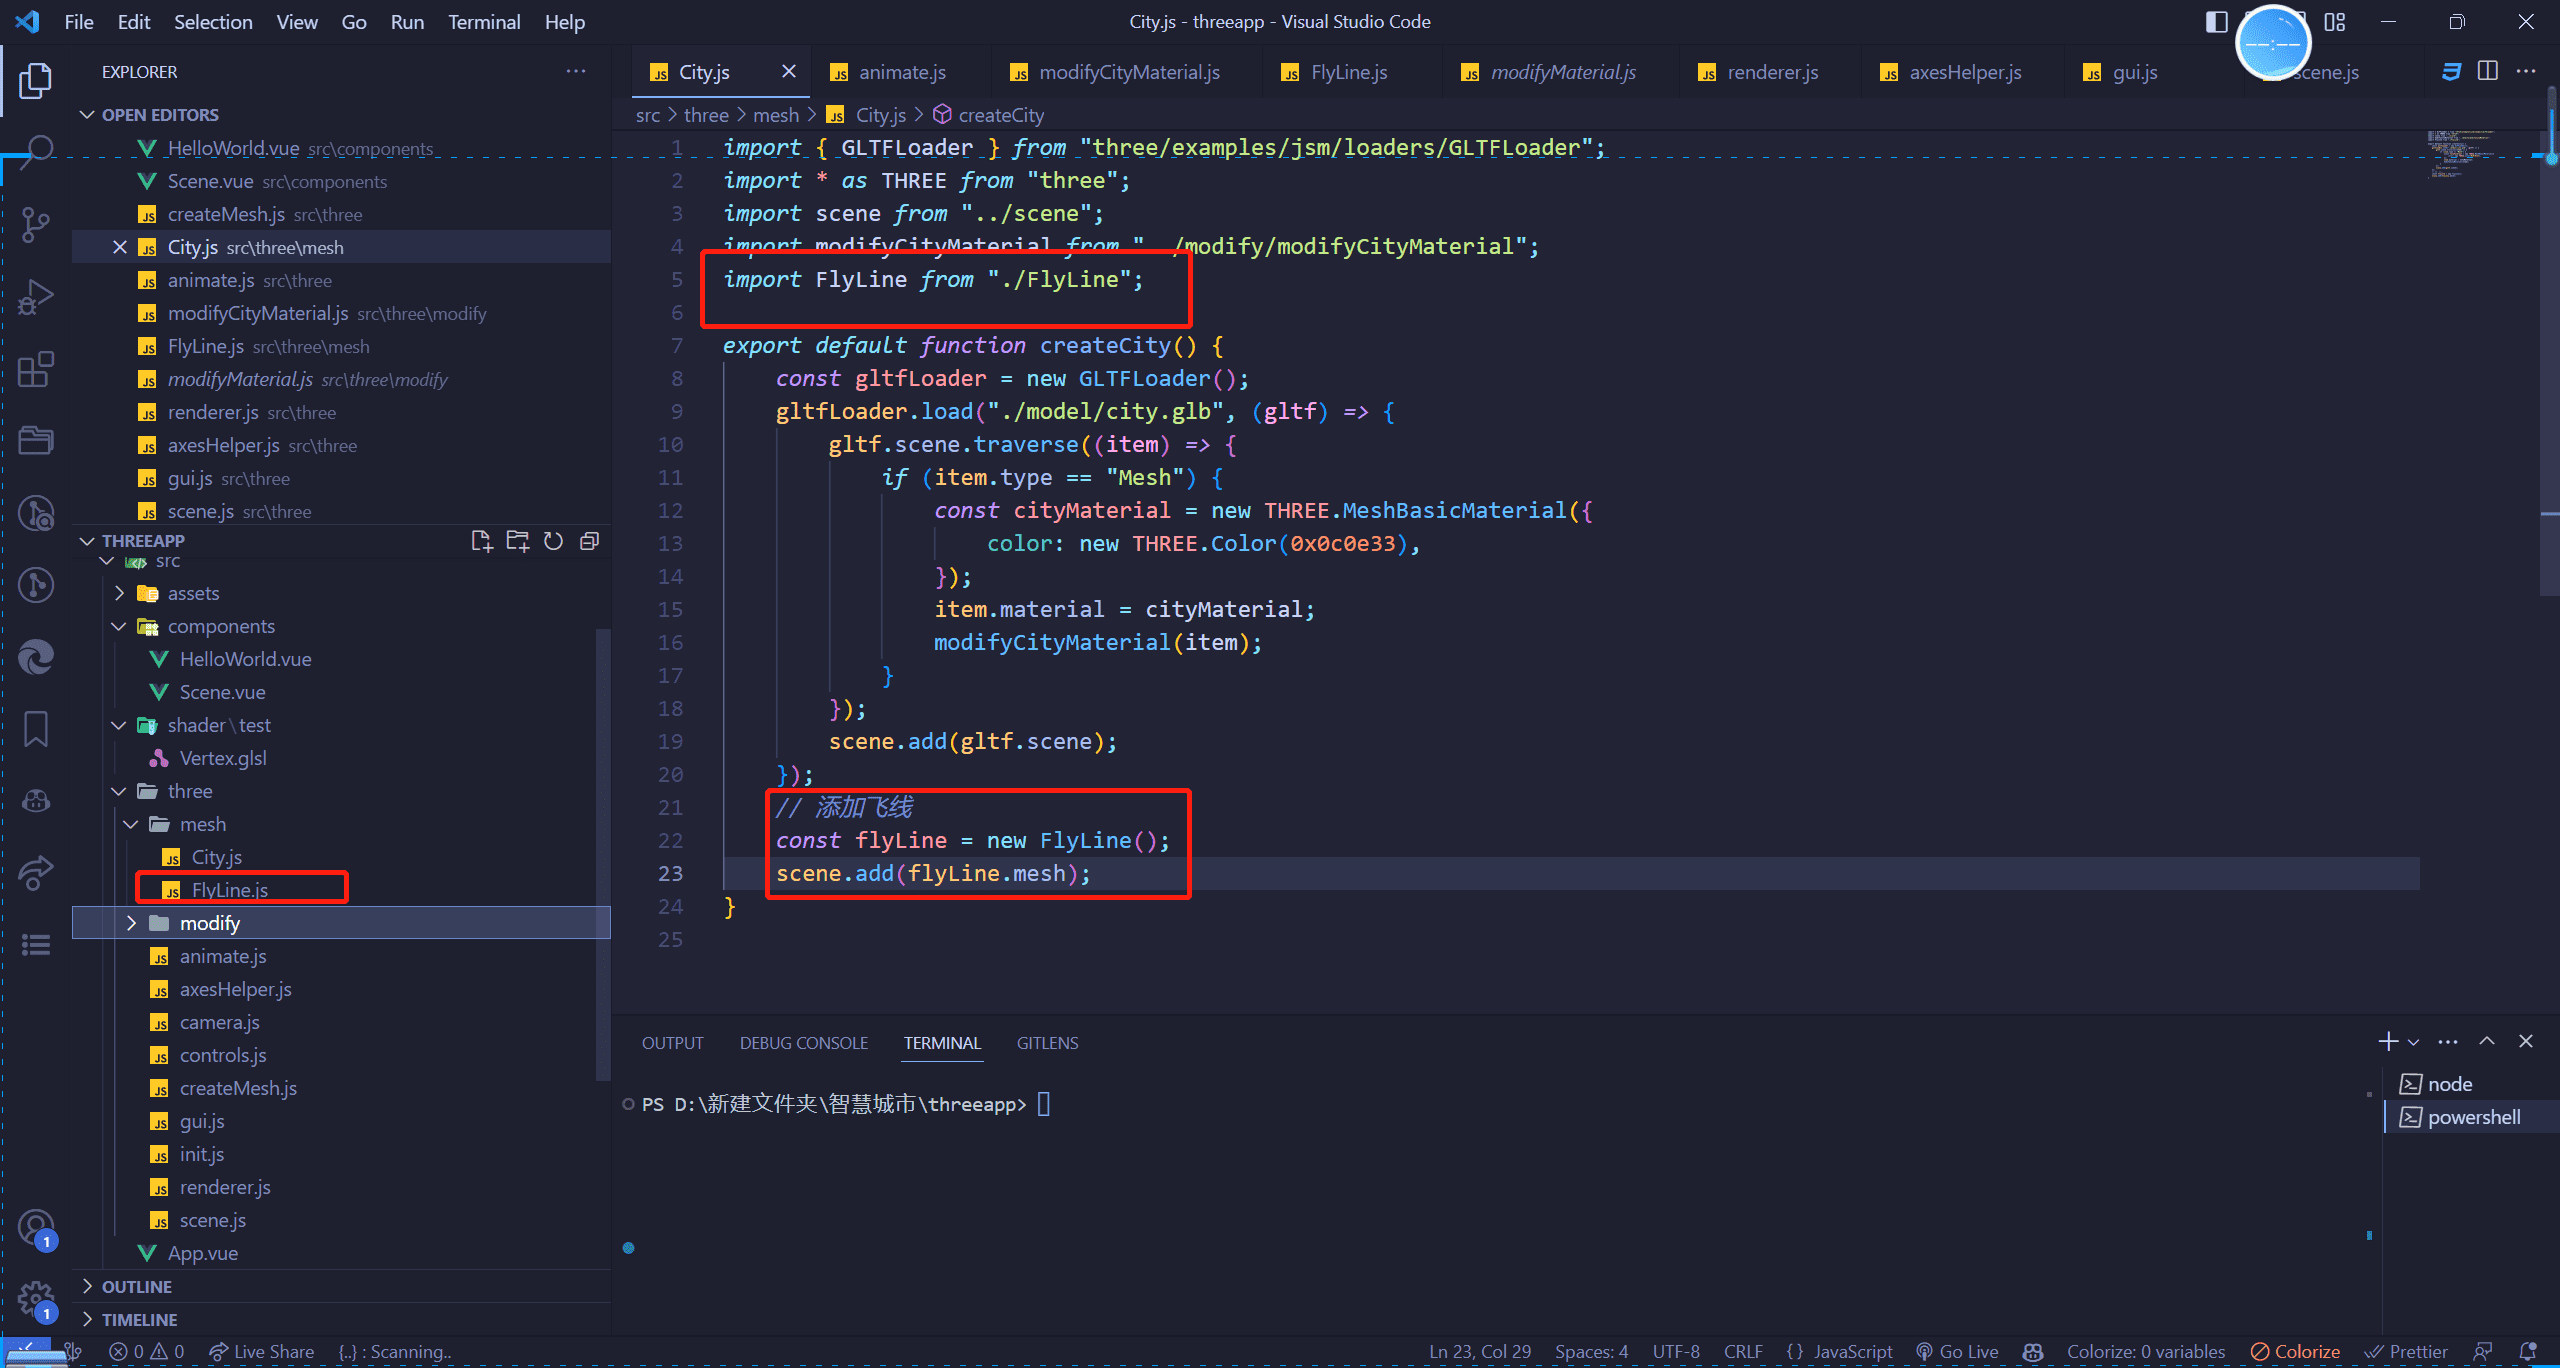
我们可以看到,官网的这个管道非常适合我们的需求
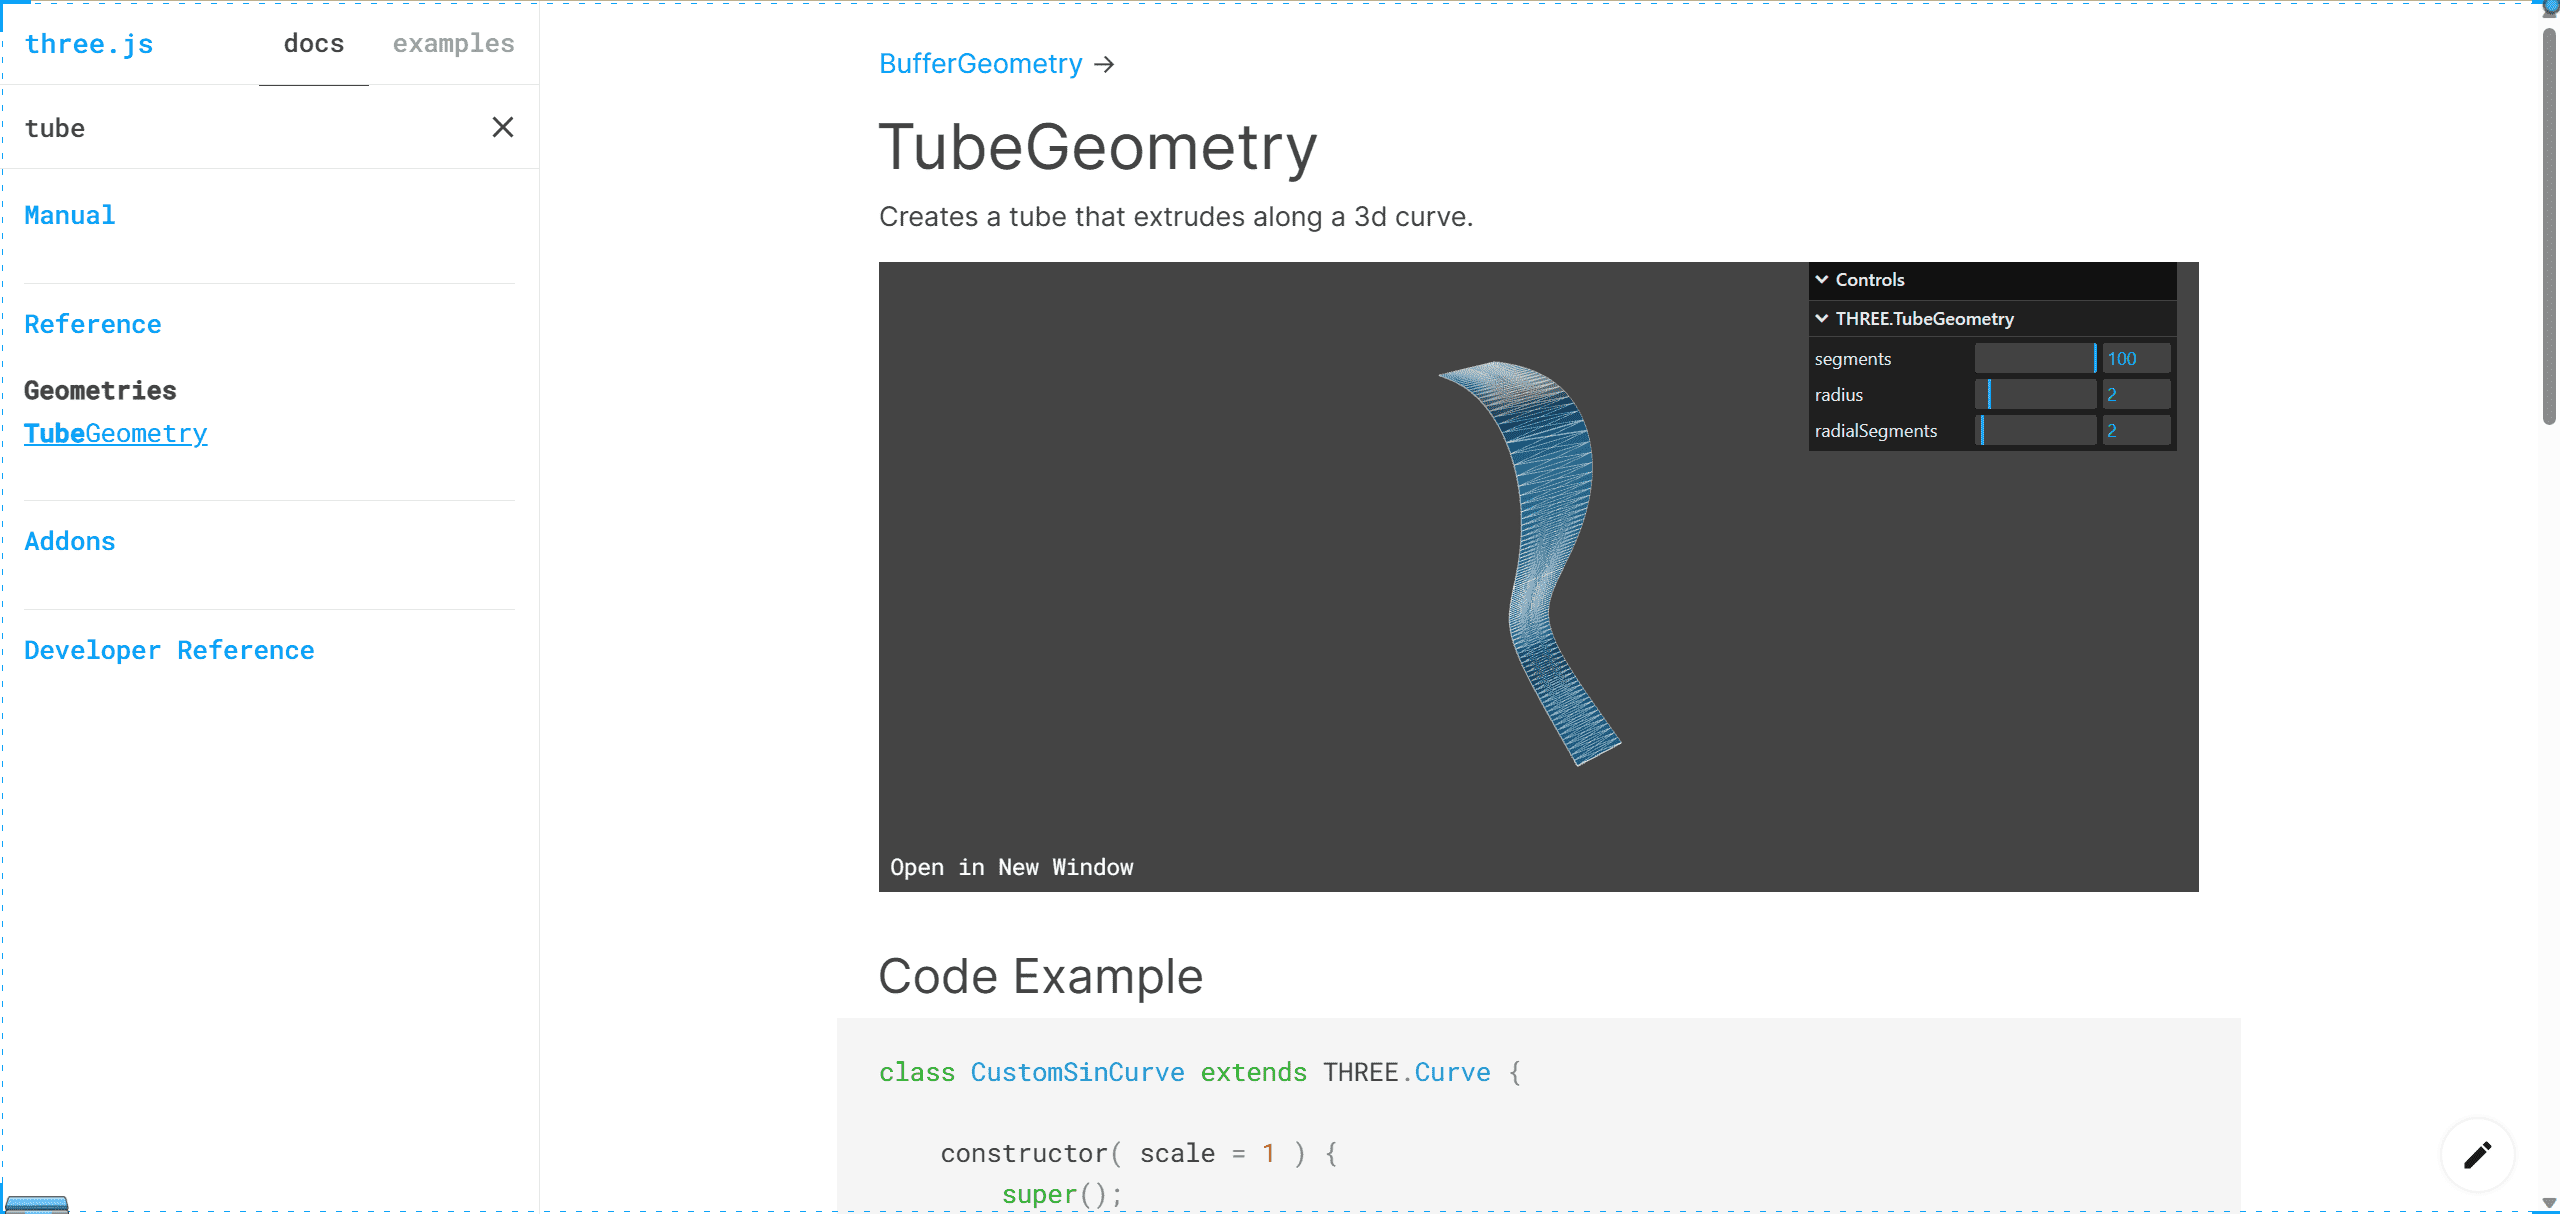
利用官网的管道生成飞线
1
2
3
4
5
6
7
8
9
10
11
12
13
14
15
16
17
18
19
20
21
22
23
24
25
26
27
28
29
30
31
32
33
34
35
| import * as THREE from "three";
import gsap from "gsap";
export default class FlyLine {
constructor() {
let linePoints = [
new THREE.Vector3(0, 0, 0),
new THREE.Vector3(5, 4, 0),
new THREE.Vector3(10, 0, 0),
];
this.lineCurve = new THREE.CatmullRomCurve3(linePoints);
this.geometry = new THREE.TubeGeometry(
this.lineCurve,
100,
0.4,
2,
false
);
this.material = new THREE.MeshBasicMaterial({
color: 0xfff000,
transparent: true,
});
this.mesh = new THREE.Mesh(this.geometry, this.material);
}
}
|
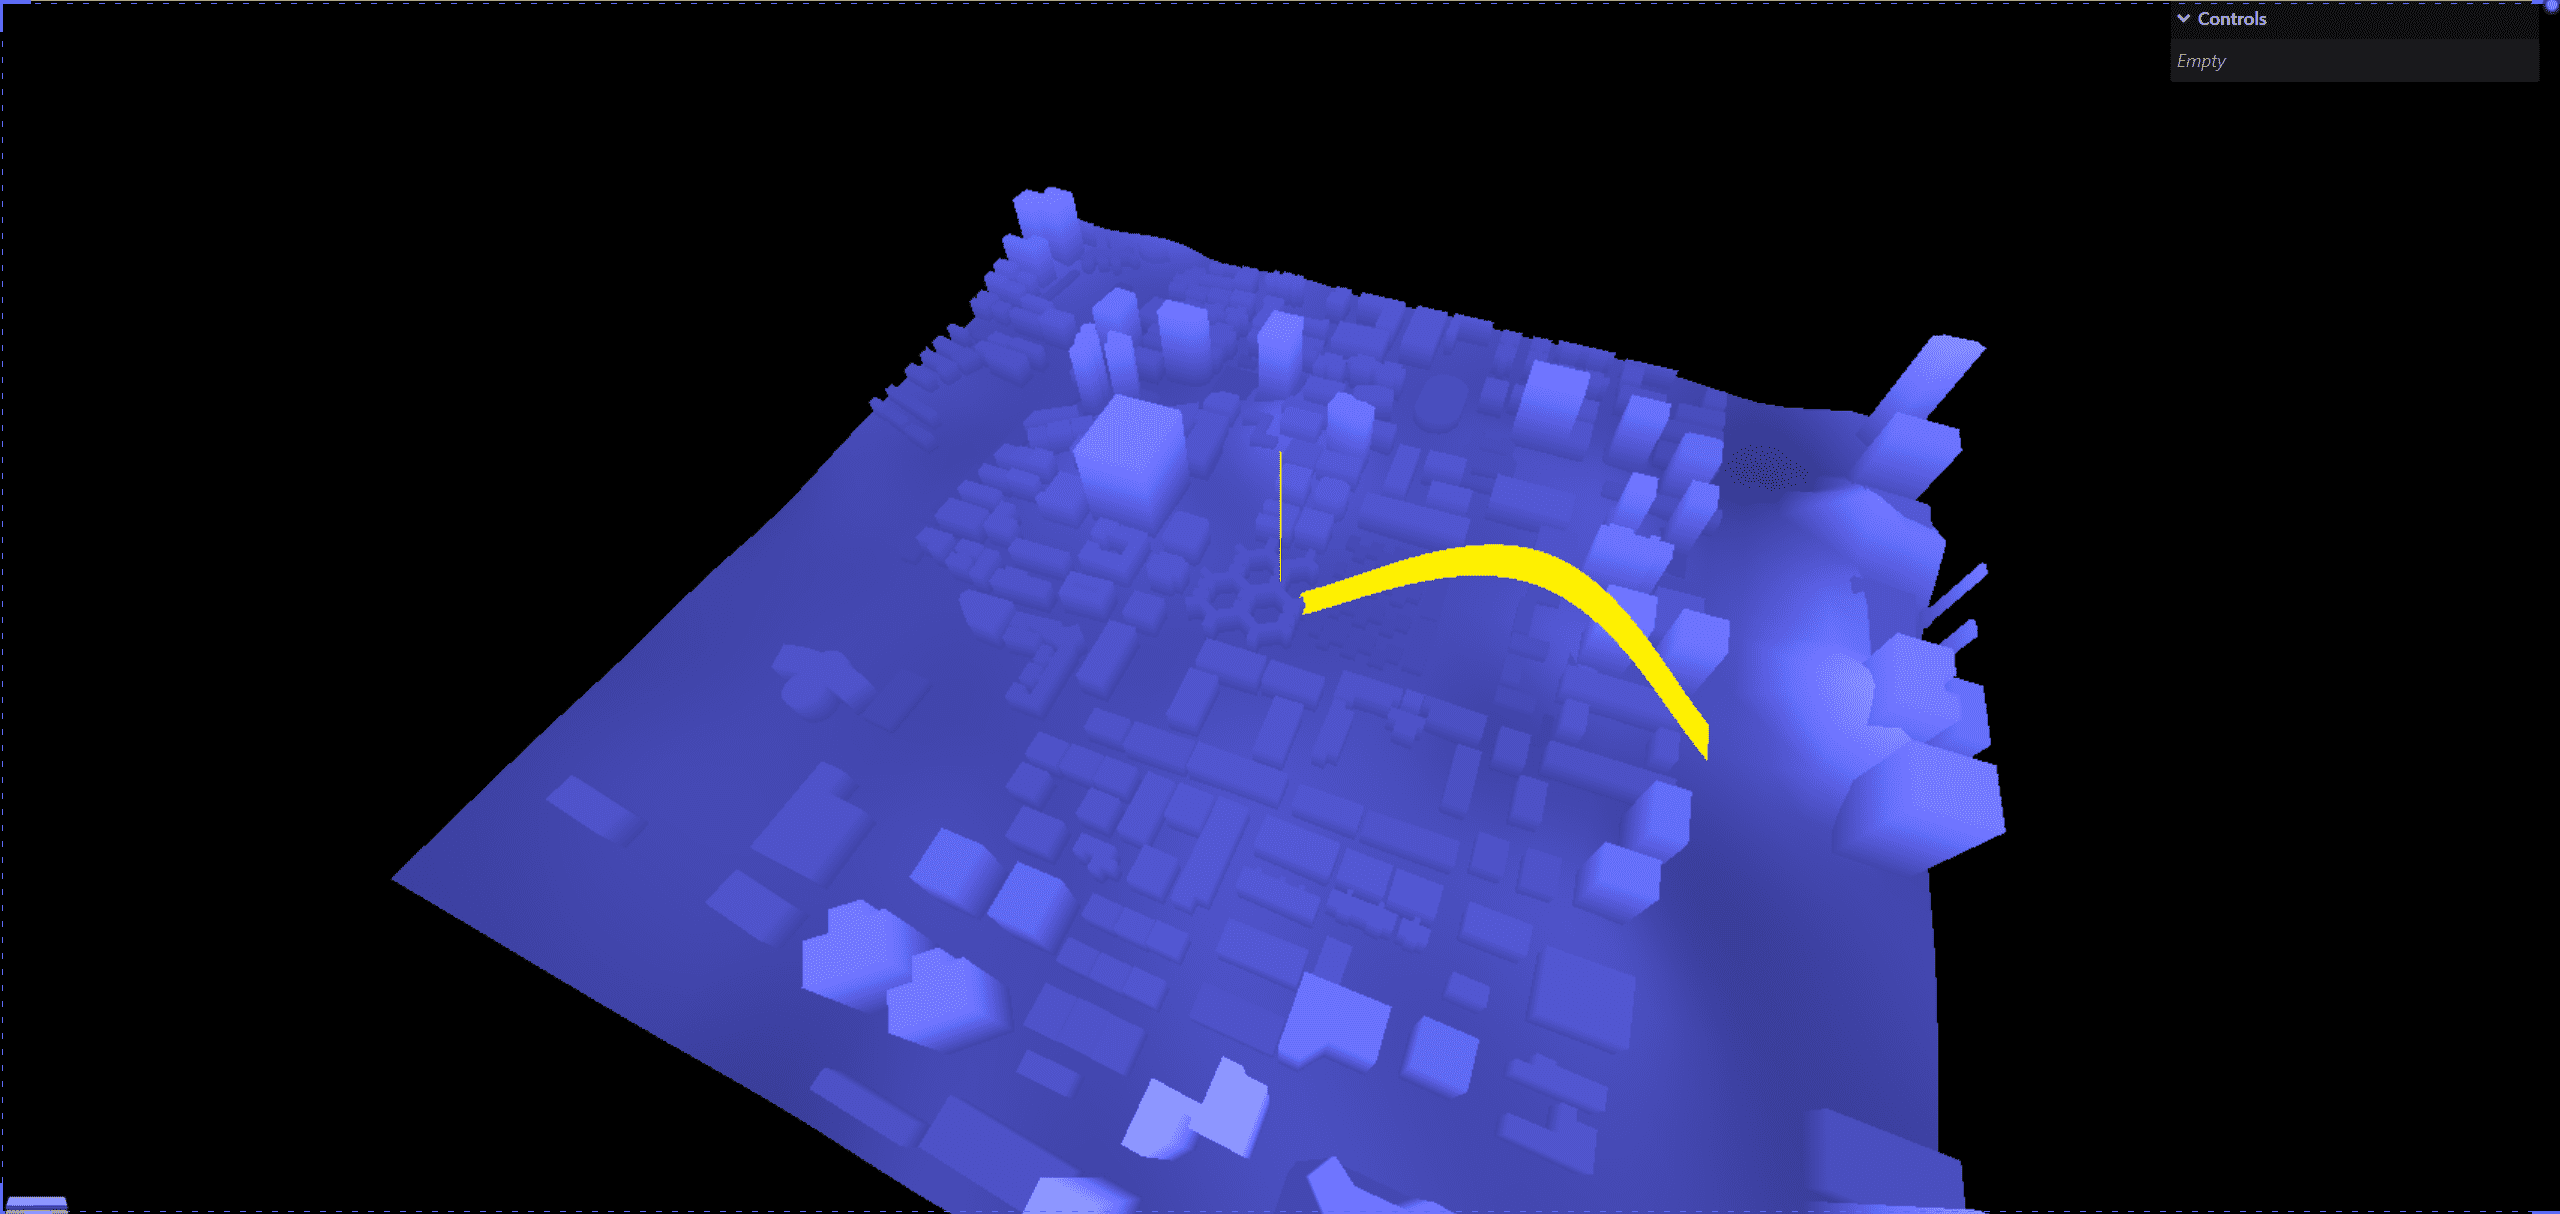
给飞线添加贴图
我们使用这一张贴图来修改材质

1
2
3
4
5
6
| const textloader = new THREE.TextureLoader();
this.texture = textloader.load("./textures/z_11.png");
this.material = new THREE.MeshBasicMaterial({
map: this.texture,
transparent: true,
});
|
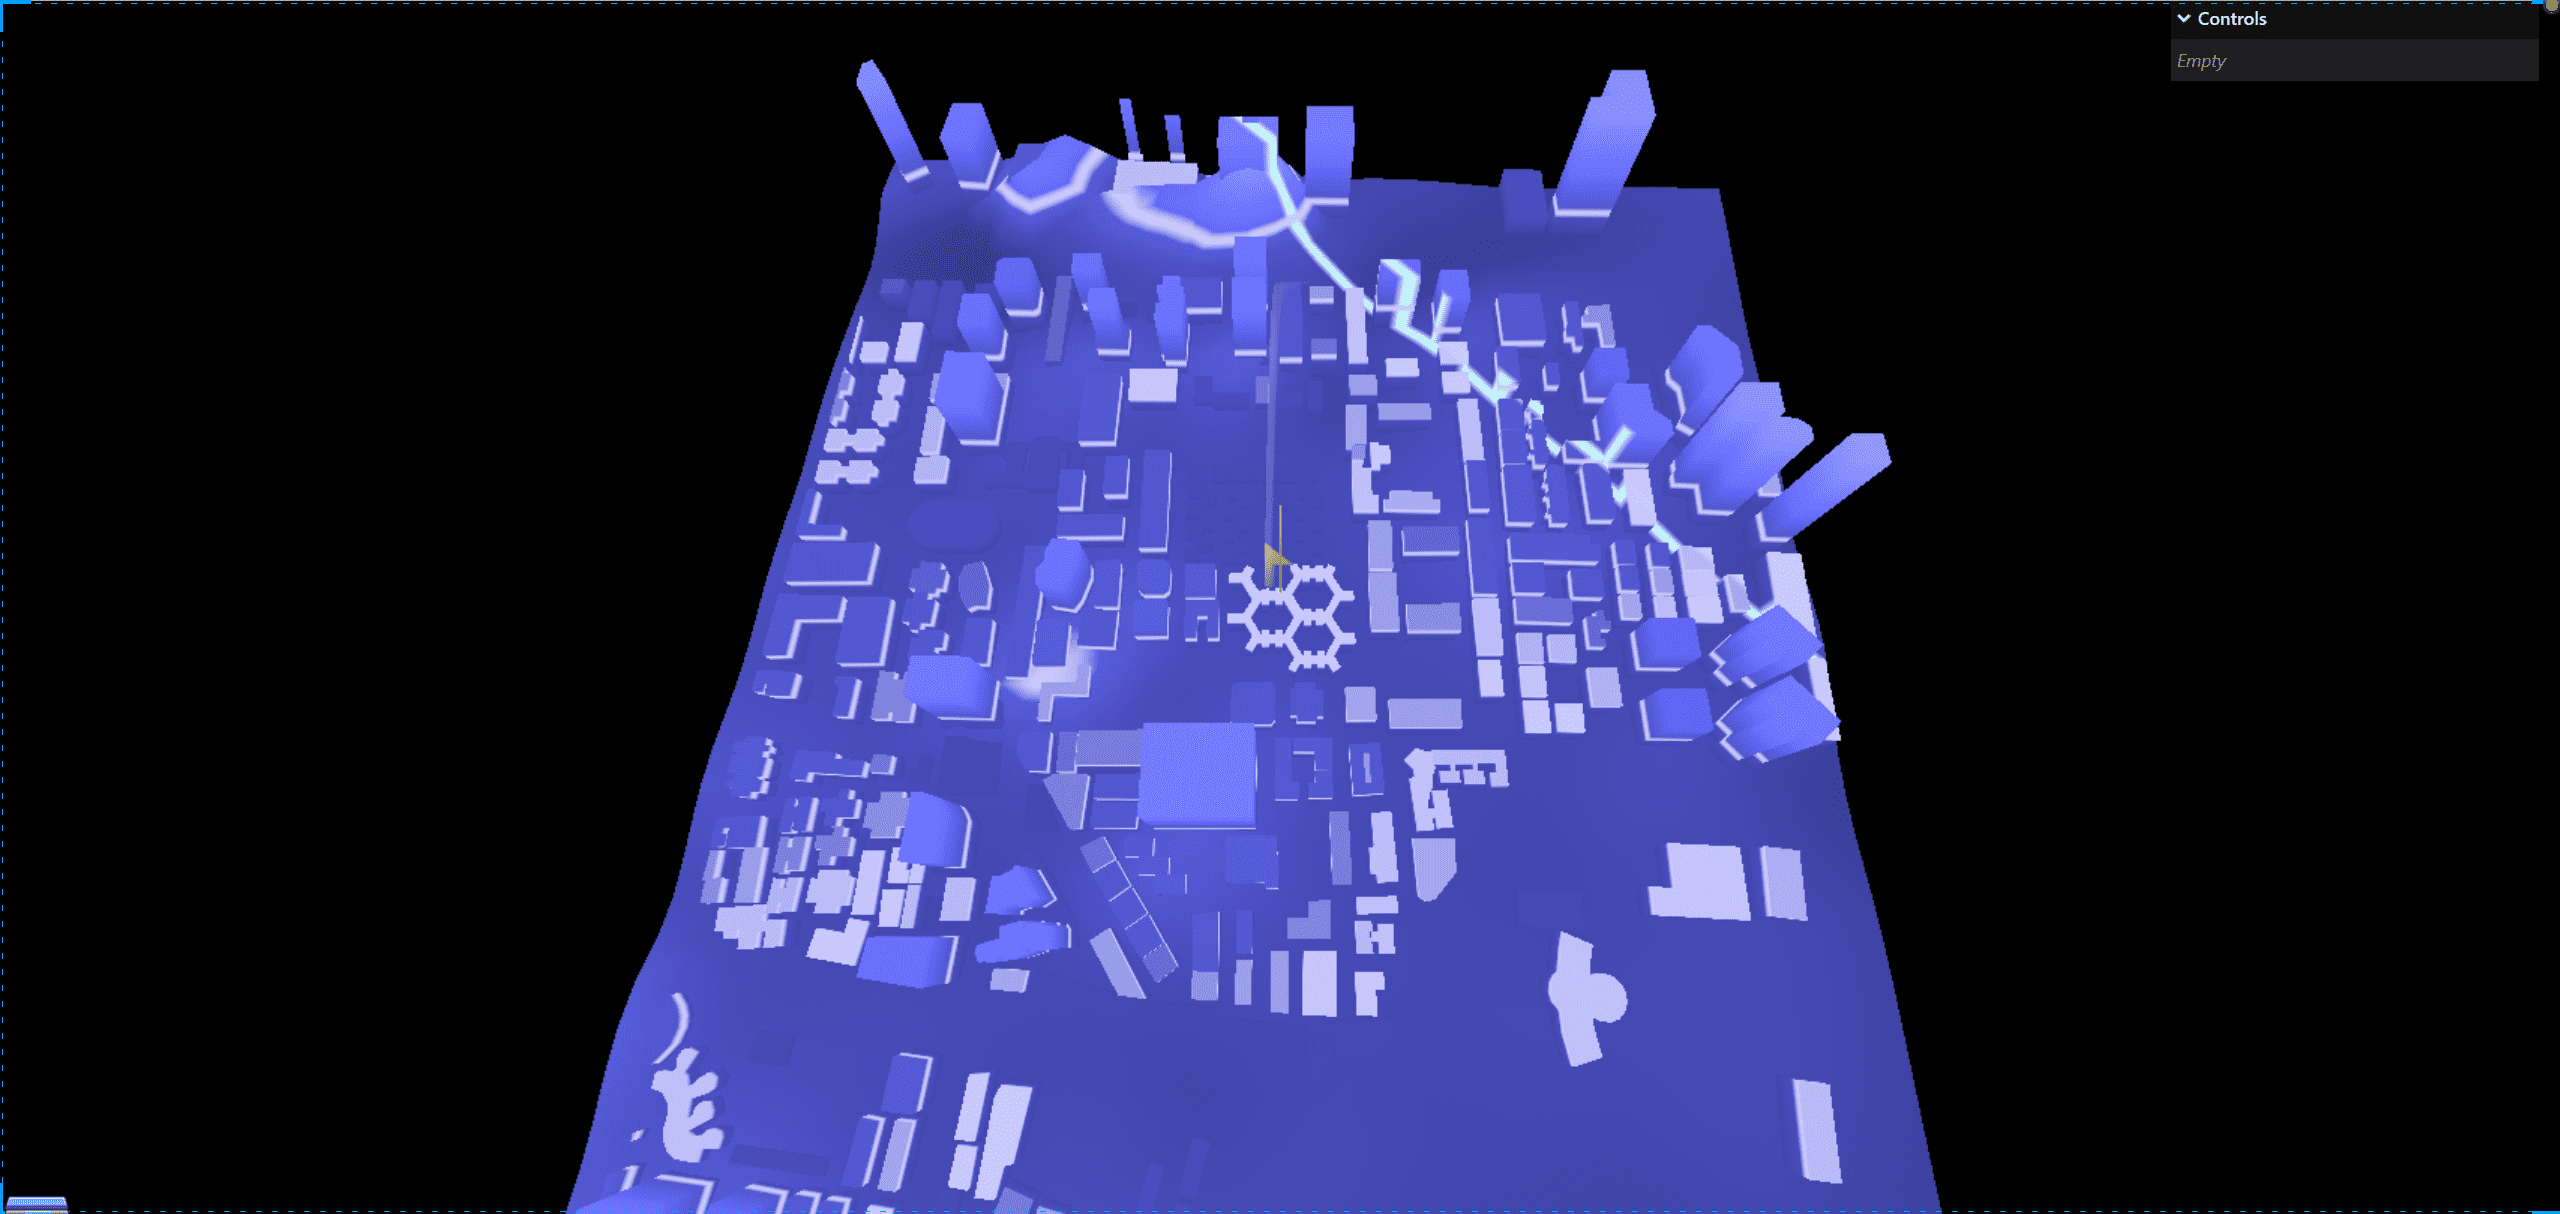
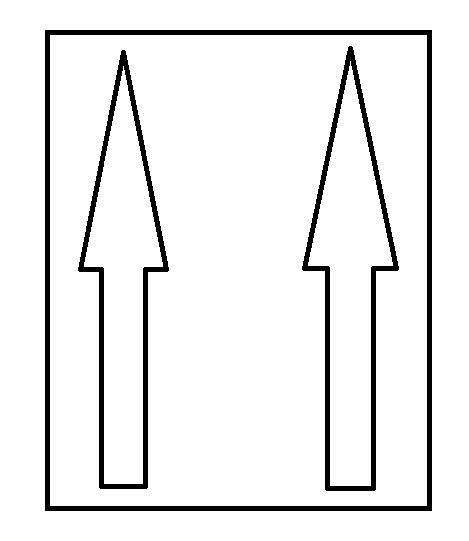
我们看到这个箭头只有一半,这是怎么回事呢,这是因为我们的管道是双面的,如果把他的uv展开,贴图贴上去我们能看到的的确只有一半
给大家画一个草图,大概就是这个样子
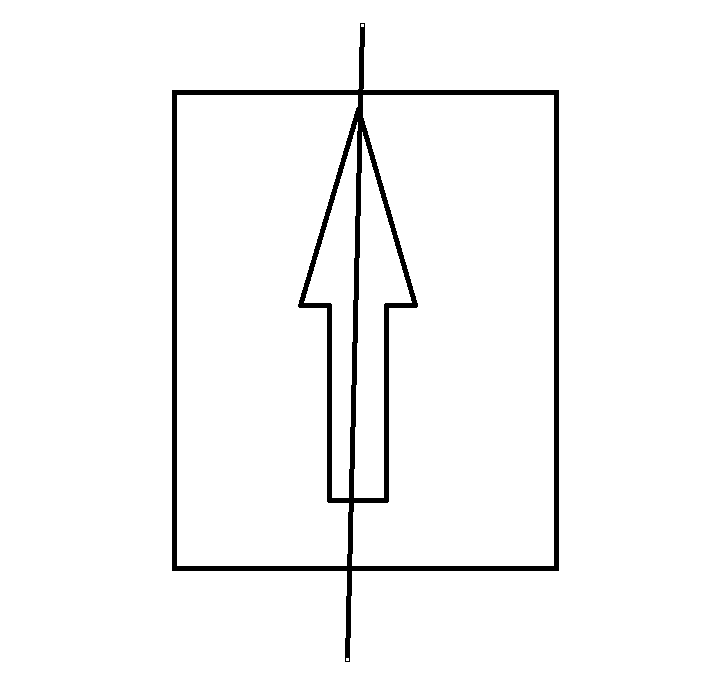
如果我们想要在每一面都正常显示,那么我们应该将箭头在俩面贴上去,就是要下面这样镜像重复的效果
1
2
3
4
5
6
7
8
9
10
| const textloader = new THREE.TextureLoader();
this.texture = textloader.load("./textures/z_11.png");
this.texture.repeat.set(1, 2);
this.texture.wrapS = THREE.RepeatWrapping;
this.texture.wrapT = THREE.MirroredRepeatWrapping;
this.material = new THREE.MeshBasicMaterial({
map: this.texture,
transparent: true,
});
|
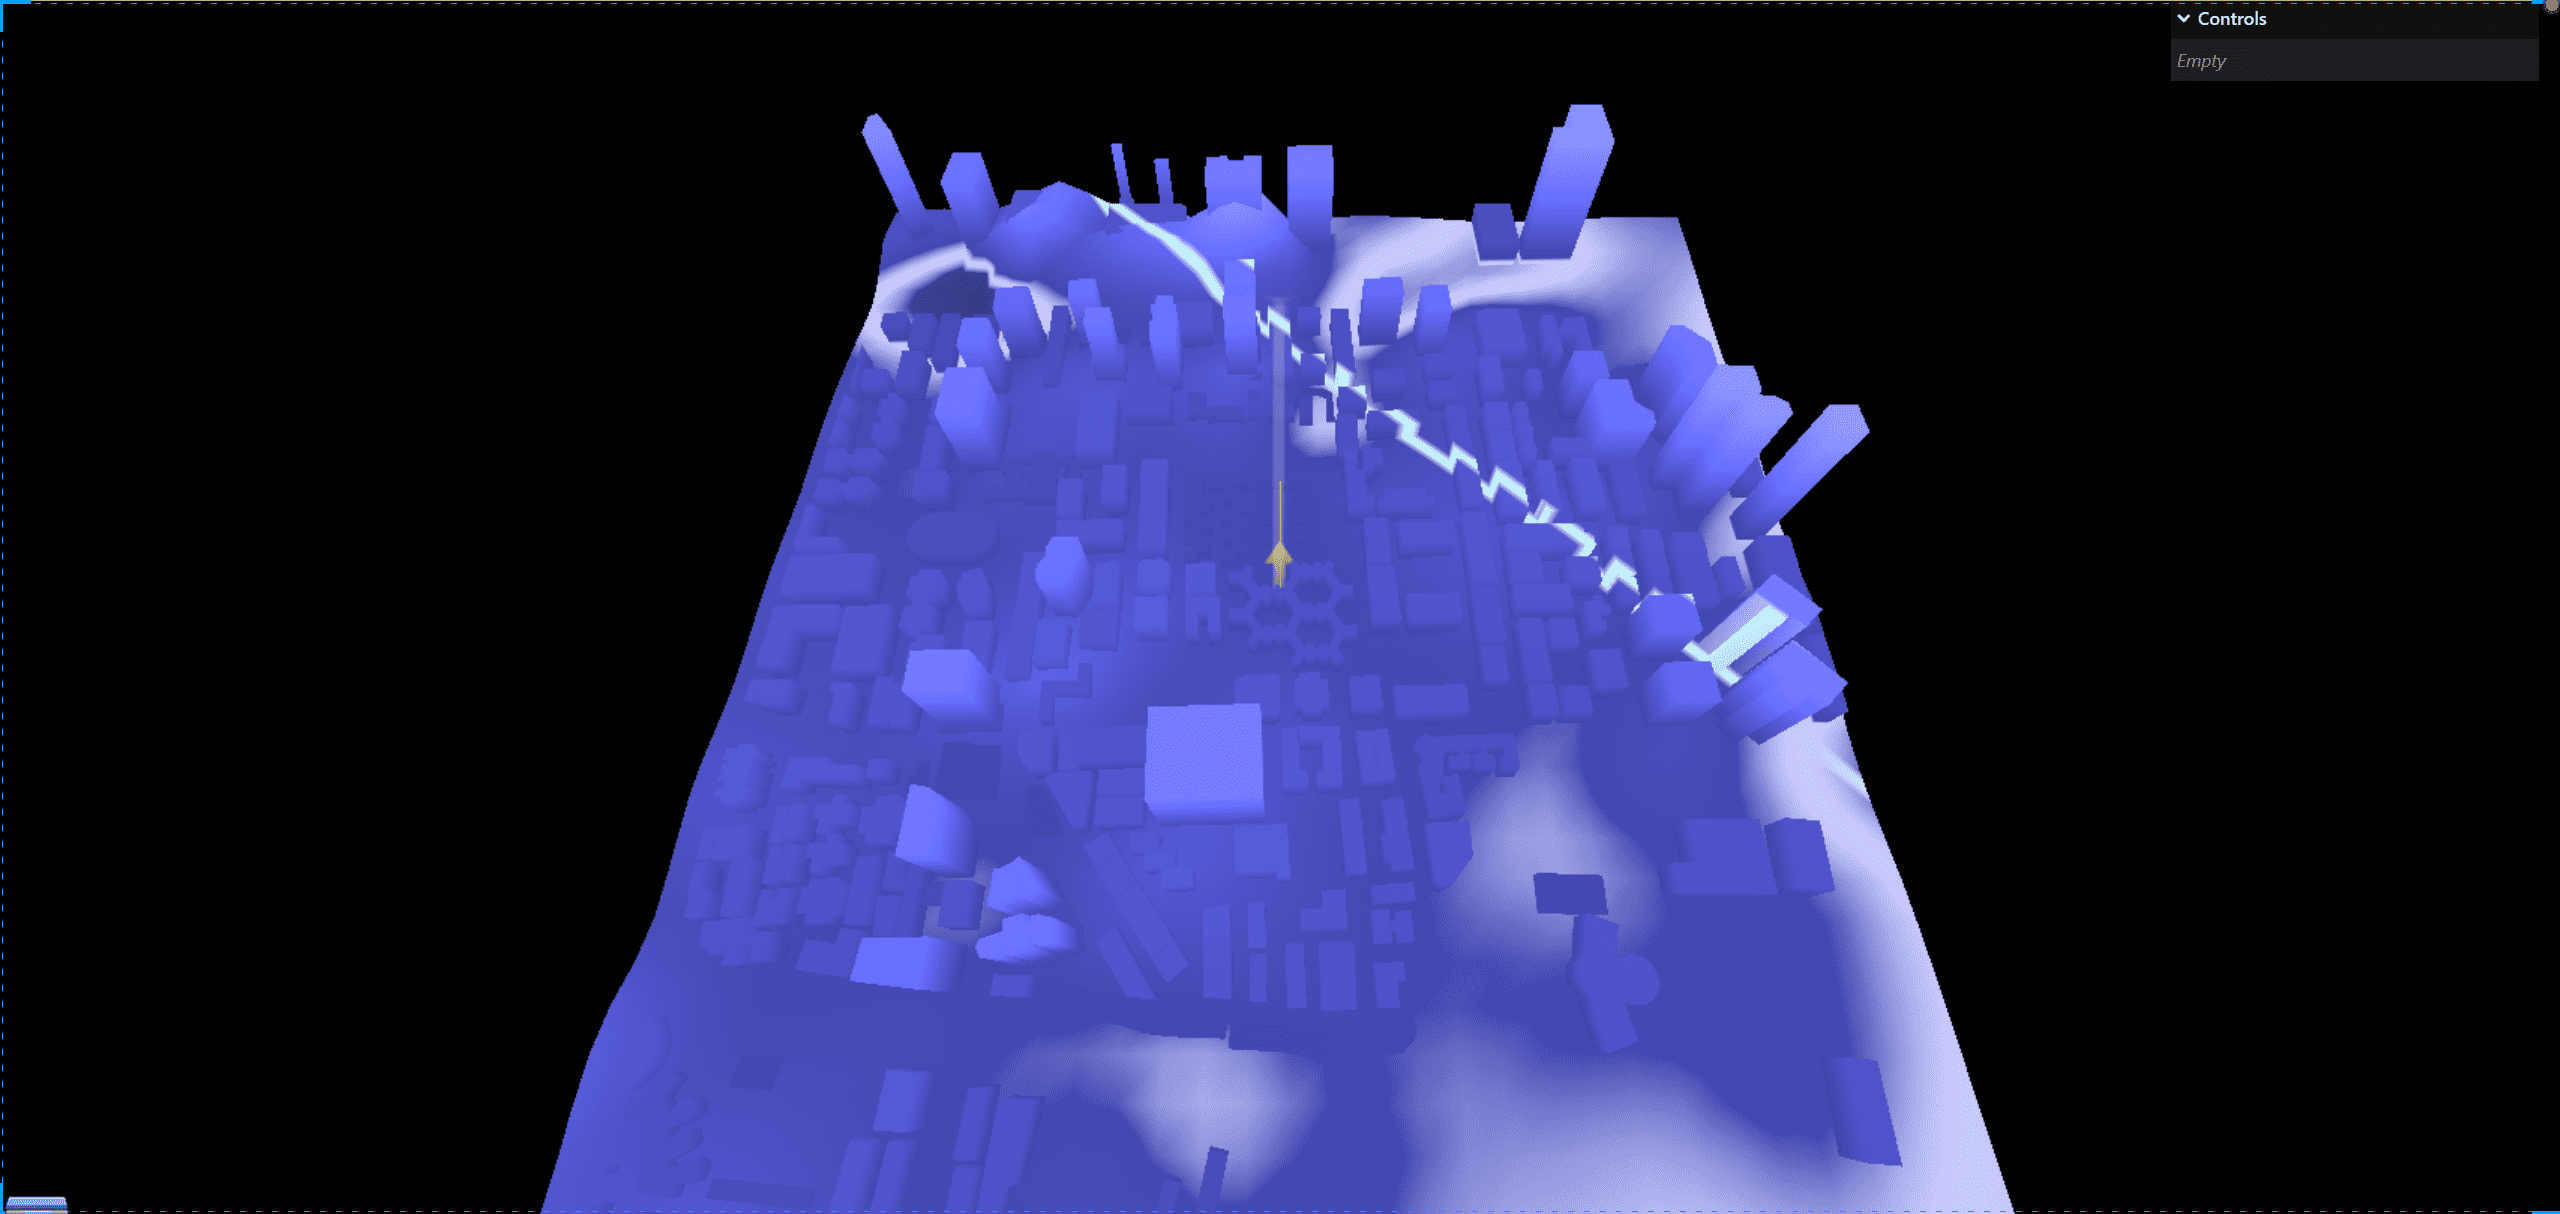
这样,我们的飞线就完成了,但是我们的飞线是静止的,我们需要让他动起来,我们可以使用gsap来让他动起来
1
2
3
4
5
6
| gsap.to(this.texture.offset, {
x: -1,
duration: 1,
repeat: -1,
ease: "none",
});
|
使用shader实现飞线效果
同样的,我们需要新建这样的目录结构
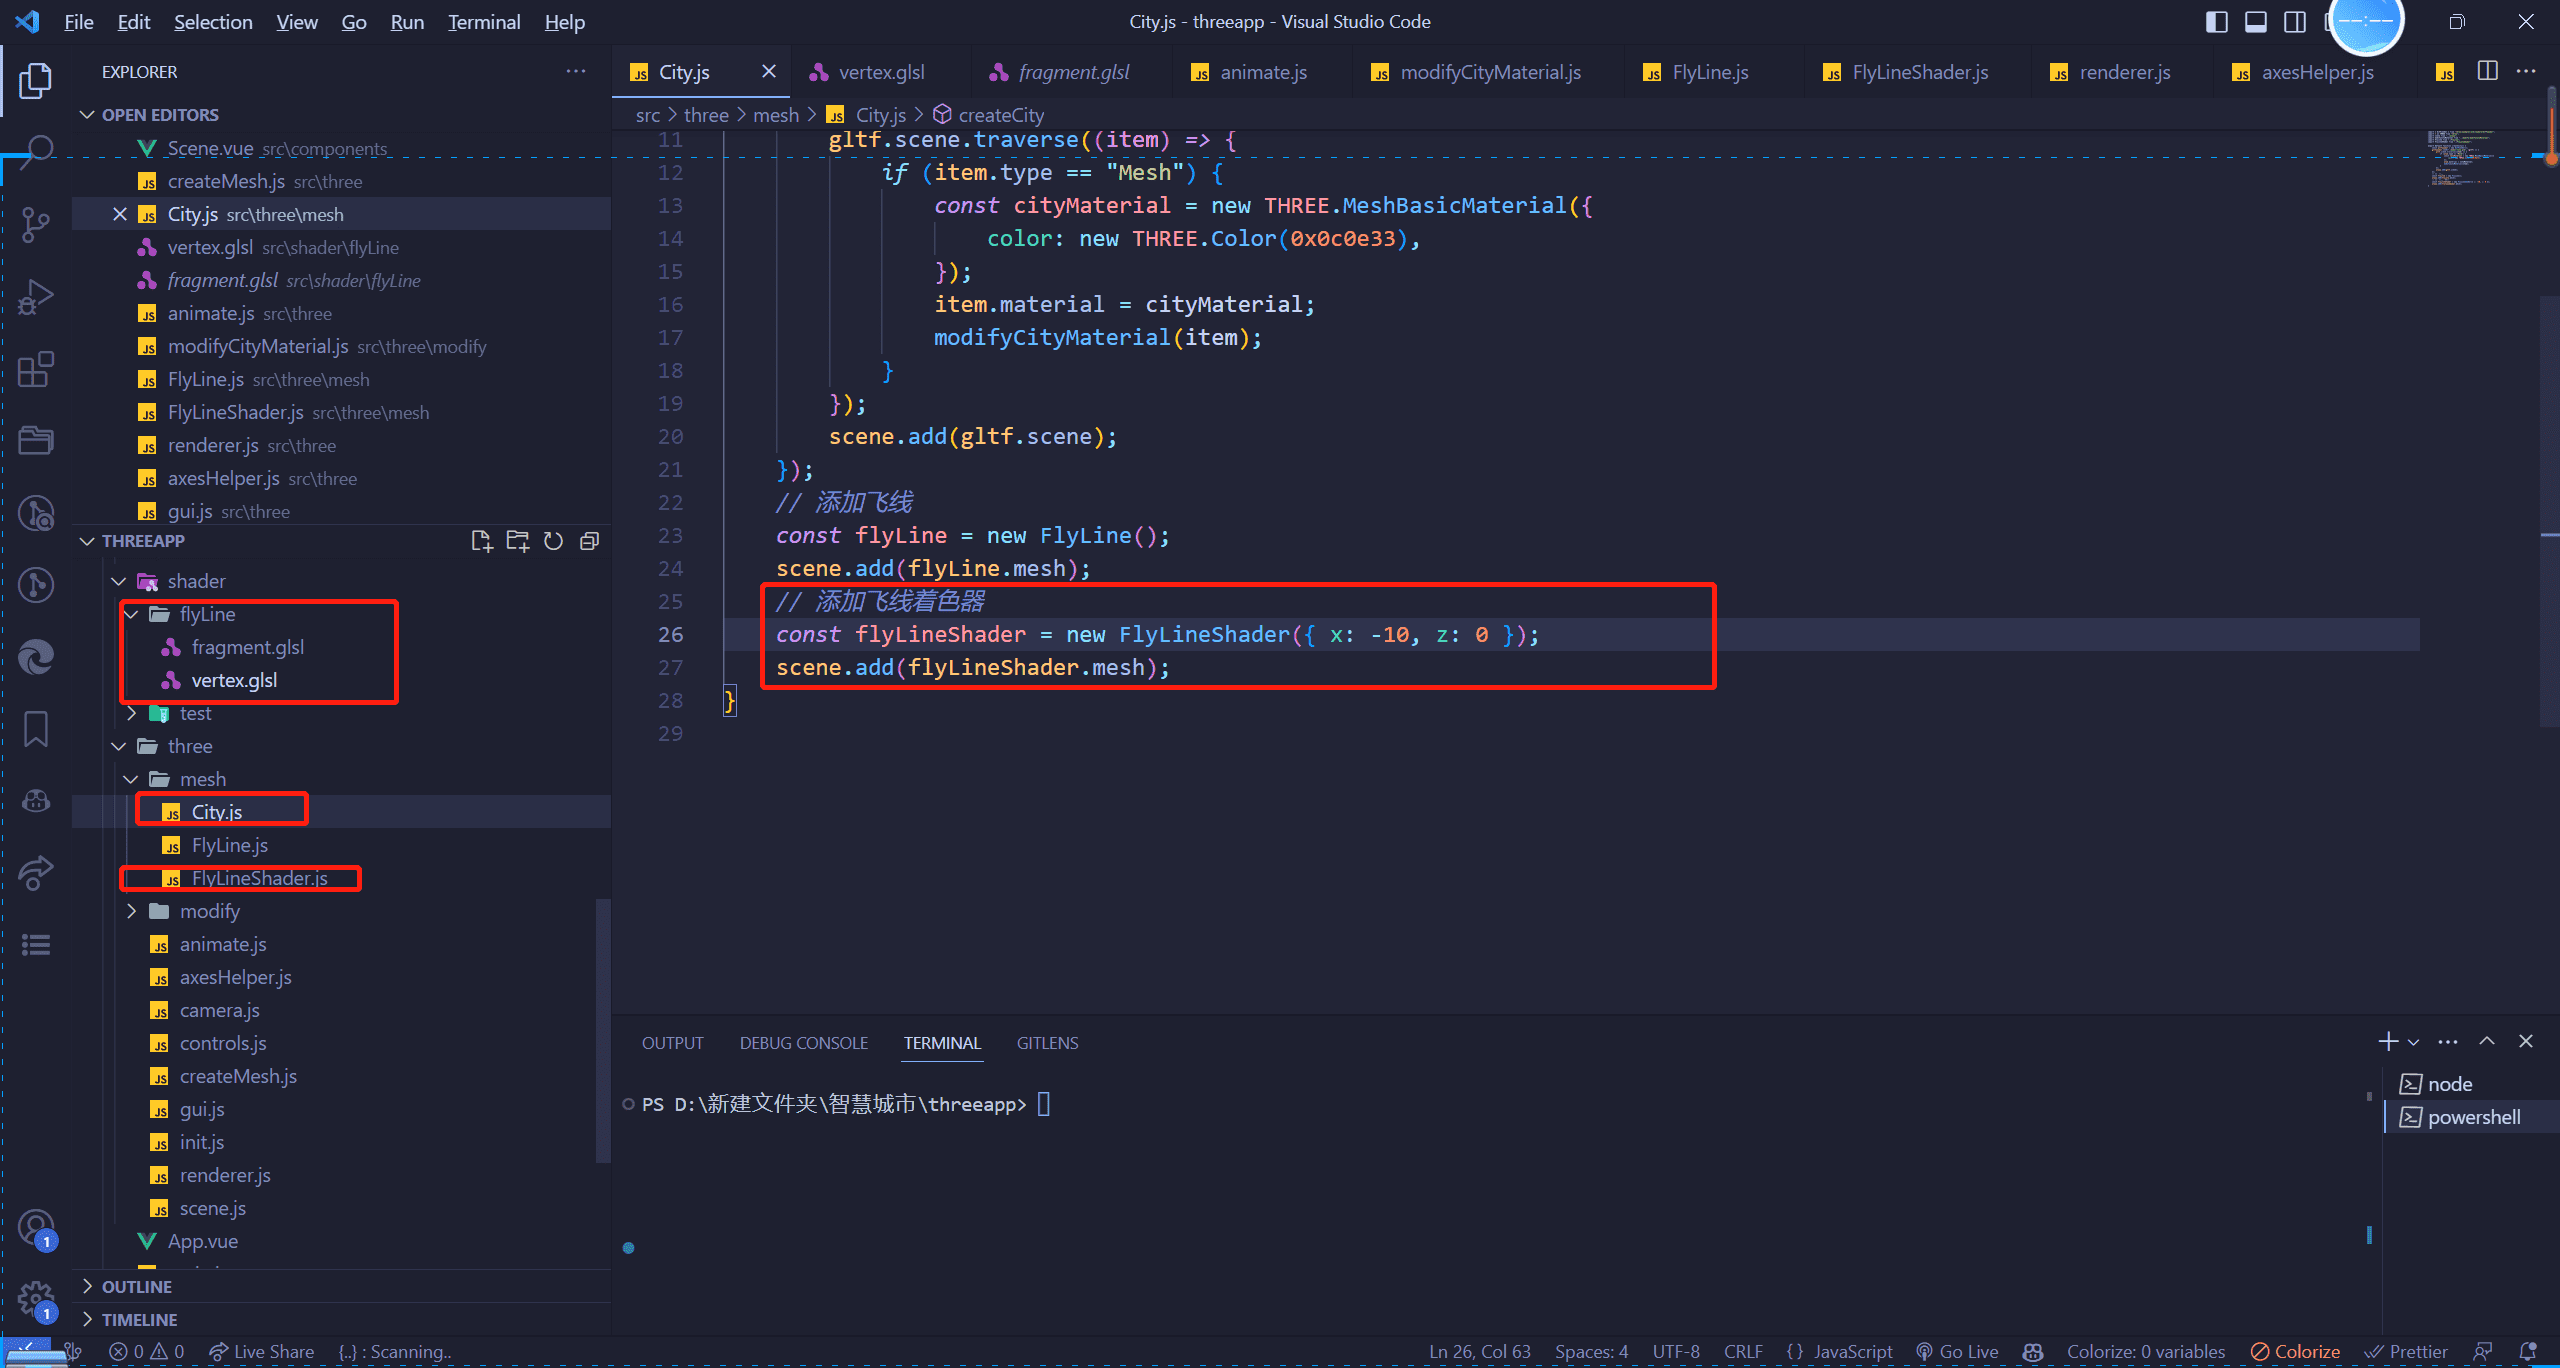
初始化代码
flylineshader
然后再flylineshader文件里面
1
2
3
4
5
6
7
8
9
10
11
12
13
14
15
16
17
18
19
20
21
22
23
24
25
26
27
28
29
30
31
32
33
34
35
36
37
| import * as THREE from "three";
import gsap from "gsap";
import vertex from "@/shader/flyLine/vertex.glsl?raw";
import fragment from "@/shader/flyLine/fragment.glsl?raw";
export default class FlyLineShader {
constructor(position = { x: 0, z: 0 }, color = 0x00ffff) {
let linePoints = [
new THREE.Vector3(0, 0, 0),
new THREE.Vector3(position.x / 2, 4, position.z / 2),
new THREE.Vector3(position.x, 0, position.z),
];
this.lineCurve = new THREE.CatmullRomCurve3(linePoints);
const points = this.lineCurve.getPoints(1000);
this.geometry = new THREE.BufferGeometry().setFromPoints(points);
this.shaderMaterial = new THREE.ShaderMaterial({
uniforms: {},
vertexShader: vertex,
fragmentShader: fragment,
transparent: true,
depthWrite: false,
blending: THREE.AdditiveBlending,
});
this.mesh = new THREE.Points(this.geometry, this.shaderMaterial);
}
remove() {
this.mesh.remove();
this.mesh.removeFromParent();
this.mesh.geometry.dispose();
this.mesh.material.dispose();
}
}
|
为了避免被遮挡住,我将transparent(透明度)开启了,depthWrite(深度写入关闭了)
接下来我们写简单的片元着色器和顶点着色器
片元着色器
1
2
3
| void main(){
gl_FragColor = vec4(1,0,0,1);
}
|
顶点着色器
1
2
3
4
5
| void main(){
vec4 viewPosition = viewMatrix * modelMatrix *vec4(position,1);
gl_Position = projectionMatrix * viewPosition;
gl_PointSize = 10.0;
}
|
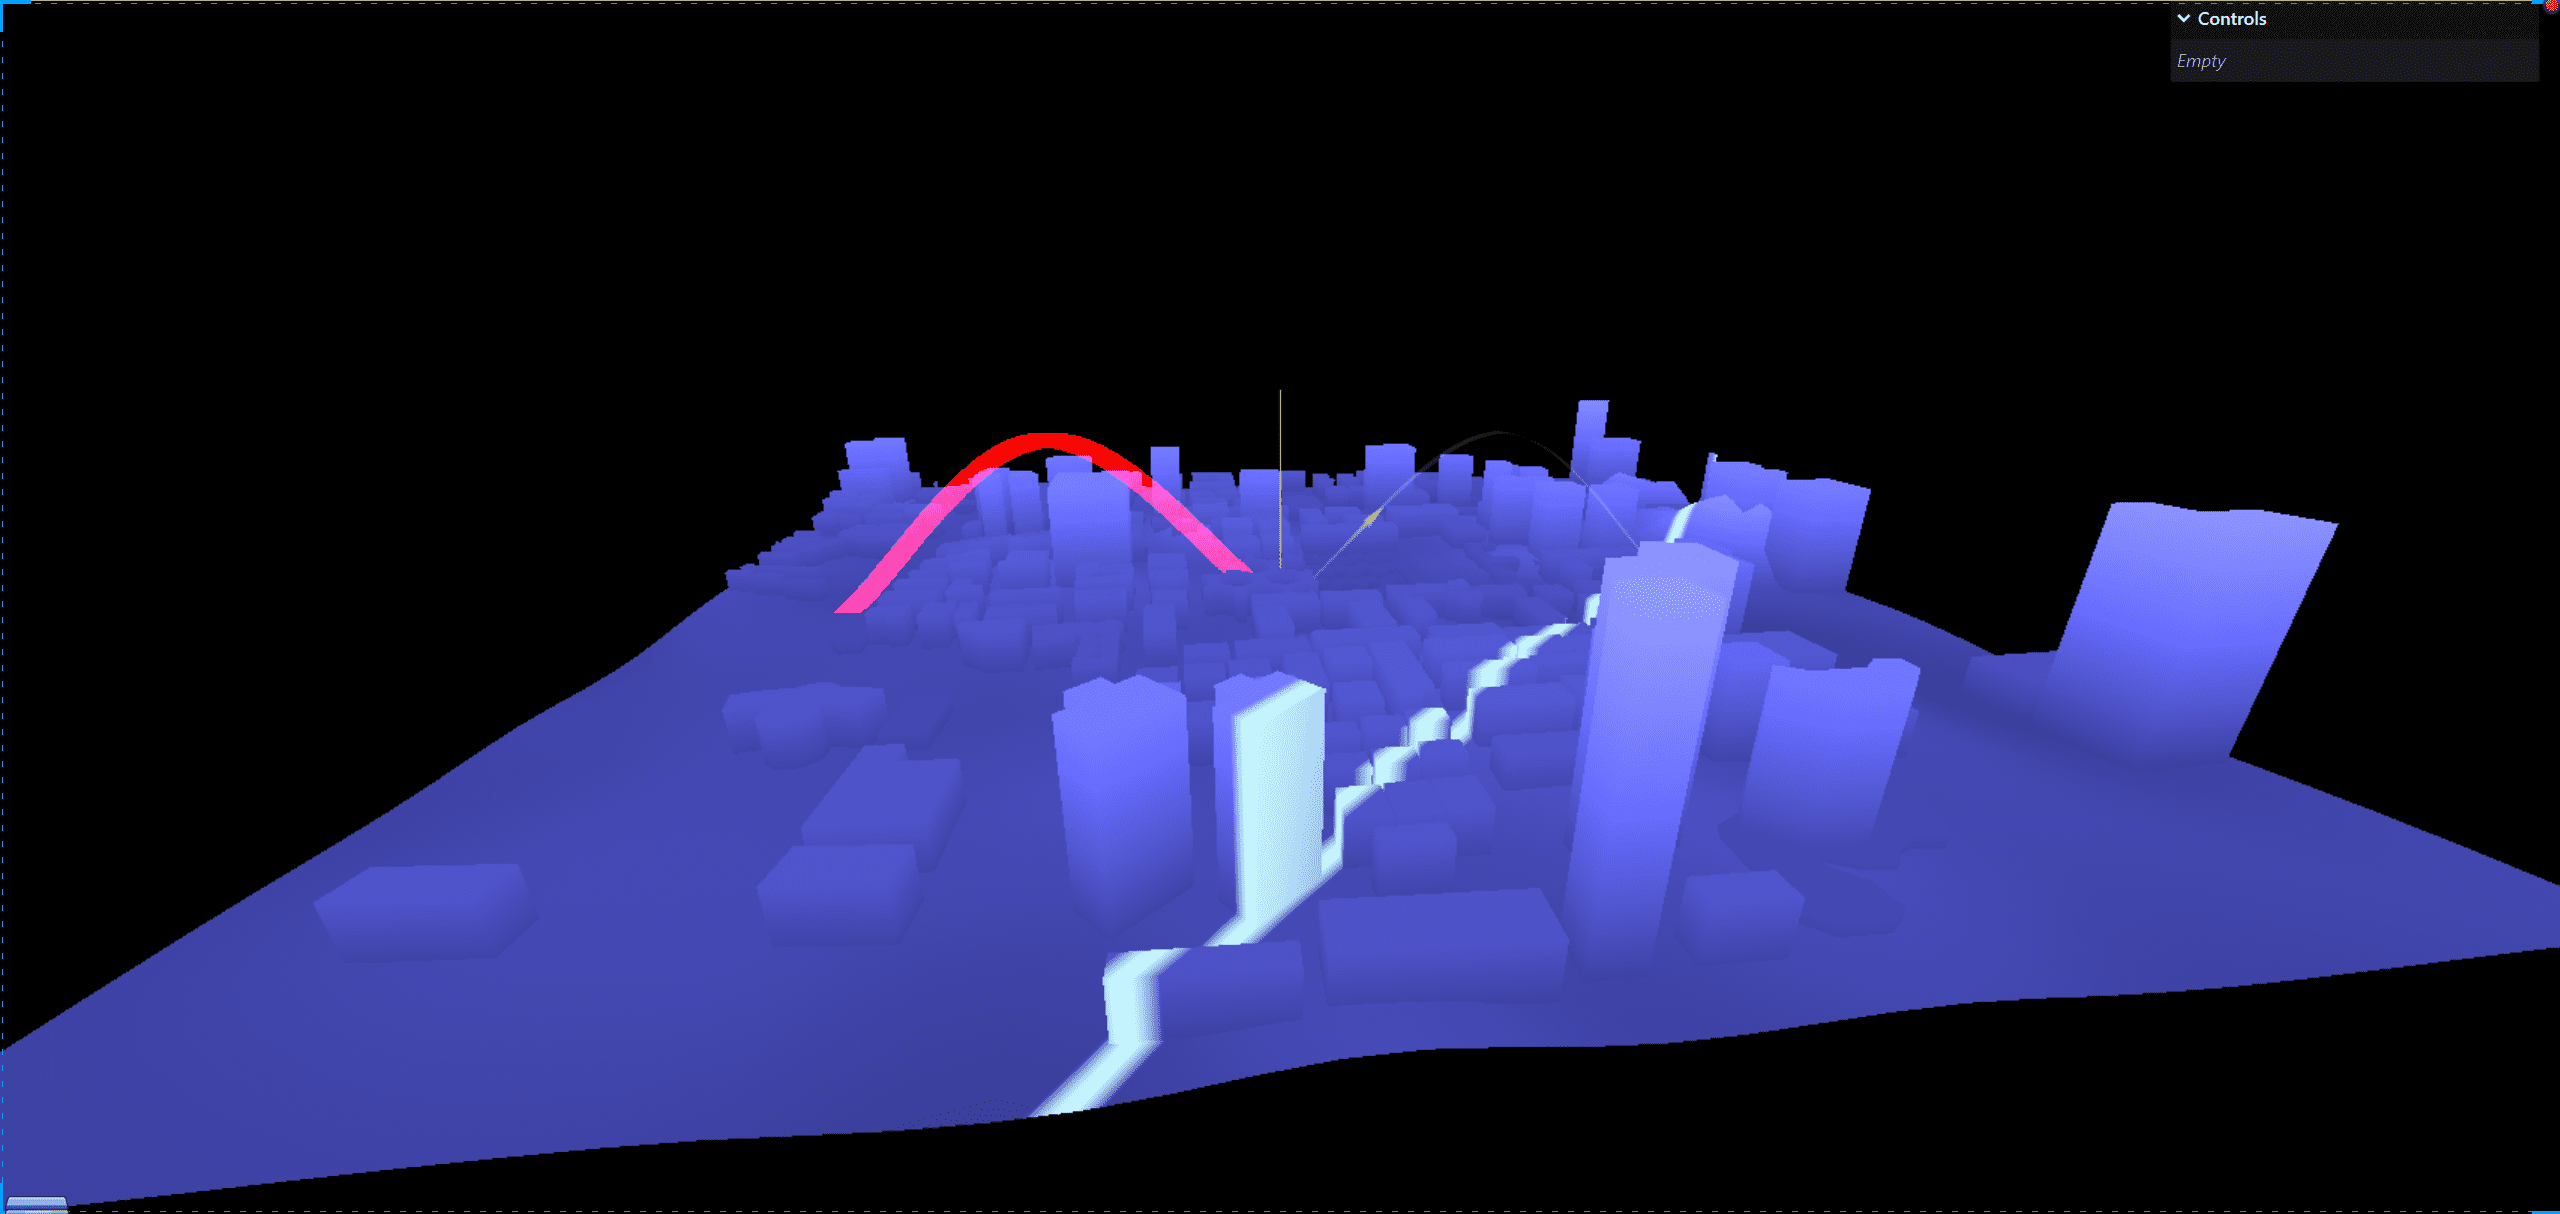
实现飞线从大到小
要实现这个功能,就需要我们记录下点的位置,在js中添加以下代码
1
2
3
4
5
6
7
8
9
10
|
const aSizeArray = new Float32Array(points.length);
for (let i = 0; i < aSizeArray.length; i++) {
aSizeArray[i] = i;
}
this.geometry.setAttribute(
"aSize",
new THREE.BufferAttribute(aSizeArray, 1)
);
|
在顶点着色器中添加以下代码
1
2
3
4
5
6
| attribute float aSize;
void main(){
vec4 viewPosition = viewMatrix * modelMatrix *vec4(position,1);
gl_Position = projectionMatrix * viewPosition;
gl_PointSize = aSize*0.01;
}
|
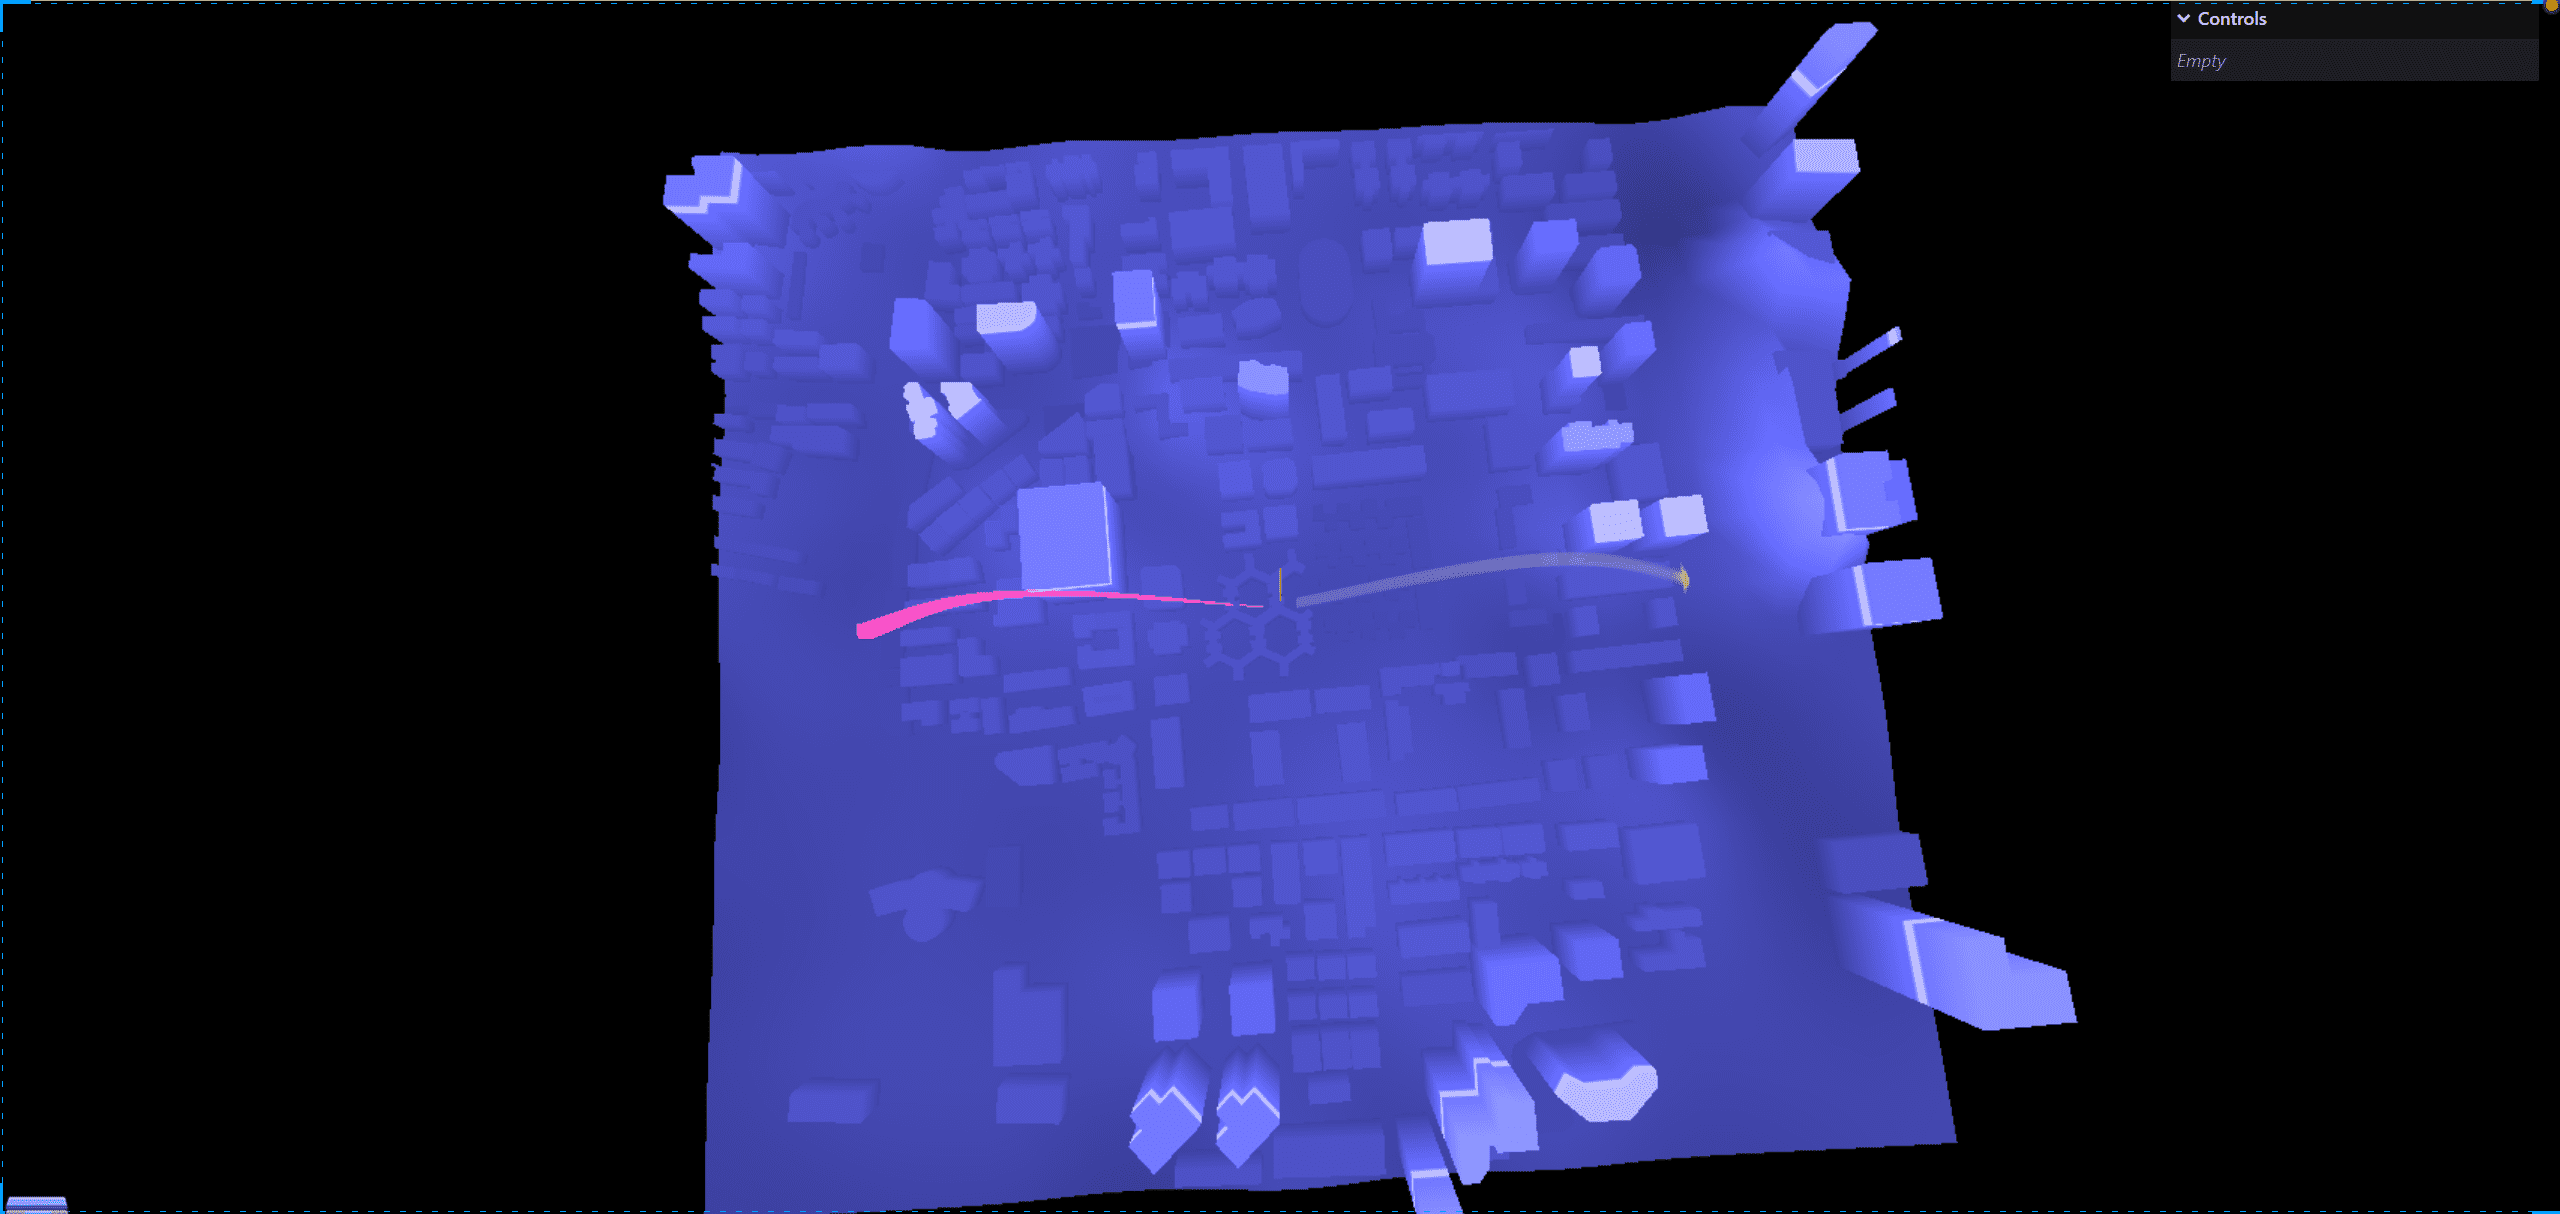
此时的效果为,可以明确看到飞线不再是均匀的了
实现飞线只展示一部分效果
在顶点着色器中,我们设置一个vSize变量,然后将aSize-500的值传递给vSize,然后将vSize传递给片元着色器
1
2
3
4
5
6
7
8
9
| attribute float aSize;
varying float vSize;
void main(){
vec4 viewPosition = viewMatrix * modelMatrix *vec4(position,1);
gl_Position = projectionMatrix * viewPosition;
vSize = (aSize-500.0)*0.1;
gl_PointSize = vSize*0.01;
}
|
在片元着色器中
1
2
3
4
5
6
7
8
9
| varying float vSize;
void main(){
if(vSize<0.0){
gl_FragColor = vec4(1,0,0,0);
}
else{
gl_FragColor = vec4(1,0,0,1);
}
}
|
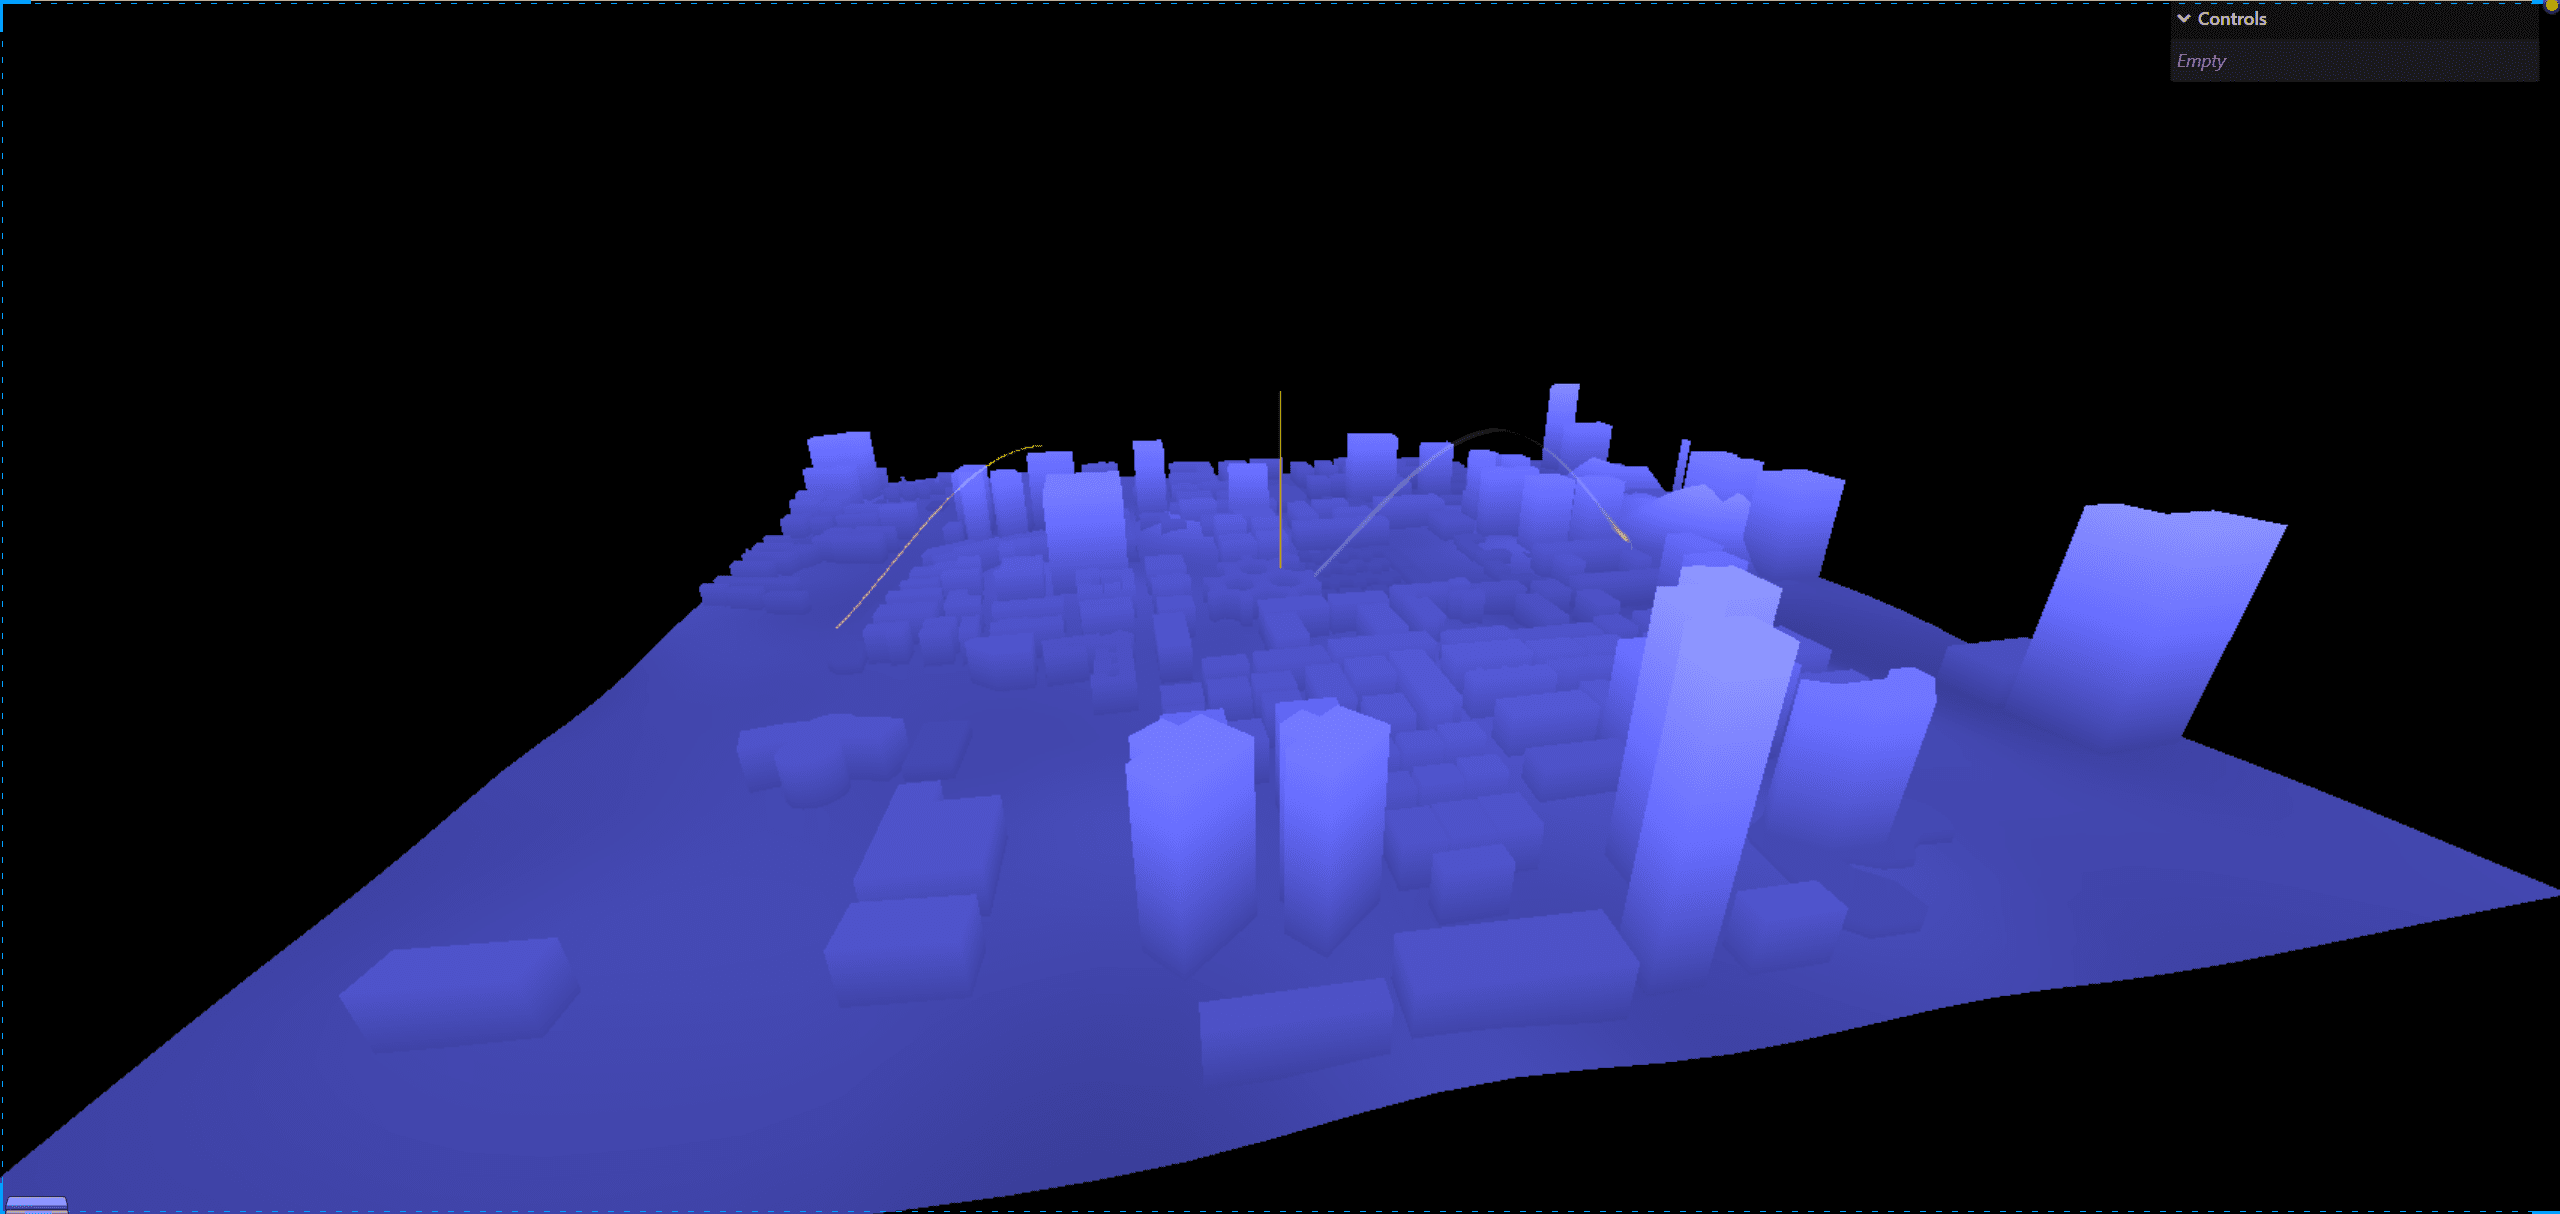
这样就可以实现我们想要的只需要一部分飞线的需求了
飞线截面变成圆而不是长方形
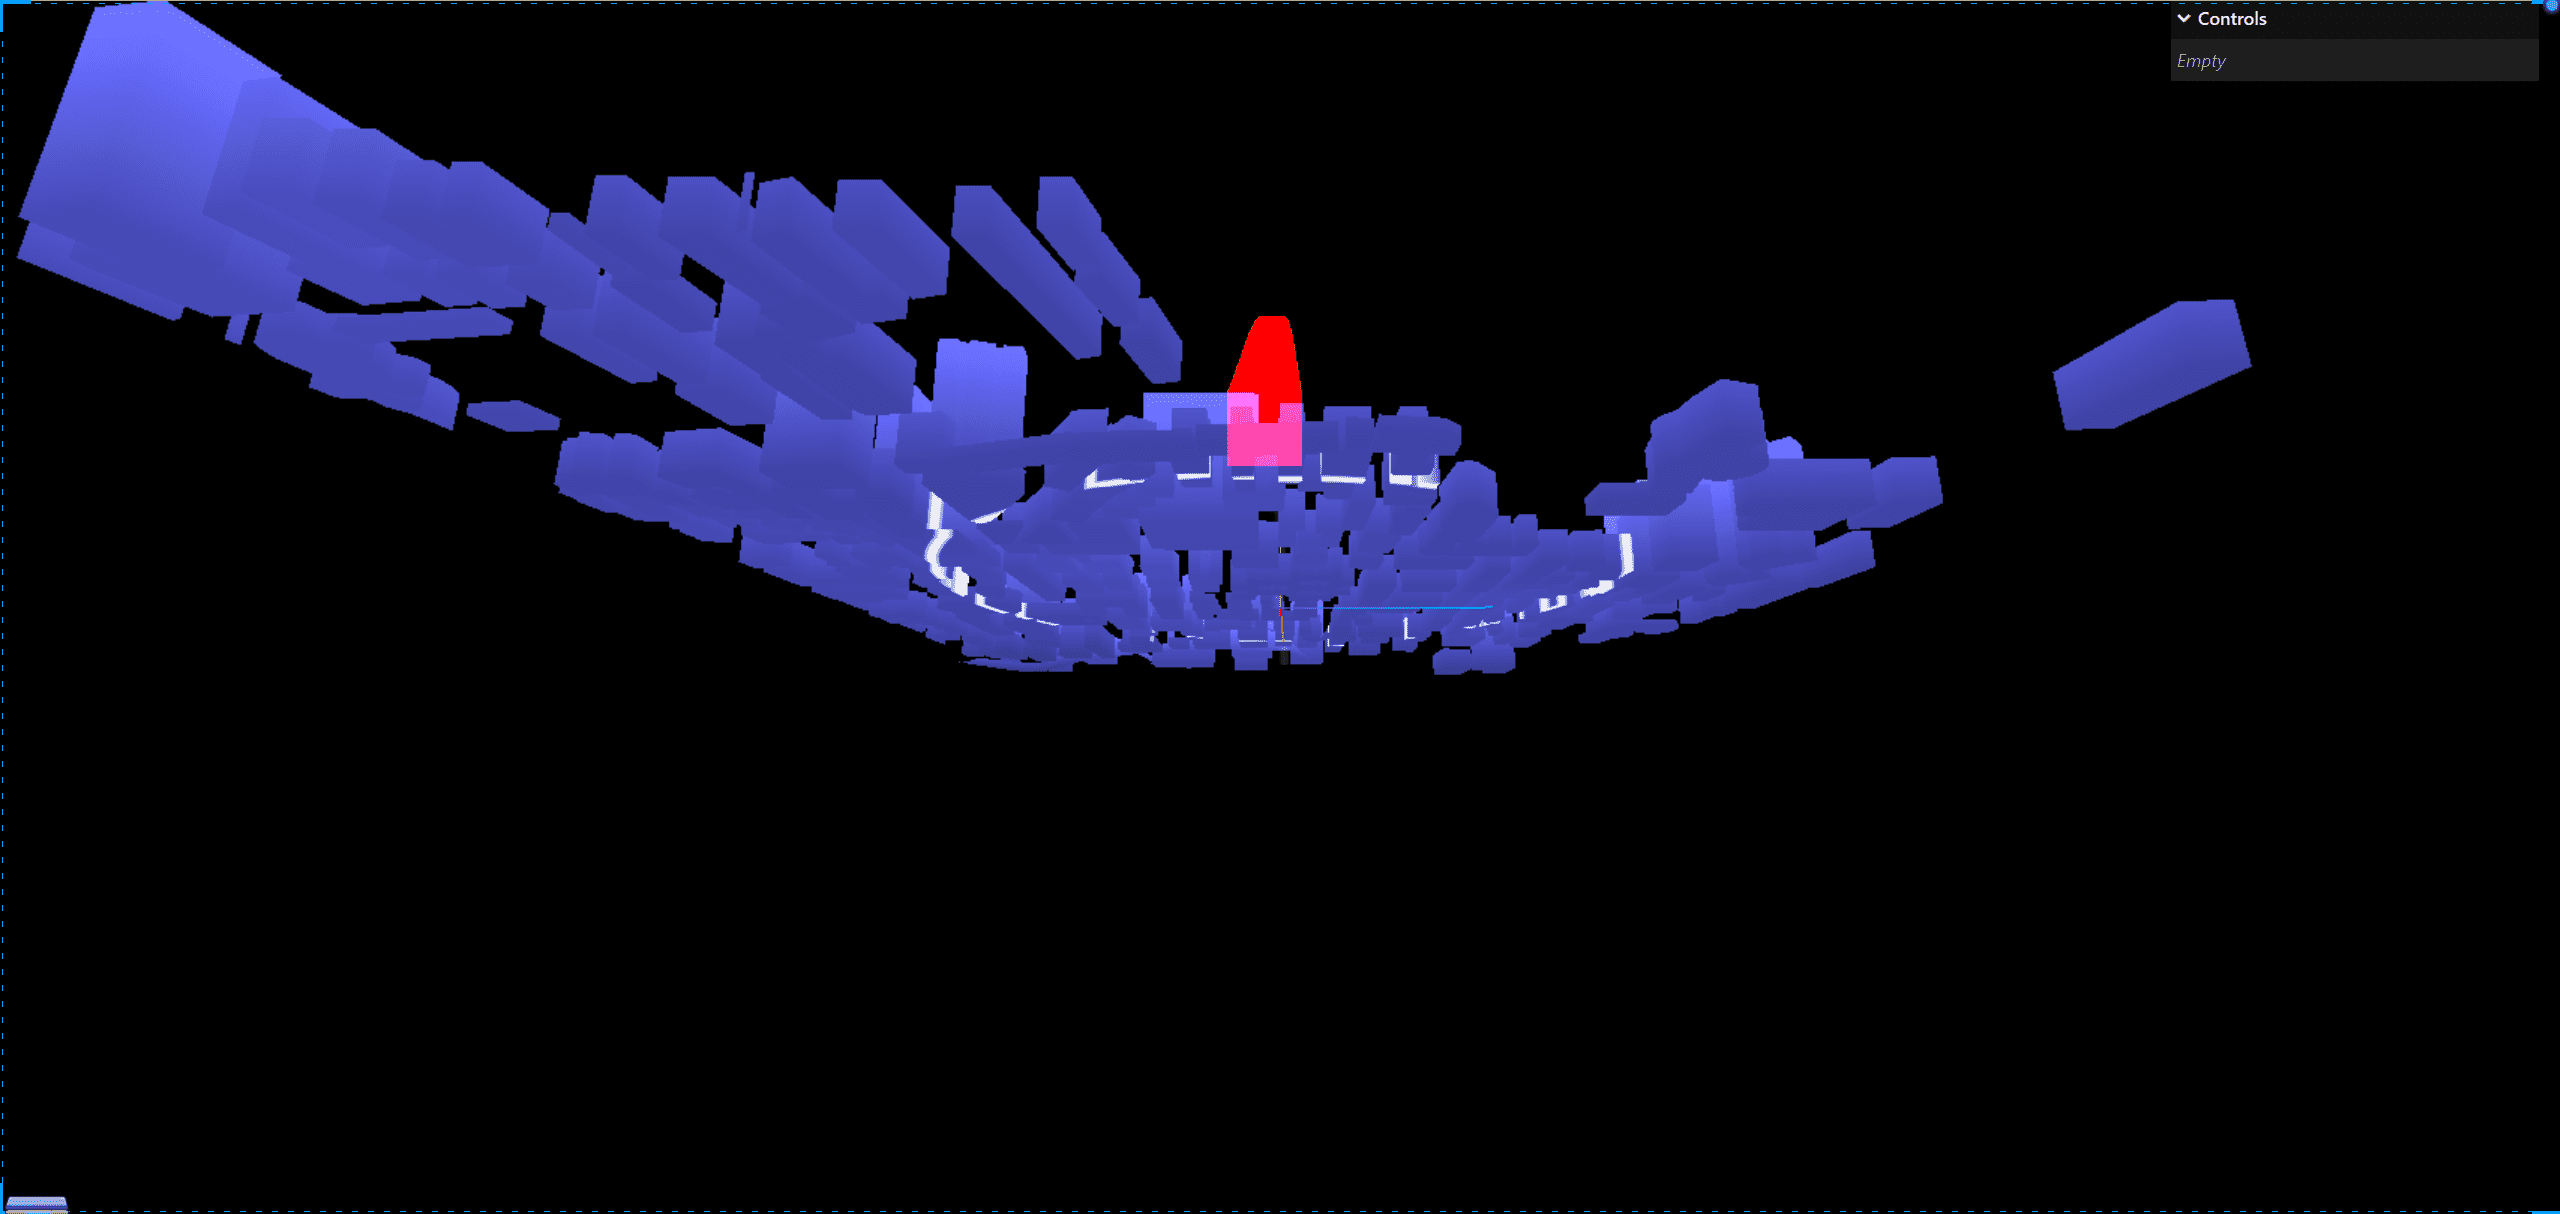
通过这张图片我们可以清楚看到,这个飞线截面其实是正方形,我们需要将这个截面改造成圆形
在片元着色器中
1
2
3
4
5
6
7
8
9
10
11
| varying float vSize;
void main(){
float distanceToCenter = distance(gl_PointCoord,vec2(0.5,0.5));
float strength = 1.0 - (distanceToCenter*2.0);
if(vSize<0.0){
gl_FragColor = vec4(1,0,0,0);
}
else{
gl_FragColor = vec4(1,0,0,strength);
}
}
|
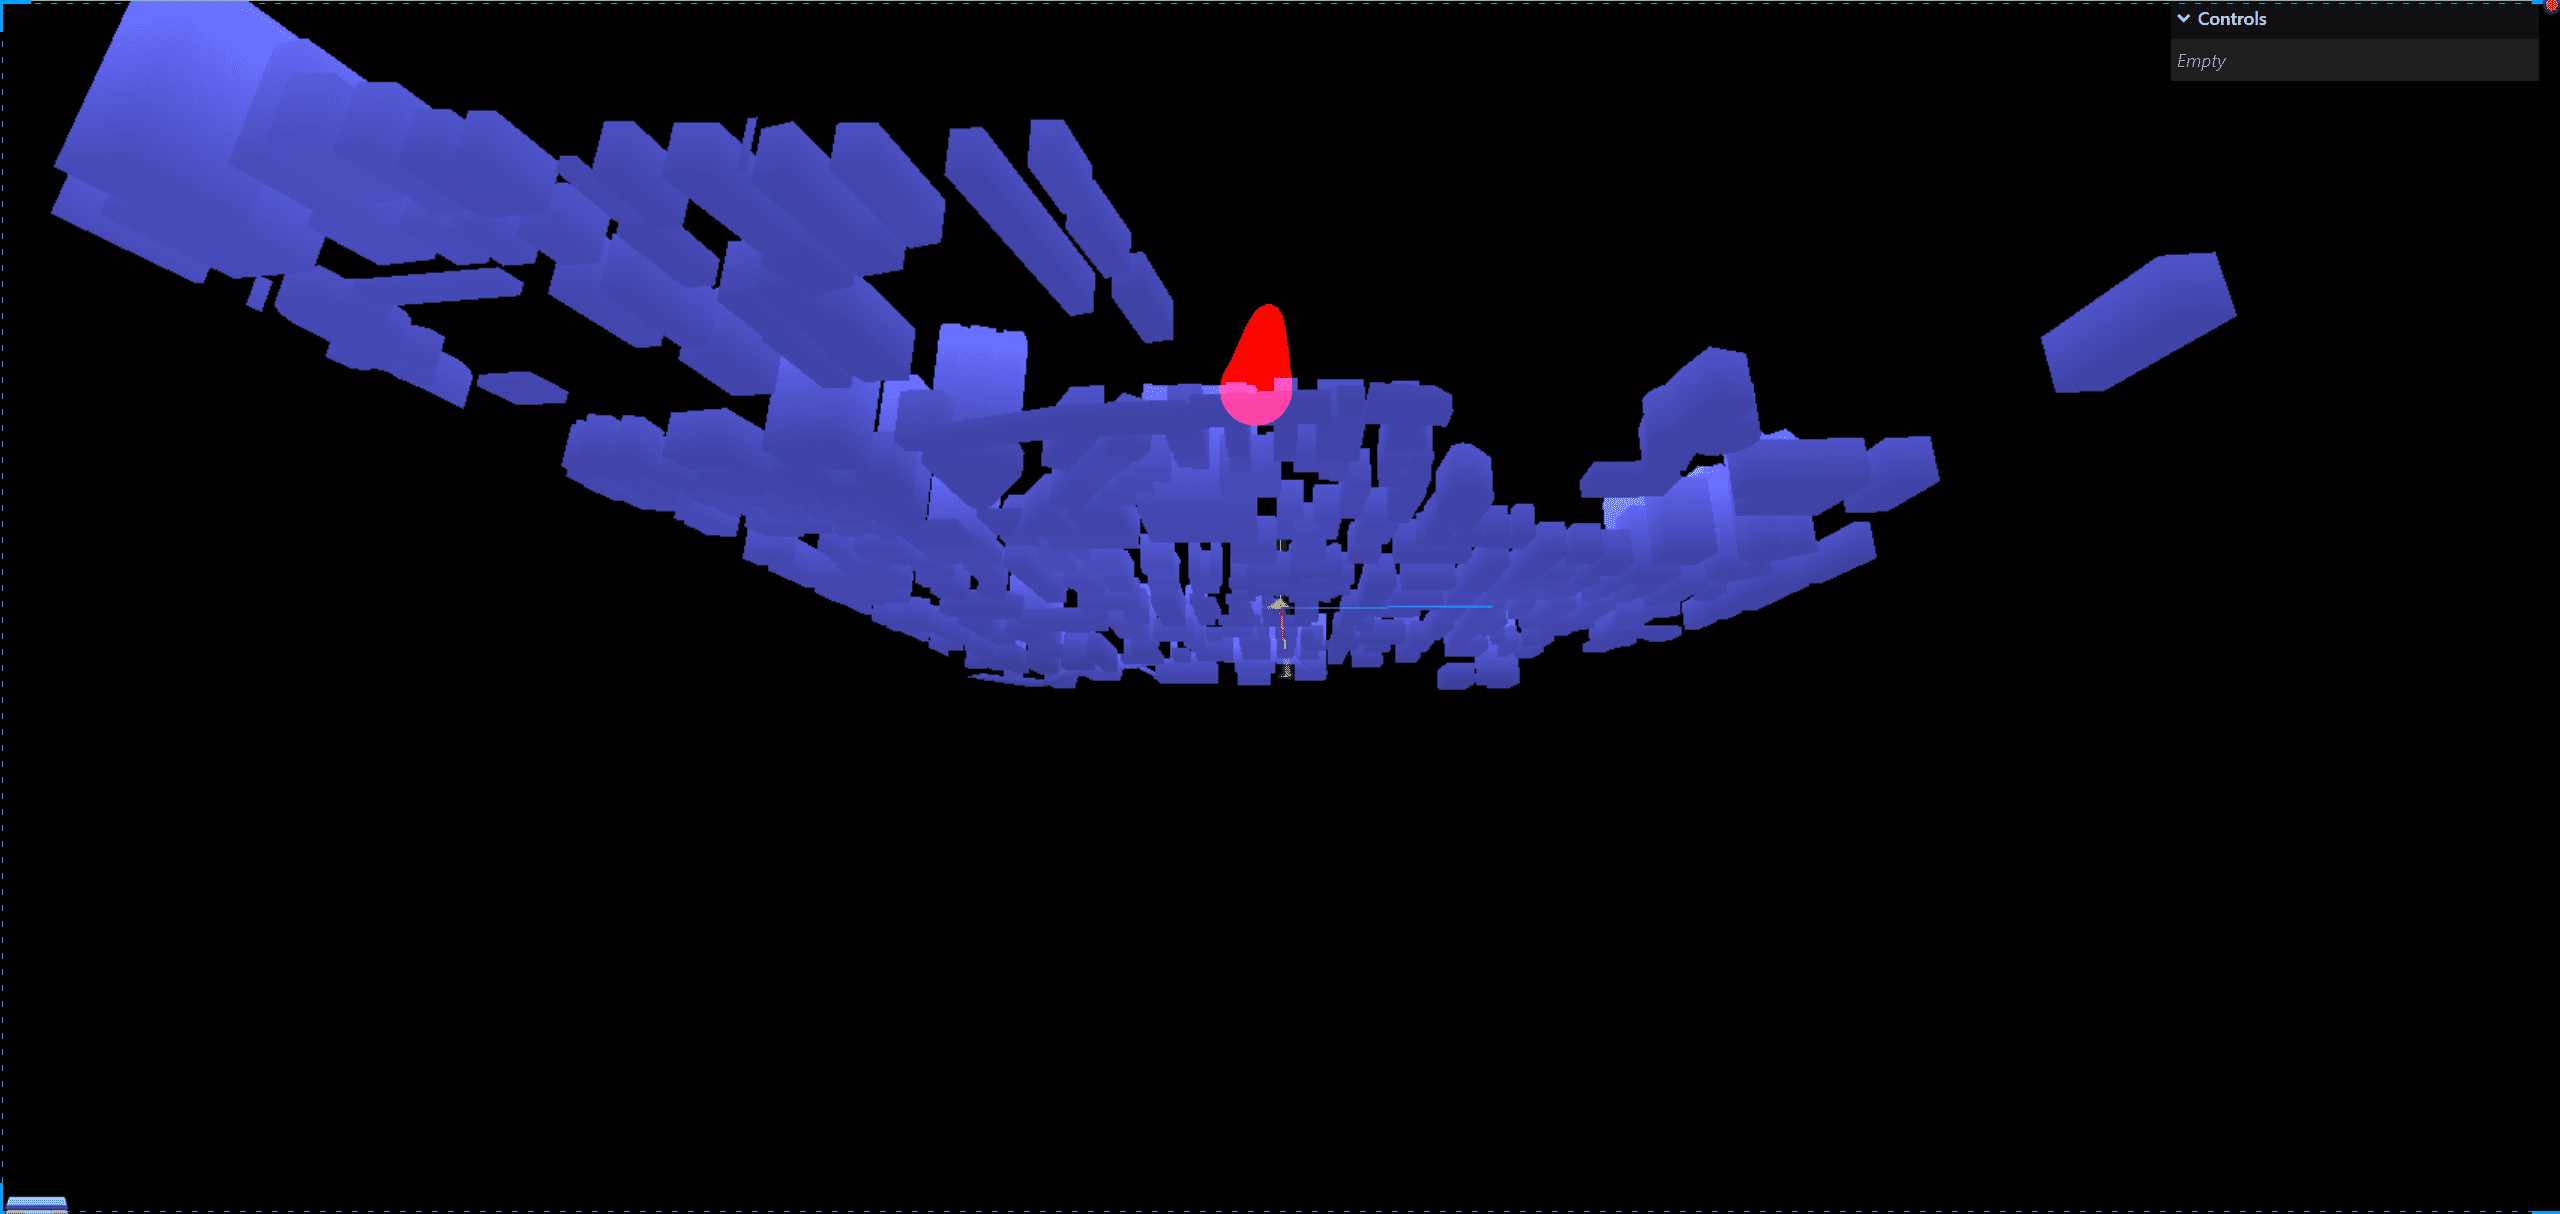
调整飞线的大小
我们可以看到如下视频,这个线因为远离我们就看起来特别的大,这样是不符合我们的需求的,我们需要将这个线的大小调整一下
在顶点着色器中根据相机视角进行大小的调整
1
2
3
4
5
6
7
8
9
| attribute float aSize;
varying float vSize;
void main(){
vec4 viewPosition = viewMatrix * modelMatrix *vec4(position,1);
gl_Position = projectionMatrix * viewPosition;
vSize = (aSize-500.0)*0.1;
gl_PointSize = -vSize/viewPosition.z;
}
|
这样,我们的飞线就看起来正常多了
让飞线动起来
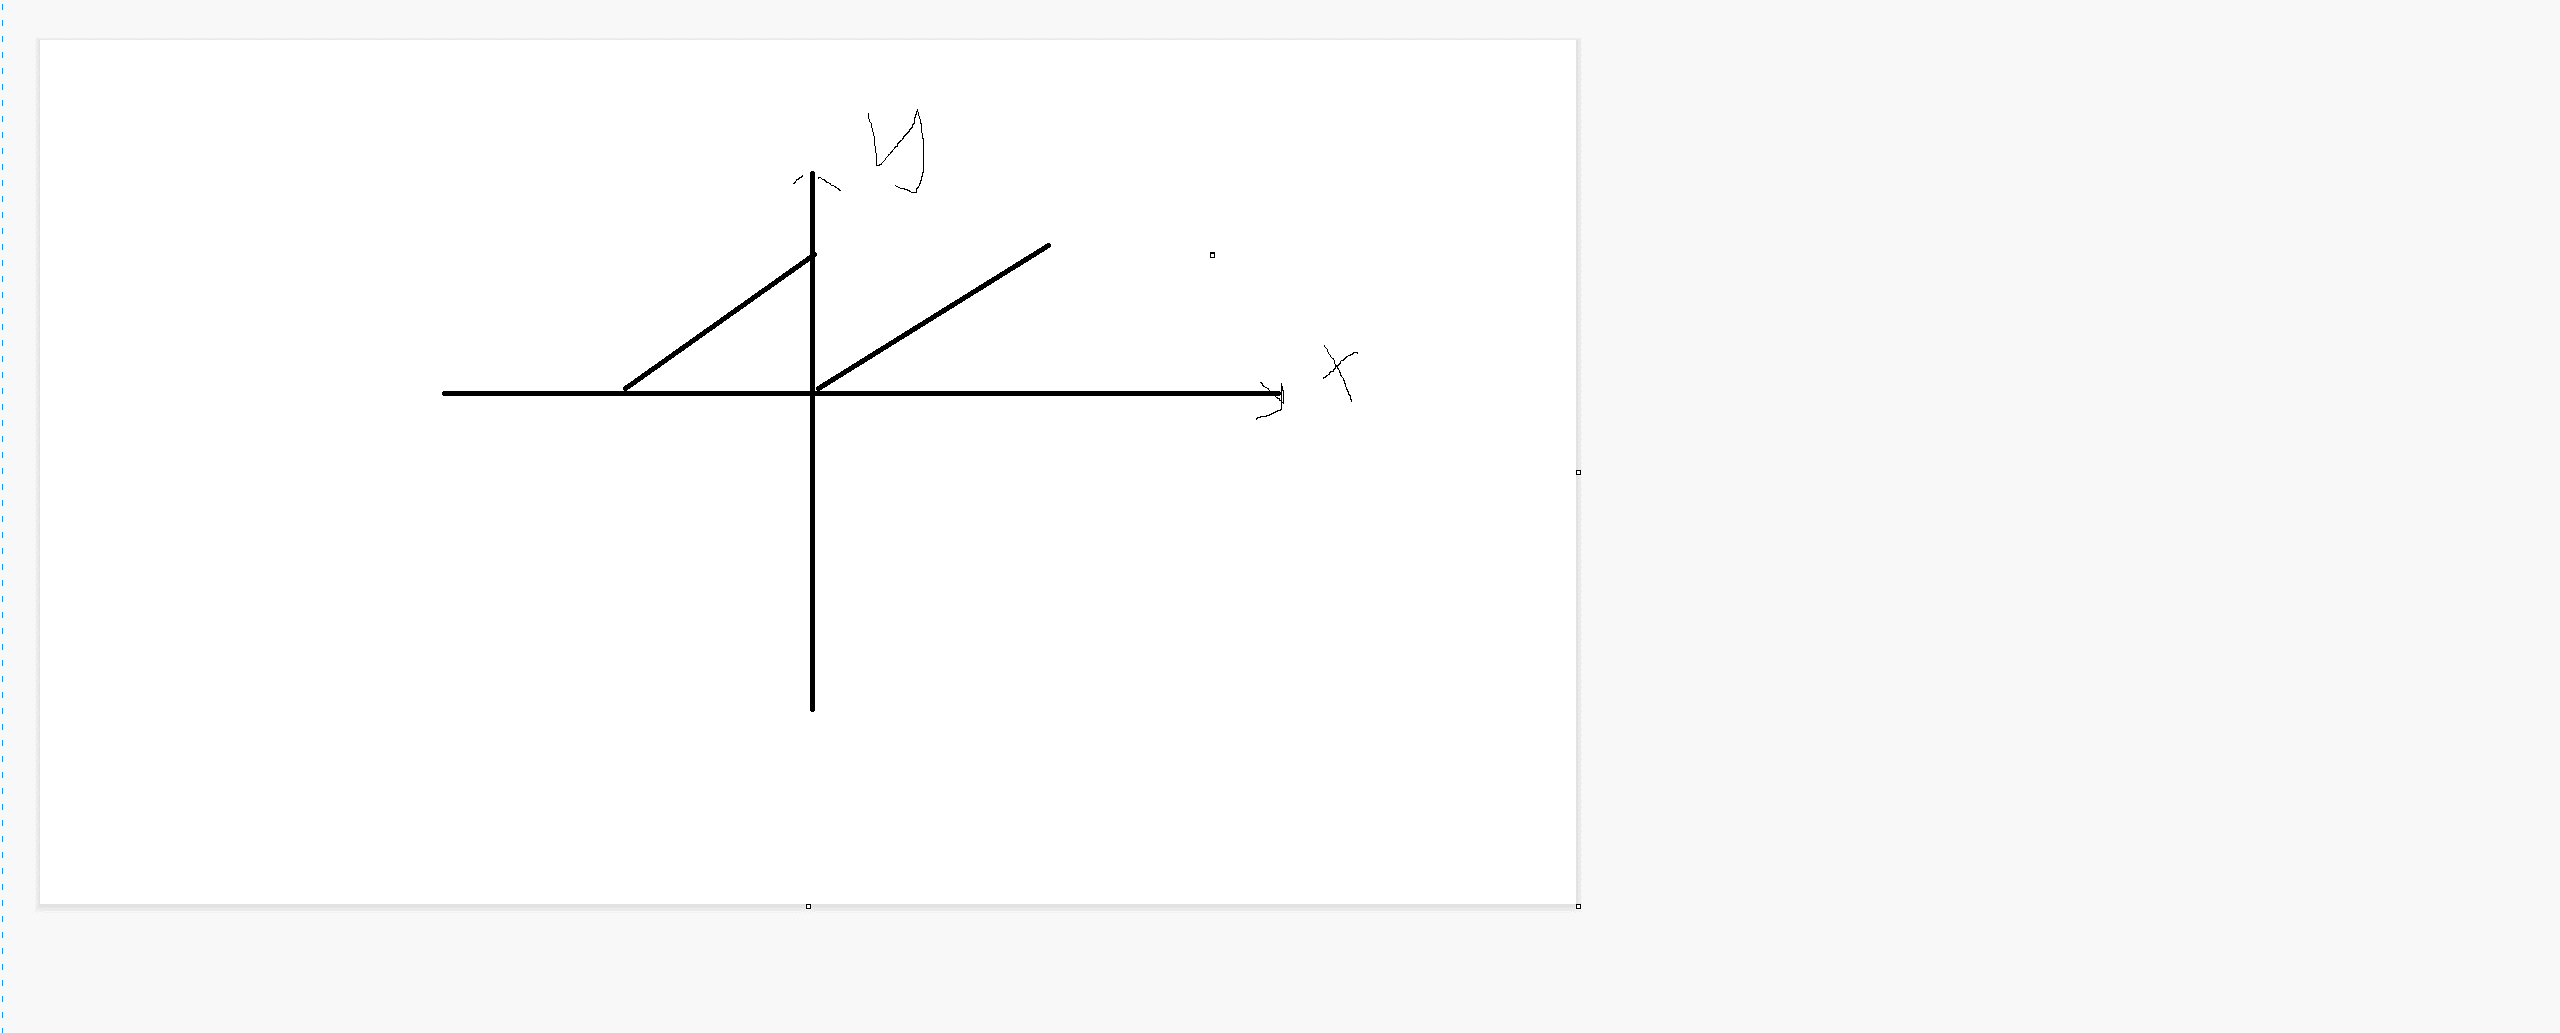
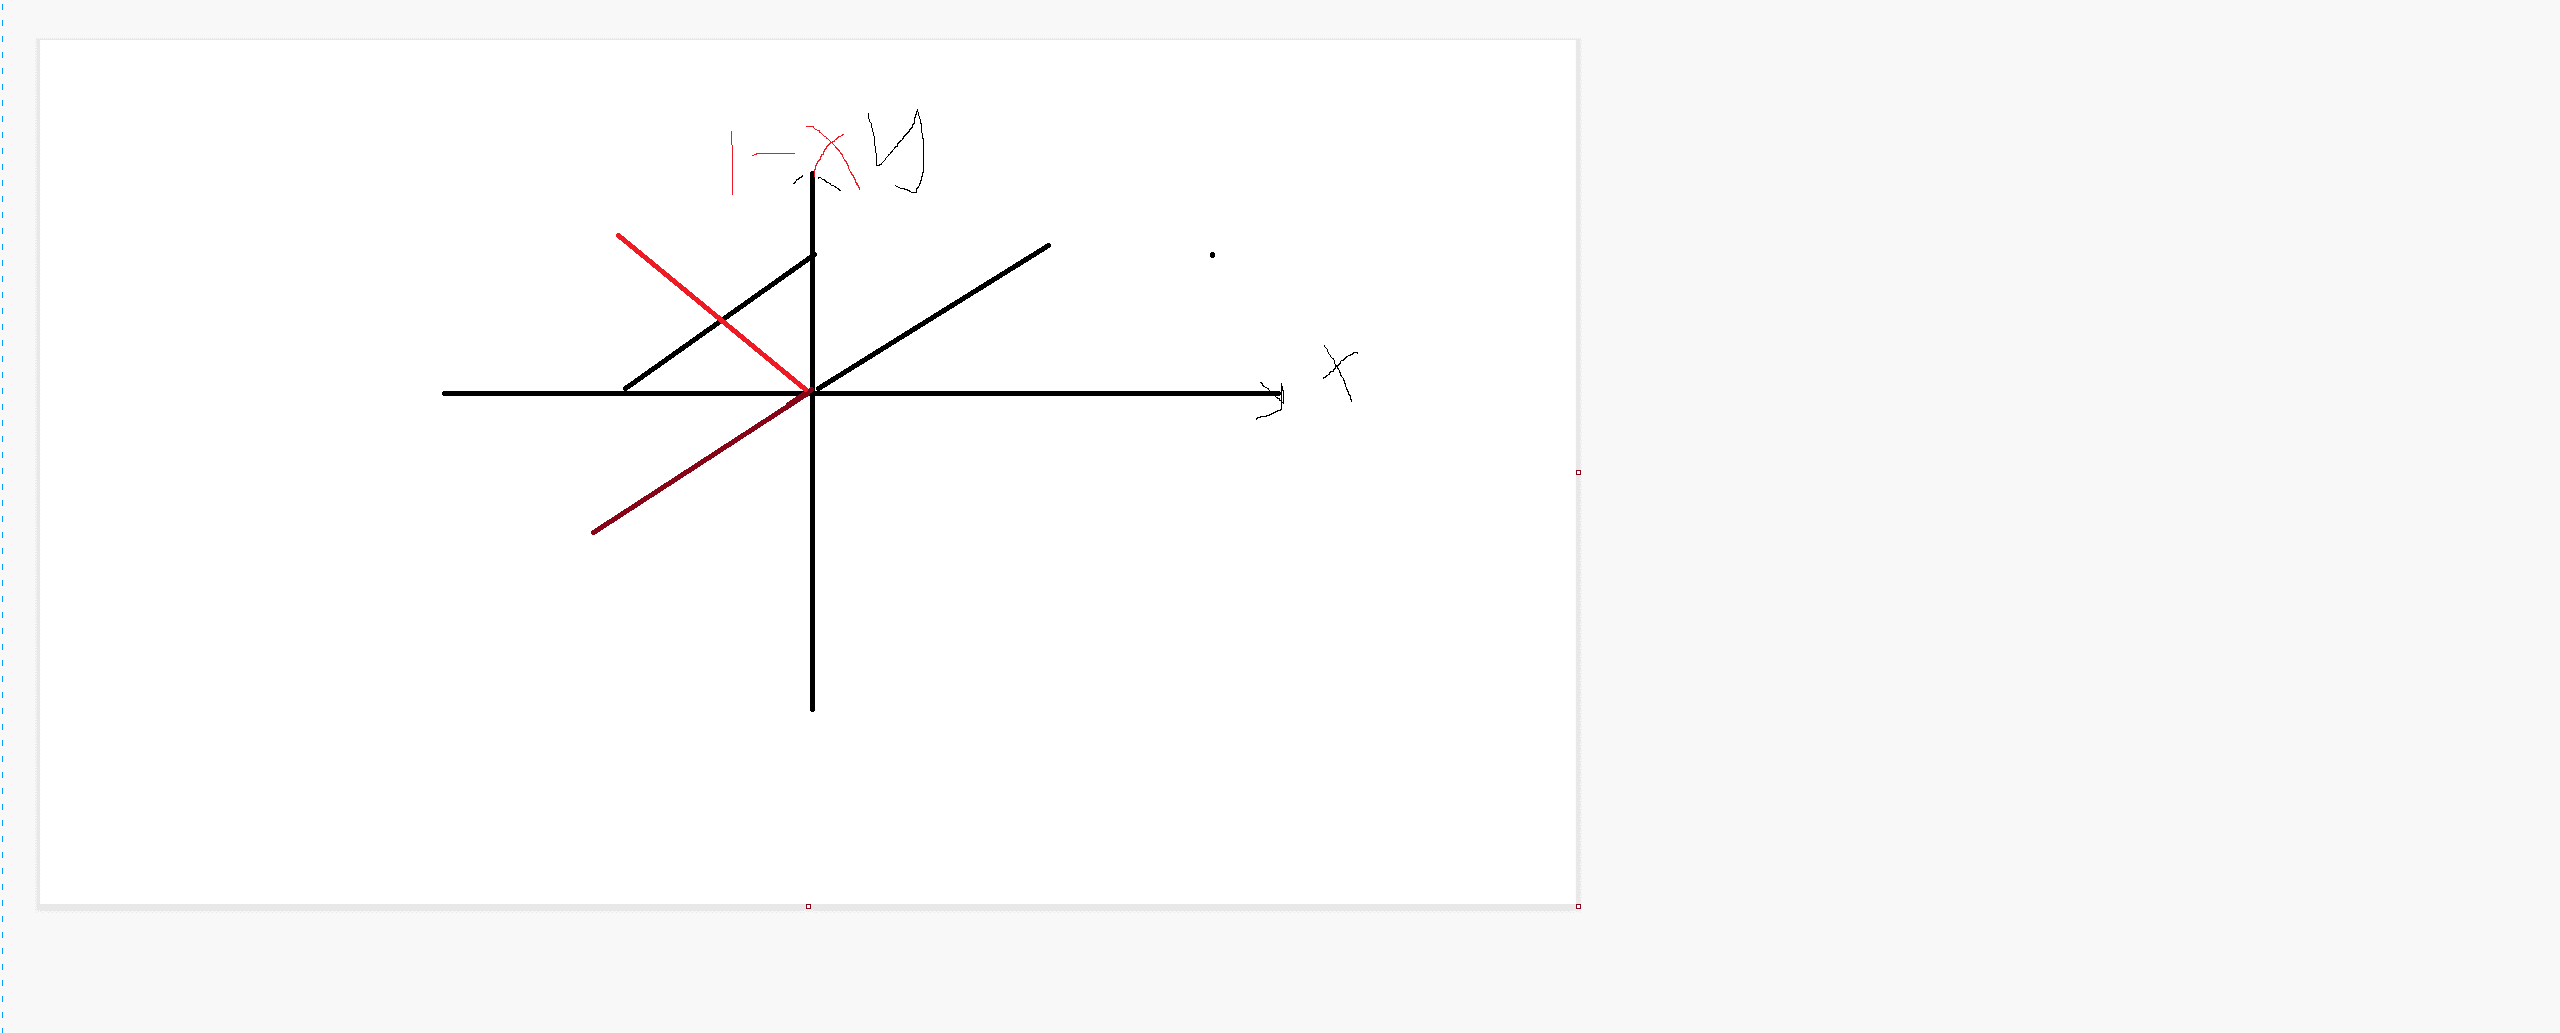
我们可以想到,飞线就是从0-最高点的一个过程,我们需要让他一直动,就是前一条飞线结束的时候,另外一条飞线开始,那么就可以理解为这样的一个函数,就是理解为如何从右边这条线变成左边这条线,显示根据y轴翻转,然后再根据中心点折叠,类似于1-x这样的一条线
在js中,我们添加颜色和时间以及动画函数
1
2
3
4
5
6
7
8
9
10
11
12
13
14
15
16
17
18
19
20
21
22
23
24
25
26
27
28
29
30
31
32
33
34
35
36
37
38
39
40
41
42
43
44
45
46
47
48
49
50
51
52
53
54
55
56
57
58
59
60
61
62
63
64
65
66
67
| import * as THREE from "three";
import gsap from "gsap";
import vertex from "@/shader/flyLine/vertex.glsl?raw";
import fragment from "@/shader/flyLine/fragment.glsl?raw";
export default class FlyLineShader {
constructor(position = { x: 0, z: 0 }, color = 0x00ffff) {
let linePoints = [
new THREE.Vector3(0, 0, 0),
new THREE.Vector3(position.x / 2, 4, position.z / 2),
new THREE.Vector3(position.x, 0, position.z),
];
this.lineCurve = new THREE.CatmullRomCurve3(linePoints);
const points = this.lineCurve.getPoints(1000);
this.geometry = new THREE.BufferGeometry().setFromPoints(points);
const aSizeArray = new Float32Array(points.length);
for (let i = 0; i < aSizeArray.length; i++) {
aSizeArray[i] = i;
}
this.geometry.setAttribute(
"aSize",
new THREE.BufferAttribute(aSizeArray, 1)
);
this.shaderMaterial = new THREE.ShaderMaterial({
uniforms: {
uTime: {
value: 0,
},
uColor: {
value: new THREE.Color(color),
},
uLength: {
value: points.length,
},
},
vertexShader: vertex,
fragmentShader: fragment,
transparent: true,
depthWrite: false,
blending: THREE.AdditiveBlending,
});
this.mesh = new THREE.Points(this.geometry, this.shaderMaterial);
gsap.to(this.shaderMaterial.uniforms.uTime, {
value: 1000,
duration: 2,
repeat: -1,
ease: "none",
});
}
remove() {
this.mesh.remove();
this.mesh.removeFromParent();
this.mesh.geometry.dispose();
this.mesh.material.dispose();
}
}
|
在片元着色器中,我们接收颜色
1
2
3
4
5
6
7
8
9
10
11
12
13
| varying float vSize;
uniform vec3 uColor;
void main(){
float distanceToCenter = distance(gl_PointCoord,vec2(0.5,0.5));
float strength = 1.0 - (distanceToCenter*2.0);
if(vSize<=0.0){
gl_FragColor = vec4(1,0,0,0);
}else{
gl_FragColor = vec4(uColor,strength);
}
}
|
在顶点着色器中
1
2
3
| if(vSize<0.0){
vSize = vSize + uLength;
}
|
上面一段代码就是我们说的翻转逻辑
1
2
3
4
5
6
7
8
9
10
11
12
13
14
15
16
17
18
|
uniform float uTime;
uniform vec3 uColor;
uniform float uLength;
attribute float aSize;
varying float vSize;
void main(){
vec4 viewPosition = viewMatrix * modelMatrix *vec4(position,1);
gl_Position = projectionMatrix * viewPosition;
vSize = (aSize-uTime);
if(vSize<0.0){
vSize = vSize + uLength;
}
vSize = (vSize-500.0)*0.1;
gl_PointSize = -vSize/viewPosition.z;
}
|
最终效果如下面这个视频展示
建筑物添加线框特效
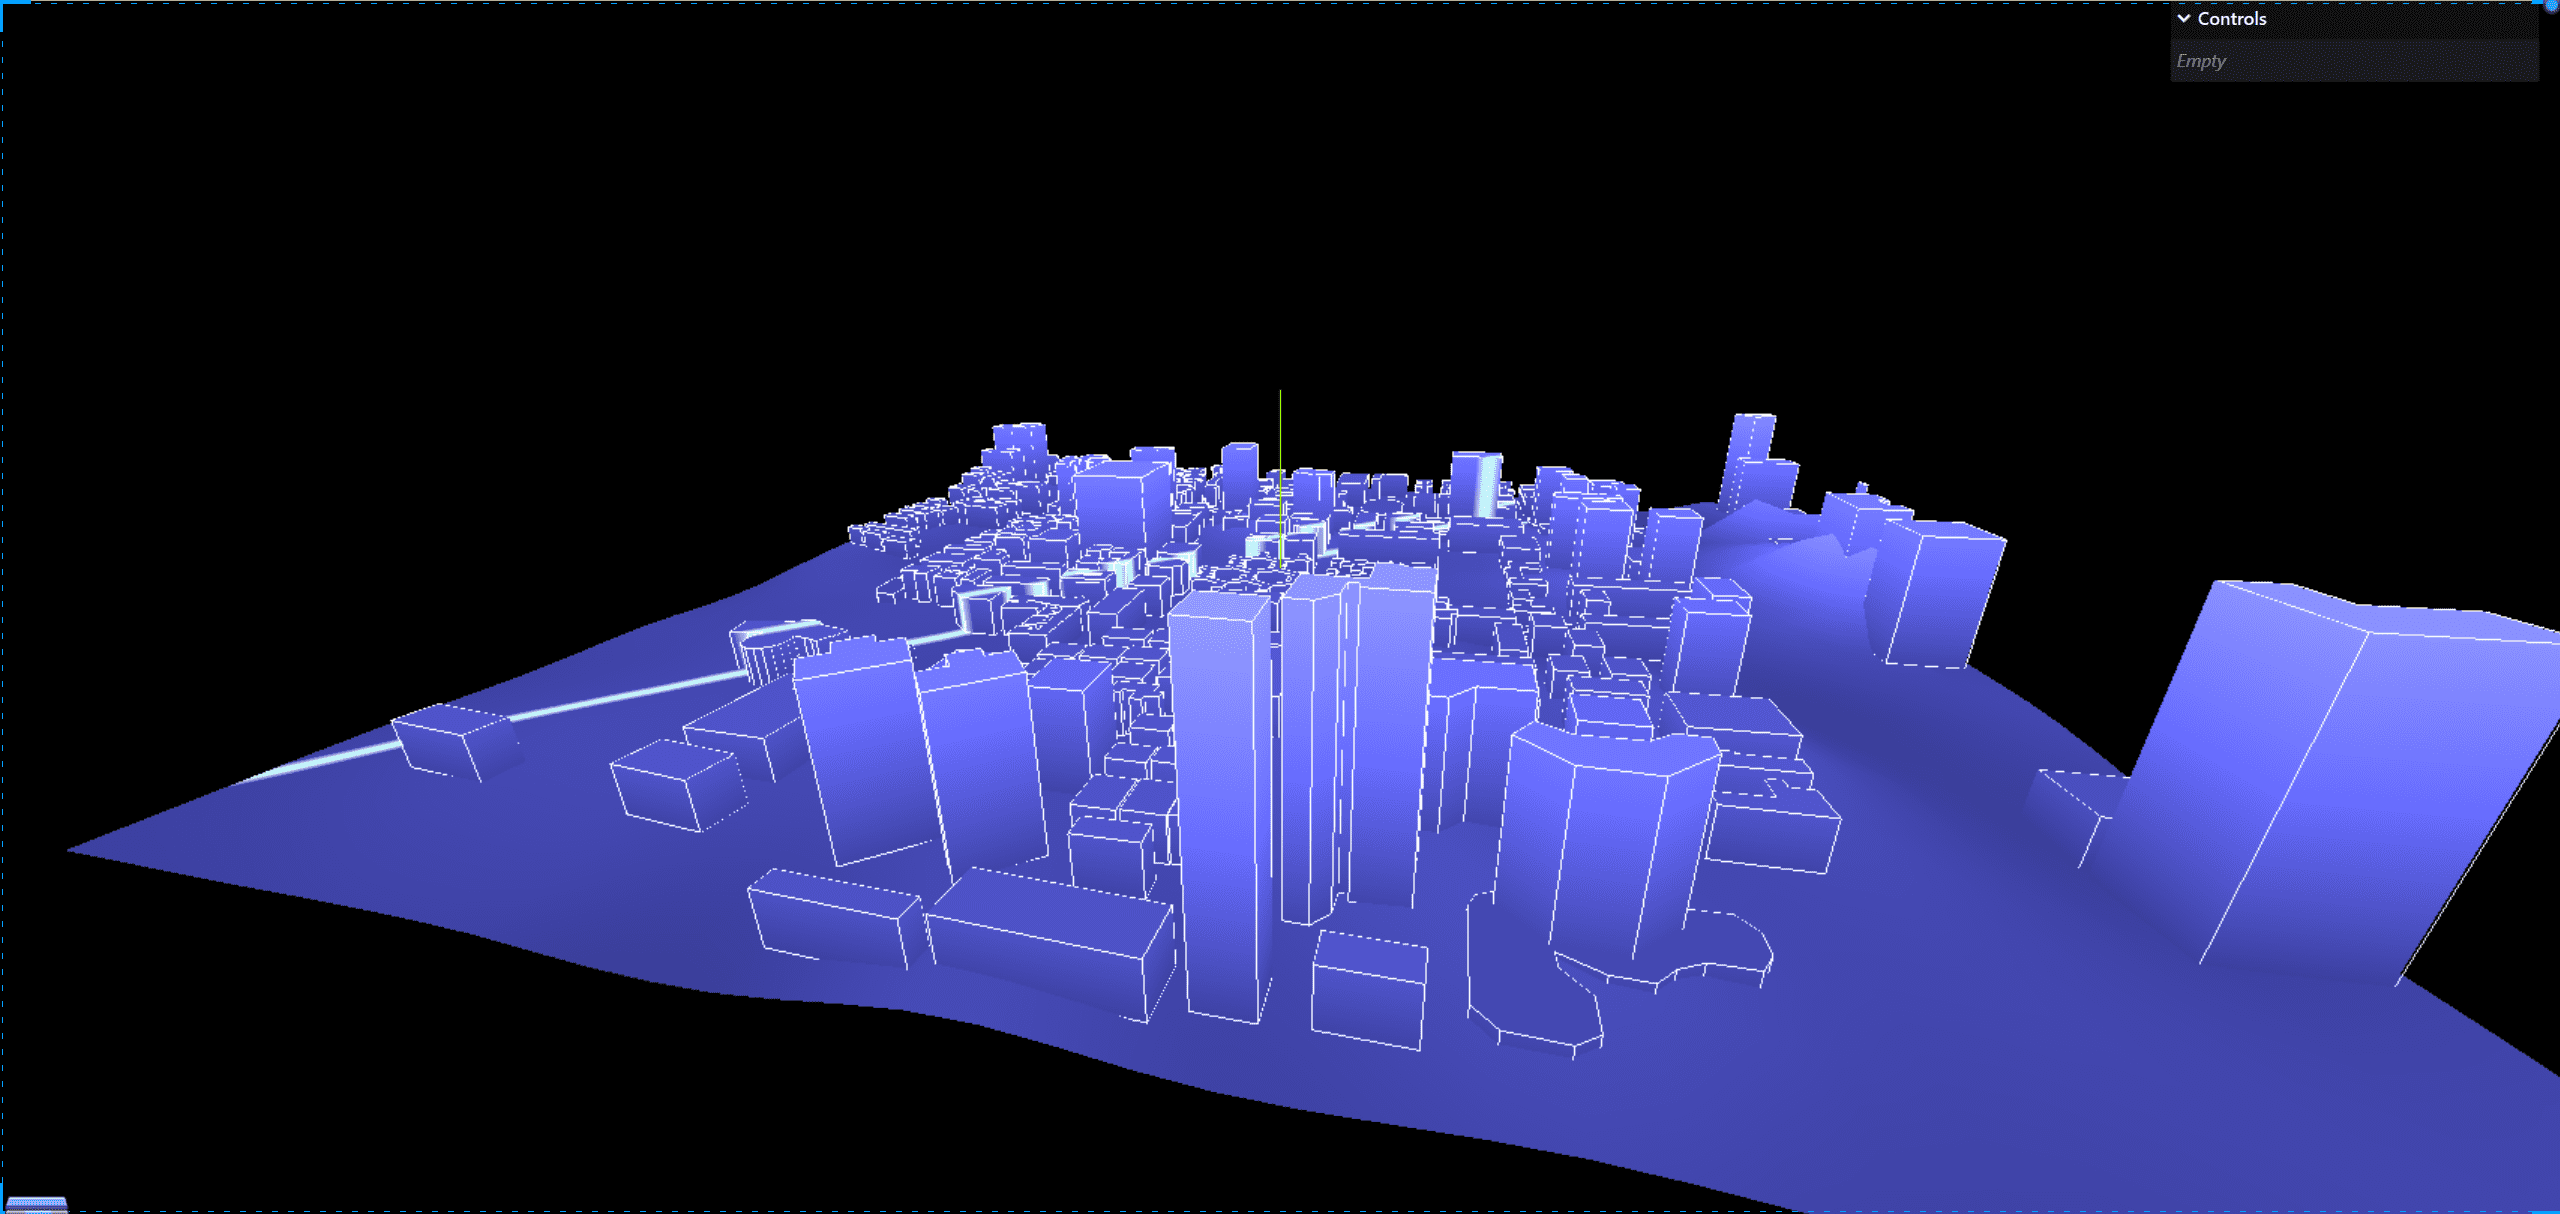
这个我们之前做过类似的,详解就不说了,直接上代码,用three的线框函数即可
添加MeshLine类
1
2
3
4
5
6
7
8
9
10
| import * as THREE from "three";
export default class MeshLine {
constructor(geometry) {
const edges = new THREE.EdgesGeometry(geometry);
this.material = new THREE.LineBasicMaterial({ color: 0xffffff });
const line = new THREE.LineSegments(edges, this.material);
this.geometry = edges;
this.mesh = line;
}
}
|
在createCity中调用
1
2
3
4
5
6
7
8
9
10
11
12
13
14
15
16
17
18
19
20
21
22
23
24
25
26
27
28
29
30
31
32
33
34
35
36
37
| import { GLTFLoader } from "three/examples/jsm/loaders/GLTFLoader";
import * as THREE from "three";
import scene from "../scene";
import modifyCityMaterial from "../modify/modifyCityMaterial";
import FlyLine from "./FlyLine";
import FlyLineShader from "./FlyLineShader";
import MeshLine from "./MeshLine";
export default function createCity() {
const gltfLoader = new GLTFLoader();
gltfLoader.load("./model/city.glb", (gltf) => {
gltf.scene.traverse((item) => {
if (item.type == "Mesh") {
const cityMaterial = new THREE.MeshBasicMaterial({
color: new THREE.Color(0x0c0e33),
});
item.material = cityMaterial;
modifyCityMaterial(item);
if (item.name == "Layerbuildings") {
const meshLine = new MeshLine(item.geometry);
const size = item.scale.x * 1.001;
meshLine.mesh.scale.set(size, size, size);
scene.add(meshLine.mesh);
}
}
});
scene.add(gltf.scene);
});
}
|
光墙特效
光墙类
同样的我们新建一个光墙的类
1
2
3
4
5
6
7
8
9
10
11
12
13
14
15
16
17
18
19
20
21
22
23
24
25
26
27
28
29
30
31
32
33
34
35
36
37
38
39
40
41
42
43
44
45
46
47
48
49
50
51
52
53
54
55
56
| import * as THREE from "three";
import gsap from "gsap";
import vertex from "@/shader/lightWall/vertex.glsl?raw";
import fragment from "@/shader/lightWall/fragment.glsl?raw";
export default class LightWall {
constructor(
radius = 5,
length = 2,
position = { x: 0, z: 0 },
color = 0xff0000
) {
this.geometry = new THREE.CylinderGeometry(
radius,
radius,
2,
32,
1,
true
);
this.material = new THREE.ShaderMaterial({
vertexShader: vertex,
fragmentShader: fragment,
transparent: true,
side: THREE.DoubleSide,
});
this.mesh = new THREE.Mesh(this.geometry, this.material);
this.mesh.position.set(position.x, 1, position.z);
this.mesh.geometry.computeBoundingBox();
let { min, max } = this.mesh.geometry.boundingBox;
let uHeight = max.y - min.y;
this.material.uniforms.uHeight = {
value: uHeight,
};
gsap.to(this.mesh.scale, {
x: length,
z: length,
duration: 1,
repeat: -1,
yoyo: true,
});
}
remove() {
this.mesh.remove();
this.mesh.removeFromParent();
this.mesh.geometry.dispose();
this.mesh.material.dispose();
}
}
|
片元着色器
在片元着色器中
1
2
3
4
5
6
7
8
| varying vec3 vPosition;
uniform float uHeight;
void main(){
float gradMix = (vPosition.y+uHeight/2.0)/uHeight;
gl_FragColor = vec4(1,1,0,1.0-gradMix);
}
|
顶点着色器
在顶点着色器中
1
2
3
4
5
6
7
| varying vec3 vPosition;
void main(){
vec4 viewPosition = viewMatrix * modelMatrix *vec4(position,1);
gl_Position = projectionMatrix * viewPosition;
vPosition = position;
}
|
调用生成
然后再createCity中调用
1
2
3
|
const lightWall = new LightWall();
scene.add(lightWall.mesh);
|
光墙效果视频
雷达效果
参考我们之前讲着色器的时候说过的雷达效果,这里我就复制过来了,不多阐述
雷达类
1
2
3
4
5
6
7
8
9
10
11
12
13
14
15
16
17
18
19
20
21
22
23
24
25
26
27
28
29
30
31
32
33
34
35
36
37
38
39
40
| import * as THREE from "three";
import gsap from "gsap";
import vertex from "@/shader/lightRadar/vertex.glsl?raw";
import fragment from "@/shader/lightRadar/fragment.glsl?raw";
export default class LightRadar {
constructor(radius = 2, position = { x: 0, z: 0 }, color = 0xff0000) {
this.geometry = new THREE.PlaneGeometry(radius, radius);
this.material = new THREE.ShaderMaterial({
uniforms: {
uColor: { value: new THREE.Color(color) },
uTime: {
value: 0,
},
},
vertexShader: vertex,
fragmentShader: fragment,
transparent: true,
side: THREE.DoubleSide,
});
this.mesh = new THREE.Mesh(this.geometry, this.material);
this.mesh.position.set(position.x, 1, position.z);
this.mesh.rotation.x = -Math.PI / 2;
gsap.to(this.material.uniforms.uTime, {
value: 1,
duration: 1,
repeat: -1,
ease: "none",
});
}
remove() {
this.mesh.remove();
this.mesh.removeFromParent();
this.mesh.geometry.dispose();
this.mesh.material.dispose();
}
}
|
顶点着色器
把uv传递给片元着色器
1
2
3
4
5
6
| varying vec2 vUv;
void main(){
vec4 viewPosition = viewMatrix * modelMatrix *vec4(position,1);
gl_Position = projectionMatrix * viewPosition;
vUv = uv;
}
|
片元着色器
这里稍微讲解一下,rotate2d是旋转矩阵,可以查阅(bookshader文档)[https://thebookofshaders.com/?lan=ch]得到
1
2
| vec2 newUv = rotate2d(uTime*6.28) * (vUv-0.5);
newUv += 0.5;
|
这两句代码首先是传参要求是角度,所以就用了uTime*2PI,然后uv减去0.5是为了根据圆心计算得到旋转矩阵,newUv再加回去是为了保证uv的范围在0-1之间
1
2
3
| float alpha = 1.0 - step(0.5,distance(newUv,vec2(0.5)));
float angle = atan(newUv.x-0.5,newUv.y-0.5);
float strength = (angle+3.14)/6.28;
|
这几行代码是计算出来的是一个圆形的渐变,step是阶梯函数,distance是计算距离,atan是计算角度,strength是计算角度的百分比,这里我用了一个三角函数,获取点到圆心的距离,所以我用了angle+PI/2,然后除以2PI,这样就可以得到0-1-0的循环了
1
2
3
4
5
6
7
8
9
10
11
12
13
14
15
16
17
18
| varying vec2 vUv;
uniform vec3 uColor;
uniform float uTime;
mat2 rotate2d(float _angle){
return mat2(cos(_angle),-sin(_angle),
sin(_angle),cos(_angle));
}
void main(){
vec2 newUv = rotate2d(uTime*6.28) * (vUv-0.5);
newUv += 0.5;
float alpha = 1.0 - step(0.5,distance(newUv,vec2(0.5)));
float angle = atan(newUv.x-0.5,newUv.y-0.5);
float strength = (angle+3.14)/6.28;
gl_FragColor =vec4(uColor,alpha*strength);
}
|
添加天空盒子和抗锯齿
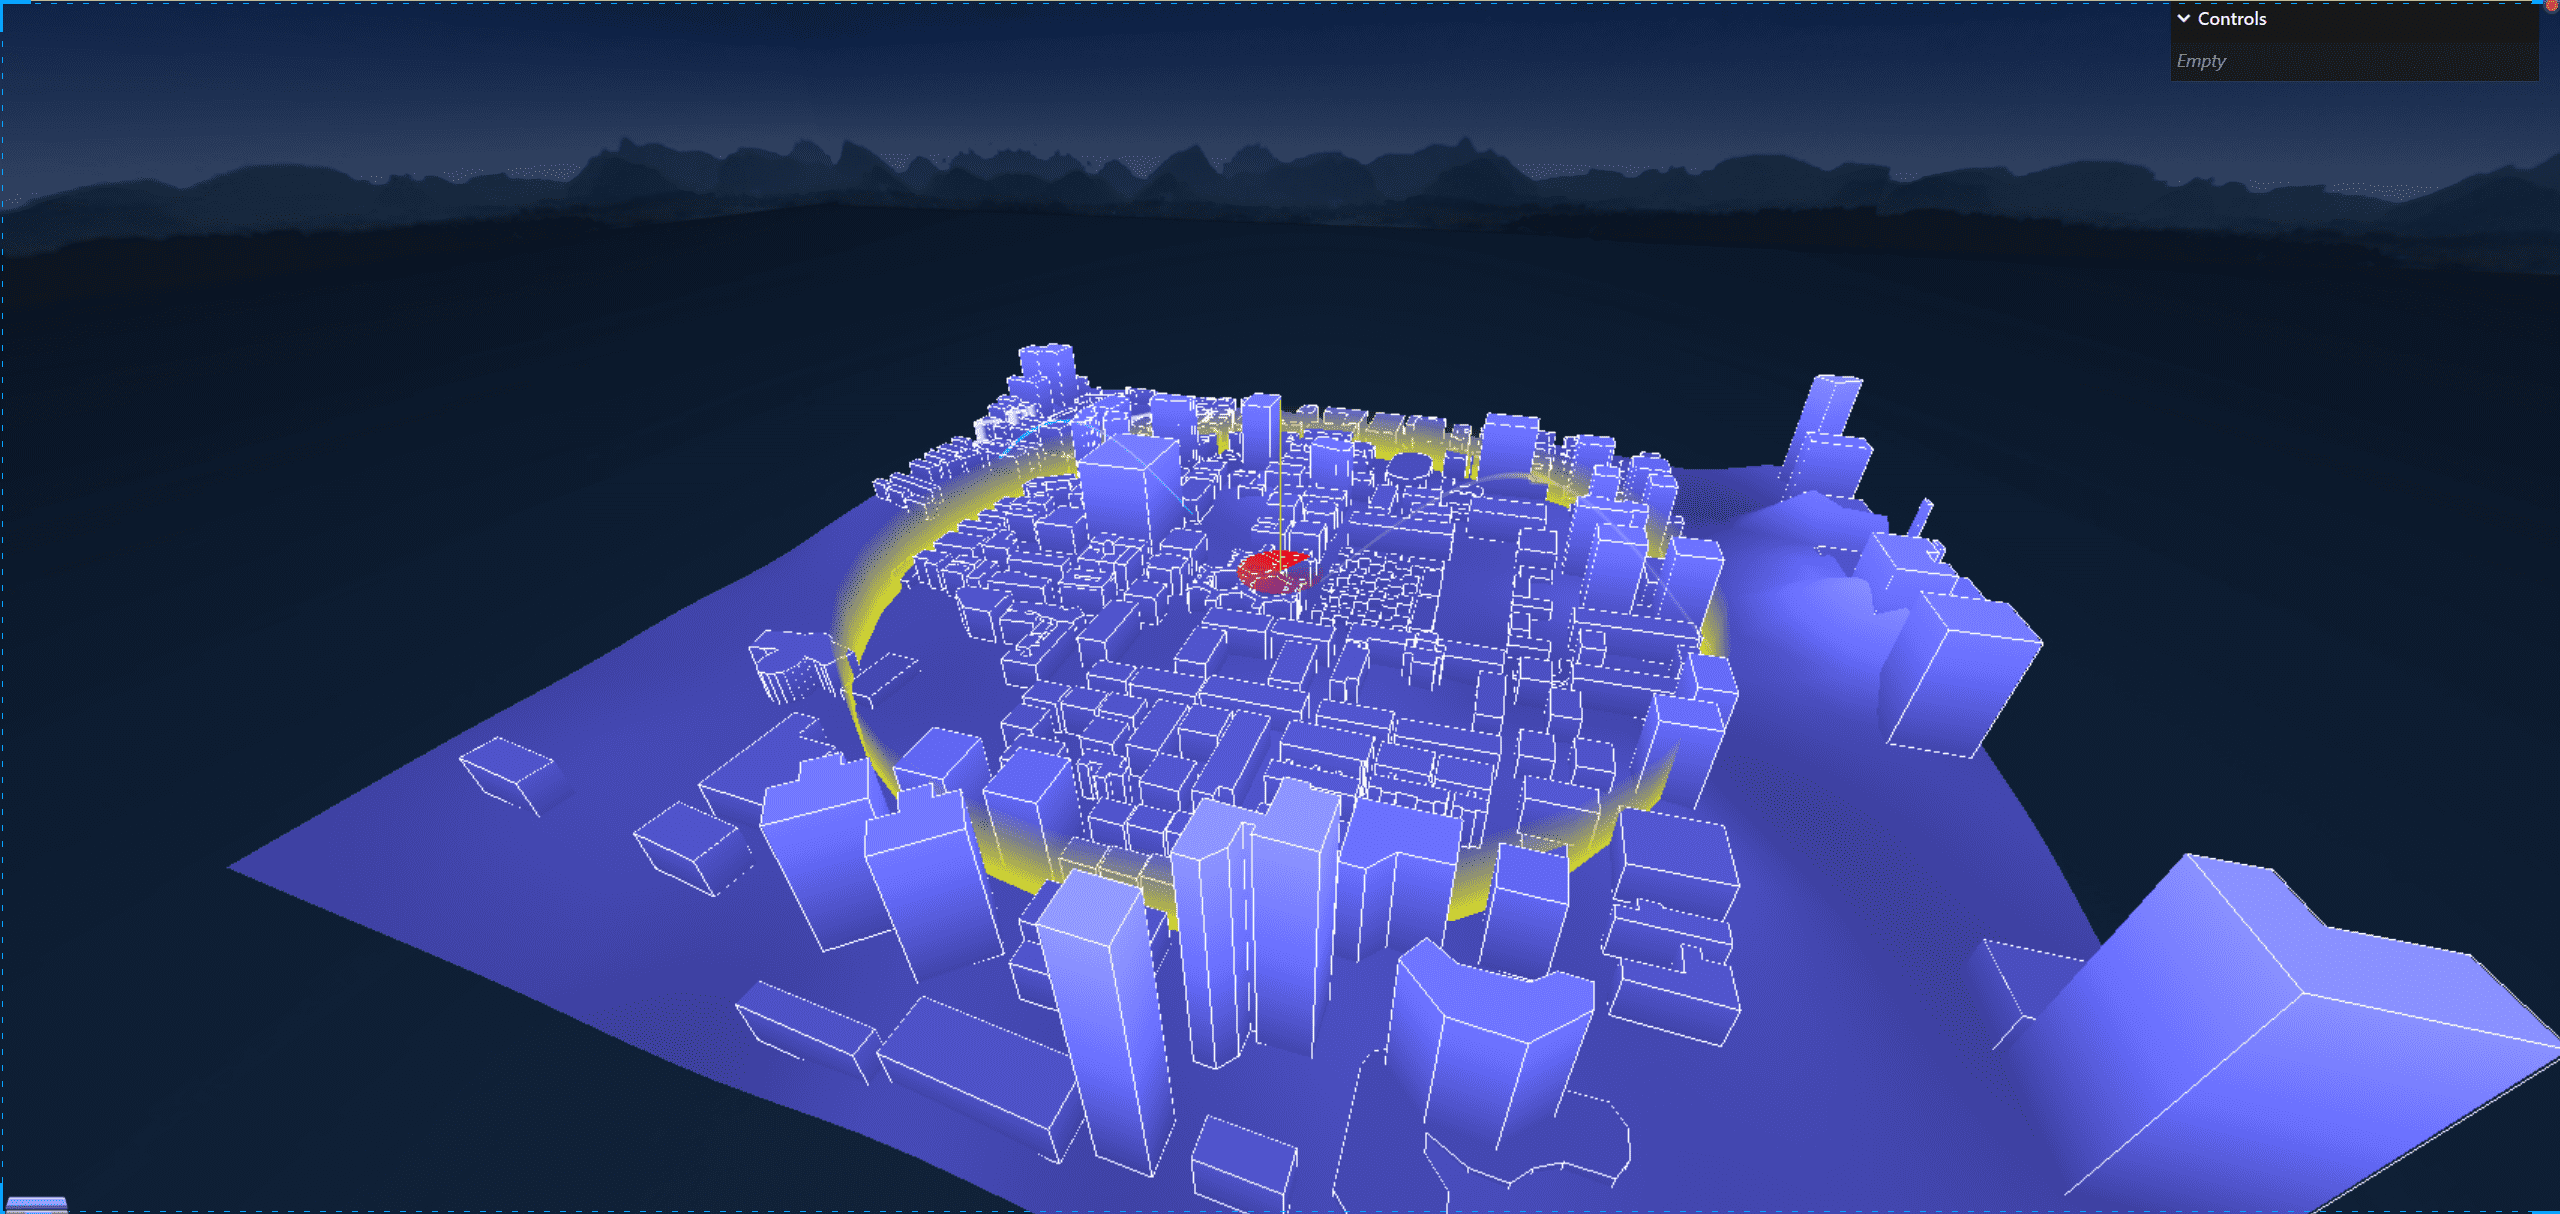
添加天空盒子
再scene.js中添加以下代码
1
2
3
4
5
6
7
8
9
10
11
12
13
|
const textureCubeLoader = new THREE.CubeTextureLoader().setPath("./textures/");
const textureCube = textureCubeLoader.load([
"1.jpg",
"2.jpg",
"3.jpg",
"4.jpg",
"5.jpg",
"6.jpg",
]);
scene.background = textureCube;
scene.environment = textureCube;
|
添加抗锯齿
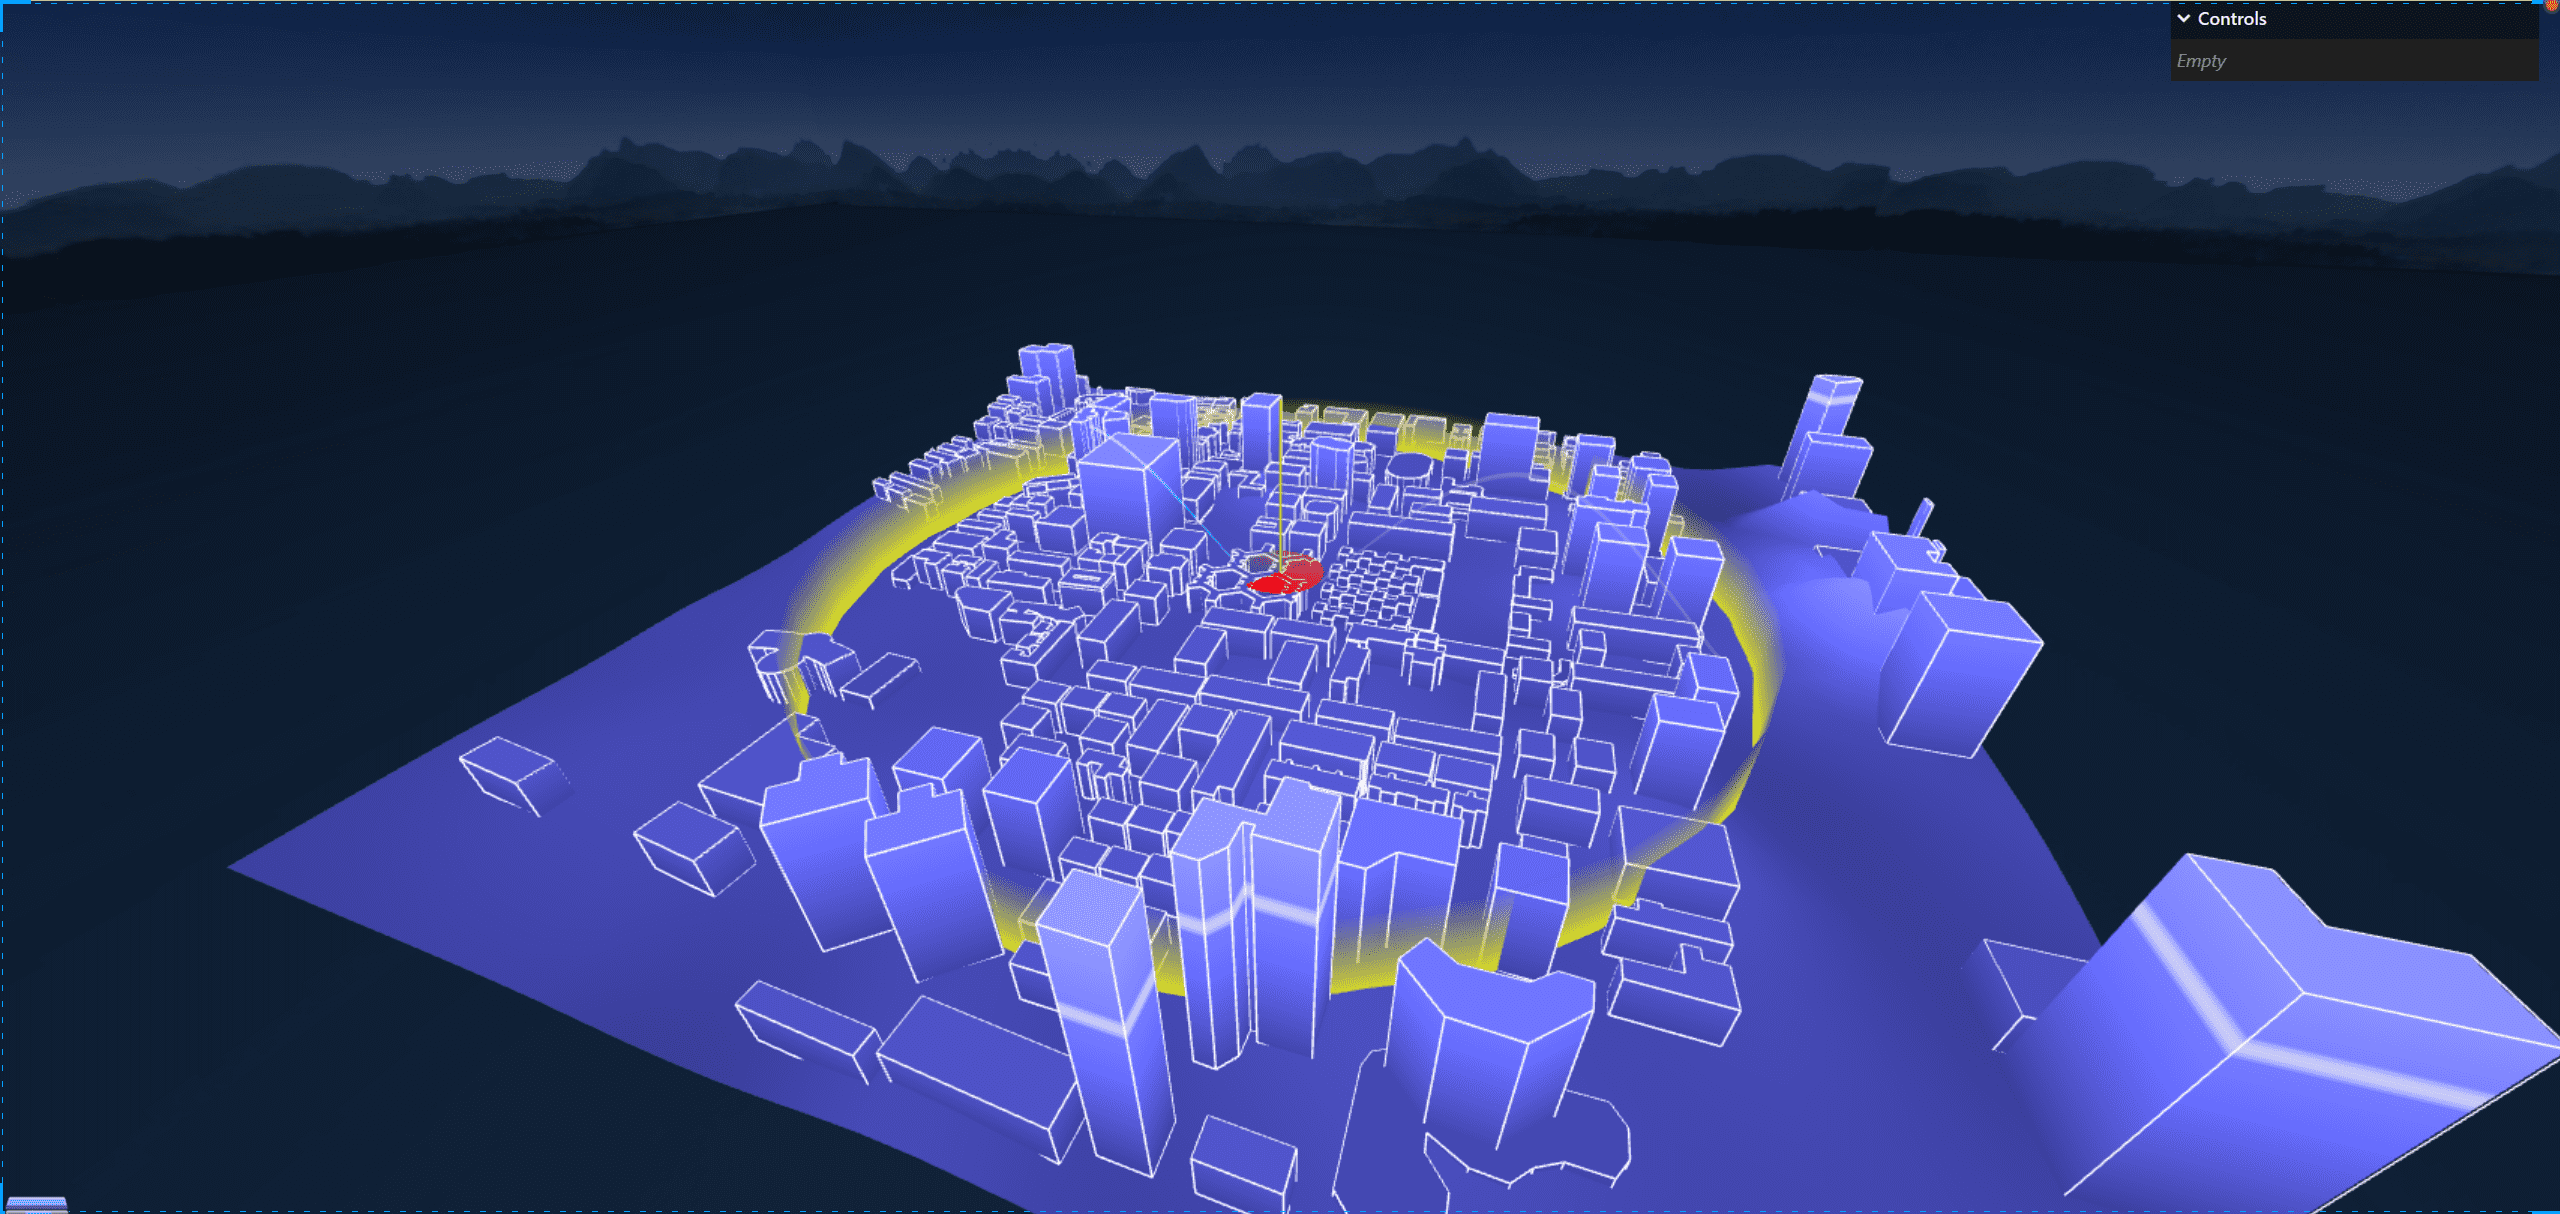
我们可以看到线框的锯齿感有点强,我们在renderer.js中添加以下代码
1
2
3
4
5
|
const renderer = new THREE.WebGLRenderer({
antialias: true,
});
|
可以明显感觉线框更加的细腻了
封装3d警告标识和点击事件
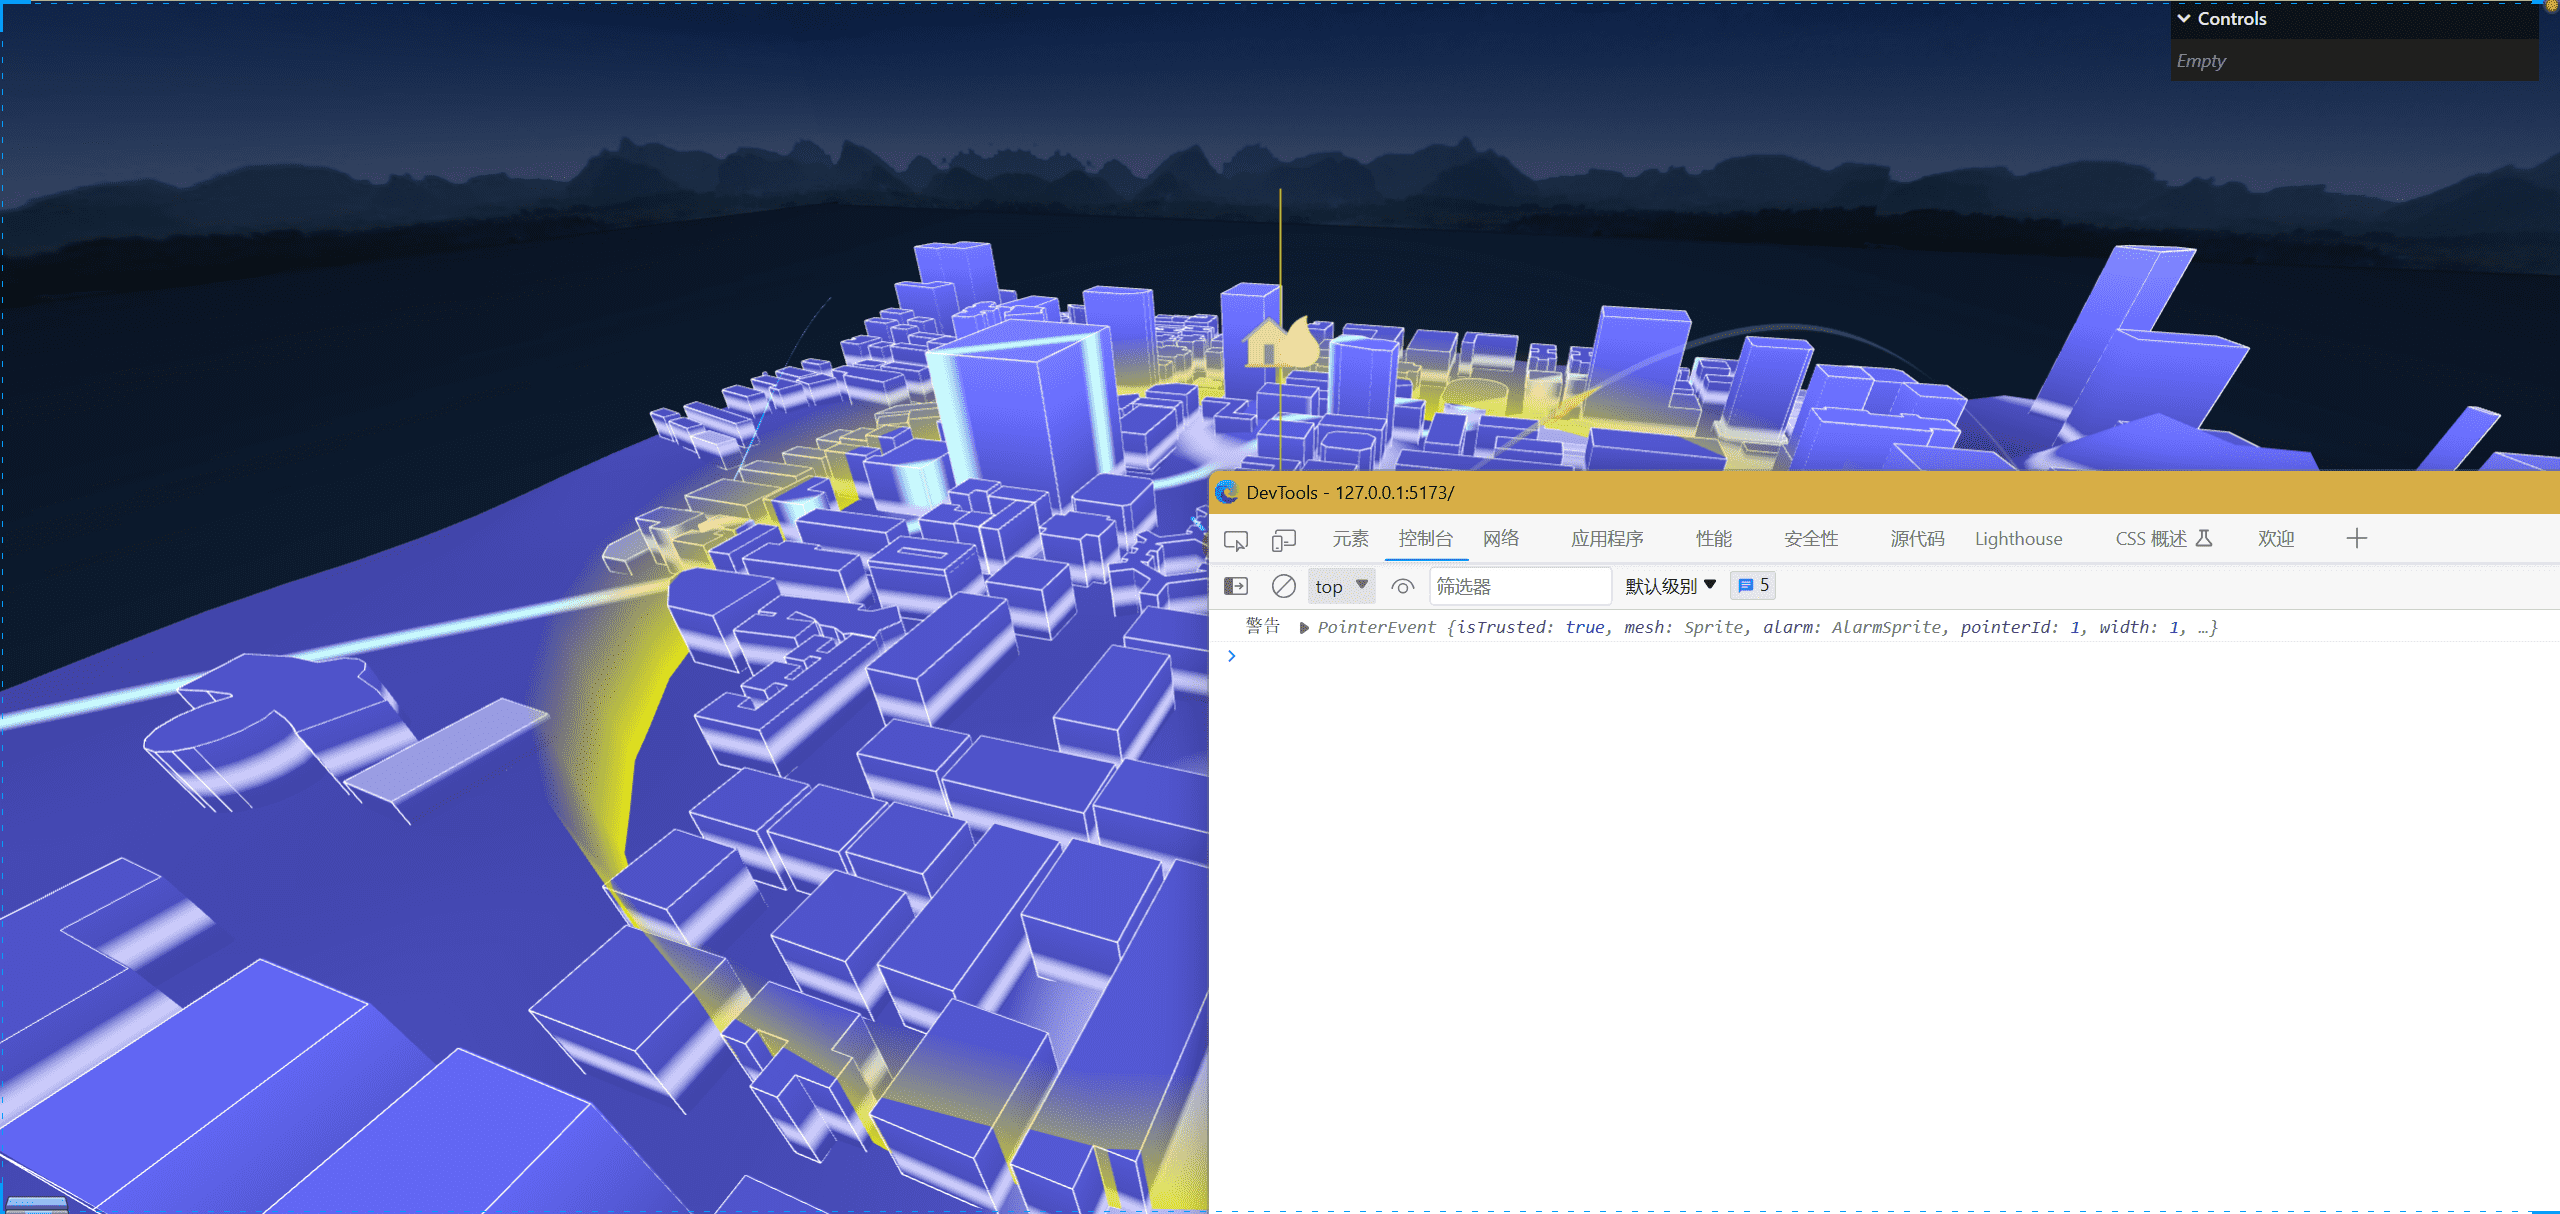
我们都知道这个可以用three的精灵图来实现,里面的点击事件之前都讲过了,不多赘述
创建类
1
2
3
4
5
6
7
8
9
10
11
12
13
14
15
16
17
18
19
20
21
22
23
24
25
26
27
28
29
30
31
32
33
34
35
36
37
38
39
40
41
42
43
44
45
46
47
48
49
50
51
52
53
54
55
56
57
58
59
60
61
62
63
| import * as THREE from "three";
import camera from "../camera";
export default class AlarmSprite {
constructor(type = "火警", position = { x: -1.8, z: 3 }, color = 0xffffff) {
const textureLoader = new THREE.TextureLoader();
const typeObj = {
火警: "./textures/tag/fire.png",
治安: "./textures/tag/jingcha.png",
电力: "./textures/tag/e.png",
};
const map = textureLoader.load(typeObj[type]);
this.material = new THREE.SpriteMaterial({
map: map,
color: color,
transparent: true,
depthTest: false,
});
this.mesh = new THREE.Sprite(this.material);
this.mesh.position.set(position.x, 3.5, position.z);
this.fns = [];
this.raycaster = new THREE.Raycaster();
this.mouse = new THREE.Vector2();
window.addEventListener("click", (event) => {
this.mouse.x = (event.clientX / window.innerWidth) * 2 - 1;
this.mouse.y = -((event.clientY / window.innerHeight) * 2 - 1);
this.raycaster.setFromCamera(this.mouse, camera);
event.mesh = this.mesh;
event.alarm = this;
const intersects = this.raycaster.intersectObject(this.mesh);
if (intersects.length > 0) {
this.fns.forEach((fn) => {
fn(event);
});
}
});
}
onClick(fn) {
this.fns.push(fn);
}
remove() {
this.mesh.remove();
this.mesh.removeFromParent();
this.mesh.geometry.dispose();
this.mesh.material.dispose();
}
}
|
调用
1
2
3
4
5
6
|
const alarmSprite = new AlarmSprite('火警', { x: 0, z: 0 });
scene.add(alarmSprite.mesh);
alarmSprite.onClick(function (e) {
console.log("警告", e);
});
|
添加大屏
这里就省略了,css实在太多了,直接看代码吧
在style.css中
1
2
3
4
5
6
| html{
font-size:calc(100vw / 19.2);
}
body{
font-size: 16px;
}
|
新建一个组件BigScreen.vue,并且在app.vue中引入
1
2
3
4
5
6
7
8
9
10
11
12
13
14
15
16
17
18
19
20
21
22
23
24
25
26
27
28
29
30
31
32
33
34
35
36
37
38
39
40
41
42
43
44
45
46
47
48
49
50
51
52
53
54
55
56
57
58
59
60
61
62
63
64
65
66
67
68
69
70
71
72
73
74
75
76
77
78
79
80
81
82
83
84
85
86
87
88
89
90
91
92
93
94
95
96
97
98
99
100
101
102
103
104
105
106
107
108
109
110
111
112
113
114
115
116
117
118
119
120
121
122
123
124
125
126
127
128
129
130
131
132
133
134
135
136
137
138
139
140
141
142
143
144
145
146
147
148
149
150
151
152
153
154
155
156
157
158
159
160
161
162
163
164
165
166
167
168
169
170
171
172
173
174
175
176
177
178
179
180
181
182
183
184
185
186
187
188
189
190
191
192
193
194
195
196
197
198
199
200
201
202
203
204
205
206
207
208
209
210
211
212
213
214
215
216
217
218
219
220
221
222
223
224
225
226
227
228
229
230
231
232
233
234
235
236
237
238
239
240
241
242
243
244
245
246
247
248
249
250
251
| <template>
<div id="bigScreen">
<div class="header">Codesigner智慧城市管理系统平台</div>
<div class="main">
<div class="left">
<div class="cityEvent" v-for="(item, key) in props.dataInfo">
<h3>
<span>{{ item.name }}</span>
</h3>
<h1>
<img src="../assets/bg/bar.svg" class="icon" />
<span>{{ toFixInt(item.number) }}({{ item.unit }})</span>
</h1>
<div class="footerBoder"></div>
</div>
</div>
<div class="right">
<div class="cityEvent list">
<h3>
<span>事件列表</span>
</h3>
<ul>
<li
v-for="(item, i) in props.eventList"
:class="{ active: currentActive == i }"
@click="toggleEvent(i)"
>
<h1>
<div>
<img class="icon" :src="imgs[item.name]" />
<span> {{ item.name }} </span>
</div>
<span class="time"> {{ item.time }} </span>
</h1>
<p>{{ item.type }}</p>
</li>
</ul>
</div>
</div>
</div>
</div>
</template>
<script setup>
import eventHub from "@/utils/eventHub";
import { ref } from "vue";
import dianli from "@/assets/bg/dianli.svg";
import fire from "@/assets/bg/fire.svg";
import jingcha from "@/assets/bg/jingcha.svg";
const props = defineProps(["dataInfo", "eventList"]);
const imgs = {
电力: dianli,
火警: fire,
治安: jingcha,
};
const toFixInt = (num) => {
return num.toFixed(0);
};
const currentActive = ref(null);
eventHub.on("spriteClick", (data) => {
// console.log(data);
currentActive.value = data.i;
});
const toggleEvent = (i) => {
currentActive.value = i;
eventHub.emit("eventToggle", i);
};
</script>
<style scoped>
#bigScreen {
width: 100vw;
height: 100vh;
position: fixed;
z-index: 100;
left: 0;
top: 0;
pointer-events: none;
display: flex;
flex-direction: column;
}
.header {
/* width: 1920px;
height: 100px; */
width: 19.2rem;
height: 1rem;
background-image: url(@/assets/bg/title.png);
background-size: cover;
background-position: center;
background-repeat: no-repeat;
text-align: center;
color: rgb(226, 226, 255);
font-size: 0.4rem;
}
.main {
flex: 1;
width: 19.2rem;
display: flex;
justify-content: space-between;
}
.left {
width: 4rem;
/* background-color: rgb(255,255,255,0.5); */
background-image: url(@/assets/bg/line_img.png);
background-repeat: no-repeat;
background-size: contain;
background-position: right center;
display: flex;
flex-direction: column;
align-items: center;
padding: 0.4rem 0;
}
.right {
width: 4rem;
/* background-color: rgb(255,255,255,0.5); */
background-image: url(@/assets/bg/line_img.png);
background-repeat: no-repeat;
background-size: contain;
background-position: left center;
display: flex;
flex-direction: column;
align-items: center;
padding: 0.4rem 0;
}
.cityEvent {
position: relative;
width: 3.5rem;
/* height: 3rem; */
margin-bottom: 0.5rem;
background-image: url(@/assets/bg/bg_img03.png);
background-repeat: repeat;
}
.cityEvent::before {
width: 0.4rem;
height: 0.4rem;
position: absolute;
left: 0;
top: 0;
border-top: 4px solid rgb(34, 133, 247);
border-left: 4px solid rgb(34, 133, 247);
content: "";
display: block;
}
.cityEvent::after {
width: 0.4rem;
height: 0.4rem;
position: absolute;
right: 0;
top: 0;
border-top: 4px solid rgb(34, 133, 247);
border-right: 4px solid rgb(34, 133, 247);
content: "";
display: block;
}
.footerBorder {
position: absolute;
bottom: 0;
bottom: 0;
width: 3.5rem;
height: 0.4rem;
}
.footerBorder::before {
width: 0.4rem;
height: 0.4rem;
position: absolute;
left: 0;
top: 0;
border-bottom: 4px solid rgb(34, 133, 247);
border-left: 4px solid rgb(34, 133, 247);
content: "";
display: block;
}
.footerBorder::after {
width: 0.4rem;
height: 0.4rem;
position: absolute;
right: 0;
top: 0;
border-bottom: 4px solid rgb(34, 133, 247);
border-right: 4px solid rgb(34, 133, 247);
content: "";
display: block;
}
.icon {
width: 40px;
height: 40px;
}
h1 {
color: #fff;
display: flex;
align-items: center;
padding: 0 0.3rem 0.3rem;
justify-content: space-between;
font-size: 0.3rem;
}
h3 {
color: #fff;
display: flex;
align-items: center;
padding: 0.3rem 0.3rem;
}
h1 > div {
display: flex;
align-items: center;
}
h1 span.time {
font-size: 0.2rem;
font-weight: normal;
}
.cityEvent li > p {
color: #eee;
padding: 0rem 0.3rem 0.3rem;
}
.list h1 {
padding: 0.1rem 0.3rem;
}
.cityEvent.list ul {
pointer-events: auto;
cursor: pointer;
}
.cityEvent li.active h1 {
color: red;
}
.cityEvent li.active p {
color: red;
}
ul,
li {
list-style: none;
}
</style>
|
在App.vue中
1
2
3
4
5
6
7
8
9
10
11
12
13
14
15
16
17
18
19
20
21
22
23
24
25
26
27
28
29
30
31
32
33
34
35
36
37
38
39
40
41
42
43
44
45
46
47
48
49
| <script setup>
import Scene from './components/Scene.vue'
import BigScreen from './components/BigScreen.vue';
import { onMounted, reactive, ref } from "vue";
import { getSmartCityInfo, getSmartCityList } from "@/api/api";
import gsap from "gsap";
const dataInfo = reactive({
iot: { number: 0 },
event: { number: 0 },
power: { number: 0 },
test: { number: 0 },
});
onMounted(async () => {
changeInfo();
getEventList();
setInterval(() => {
changeInfo();
getEventList();
}, 10000);
});
const changeInfo = async () => {
let res = await getSmartCityInfo();
for (let key in dataInfo) {
dataInfo[key].name = res.data.data[key].name;
dataInfo[key].unit = res.data.data[key].unit;
gsap.to(dataInfo[key], {
number: res.data.data[key].number,
duration: 1,
});
}
};
const eventList = ref([]);
const getEventList = async () => {
let result = await getSmartCityList();
eventList.value = result.data.list;
};
</script>
<template>
<Scene :eventList="eventList"></Scene>
<BigScreen :dataInfo="dataInfo" :eventList="eventList"></BigScreen>
</template>
<style scoped>
</style>
|
Scene.vue
1
2
3
4
5
6
7
8
9
10
11
12
13
14
15
16
17
18
19
20
21
22
23
24
25
26
27
28
29
30
31
32
33
34
35
36
37
38
39
40
41
42
43
44
45
46
47
48
49
50
51
52
53
54
55
56
57
58
59
60
61
62
63
64
65
66
67
68
69
70
71
72
73
74
75
76
77
78
79
80
81
82
83
84
85
86
87
88
89
90
91
92
93
94
95
96
97
98
99
100
101
102
103
104
105
106
107
108
109
110
111
112
113
114
115
116
117
118
119
120
121
122
123
124
125
126
127
128
129
130
131
132
133
134
135
| <template>
<div class="scene" ref="sceneDiv"></div>
</template>
<script setup>
import { onMounted, ref, watch } from "vue";
import * as THREE from "three";
import gsap from "gsap";
// 导入场景
import scene from "@/three/scene";
// 导入相机
import camera from "@/three/camera";
// 导入控制器
import controls from "@/three/controls";
// 导入辅助坐标轴
import axesHelper from "@/three/axesHelper";
// 导入渲染器
import renderer from "@/three/renderer";
// 初始化调整屏幕
import "@/three/init";
// 导入添加物体函数
import createMesh from "@/three/createMesh";
// 导入每一帧的执行函数
import animate from "@/three/animate";
import AlarmSprite from "@/three/mesh/AlarmSprite";
import LightWall from "@/three/mesh/LightWall";
import FlyLineShader from "@/three/mesh/FlyLineShader";
import LightRadar from "@/three/mesh/LightRadar";
import eventHub from "@/utils/eventHub";
const props = defineProps(["eventList"]);
// 场景元素div
let sceneDiv = ref(null);
// 添加相机
scene.add(camera);
// 添加辅助坐标轴
scene.add(axesHelper);
// 创建物体
createMesh();
onMounted(() => {
sceneDiv.value.appendChild(renderer.domElement);
animate();
});
const eventListMesh = [];
let mapFn = {
火警: (position, i) => {
const lightWall = new LightWall(1, 2, position);
lightWall.eventListIndex = i;
scene.add(lightWall.mesh);
eventListMesh.push(lightWall);
},
治安: (position, i) => {
// 生成随机颜色
const color = new THREE.Color(
Math.random(),
Math.random(),
Math.random()
).getHex();
// 添加着色器飞线
const flyLineShader = new FlyLineShader(position, color);
flyLineShader.eventListIndex = i;
scene.add(flyLineShader.mesh);
eventListMesh.push(flyLineShader);
},
电力: (position, i) => {
// 添加雷达
const lightRadar = new LightRadar(2, position);
lightRadar.eventListIndex = i;
scene.add(lightRadar.mesh);
eventListMesh.push(lightRadar);
},
};
eventHub.on("eventToggle", (i) => {
eventListMesh.forEach((item) => {
if (item.eventListIndex === i) {
item.mesh.visible = true;
} else {
item.mesh.visible = false;
}
});
const position = {
x: props.eventList[i].position.x / 5 - 10,
y: 0,
z: props.eventList[i].position.y / 5 - 10,
};
// controls.target.set(position.x, position.y, position.z);
gsap.to(controls.target, {
duration: 1,
x: position.x,
y: position.y,
z: position.z,
});
});
watch(
() => props.eventList,
(val) => {
// console.log(val);
eventListMesh.forEach((item) => {
item.remove();
});
props.eventList.forEach((item, i) => {
const position = {
x: item.position.x / 5 - 10,
z: item.position.y / 5 - 10,
};
const alarmSprite = new AlarmSprite(item.name, position);
alarmSprite.onClick(() => {
// console.log(item.name, i);
eventHub.emit("spriteClick", { event: item, i });
});
alarmSprite.eventListIndex = i;
eventListMesh.push(alarmSprite);
scene.add(alarmSprite.mesh);
if (mapFn[item.name]) {
mapFn[item.name](position, i);
}
});
}
);
</script>
<style>
.scene {
width: 100vw;
height: 100vh;
position: fixed;
z-index: 100;
left: 0;
top: 0;
}
</style>
|
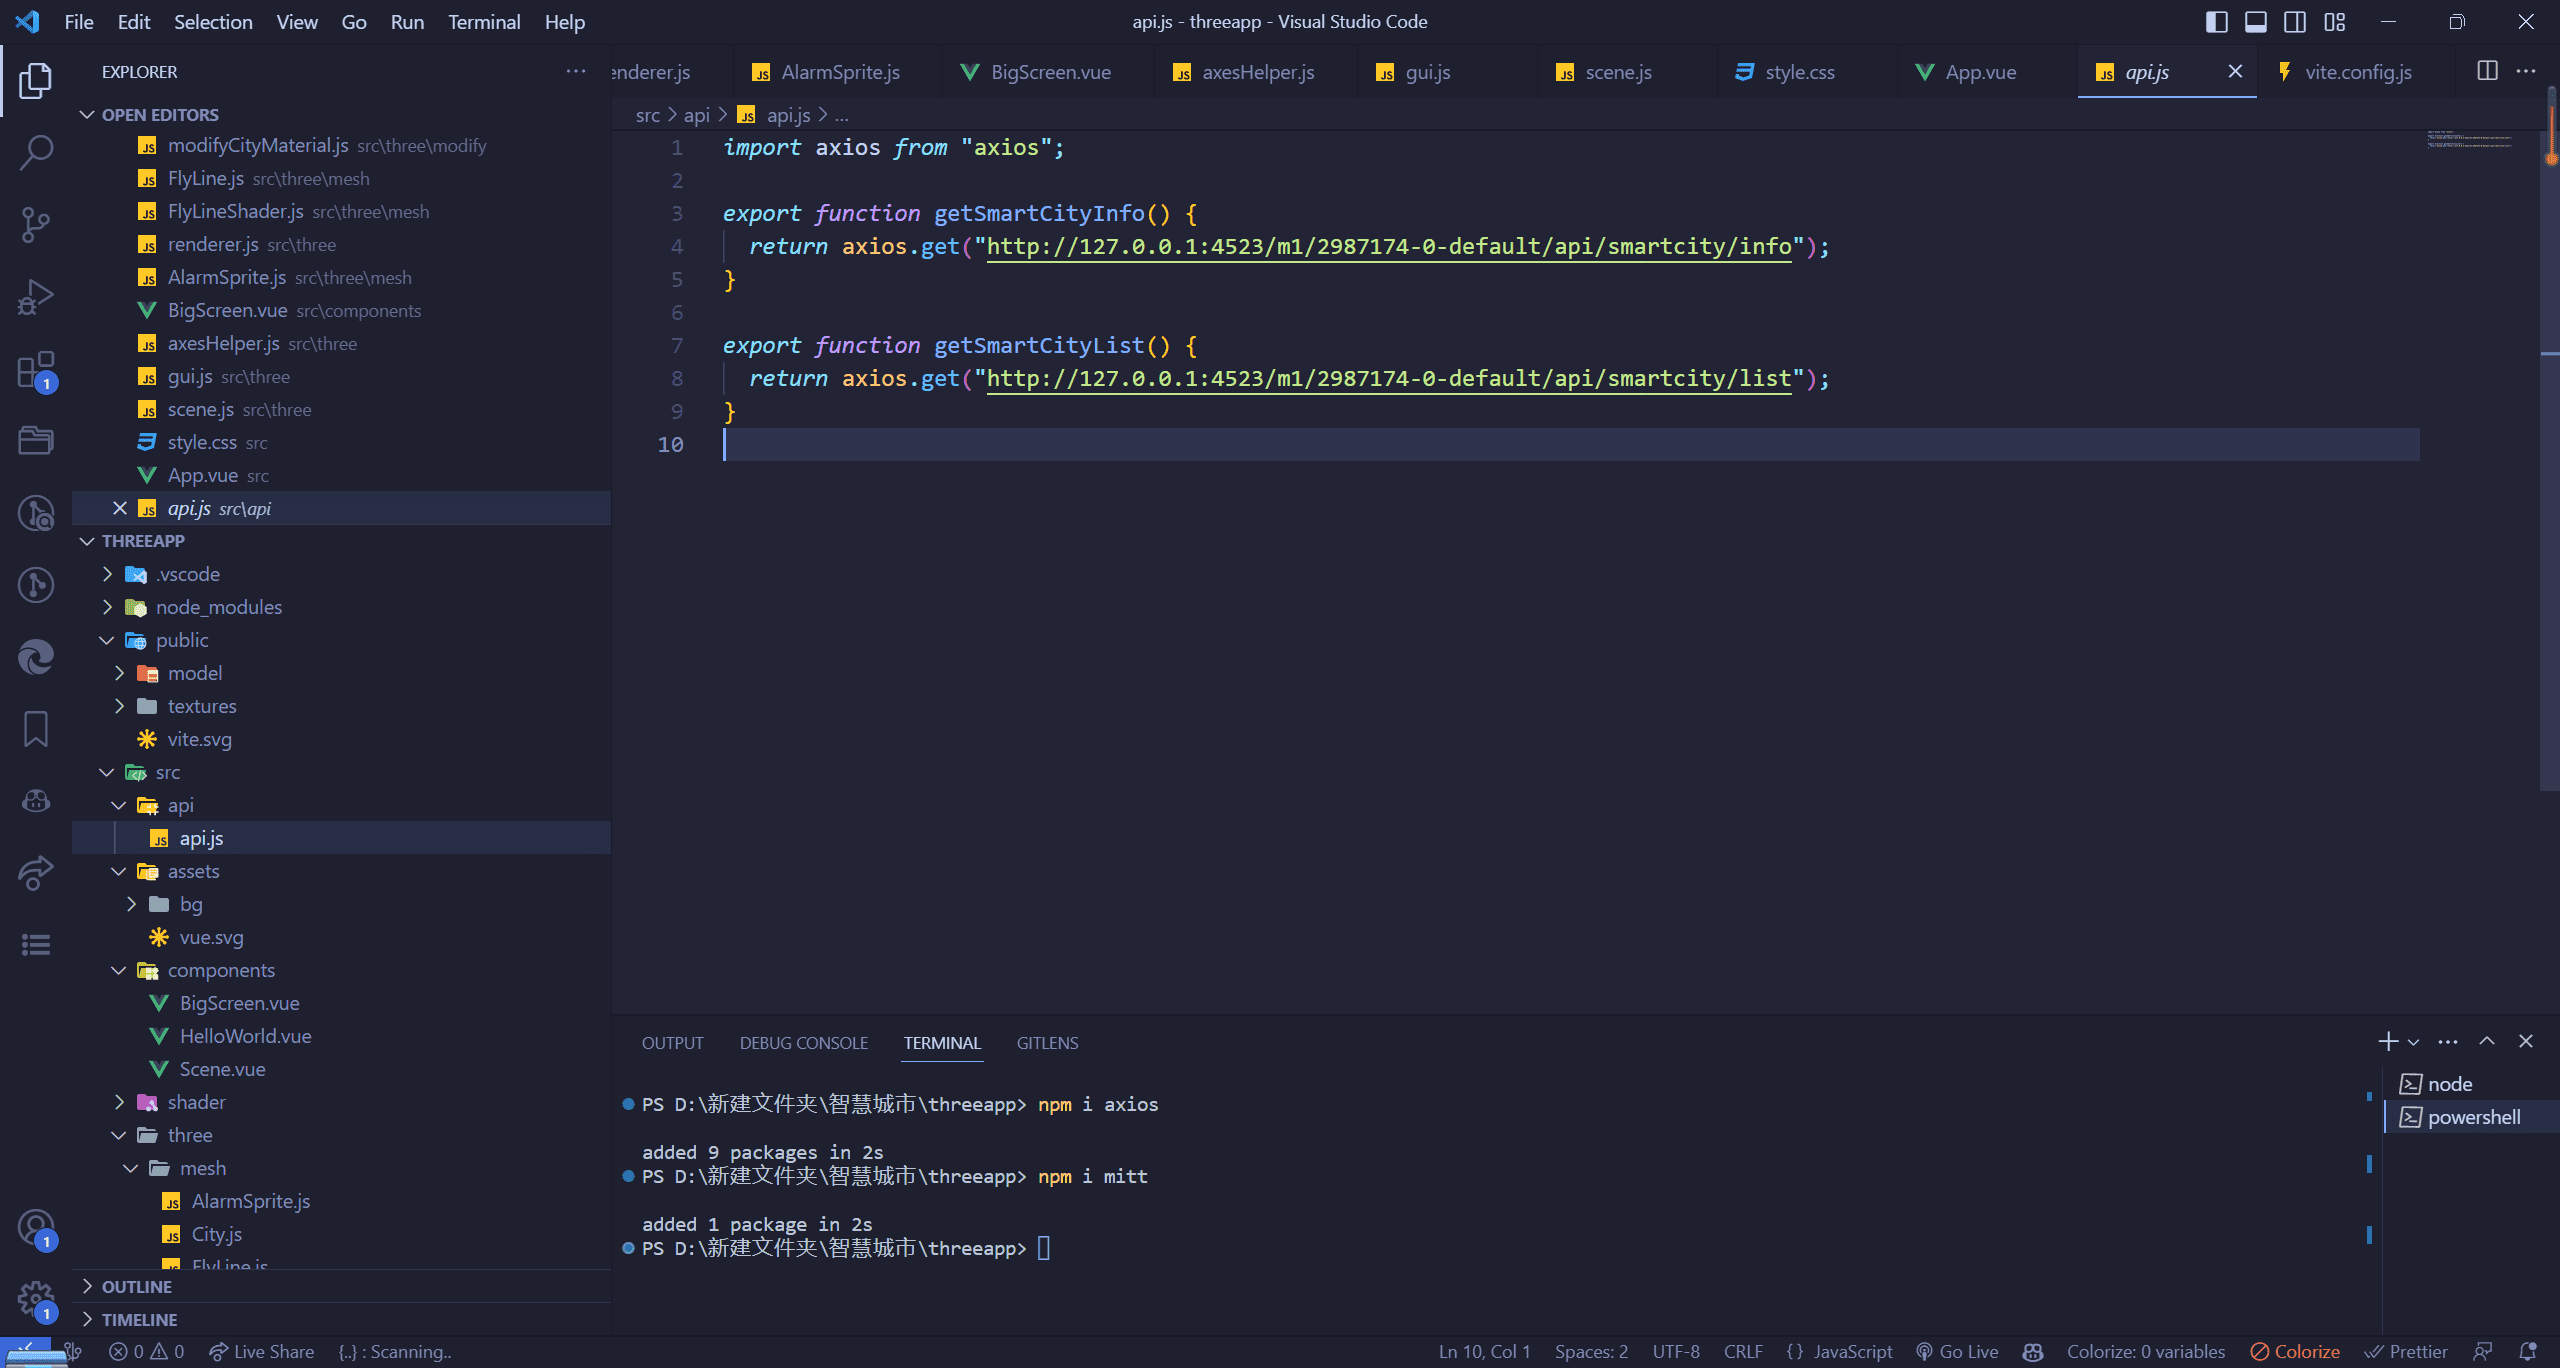
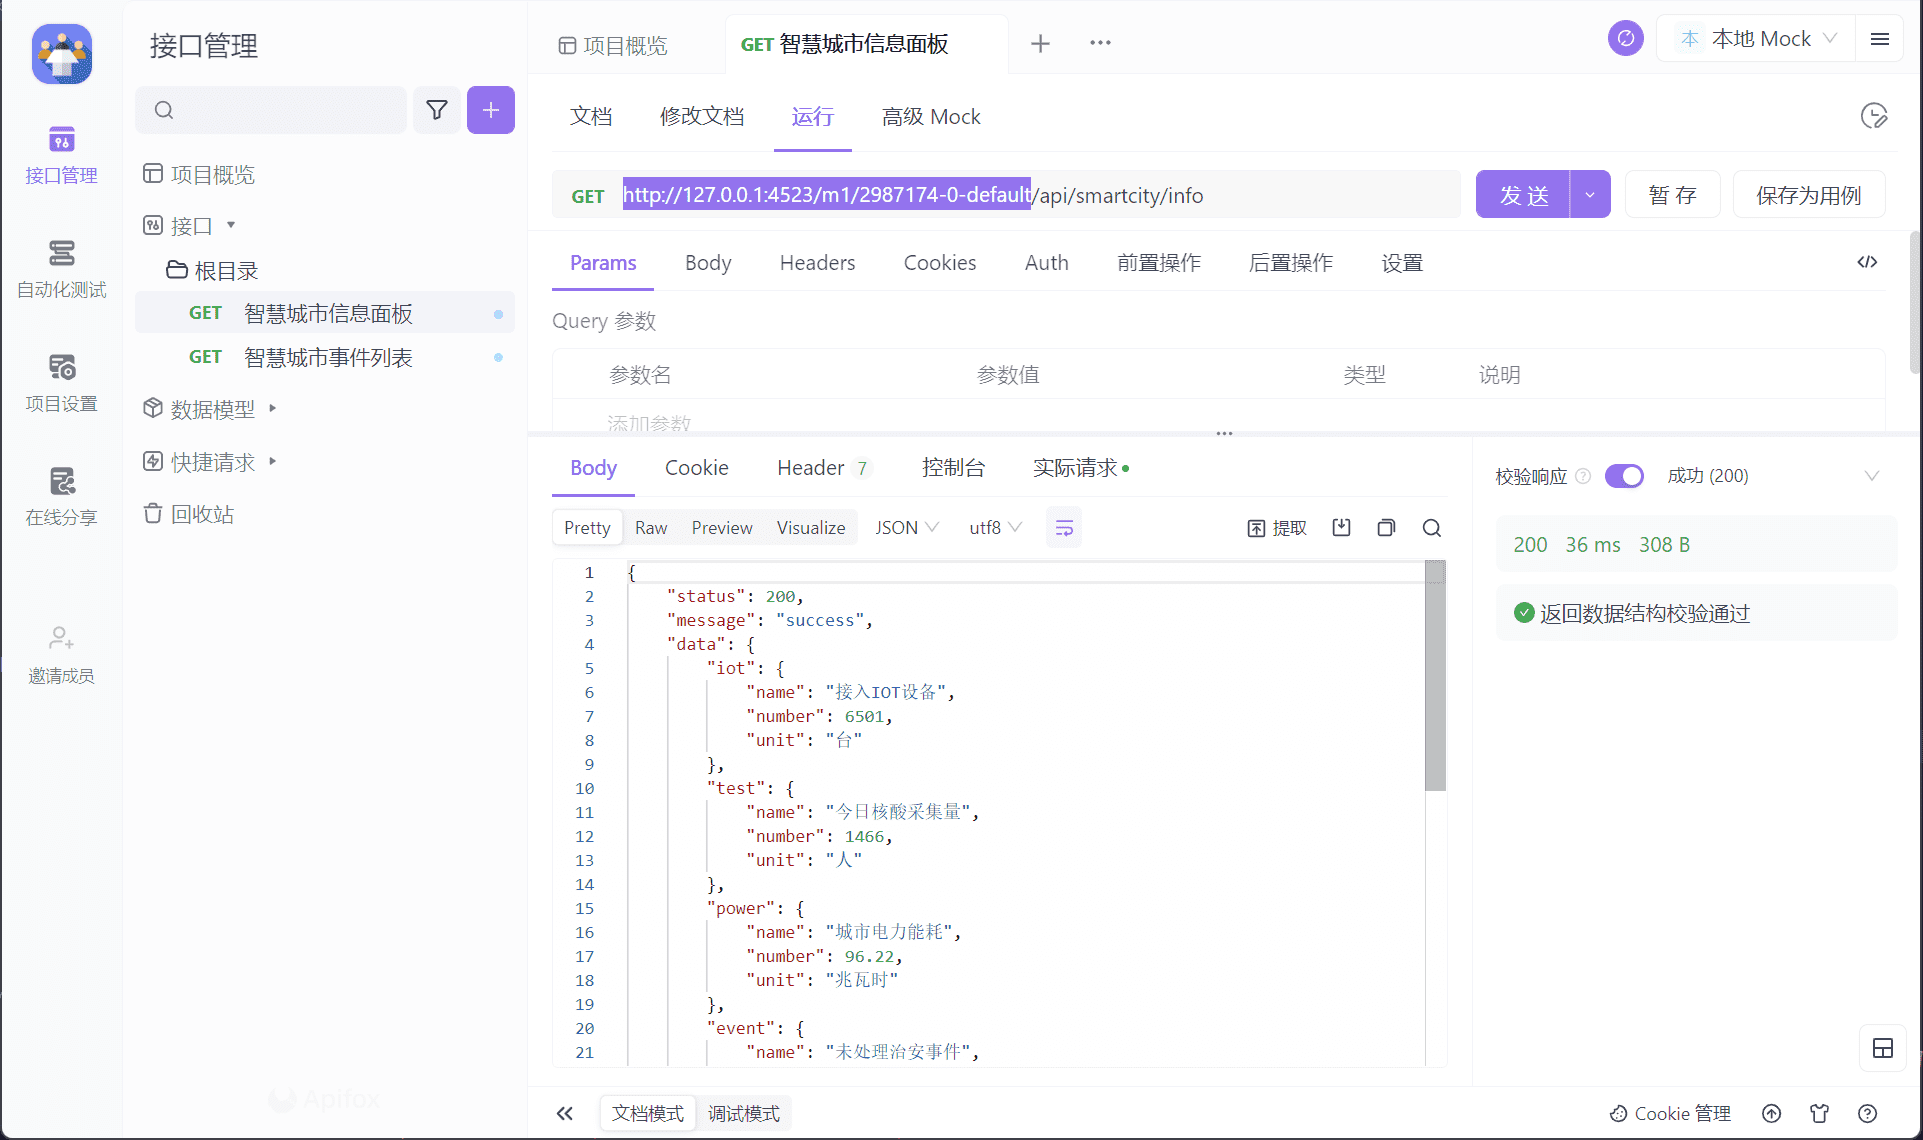
安装axios,新增api接口,用apifox模拟请求数据,我将生成的json文件放在了源码当中,需要自己去apifox导入模拟数据
让兄弟组件监听,安装mitt之后,新建utils文件夹,新建eventHub.js
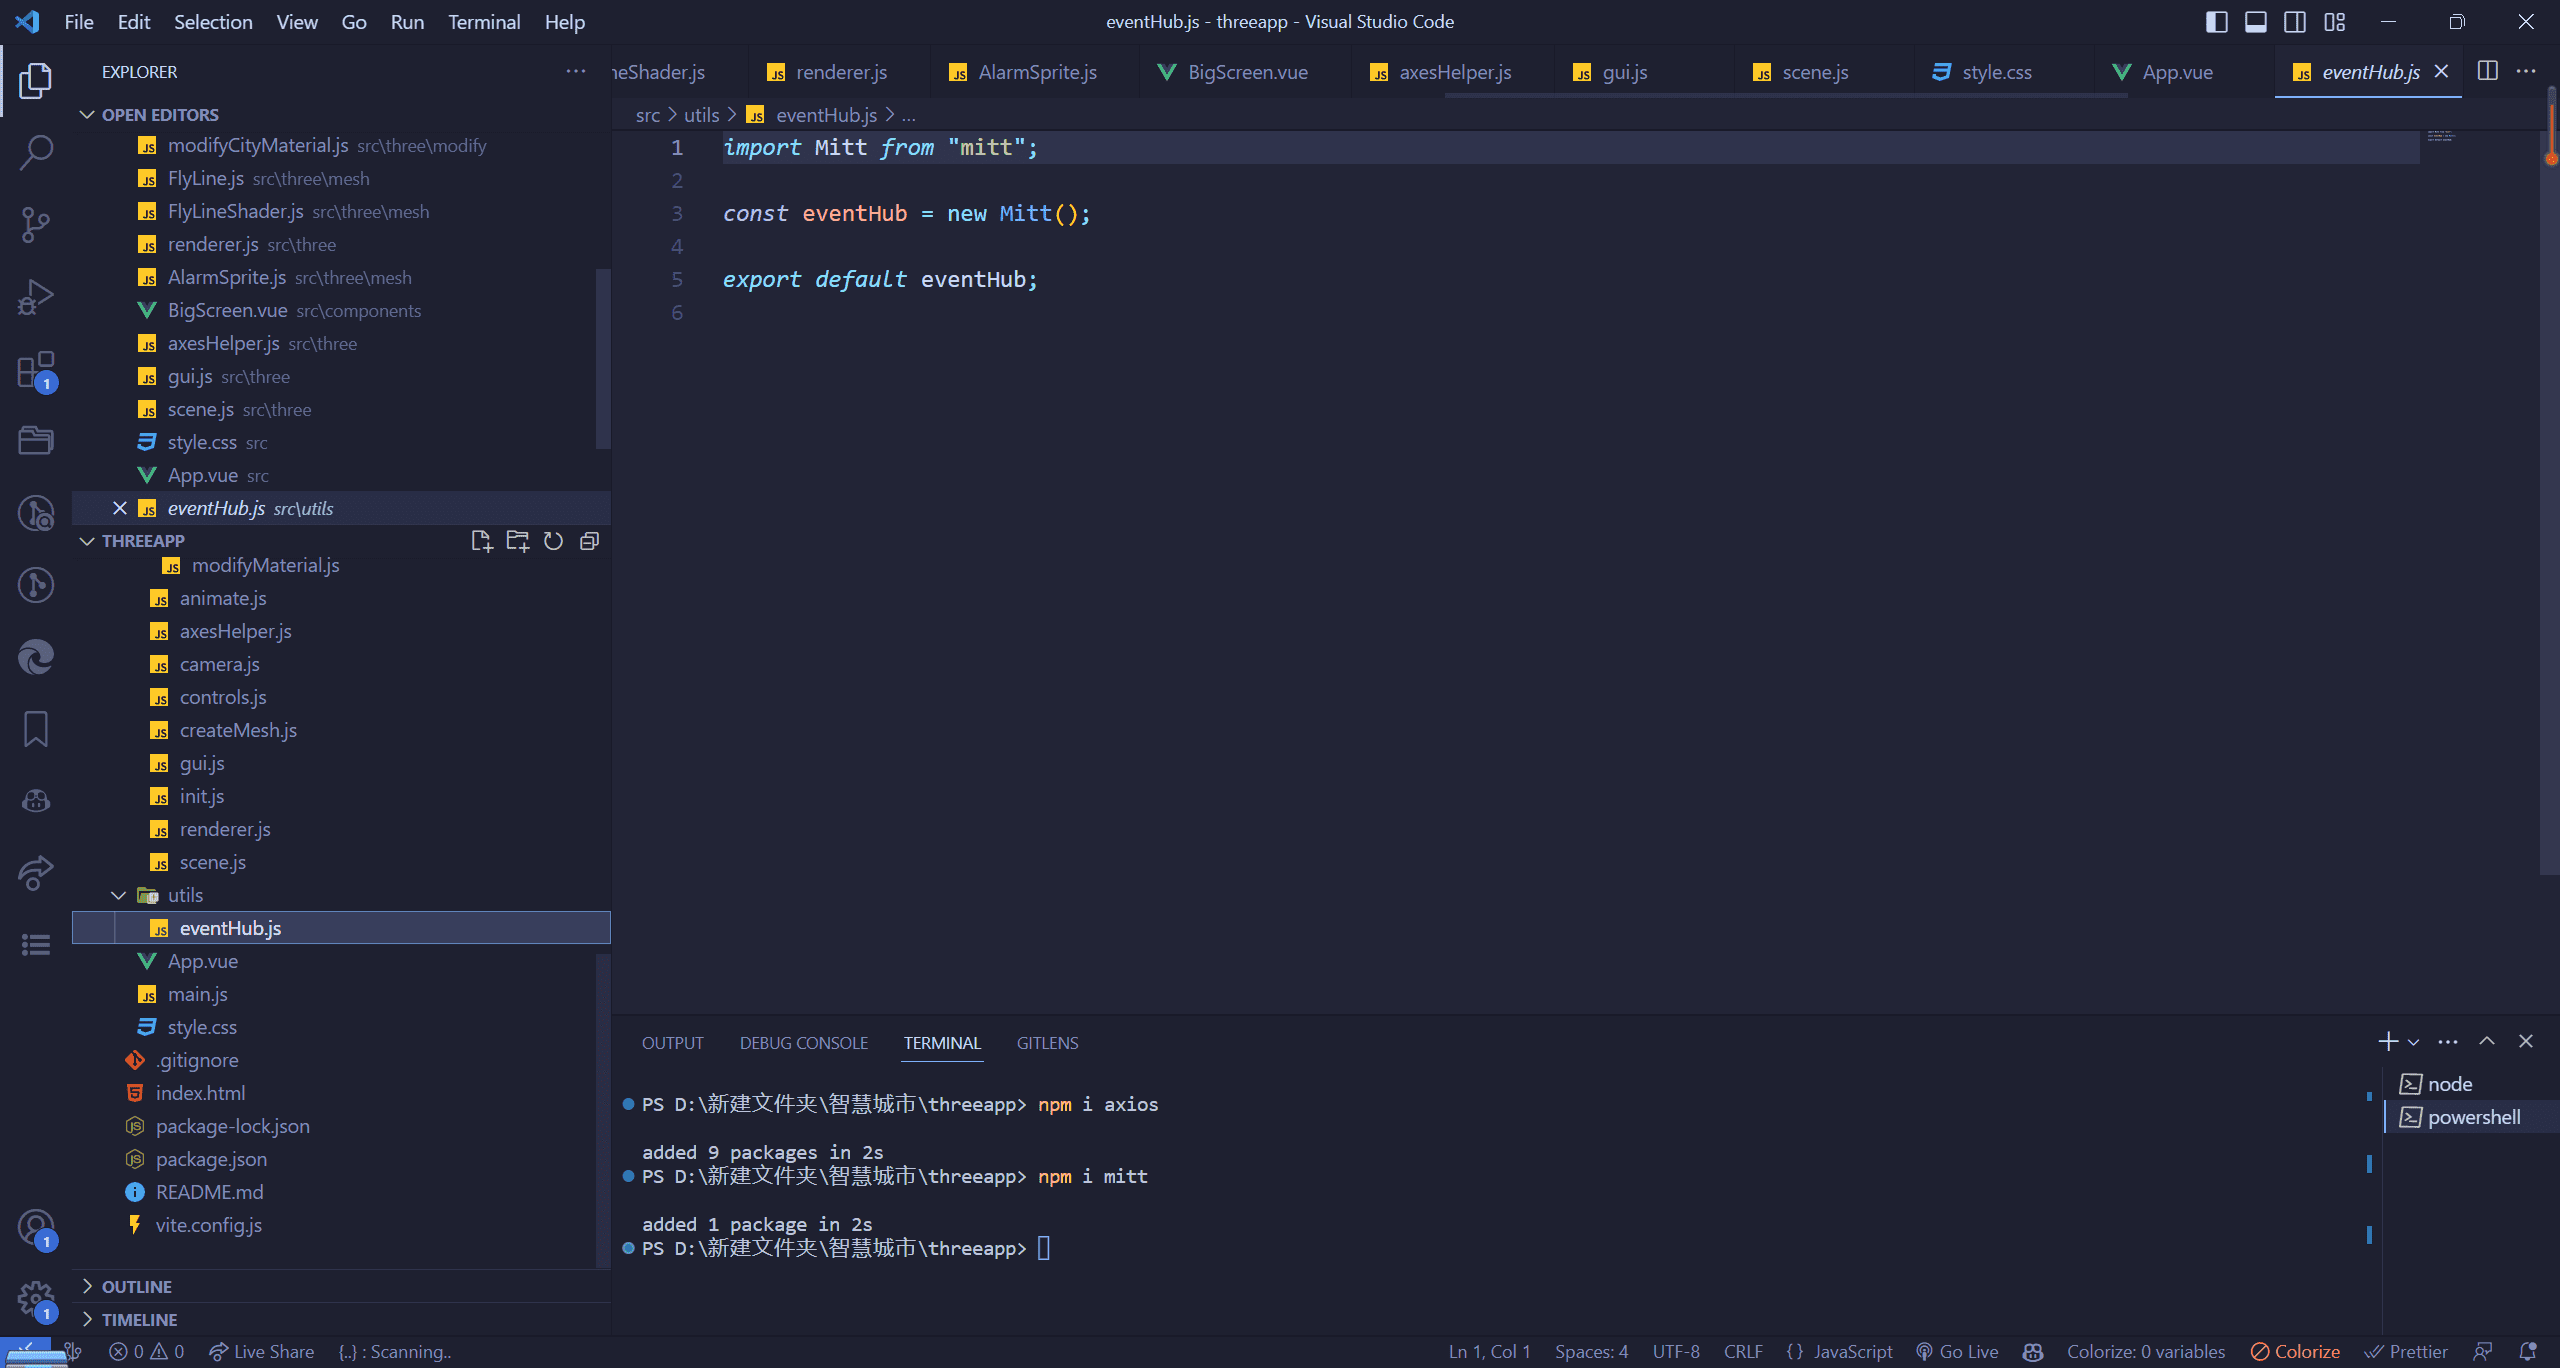
代码之中渲染部分我就不讲解了,着重讲一下业务逻辑
首先是BigScreen.vue
1
2
3
| const toFixInt = (num) => {
return num.toFixed(0);
};
|
这一段代码是因为为了让数字更新一下避免小数捣乱样式,把数字变成了整数
1
2
3
4
5
| const currentActive = ref(null);
eventHub.on("spriteClick", (data) => {
currentActive.value = data.i;
});
|
这一段代码是监听Scene.vue中点击精灵图的事件,当点击了某个精灵图,那么就将这个精灵图对应的右侧事件样式高亮
1
2
3
4
| const toggleEvent = (i) => {
currentActive.value = i;
eventHub.emit("eventToggle", i);
};
|
这一段代码测试点击事件列表中的某个参数,将值传过去
接下来是Scene.vue
1
2
3
4
5
6
7
8
9
10
11
12
13
14
15
16
17
18
19
20
21
22
23
24
25
26
| watch(
() => props.eventList,
(val) => {
eventListMesh.forEach((item) => {
item.remove();
});
props.eventList.forEach((item, i) => {
const position = {
x: item.position.x / 5 - 10,
z: item.position.y / 5 - 10,
};
const alarmSprite = new AlarmSprite(item.name, position);
alarmSprite.onClick(() => {
eventHub.emit("spriteClick", { event: item, i });
});
alarmSprite.eventListIndex = i;
eventListMesh.push(alarmSprite);
scene.add(alarmSprite.mesh);
if (mapFn[item.name]) {
mapFn[item.name](position, i);
}
});
}
);
|
这一段是监听父元素事件改变,在场景中对应添加精灵图
ok,智慧城市的内容我就说到这里了


