【可视化学习】43-元宇宙基础学习(二)
发表于:2023-09-13 |

前言

本篇文章将围绕上一篇文章继续展开我们的学习

上文完整代码

1
2
3
4
5
6
7
8
9
10
11
12
13
14
15
16
17
18
19
20
21
22
23
24
25
26
27
28
29
30
31
32
33
34
35
36
37
38
39
40
41
42
43
44
45
46
47
48
49
50
51
52
53
54
55
56
57
58
59
60
61
62
63
64
65
66
67
68
69
70
71
72
73
74
75
76
77
78
79
80
81
82
83
84
85
86
87
88
89
90
91
92
93
94
95
96
97
98
99
100
101
102
103
104
105
106
107
108
109
110
111
112
113
114
115
116
117
118
119
120
121
122
123
124
125
126
127
128
129
130
131
132
133
134
135
136
137
138
139
140
141
142
143
144
145
146
147
148
149
150
151
152
153
154
155
156
157
158
159
160
161
162
163
164
165
166
167
168
169
170
171
172
173
174
175
176
177
178
179
180
181
182
183
184
185
186
187
188
189
190
191
192
193
194
195
196
197
198
199
200
201
202
203
204
205
206
207
208
209
210
211
212
213
214
215
216
217
218
219
220
221
222
223
224
225
226
227
228
229
230
231
232
233
234
235
236
237
238
239
240
241
242
243
244
245
246
247
<template>
<div id="container"></div>
</template>
<script setup>
import * as THREE from "three";
import { OrbitControls } from "three/examples/jsm/controls/OrbitControls.js";
import { onMounted } from "vue";
import { Capsule } from "three/examples/jsm/math/Capsule.js";
import { Octree } from "three/examples/jsm/math/Octree.js";
import Stats from "three/examples/jsm/libs/stats.module.js";

onMounted(()=>{
const clock = new THREE.Clock();
const scene = new THREE.Scene();
scene.background = new THREE.Color(0x88ccee);
scene.fog = new THREE.Fog(0x88ccee, 0, 50);
const camera = new THREE.PerspectiveCamera(
75,
window.innerWidth / window.innerHeight,
0.1,
1000
);
camera.position.set(0,5,10);

const renderer = new THREE.WebGLRenderer({ antialias: true });
renderer.setPixelRatio(window.devicePixelRatio);
renderer.setSize(window.innerWidth, window.innerHeight);
renderer.shadowMap.enabled = true;
renderer.shadowMap.type = THREE.VSMShadowMap;
renderer.outputEncoding = THREE.SRGBColorSpace;
renderer.toneMapping = THREE.ACESFilmicToneMapping;

const container=document.getElementById("container")
container.appendChild(renderer.domElement);
const stats = new Stats();
stats.domElement.style.position = "absolute";
stats.domElement.style.top = "0px";
container.appendChild(stats.domElement);

// const controls = new OrbitControls(camera, renderer.domElement);
// controls.target.set(0, 0, 0);

// 创建一个平面
const planeGeometry = new THREE.PlaneGeometry(20, 20, 1, 1);
const planeMaterial = new THREE.MeshBasicMaterial({
color: 0xffffff,
side: THREE.DoubleSide,
});
const plane = new THREE.Mesh(planeGeometry, planeMaterial);
plane.receiveShadow = true;
plane.rotation.x = -Math.PI / 2;
scene.add(plane);

// 创建一个平面
const capsuleBodyGeometry = new THREE.PlaneGeometry(1, 0.5, 1, 1);
const capsuleBodyMaterial = new THREE.MeshBasicMaterial({
color: 0x0000ff,
side: THREE.DoubleSide,
});
const capsuleBody = new THREE.Mesh(capsuleBodyGeometry, capsuleBodyMaterial);
capsuleBody.position.set(0, 0.5, 0);
// 创建一个胶囊物体
const capsuleGeometry = new THREE.CapsuleGeometry(0.35, 1, 32);
const capsuleMaterial = new THREE.MeshBasicMaterial({
color: 0xff0000,
side: THREE.DoubleSide,
});
const capsule = new THREE.Mesh(capsuleGeometry, capsuleMaterial);
capsule.position.set(0, 0.85, 0);

// 将相机作为胶囊的子元素,就可以实现跟随
camera.position.set(0, 2, -5);
camera.lookAt(capsule.position);
capsule.add(camera);
capsule.add(capsuleBody);

scene.add(capsule);

// 创建玩家的碰撞体
const playerCollider = new Capsule(
new THREE.Vector3(0, 0.35, 0),
new THREE.Vector3(0, 1.35, 0),
0.35
);
// 设置重力
const gravity = -9.8;
// 玩家的速度
const playerVelocity = new THREE.Vector3(0, 0, 0);
// 方向向量
const playerDirection = new THREE.Vector3(0, 0, 0);

// 键盘按下事件
const keyStates = {
KeyW: false,
KeyA: false,
KeyS: false,
KeyD: false,
Space: false,
isDown: false,
};

// 根据键盘按下的键来更新键盘的状态
document.addEventListener(
"keydown",
(event) => {
keyStates[event.code] = true;
keyStates.isDown = true;
},
false
);
document.addEventListener(
"keyup",
(event) => {
keyStates[event.code] = false;
keyStates.isDown = false;
},
false
);

// 根据鼠标在屏幕移动,来旋转胶囊
window.addEventListener(
"mousemove",
(event) => {
capsule.rotation.y -= event.movementX * 0.003;
},
false
);

// 根据键盘状态更新玩家的速度
function controlPlayer(deltaTime) {
if (keyStates["KeyW"]) {
playerDirection.z = 1;
//获取胶囊的正前面方向
const capsuleFront = new THREE.Vector3(0, 0, 0);
capsule.getWorldDirection(capsuleFront);
// console.log(capsuleFront);
// 计算玩家的速度
playerVelocity.add(capsuleFront.multiplyScalar(deltaTime));
}
if (keyStates["KeyS"]) {
playerDirection.z = 1;
//获取胶囊的正前面方向
const capsuleFront = new THREE.Vector3(0, 0, 0);
capsule.getWorldDirection(capsuleFront);
// console.log(capsuleFront);
// 计算玩家的速度
playerVelocity.add(capsuleFront.multiplyScalar(-deltaTime));
}
if (keyStates["KeyA"]) {
playerDirection.x = 1;
//获取胶囊的正前面方向
const capsuleFront = new THREE.Vector3(0, 0, 0);
capsule.getWorldDirection(capsuleFront);

// 侧方的方向,正前面的方向和胶囊的正上方求叉积,求出侧方的方向
capsuleFront.cross(capsule.up);
// console.log(capsuleFront);
// 计算玩家的速度
playerVelocity.add(capsuleFront.multiplyScalar(-deltaTime));
}
if (keyStates["KeyD"]) {
playerDirection.x = 1;
//获取胶囊的正前面方向
const capsuleFront = new THREE.Vector3(0, 0, 0);
capsule.getWorldDirection(capsuleFront);

// 侧方的方向,正前面的方向和胶囊的正上方求叉积,求出侧方的方向
capsuleFront.cross(capsule.up);
// console.log(capsuleFront);
// 计算玩家的速度
playerVelocity.add(capsuleFront.multiplyScalar(deltaTime));
}
if (keyStates["Space"]) {
playerVelocity.y = 15;
}
}

// 归位
function resetPlayer() {
if (capsule.position.y < -20) {
playerCollider.start.set(0, 2.35, 0);
playerCollider.end.set(0, 3.35, 0);
playerCollider.radius = 0.35;
playerVelocity.set(0, 0, 0);
playerDirection.set(0, 0, 0);
}
}

// 创建一个octree
const worldOctree = new Octree();
worldOctree.fromGraphNode(plane);

// 判断是否在平面上
let playerOnFloor = false;

// 碰撞检验
function playerCollisions() {
// 人物碰撞检测
const result = worldOctree.capsuleIntersect(playerCollider);
playerOnFloor = false;
if (result) {
playerOnFloor = result.normal.y > 0;
playerCollider.translate(result.normal.multiplyScalar(result.depth));
}
}

function updatePlayer(deltaTime) {
let damping = -0.05;
if (playerOnFloor) {
playerVelocity.y = 0;
keyStates.isDown ||
playerVelocity.addScaledVector(playerVelocity, damping);
} else {
playerVelocity.y += gravity * deltaTime;
}
// 计算玩家移动的距离
const playerMoveDistance = playerVelocity.clone().multiplyScalar(deltaTime);
playerCollider.translate(playerMoveDistance);
// 将胶囊的位置进行设置
playerCollider.getCenter(capsule.position);
// 碰撞检测
playerCollisions()
}

const animate = function () {
let delta = clock.getDelta();
updatePlayer(delta);
controlPlayer(delta)
resetPlayer();
stats.update();
requestAnimationFrame(animate);
// controls.update();
renderer.render(scene, camera);
};
animate();
})
</script>
<style>
* {
margin: 0;
padding: 0;
}
#container {
width: 100vw;
height: 100vh;
}
</style>

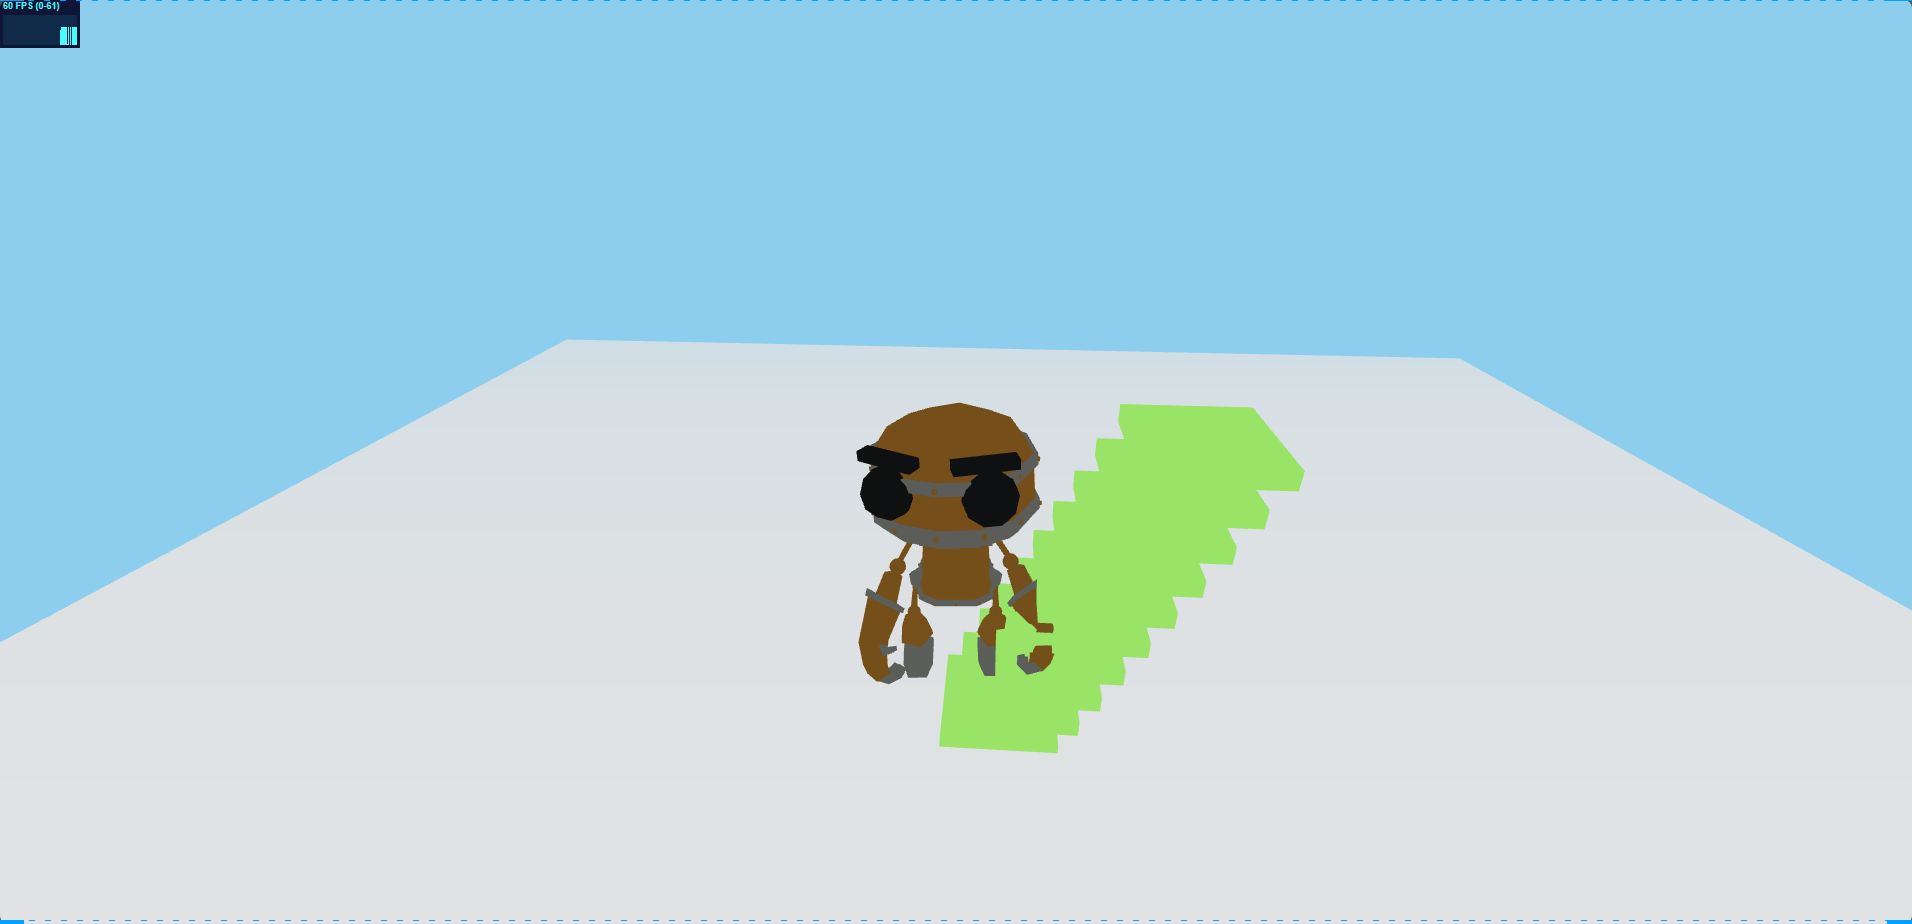
测试是否可上楼梯

创建立方体叠楼梯

1
2
3
4
5
6
7
8
9
// 创建立方体叠楼梯的效果
for (let i = 0; i < 10; i++) {
const boxGeometry = new THREE.BoxGeometry(1, 1, 0.15);
const boxMaterial = new THREE.MeshBasicMaterial({ color: 0x00ff00 });
const box = new THREE.Mesh(boxGeometry, boxMaterial);
box.position.y = 0.15 + i * 0.15;
box.position.z = i * 0.3;
plane.add(box);
}

效果图

原理解释

我们可以看到,我们的小人已经可以正常上楼梯了,这是因为我们的斜坡由于我们的碰撞检测,前进的时候胶囊会嵌入到地面,但是又被我们的碰撞检测给抬起来了,就实现了这样的效果

节约性能

我们渲染内容的时候都是一个一个点构成的,点多了之后,项目启动就会变得卡顿,但其实当我们把相机远离物体的时候,不需要这么多的点来构成物体,只需要看到物体的轮廓,我们可以通过LOD来实现这个效果

代码

我们创建一个线框球体,然后循环5次,在不同的位置添加不同的点位

1
2
3
4
5
6
7
8
9
10
11
12
13
14
15
16
17
18
// 多层次细节展示
const material = new THREE.MeshBasicMaterial({
color: 0xff0000,
wireframe: true,
});
let lod = new THREE.LOD();
for (let i = 0; i < 5; i++) {
const geometry = new THREE.SphereBufferGeometry(1, 22 - i * 5, 22 - i * 5);

const mesh = new THREE.Mesh(geometry, material);

lod.addLevel(mesh, i * 5);
}
let mesh = new THREE.Mesh(new THREE.PlaneBufferGeometry(1, 1), material);
mesh.visible = false;
lod.addLevel(mesh, 25);
lod.position.set(10, 0, 10);
scene.add(lod);

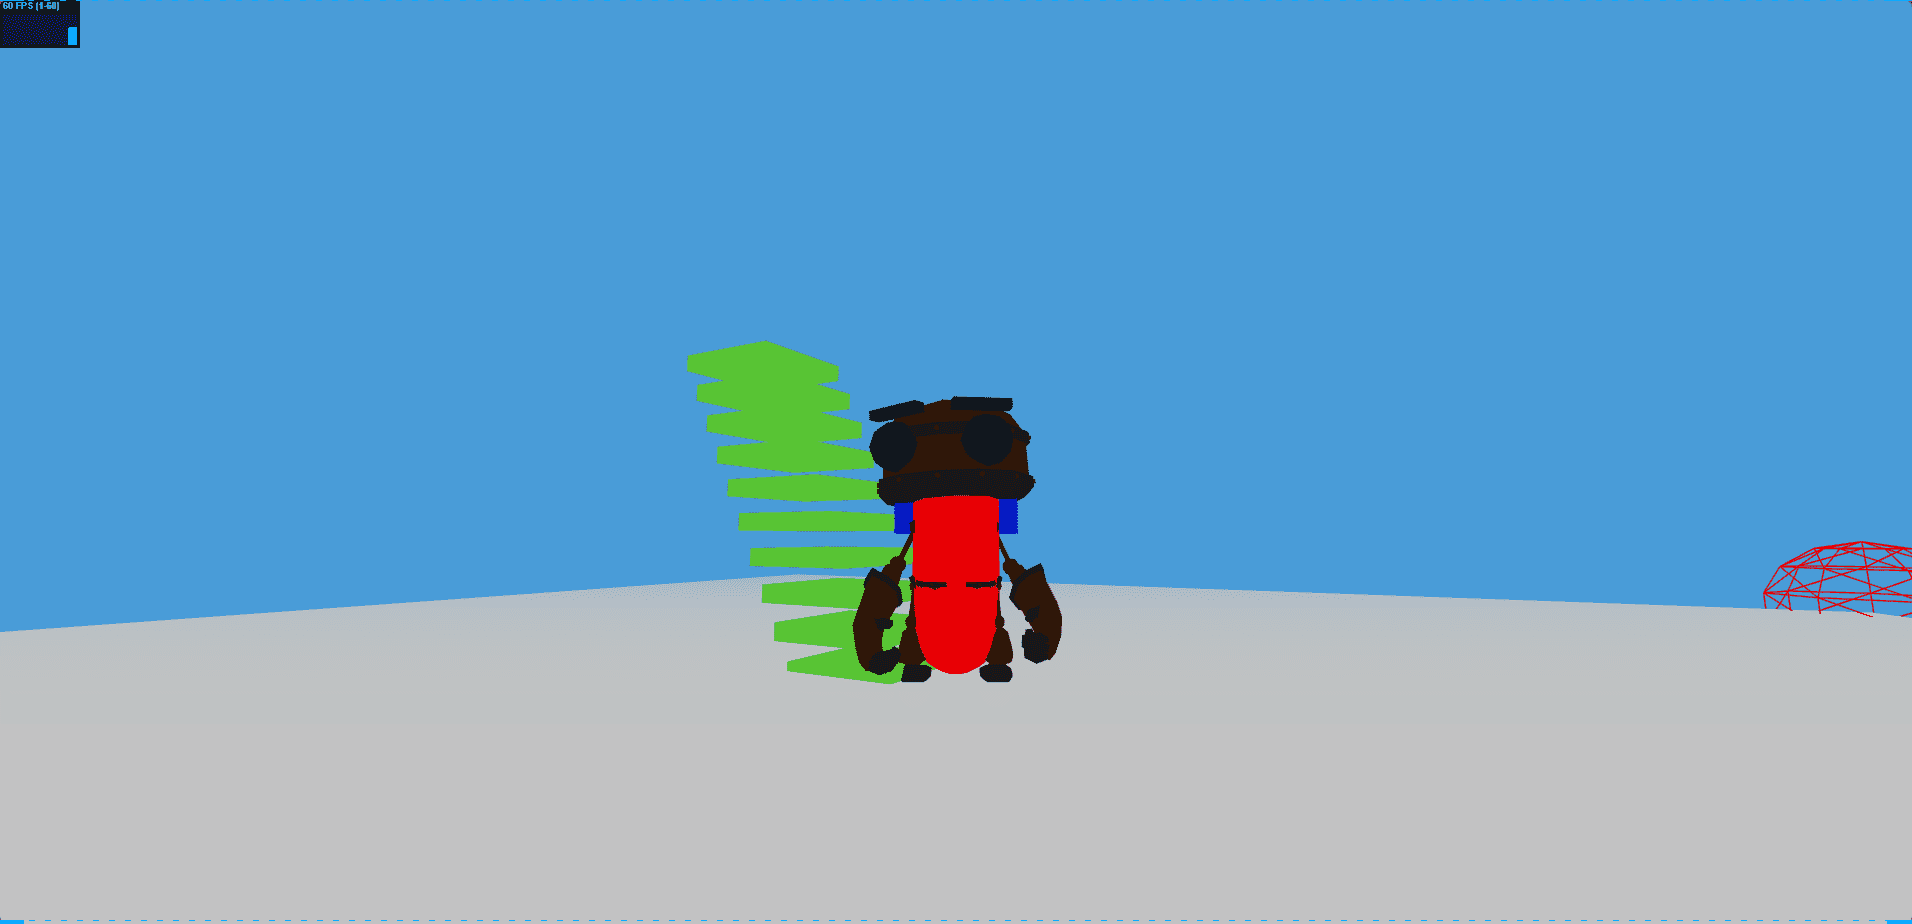
效果图

锁定光标

通过这个可以隐藏光标

1
2
3
4
5
6
7
8
document.addEventListener(
"mousedown",
(event) => {
// 锁定鼠标指针
document.body.requestPointerLock();
},
false
);

添加鼠标上下控制镜头

在上一篇中我们添加了鼠标左右控制镜头,但是我们的镜头还是可以上下移动的

代码

添加一个控制旋转上下的空3d对象,这是为了我们控制上下的时候,不要对我们的胶囊物体进行抬起操作
现在的层级关系:

  • 胶囊物体–>胶囊空对象–>相机
    1
    2
    3
    4
    5
    6
    7
    8
    9
    10
    11
    12
    13
    14
    // 控制旋转上下的空3d对象
    const capsuleBodyControl = new THREE.Object3D();
    capsuleBodyControl.add(camera);
    capsule.add(capsuleBodyControl);
    capsule.add(capsuleBody);
    // 根据鼠标在屏幕移动,来旋转胶囊
    window.addEventListener(
    "mousemove",
    (event) => {
    capsule.rotation.y -= event.movementX * 0.003;
    capsuleBodyControl.rotation.x += event.movementY * 0.003;
    },
    false
    );

效果图

限制旋转角度

1
2
3
4
5
6
7
8
9
10
11
12
13
14
// 根据鼠标在屏幕移动,来旋转胶囊
window.addEventListener(
"mousemove",
(event) => {
capsule.rotation.y -= event.movementX * 0.003;
capsuleBodyControl.rotation.x += event.movementY * 0.003;
if (capsuleBodyControl.rotation.x > Math.PI / 8) {
capsuleBodyControl.rotation.x = Math.PI / 8;
} else if (capsuleBodyControl.rotation.x < -Math.PI / 8) {
capsuleBodyControl.rotation.x = -Math.PI / 8;
}
},
false
);

效果图

人物视角切换

新建另外一个相机

1
2
3
4
5
6
7
const backCamera = new THREE.PerspectiveCamera(
70,
window.innerWidth / window.innerHeight,
0.001,
1000
);
backCamera.position.set(0, 5, -10);

相机追加到追随物体

1
2
3
backCamera.position.set(0, 2, 5);
backCamera.lookAt(capsule.position);
capsuleBodyControl.add(backCamera);

设置相机切换

定义当前激活相机

1
2
// 定义当前激活相机
let activeCamera = camera;

修改animate

将renderer依托的相机改成我们的activeCamera

1
2
3
4
5
6
7
8
9
10
function animate() {
let delta = clock.getDelta();
controlPlayer(delta);
updatePlayer(delta);
resetPlayer();
stats.update();
// controls.update();
renderer.render(scene, activeCamera);
requestAnimationFrame(animate);
}

效果

胶囊替换成模型

网站推荐

人物模型推荐网站

效果图

导入模型

大家找一个自己喜欢的模型即可

1
2
3
4
5
6
7
import { GLTFLoader } from "three/examples/jsm/loaders/GLTFLoader.js";
// 加载机器人模型
const loader = new GLTFLoader();
loader.load("./models/RobotExpressive.glb", (gltf) => {
const robot = gltf.scene;
capsule.add(robot);
});

效果图

修改模型效果

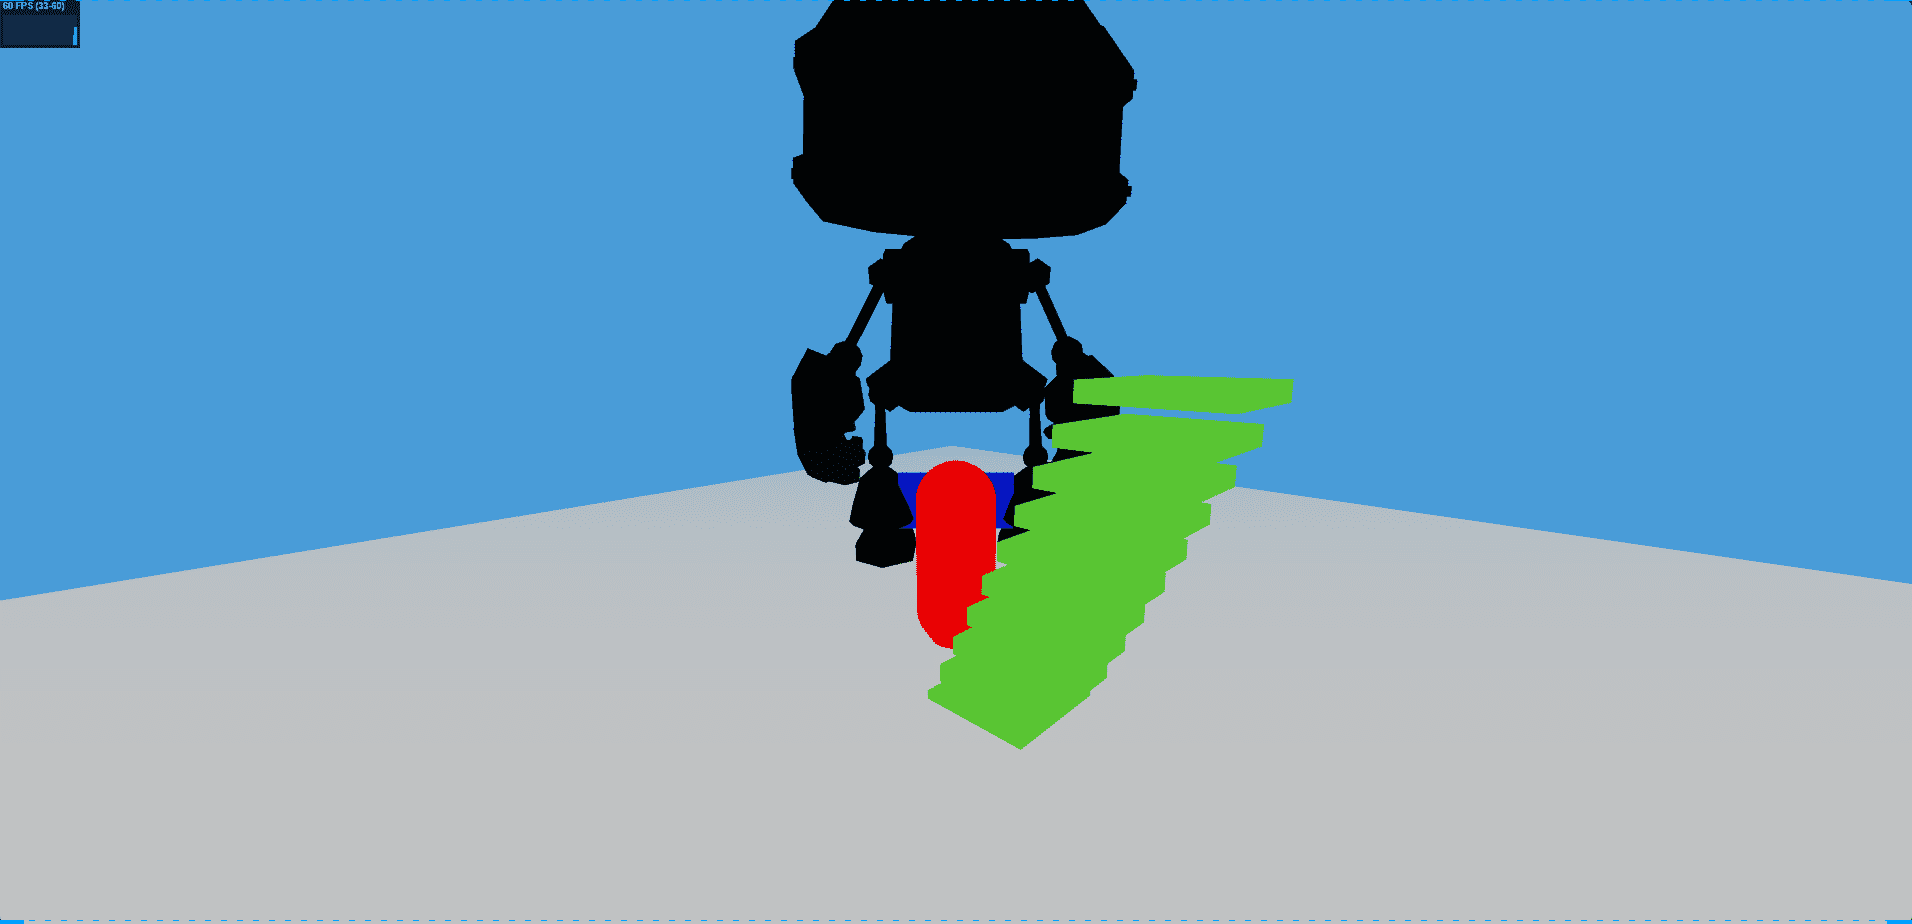
我们可以看到,我们的模型有点大,而且因为没有光源,加载进来的模型是黑色的

添加光源

1
2
3
// 添加半球光源
const hemisphereLight = new THREE.HemisphereLight(0xffffff, 0xffffff, 1);
scene.add(hemisphereLight);

效果图

缩小模型

1
2
3
4
5
6
loader.load("./models/RobotExpressive.glb", (gltf) => {
const robot = gltf.scene;
robot.scale.set(0.5, 0.5, 0.5);
robot.position.set(0, -0.88, 0);
capsule.add(robot);
});

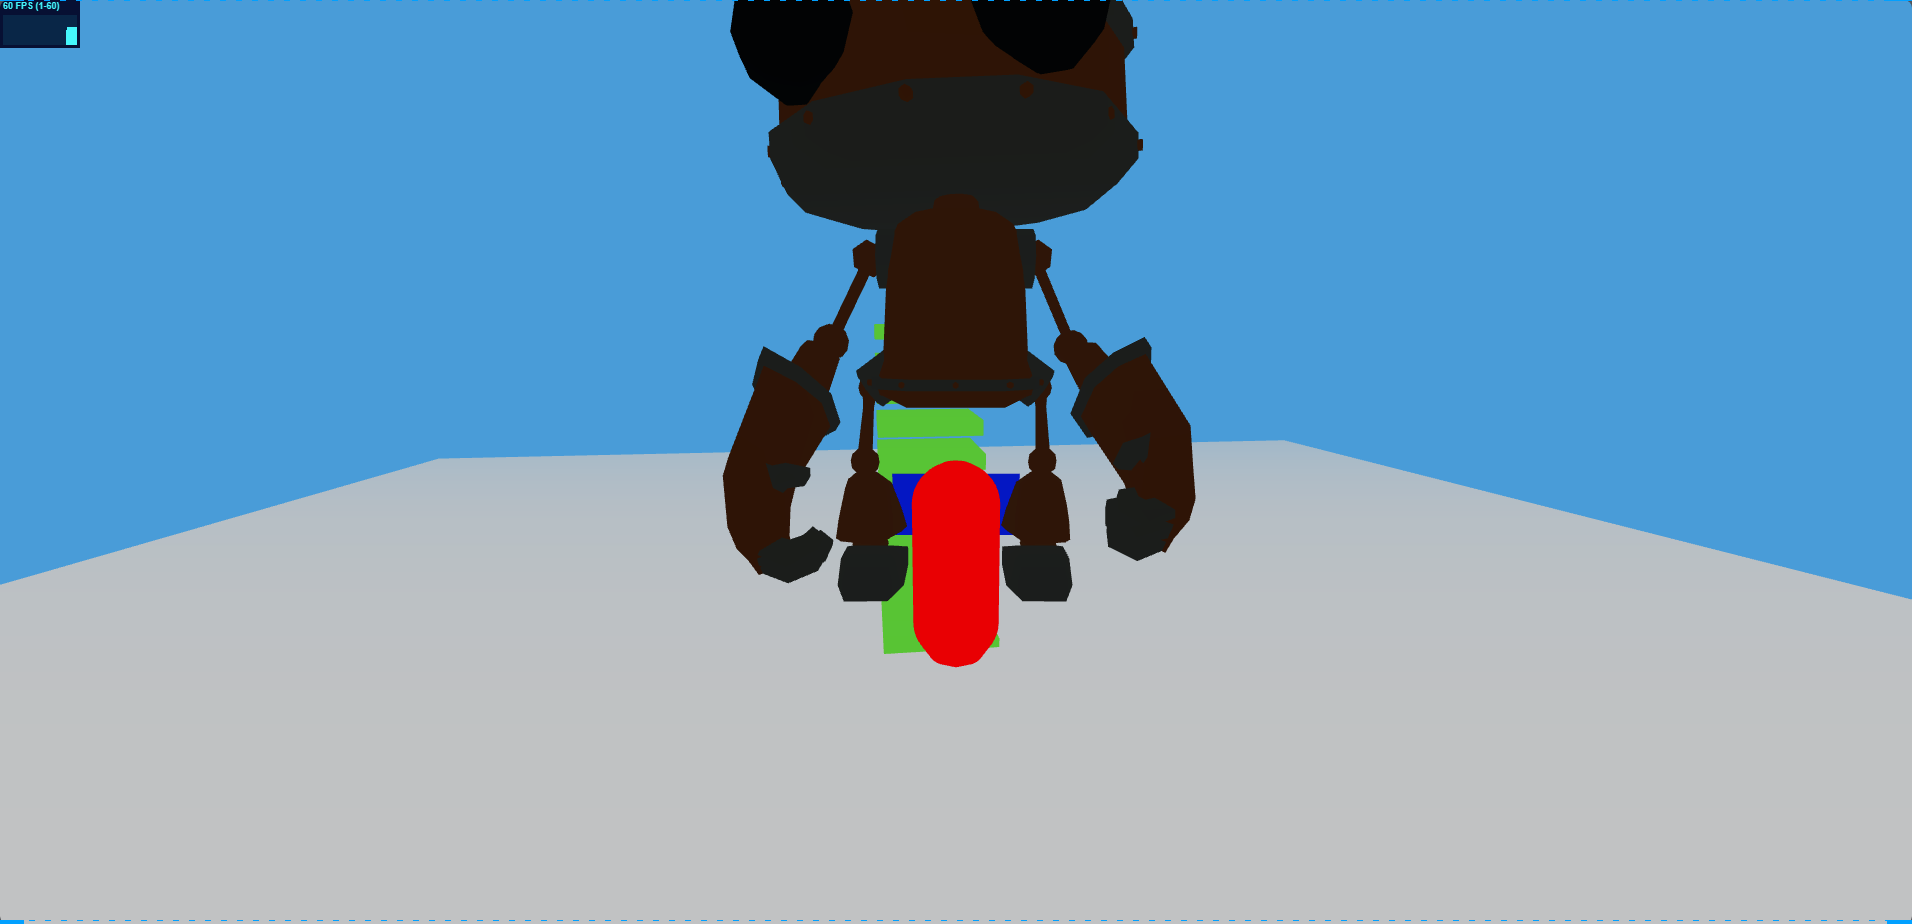
效果图

键盘事件绑定到物体上

其实这时候我们已经把键盘事件绑定在物体上了,只需要将之前的胶囊代码注释掉改成如下代码即可

1
2
3
4
5
6
7
8
9
10
11
12
13
const capsule=new THREE.Object3D();
capsule.position.set(0, 0.85, 0);

// 将相机作为胶囊的子元素,就可以实现跟随
camera.position.set(0, 2, -5);
camera.lookAt(capsule.position);
backCamera.position.set(0, 2, 5);
backCamera.lookAt(capsule.position);
// 控制旋转上下的空3d对象
const capsuleBodyControl = new THREE.Object3D();
capsuleBodyControl.add(camera);
capsuleBodyControl.add(backCamera);
capsule.add(capsuleBodyControl);

效果图

修改前文代码bug

这里申明下前面文章的代码问题

1
renderer.outputEncoding = THREE.SRGBColorSpace;

这句代码我写错了,如果是新版本的话直接去掉,老版本three的话改成

1
renderer.outputEncoding = THREE.sRGBEncoding;

这样,我们模型的光泽就出来了
效果图

添加模型动画

在这个模型里面,其实内置了一些动画,现在给加上

动作是否持续设置

我这里将

  1. Idle:待机动画
  2. Walking:走路动画
  3. Running:跑步动画
    我将这三个动作设置成可持续的,其他动作都改成了仅一次的
    1
    2
    3
    4
    5
    6
    7
    8
    9
    10
    11
    12
    13
    14
    15
    16
    17
    18
    19
    20
    21
    22
    23
    24
    25
    26
    27
    // 加载机器人模型
    const loader = new GLTFLoader();
    // 设置动作混合器
    let mixer = null;
    let actions = {};
    // 设置激活动作
    let activeAction = null;
    loader.load("./models/RobotExpressive.glb", (gltf) => {
    const robot = gltf.scene;
    robot.scale.set(0.5, 0.5, 0.5);
    robot.position.set(0, -0.88, 0);
    capsule.add(robot);
    mixer = new THREE.AnimationMixer(robot);
    for (let i = 0; i < gltf.animations.length; i++) {
    let name = gltf.animations[i].name;
    actions[name] = mixer.clipAction(gltf.animations[i]);
    if (name == "Idle" || name == "Walking" || name == "Running") {
    actions[name].clampWhenFinished = false;
    actions[name].loop = THREE.LoopRepeat;
    } else {
    actions[name].clampWhenFinished = true;
    actions[name].loop = THREE.LoopOnce;
    }
    }
    activeAction = actions["Idle"];
    activeAction.play();
    });

修改animate

当有mixer的时候进行更新

1
2
3
4
5
6
7
8
9
10
11
12
13
const animate = function () {
let delta = clock.getDelta();
updatePlayer(delta);
controlPlayer(delta)
resetPlayer();
stats.update();
requestAnimationFrame(animate);
if (mixer) {
mixer.update(delta);
}
// controls.update();
renderer.render(scene, activeCamera);
};

效果视频

添加打招呼动作

修改keyup监听

1
2
3
4
5
6
7
8
9
10
11
12
13
14
15
document.addEventListener(
"keyup",
(event) => {
keyStates[event.code] = false;
keyStates.isDown = false;
if (event.code === "KeyV") {
activeCamera = activeCamera === camera ? backCamera : camera;
}
if (event.code === "KeyT") {
// 打招呼
fadeToAction("Wave");
}
},
false
);

添加方法fadeToAction

1
2
3
4
5
6
7
8
9
10
11
12
13
14
15
16
17
18
19
20
21
22
23
24
const fadeToAction = (actionName) => {
let prevAction = activeAction;
activeAction = actions[actionName];
if (prevAction != activeAction) {
prevAction.fadeOut(0.3);
activeAction
.reset()
.setEffectiveTimeScale(1)
.setEffectiveWeight(1)
.fadeIn(0.3)
.play();
mixer.addEventListener("finished", () => {
let prevAction = activeAction;
activeAction = actions["Idle"];
prevAction.fadeOut(0.3);
activeAction
.reset()
.setEffectiveTimeScale(1)
.setEffectiveWeight(1)
.fadeIn(0.3)
.play();
});
}
};

效果展示

添加走路跑步动作

在updatePlayer方法中添加

1
2
3
4
5
6
7
8
9
10
11
// 如果有水平的运动,则设置运动的动作
if (
Math.abs(playerVelocity.x) + Math.abs(playerVelocity.z) > 0.1 &&
Math.abs(playerVelocity.x) + Math.abs(playerVelocity.z) <= 3
) {
fadeToAction("Walking");
} else if (Math.abs(playerVelocity.x) + Math.abs(playerVelocity.z) > 3) {
fadeToAction("Running");
} else {
fadeToAction("Idle");
}

效果展示

结语

好了,本篇文章就到这里了,更多内容敬请期待,这两节的内容我放在了我的个人gitee上https://gitee.com/guJyang/metaverse-1

上一篇:
【可视化学习】44-元宇宙基础学习(三)
下一篇:
【可视化学习】42-元宇宙基础学习(一)