前言
本文基于之前的项目配置代码进行讲解
路由拦截定义
路由拦截是指在路由跳转前,对路由进行拦截,判断是否有权限进行跳转,如果没有权限则跳转到指定页面,如果有权限则跳转到目标页面。常用于需要登录的系统中,如果没有登录则跳转到登录页面,如果已经登录则跳转到目标页面。
路由拦截的实现
src下新建permission.ts文件
导入路由并且监听操作路由跳转前的行为
1
2
3
4
| import router from '@/router';
router.beforeEach(async (to,from,next)=>{
console.log(to,from,next)
})
|
main.ts下引入permission.ts
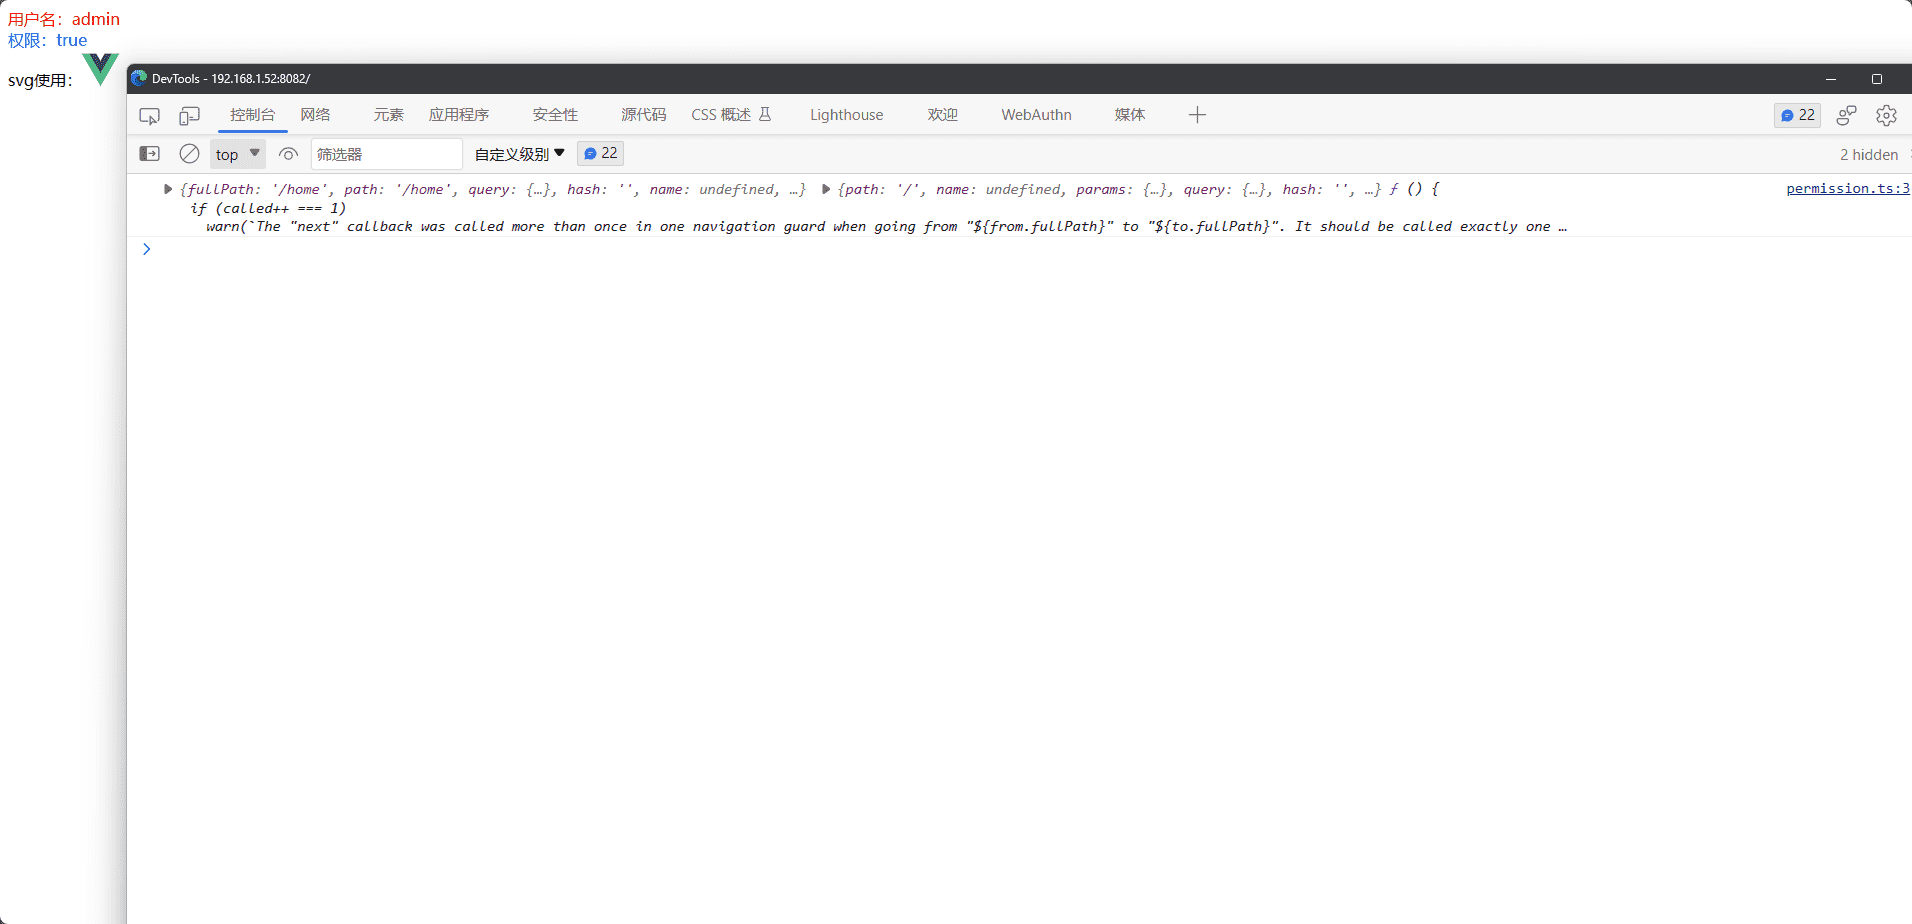
查看页面效果

此时我们可以看到我们的页面并没有进行渲染,而是一直在打印路由信息,通过to,和from就可以得到我们是从哪个路由跳转到哪个路由的了,因为我们没有进行next()操作,所以路由一直处于拦截状态,我们可以在permission.ts中添加next()操作
permission.ts添加next()操作
1
2
3
4
5
| import router from '@/router';
router.beforeEach(async (to,from,next)=>{
console.log(to,from,next)
next()
})
|
此时我们可以看到页面已经渲染出来了

permission.ts添加权限判断
基于上面这个逻辑,我们就可以实现最简单的权限判断了,我们可以在permission.ts中添加权限判断逻辑,如果有权限则next(),如果没有权限则跳转到指定页面
login.vue
在pages下面新建login文件夹,再新建一个index.vue,随便搞点代码
1
2
3
4
5
| <template>
<div>
我是登录页面
</div>
</template>
|
路由添加
修改router文件夹下的index.ts中的这部分代码,把login加上
1
2
3
4
5
6
7
8
9
10
11
12
|
const defaultRouterList: Array<RouteRecordRaw> = [
{
path: '/login',
name: 'login',
component: () => import('@/pages/login/index.vue'),
},
{
path: '/',
redirect: '/home',
},
];
|
因为我们之前都没给我们的home和about路由加上name,现在记得加上,在router文件下的modules文件夹下的homepage.ts中加上name
1
2
3
4
5
6
7
8
9
10
11
12
| export default [
{
path:"/home",
component:()=>import("@/pages/home/index.vue"),
name:"home",
},
{
path:"/about",
component:()=>import("@/pages/about/index.vue"),
name:"about",
}
]
|
store中添加token属性
往store文件夹下的modules中的user.ts中添加token属性
1
2
3
4
5
6
7
8
9
10
11
12
13
14
15
16
17
18
19
20
21
| import { defineStore } from 'pinia';
import { store } from '@/store';
export const useUserStore= defineStore('user', {
state: () => ({
username: '',
token: 'main_token',
isAdmin: false,
}),
actions: {
setValue(param: { username: string; isAdmin: boolean }) {
this.username = param.username;
this.isAdmin = param.isAdmin;
},
},
persist: false,
});
export function getUserStore() {
return useUserStore(store);
}
|
permission.ts
判断是否有token,如果有token则就进入下一步,判断如果是前往登录界面,那么就放行next(),然后判断路由是否有name,没有的话前往我们的/,如果是有name就是我们自定义的路由,就跳转过去,然后使用try,catch中的catch兜底,如果有错误重定向登录界面,如果没有token则重定向到登录页面
注意:
这段代码在没有token的时候也要添加,不然就会造成死循环,我们重定向到登录页面,但是登录页面又会重定向到登录页面,就会造成死循环
1
2
3
4
| if (to.path === '/login') {
next();
return;
}
|
1
2
3
4
5
6
7
8
9
10
11
12
13
14
15
16
17
18
19
20
21
22
23
24
25
26
27
28
29
30
31
32
33
| import router from '@/router';
import { useUserStore } from '@/store';
router.beforeEach(async (to,from,next)=>{
const userStore = useUserStore();
if (userStore.token) {
if (to.path === '/login') {
    next();
    return;
}
try {
if (router.hasRoute(to.name)) {
next();
} else {
next(`/`);
}
} catch (error) {
next({
path: '/login',
query: { redirect: encodeURIComponent(to.fullPath) },
});
}
} else {
if (to.path === '/login') {
next();
return;
}
next({
path: '/login',
query: { redirect: encodeURIComponent(to.fullPath) },
});
}
})
|
ok,此时我们可以看到,因为有token,我们的路由已经跳转到了home页面

去除token
我们可以在store中把token去除之后,我们就被重定向到了登录界面

到这里,最简单的路由拦截操作就讲解完成了,接下来我们进阶一点
白名单路由
白名单路由是指在路由拦截中,有一些路由是不需要进行权限判断的,比如登录页面,注册页面,忘记密码页面等等,这些页面都是不需要进行权限判断的,我们可以把这些路由放在白名单中,当路由跳转到白名单中的路由时,就不需要进行权限判断了,直接放行即可
就相当于当我们没有token的时候原来的
1
2
3
4
| if (to.path === '/login') {
next();
return;
}
|
需要改成
1
2
3
| if (whiteListRouters.includes(to.path)) {
next();
}
|
定义store中的whiteListRouters
新建store下的modules中的permission.ts
1
2
3
4
5
6
7
8
9
10
11
12
13
14
15
| import { defineStore } from 'pinia';
import { store } from '@/store';
export const usePermissionStore = defineStore('permission', {
state: () => ({
whiteListRouters: ['/login','/about'],
}),
actions: {
},
});
export function getPermissionStore() {
return usePermissionStore(store);
}
|
在store.ts中引入
1
2
3
4
5
6
7
8
9
10
11
12
| import { createPinia } from 'pinia';
import { createPersistedState } from 'pinia-plugin-persistedstate';
const store = createPinia();
store.use(createPersistedState());
export { store };
export * from './modules/user';
export * from './modules/permission';
export default store;
|
在permission.ts中使用
1
2
3
4
5
6
7
8
9
10
11
12
13
14
15
16
17
18
19
20
21
22
23
24
25
26
27
28
29
30
31
32
33
34
35
36
| import router from '@/router';
import { useUserStore } from '@/store';
import { getPermissionStore } from '@/store';
router.beforeEach(async (to,from,next)=>{
const userStore = useUserStore();
const permissionStore = getPermissionStore();
const { whiteListRouters } = permissionStore;
if (userStore.token) {
if (to.path === '/login') {
    next();
    return;
}
try {
if (router.hasRoute(to.name)) {
next();
} else {
next(`/`);
}
} catch (error) {
next({
path: '/login',
query: { redirect: encodeURIComponent(to.fullPath) },
});
}
} else {
if (whiteListRouters.includes(to.path)) {
next();
return;
}
next({
path: '/login',
query: { redirect: encodeURIComponent(to.fullPath) },
});
}
})
|
此时我们即使在没有token的情况下,也可以跳转到about页面了


