【可视化学习】45-3D图表实现
发表于:2023-09-16 |

前言

本文将讲解在Three中3D图表该如何实现

初始化代码

基础代码

1
2
3
4
5
6
7
8
9
10
11
12
13
14
15
16
17
18
19
20
21
22
23
24
25
26
27
28
29
30
31
32
33
34
35
36
37
38
39
40
41
42
43
44
45
46
47
48
49
50
51
52
53
54
55
56
57
58
59
60
61
62
63
64
65
66
67
68
69
70
71
72
73
74
75
76
77
78
79
80
81
82
83
84
85
86
87
88
89
90
91
92
93
<template>
<div class="home" ref="screenDom">
<div class="canvas-container"></div>
<div class="loading" v-if="progress != 100"></div>
<div class="progress" v-if="progress != 100">
<img src="../assets/loading.gif" alt="" />
<span>加载中:{{ progress }}%</span>
</div>
<div class="title">Codesigner3D图表</div>
</div>
</template>
<script setup>
import { onMounted, onUnmounted, ref } from "vue";
import ThreePlus from "../three/index";
import * as THREE from "three";
let progress = ref(0);

let screenDom = ref(null);
const resizeFn = () => {
let scale = window.innerWidth / 1920;
screenDom.value.style.transform = `scale(${scale})`;
};
onMounted(() => {
resizeFn();
window.addEventListener("resize", resizeFn);
});

onMounted(() => {
let threePlus = new ThreePlus(".canvas-container");
threePlus.camera.position.set(0, 5, 12);
threePlus.camera.lookAt(0, 2, 0);
threePlus.control.target.set(0, 2, 0);
threePlus.setBgJpg("./assets/textures/25s.jpg");
// 添加光
threePlus.setLight();

THREE.DefaultLoadingManager.onProgress = function (item, loaded, total) {
console.log(item, loaded, total);
progress.value = new Number((loaded / total) * 100).toFixed(2);
};
});
<style>
.home {
width: 1920px;
height: 1080px;
transform-origin: 0 0;
}
.canvas-container {
width: 100%;
height: 100%;
}
.loading {
position: fixed;
top: 0;
left: 0;
width: 1920px;
height: 1080px;
background-image: url(../assets/loading.jpg);
background-size: cover;
filter: blur(50px);
z-index: 100;
}
.progress {
position: fixed;
top: 0;
left: 0;
width: 1920px;
height: 1080px;
z-index: 101;
display: flex;
justify-content: center;
align-items: center;
font-size: 20px;
color: #fff;
}
.progress > img {
padding: 0 15px;
}

.title {
width: 380px;
height: 40px;
position: fixed;
right: 100px;
top: 50px;
background-color: rgba(0, 0, 0, 0.5);
line-height: 40px;
text-align: center;
color: #fff;
border-radius: 5px;
z-index: 110;
}
</style>

定义threePlus

这个是我基于常用的方法进行封装的一个加强版three,用以简化three的使用,具体代码如下:

1
2
3
4
5
6
7
8
9
10
11
12
13
14
15
16
17
18
19
20
21
22
23
24
25
26
27
28
29
30
31
32
33
34
35
36
37
38
39
40
41
42
43
44
45
46
47
48
49
50
51
52
53
54
55
56
57
58
59
60
61
62
63
64
65
66
67
68
69
70
71
72
73
74
75
76
77
78
79
80
81
82
83
84
85
86
87
88
89
90
91
92
93
94
95
96
97
98
99
100
101
102
103
104
105
106
107
108
109
110
111
112
113
114
115
116
117
118
119
120
121
122
123
124
125
126
127
128
129
130
131
132
133
134
135
136
137
138
139
140
141
142
143
144
145
146
147
148
149
150
151
152
153
154
155
156
157
158
159
160
161
162
163
164
165
166
167
168
169
170
171
172
173
174
175
import * as THREE from "three";
// 导入轨道控制器
import { OrbitControls } from "three/examples/jsm/controls/OrbitControls";
import { RGBELoader } from "three/examples/jsm/loaders/RGBELoader";
import { DRACOLoader } from "three/examples/jsm/loaders/DRACOLoader";
import { GLTFLoader } from "three/examples/jsm/loaders/GLTFLoader";
import { FBXLoader } from "three/examples/jsm/loaders/FBXLoader.js";
// 导入后期效果合成器
import { EffectComposer } from "three/examples/jsm/postprocessing/EffectComposer";
// three框架本身自带效果
import { RenderPass } from "three/examples/jsm/postprocessing/RenderPass";
export default class ThreePlus {
constructor(selector) {
this.clock = new THREE.Clock();
this.domElement = document.querySelector(selector);
this.width = this.domElement.clientWidth;
this.height = this.domElement.clientHeight;
this.init();
}
init() {
this.initScene();
this.initCamera();
this.initRenderer();
this.initControl();
this.initEffect();
this.render();
}
initScene() {
this.scene = new THREE.Scene();
this.scene.background = new THREE.Color(0xcccccc);
}
initCamera() {
this.camera = new THREE.PerspectiveCamera(
45,
this.width / this.height,
0.000001,
10000
);
this.camera.position.set(0, 1.5, 12);

this.camera.aspect = this.width / this.height;
// 更新摄像机的投影矩阵
this.camera.updateProjectionMatrix();
}
initRenderer() {
this.renderer = new THREE.WebGLRenderer({
logarithmicDepthBuffer: true,
antialias: true,
});
this.renderer.setSize(this.width, this.height);
this.renderer.shadowMap.enabled = true;
this.renderer.outputEncoding = THREE.sRGBEncoding;
this.renderer.physicallyCorrectLights = true;
this.renderer.toneMapping = THREE.ACESFilmicToneMapping;
this.renderer.toneMappingExposure = 2;
this.renderer.sortObjects = true;
this.domElement.appendChild(this.renderer.domElement);
}
initControl() {
this.control = new OrbitControls(this.camera, this.renderer.domElement);
}
addUpdateMesh(mesh) {
this.updateMeshArr.push(mesh);
}
render() {
this.control && this.control.update();
this.effectComposer.render();
requestAnimationFrame(this.render.bind(this));
}
gltfLoader(url) {
const gltfLoader = new GLTFLoader();
const dracoLoader = new DRACOLoader();
dracoLoader.setDecoderPath("./draco/gltf/");
dracoLoader.setDecoderConfig({ type: "js" });
dracoLoader.preload();
gltfLoader.setDRACOLoader(dracoLoader);

return new Promise((resolve, reject) => {
gltfLoader.load(url, (gltf) => {
resolve(gltf);
});
});
}
fbxLoader(url) {
const fbxLoader = new FBXLoader();
return new Promise((resolve, reject) => {
fbxLoader.load(url, (fbx) => {
resolve(fbx);
});
});
}
hdrLoader(url) {
const hdrLoader = new RGBELoader();
return new Promise((resolve, reject) => {
hdrLoader.load(url, (hdr) => {
resolve(hdr);
});
});
}
setBg(url) {
this.hdrLoader(url).then((texture) => {
texture.mapping = THREE.EquirectangularRefractionMapping;
texture.anisotropy = 16;
texture.format = THREE.RGBAFormat;
this.scene.background = texture;
this.scene.environment = texture;
});
}
setBgJpg(url) {
let texture = new THREE.TextureLoader().load(url);
texture.mapping = THREE.EquirectangularRefractionMapping;
texture.anisotropy = 16;
texture.format = THREE.RGBAFormat;
this.scene.background = texture;
this.scene.environment = texture;
}
setLight() {
// 添加环境光

this.ambientLight = new THREE.AmbientLight(0xffffff, 1);
this.scene.add(this.ambientLight);
const light1 = new THREE.DirectionalLight(0xffffff, 0.3);
light1.position.set(0, 10, 10);
const light2 = new THREE.DirectionalLight(0xffffff, 0.3);
light2.position.set(0, 10, -10);
const light3 = new THREE.DirectionalLight(0xffffff, 0.8);
light3.position.set(10, 10, 10);
light1.castShadow = true;
light2.castShadow = true;
light3.castShadow = true;
light1.shadow.mapSize.width = 10240;
light1.shadow.mapSize.height = 10240;
light2.shadow.mapSize.width = 10240;
light2.shadow.mapSize.height = 10240;
light3.shadow.mapSize.width = 10240;
light3.shadow.mapSize.height = 10240;
this.scene.add(light1, light2, light3);
}
initEffect() {
// 合成效果
this.effectComposer = new EffectComposer(this.renderer);
this.effectComposer.setSize(window.innerWidth, window.innerHeight);

// 添加渲染通道
const renderPass = new RenderPass(this.scene, this.camera);
this.effectComposer.addPass(renderPass);
}
// 添加辅助坐标轴
addAxis() {
let axis = new THREE.AxesHelper(10);
this.scene.add(axis);
}
controlsCamera() {
this.iskeyDown = false;
this.domElement.addEventListener("mousedown", (e) => {
this.iskeyDown = true;
});
this.domElement.addEventListener("mouseup", (e) => {
this.iskeyDown = false;
});
this.domElement.addEventListener("mouseout", (e) => {
this.iskeyDown = false;
});
this.domElement.addEventListener("mousemove", (e) => {
if (this.iskeyDown) {
this.camera.rotation.y -= e.movementX * 0.002;
this.camera.rotation.x -= e.movementY * 0.002;
this.camera.rotation.z = 0;
this.camera.rotation.order = "YXZ";
}
});
}
}


效果图

添加3D坐标系

往threePlus中添加方法

1
2
3
4
5
6
7
8
// 添加图形3d坐标
import Axis3d from "./charts3d/Axis3d";

addAxis3d(data) {
let axis3d = new Axis3d(data);
this.scene.add(axis3d.mesh);
return axis3d;
}

在主函数调用

1
2
// 添加坐标轴
threePlus.addAxis3d();

定义Axis3d

创建GridHelper

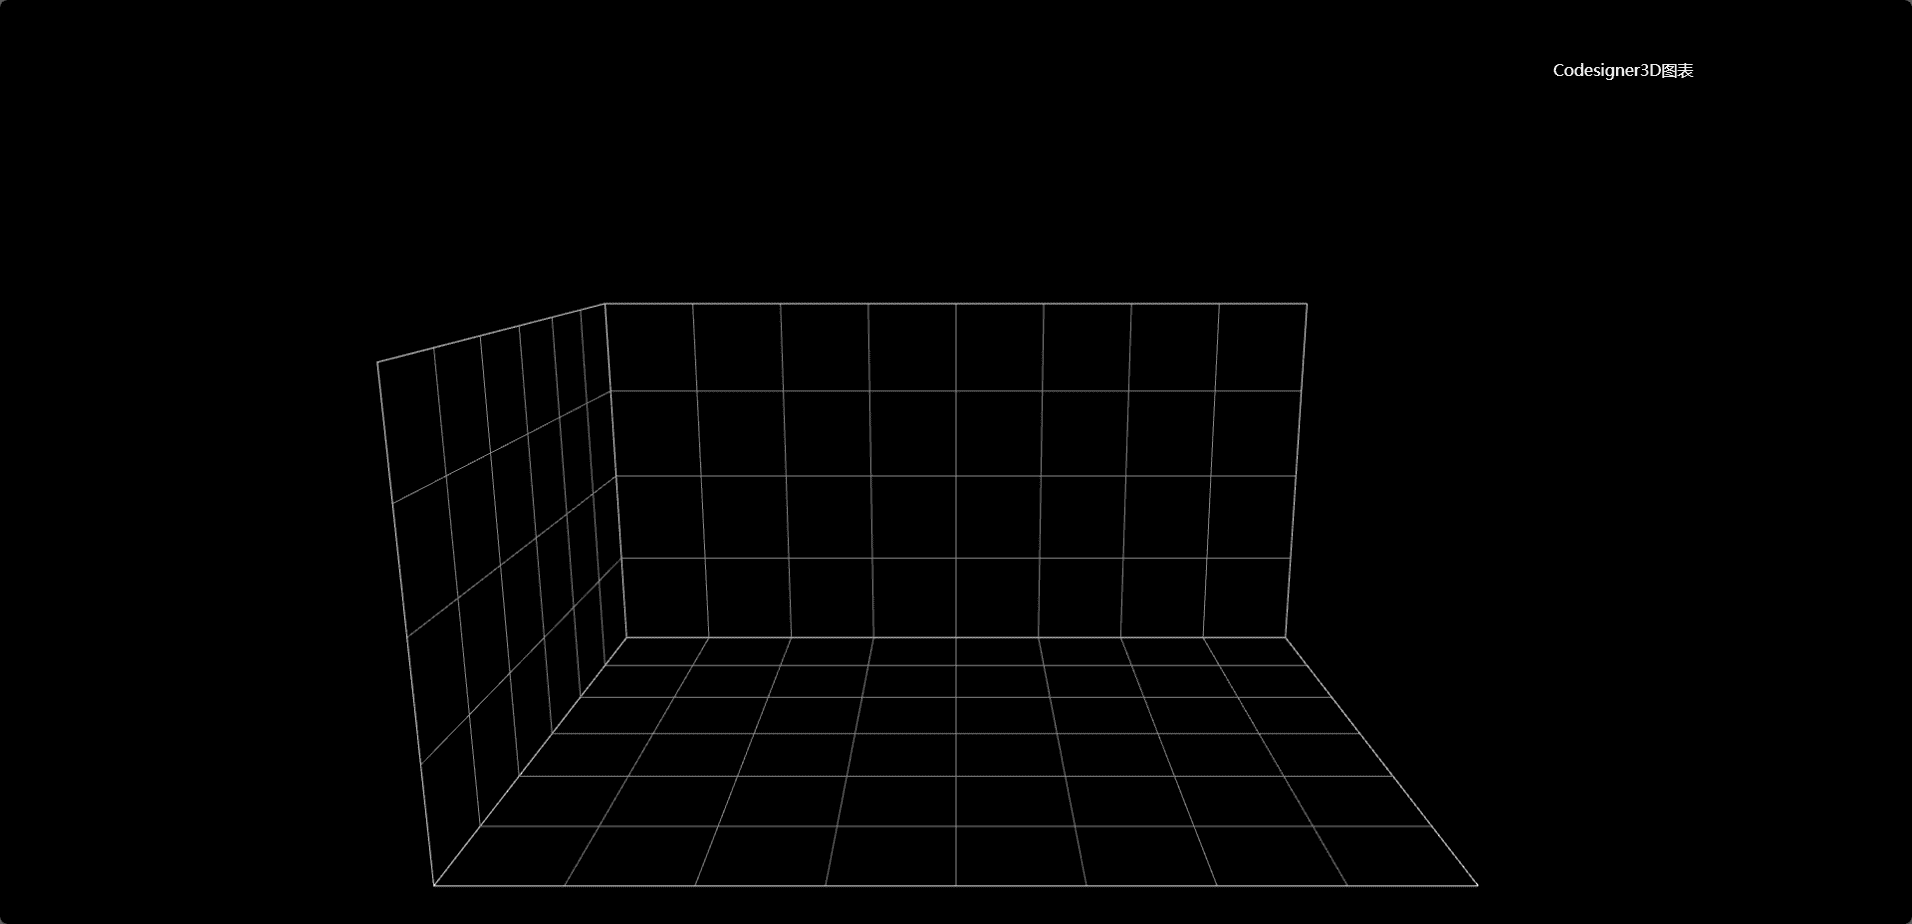
这里我们创建一个GridHelper的类,他继承THREE.LineSegments(线段)
然后我们将GridHelper的中心点作为原点,然后根据传入的参数,创建一个网格,
实现逻辑就是确定两个点,然后将这两个点作为线段的两个端点,然后将这些线段连接起来,就形成了网格,
具体代码如下:

1
2
3
4
5
6
7
8
9
10
11
12
13
14
15
16
17
18
19
20
21
22
23
24
25
26
27
28
29
30
31
32
33
34
35
36
37
38
39
40
41
42
43
44
45
46
47
48
49
50
class GridHelper extends THREE.LineSegments {
constructor(sizeX = 10, sizeY = 10, color1 = 0x444444, color2 = 0xffffff) {
color1 = new THREE.Color(color1);
color2 = new THREE.Color(color2);

const center = sizeY / 2;
const step = 1;
const halfSizeX = sizeX / 2;
const halfSizeY = sizeY / 2;

const vertices = [],
colors = [];
let j = 0;
for (let i = 0, k = -halfSizeX; i <= sizeX; i++, k += step) {
vertices.push(k, 0, -halfSizeY, k, 0, halfSizeY);

const color = i == 0 || i == sizeX ? color2 : color1;

color.toArray(colors, j);
j += 3;
color.toArray(colors, j);
j += 3;
}

for (let i = 0, k = -halfSizeY; i <= sizeY; i++, k += step) {
vertices.push(-halfSizeX, 0, k, halfSizeX, 0, k);
const color = i == 0 || i == sizeY ? color2 : color1;
color.toArray(colors, j);
j += 3;
color.toArray(colors, j);
j += 3;
}

const geometry = new THREE.BufferGeometry();
geometry.setAttribute(
"position",
new THREE.Float32BufferAttribute(vertices, 3)
);
geometry.setAttribute("color", new THREE.Float32BufferAttribute(colors, 3));

const material = new THREE.LineBasicMaterial({
vertexColors: true,
toneMapped: false,
});

super(geometry, material);

this.type = "GridHelper";
}
}

使用GridHelper

创建网格,然后翻转,然后将网格添加到mesh中,具体代码如下:

1
2
3
4
5
6
7
8
9
10
11
12
13
14
15
16
17
18
19
export default class Axis3d {
// size作为3d坐标轴长宽高
constructor(size = new THREE.Vector3(8, 6, 4)) {
this.mesh = new THREE.Group();
// 水平面的网格
let gridHelper = new GridHelper(size.x, size.y);
this.mesh.add(gridHelper);
// 侧面的网格
let gridVHelper = new GridHelper(size.z, size.y);
gridVHelper.rotation.z = Math.PI / 2;
gridVHelper.position.set(-size.x / 2, size.z / 2, 0);
this.mesh.add(gridVHelper);
// 垂直面的网格
let gridZHelper = new GridHelper(size.x, size.z);
gridZHelper.rotation.x = Math.PI / 2;
gridZHelper.position.set(0, size.z / 2, -size.y / 2);
this.mesh.add(gridZHelper);
}
}

效果图

添加精灵字体

定义精灵字体的类

这个和之前写过的很类似,这里就不多阐述了,我在这里添加了一个精灵字体点击事件

1
2
3
4
5
6
7
8
9
10
11
12
13
14
15
16
17
18
19
20
21
22
23
24
25
26
27
28
29
30
31
32
33
34
35
36
37
38
39
40
41
42
43
44
45
46
47
48
49
50
51
52
53
54
55
56
57
58
59
60
61
62
63
64
65
66
67
68
69
70
71
72
73
74
75
76
77
78
79
80
81
import * as THREE from "three";

export default class SpriteText {
constructor(
text = "helloworld",
position = new THREE.Vector3(0, 0, 0),
opacity = 0.7,
camera
) {
this.fns = [];
// 创建canvas对象
const canvas = document.createElement("canvas");
canvas.width = 1024;
canvas.height = 1024;
// canvas.style.position = "absolute";
// canvas.style.top = "0px";
// canvas.style.left = "0px";
// canvas.style.zIndex = "1";
// canvas.style.transformOrigin = "0 0";
// canvas.style.transform = "scale(0.1)";
const context = canvas.getContext("2d");
this.context = context;
context.fillStyle = `rgba(90,90,90,${opacity})`;
context.fillRect(0, 256, 1024, 512);
context.textAlign = "center";
context.textBaseline = "middle";
context.font = "bold 200px Arial";
context.fillStyle = "rgba(255,255,255,1)";
context.fillText(text, canvas.width / 2, canvas.height / 2);

let texture = new THREE.CanvasTexture(canvas);

const material = new THREE.SpriteMaterial({
map: texture,
color: 0xffffff,
// alphaMap: texture,
side: THREE.DoubleSide,
transparent: true,
// blending: THREE.AdditiveBlending,
depthTest: false,
depthWrite: false,
});
this.mesh = new THREE.Sprite(material);
this.mesh.scale.set(1, 1, 1);
this.mesh.position.copy(position);
// this.mesh.rotation.copy(euler);

// console.log(this);

// 创建射线
this.raycaster = new THREE.Raycaster();
this.mouse = new THREE.Vector2();

if (camera) {
// 事件的监听
window.addEventListener("click", (event) => {
this.mouse.x = (event.clientX / window.innerWidth) * 2 - 1;
this.mouse.y =
-(event.clientY / (1080 * (window.innerWidth / 1920))) * 2 + 1;

this.raycaster.setFromCamera(this.mouse, camera);

event.mesh = this.mesh;
event.spriteCanvas = this;

// console.log(this.mouse);
const intersects = this.raycaster.intersectObject(this.mesh);
event.intersects = intersects;
// console.log(intersects);
if (intersects.length > 0) {
this.fns.forEach((fn) => {
fn(event);
});
}
});
}
}
onClick(fn) {
this.fns.push(fn);
}
}

在Axis3d中使用

1
2
3
4
5
6
7
8
9
10
11
12
13
14
15
16
17
18
19
20
21
22
23
import SpriteText from "../SpriteText.js";

let dataExamples = [
"星期一",
"星期二",
"星期三",
"星期四",
"星期五",
"星期六",
"星期日",
];
export default class Axis3d {
// xxxxx,省略代码
this.addAxisLabel();
}
addAxisLabel(data) {
data = data || dataExamples;
data.forEach((item, i) => {
let textPosition = new THREE.Vector3(i - data.length / 2 + 0.5, -0.5, 0);
let spriteText = new SpriteText(item, textPosition, 0);
this.mesh.add(spriteText.mesh);
});
}

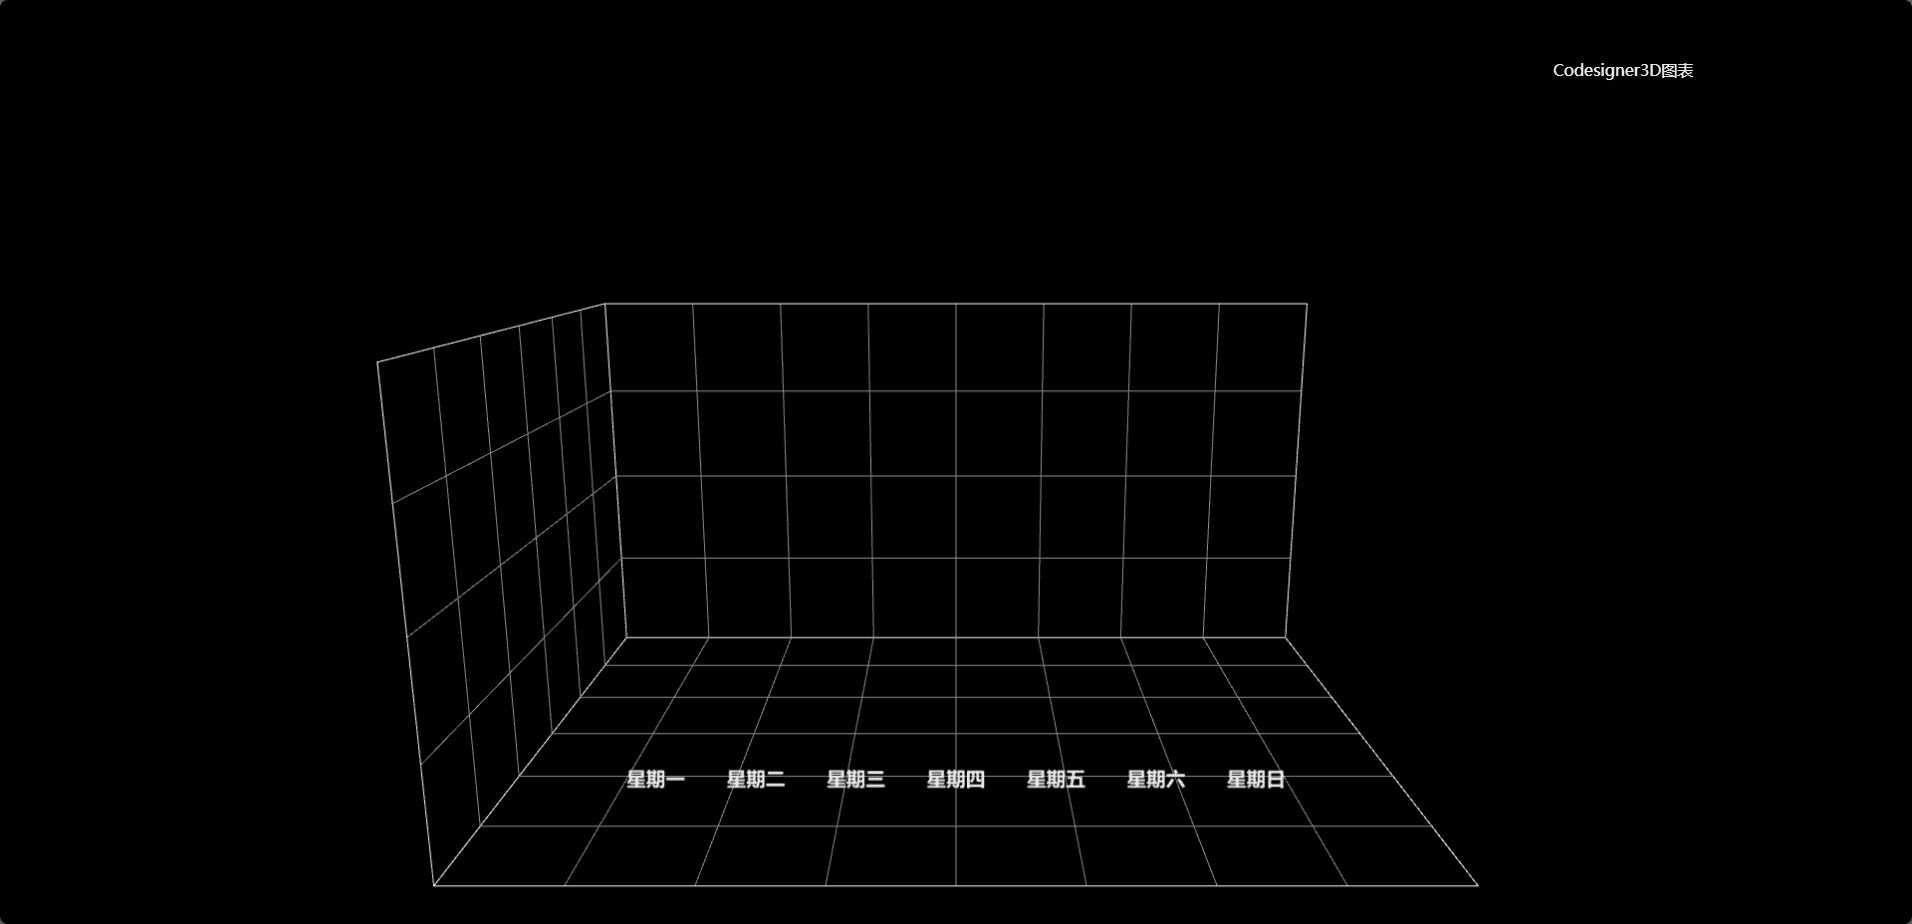
效果图

柱状图

定义柱状图的类

1
2
3
4
5
6
7
8
9
10
11
12
13
14
15
16
17
18
19
20
21
22
23
24
25
26
27
28
29
30
31
32
33
34
35
36
37
38
39
40
41
42
43
44
45
46
47
48
49
50
51
52
53
54
import * as THREE from "three";
import SpriteText from "../SpriteText.js";
let dataExamples = [
{
value: 3.5,
name: "第一季度",
},
{
value: 2.7,
name: "第二季度",
},
{
value: 3.0,
name: "第三季度",
},
{
value: 2.5,
name: "第四季度",
},
];

export default class Bar3d {
constructor(data, type = "cylinder") {
data = data || dataExamples;
this.mesh = new THREE.Group();
data.forEach((item, index) => {
let color = new THREE.Color(Math.random() * 0xffffff);
let material = new THREE.MeshStandardMaterial({
color: color,
transparent: true,
opacity: 0.8,
});

if (type == "rect") {
let boxGeometry = new THREE.BoxGeometry(1, item.value, 1);

let box = new THREE.Mesh(boxGeometry, material);
box.position.set(-3 + index * 2, item.value / 2, 0);
this.mesh.add(box);
} else {
let cylinderGeometry = new THREE.CylinderGeometry(0.5, 0.5, item.value);
let cylinder = new THREE.Mesh(cylinderGeometry, material);
cylinder.position.set(-3 + index * 2, item.value / 2, 0);
this.mesh.add(cylinder);
}

// 添加字体精灵
let textPosition = new THREE.Vector3(-3 + index * 2, item.value + 0.5, 0);
let spriteText = new SpriteText(item.name, textPosition);
this.mesh.add(spriteText.mesh);
});
}
}

threePlus添加方法

1
2
3
4
5
6
7
8
// 添加3d柱状图
import Bar3d from "./charts3d/Bar3d";
// 添加3d柱状图
addBar3d(data, type) {
let bar3d = new Bar3d(data,type);
this.scene.add(bar3d.mesh);
return bar3d;
}

主函数引用

1
2
3
4
5
6
7
8
9
10
11
12
13
14
15
16
17
18
19
20
let data = [
{
value: 3.5,
name: "第一季度",
},
{
value: 3.0,
name: "第二季度",
},
{
value: 2.5,
name: "第三季度",
},
{
value: 2.0,
name: "第四季度",
},
];
// 创建柱状图
threePlus.addBar3d(data);

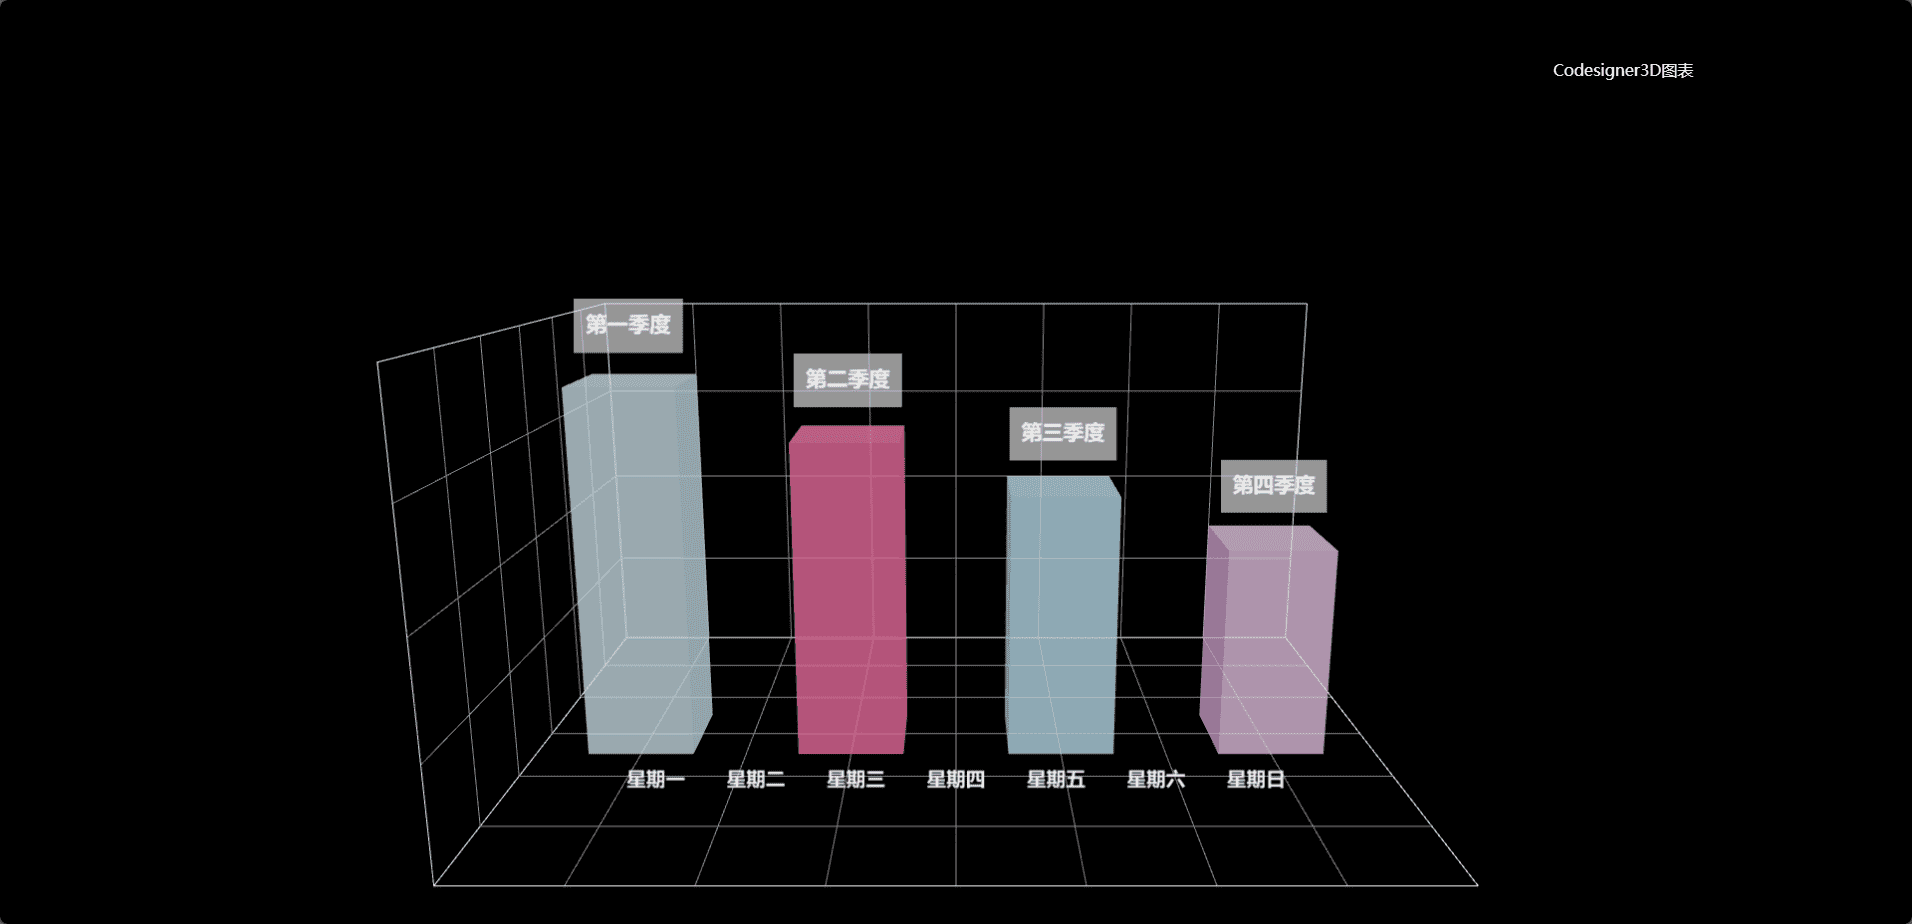
效果图

主函数引用替换参数

1
2
// 创建柱状图
threePlus.addBar3d(data,'rect');

效果图

折线图

定义折线图的类

将各个点位连起来形成一个面,然后挤出

1
2
3
4
5
6
7
8
9
10
11
12
13
14
15
16
17
18
19
20
21
22
23
24
25
26
27
28
29
30
31
32
33
34
35
36
37
38
39
40
41
42
43
44
45
46
47
48
49
50
51
52
53
54
55
56
57
58
59
60
61
62
63
64
65
66
67
68
69
70
71
72
73
74
75
76
77
78
79
80
81
82
83
84
85
86
87
88
89
90
91
92
93
import * as THREE from "three";
import SpriteText from "../SpriteText.js";
import gsap from "gsap";

let dataExamples = [
{
value: 2.5,
name: "星期一",
type: "亿台",
},
{
value: 1.7,
name: "星期二",
type: "万台",
},
{
value: 2.0,
name: "星期三",
type: "万台",
},
{
value: 1.5,
name: "星期四",
type: "万台",
},
{
value: 2.2,
name: "星期五",
type: "万台",
},
{
value: 2.6,
name: "星期六",
type: "万台",
},
{
value: 1.0,
name: "星期日",
type: "万台",
},
];

export default class Polyline3d {
constructor(data) {
data = data || dataExamples;
this.mesh = new THREE.Group();

let color = new THREE.Color(Math.random() * 0xffffff);
const material = new THREE.MeshStandardMaterial({
color: color,
side: THREE.DoubleSide,
opacity: 0.8,
transparent: true,
});
const extrudeSettings = {
steps: 1,
depth: 0.5,
bevelEnabled: false,
bevelThickness: 1,
bevelSize: 1,
bevelOffset: 0,
bevelSegments: 5,
};
const shape = new THREE.Shape();
shape.moveTo(0, 0);

data.forEach((item, i) => {
shape.lineTo(i, item.value);

// 添加字体精灵
let textPosition = new THREE.Vector3(
i,

item.value + 0.5,
0
);
let spriteText = new SpriteText(
"" + item.value + item.type,
textPosition
);
this.mesh.add(spriteText.mesh);
});
shape.lineTo(data.length - 1, 0);
shape.lineTo(0, 0);
const geometry = new THREE.ExtrudeGeometry(shape, extrudeSettings);

const mesh = new THREE.Mesh(geometry, material);
this.mesh.position.set(-3, 0, 0);

this.mesh.add(mesh);
}
}

threePlus引入

1
2
3
4
5
6
7
8
// 添加3d折线图
import Polyline3d from "./charts3d/Polyline3d";

addPolyline3d(data) {
let polyline3d = new Polyline3d(data);
this.scene.add(polyline3d.mesh);
return polyline3d;
}

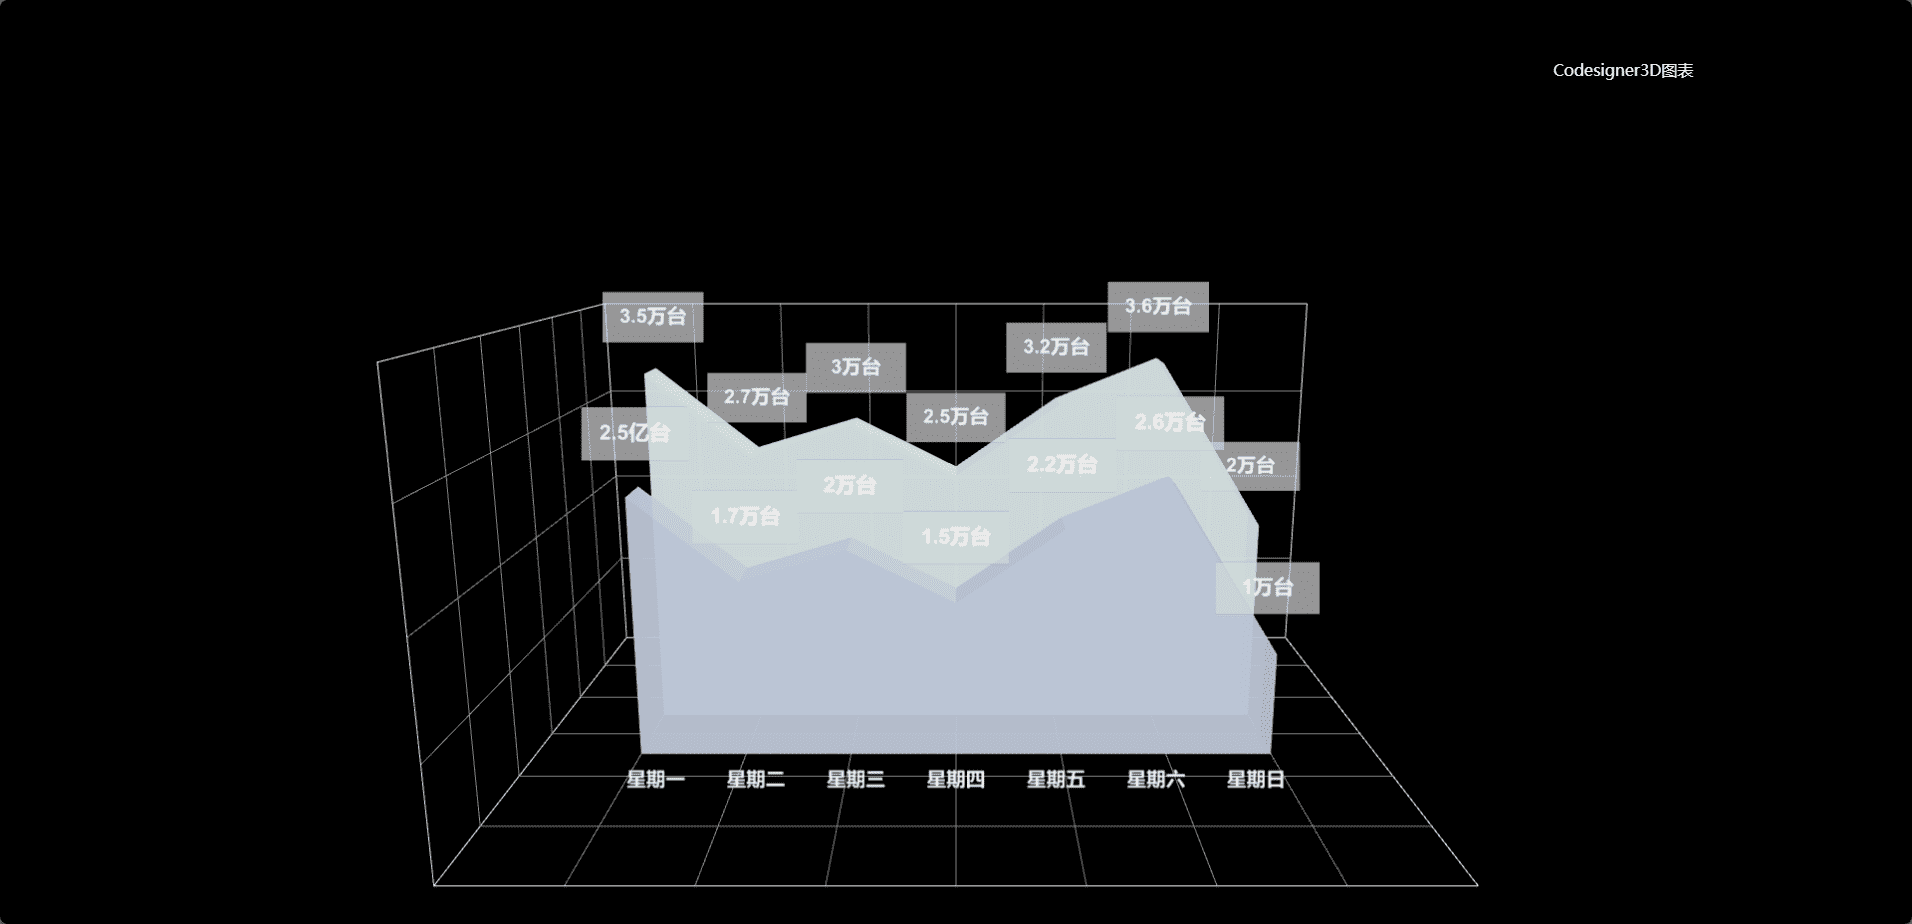
主函数引入

这里我添加了两个折线图,第二个折线图适当的向后移动了一点

1
2
3
4
5
6
7
8
9
10
11
12
13
14
15
16
17
18
19
20
21
22
23
24
25
26
27
28
29
30
31
32
33
34
35
36
37
38
39
40
threePlus.addPolyline3d()
let dataExamples2 = [
{
value: 3.5,
name: "星期一",
type: "万台",
},
{
value: 2.7,
name: "星期二",
type: "万台",
},
{
value: 3.0,
name: "星期三",
type: "万台",
},
{
value: 2.5,
name: "星期四",
type: "万台",
},
{
value: 3.2,
name: "星期五",
type: "万台",
},
{
value: 3.6,
name: "星期六",
type: "万台",
},
{
value: 2.0,
name: "星期日",
type: "万台",
},
];
let pline = threePlus.addPolyline3d(dataExamples2);
pline.mesh.position.z = -1;

效果图

饼图

定义饼图的类

1
2
3
4
5
6
7
8
9
10
11
12
13
14
15
16
17
18
19
20
21
22
23
24
25
26
27
28
29
30
31
32
33
34
35
36
37
38
39
40
41
42
43
44
45
46
47
48
49
50
51
52
53
54
55
56
57
58
59
60
61
62
63
64
65
66
67
68
69
70
71
72
73
74
75
76
77
78
79
80
81
82
83
84
85
86
87
88
89
90
91
92
93
94
95
96
97
98
99
100
101
102
103
104
105
106
107
108
109
110
111
112
113
114
115
116
117
118
119
120
121
122
123
124
125
126
127
128
129
130
131
132
133
134
135
136
137
138
139
140
141
142
143
144
145
146
147
148
149
150
151
152
153
154
155
156
157
158
import * as THREE from "three";
import SpriteText from "../SpriteText.js";
import gsap from "gsap";

let dataExamples = [
{
value: 3.5,
name: "第一季度",
},
{
value: 2.7,
name: "第二季度",
},
{
value: 3.0,
name: "第三季度",
},
{
value: 2.5,
name: "第四季度",
},
];

export default class Pie3d {
constructor(data, camera) {
data = data || dataExamples;
this.mesh = new THREE.Group();
this.sum = 0;
data.forEach((item, i) => {
this.sum += item.value;
});

let sumRotation = 0;

data.forEach((item, i) => {
// 计算旋转百分比弧度
let rotation = (item.value / this.sum) * 2 * Math.PI;

let color = new THREE.Color(Math.random() * 0xffffff);
const material = new THREE.MeshStandardMaterial({
color: color,
side: THREE.DoubleSide,
opacity: 0.8,
transparent: true,
// depthTest: false,
});

const shape = new THREE.Shape();
shape.moveTo(0, 0);
let rad = 0;
while (rad < rotation) {
shape.lineTo(3 * Math.cos(rad), 3 * Math.sin(rad));
rad += 0.05;
}
shape.lineTo(3 * Math.cos(rotation), 3 * Math.sin(rotation));
shape.lineTo(0, 0);

const extrudeSettings = {
steps: 1,
depth: (item.value / this.sum) * 5,
bevelEnabled: false,
bevelThickness: 1,
bevelSize: 1,
bevelOffset: 0,
bevelSegments: 5,
};

const geometry = new THREE.ExtrudeGeometry(shape, extrudeSettings);

const cylinder = new THREE.Mesh(geometry, material);
cylinder.rotation.z = sumRotation;
this.mesh.add(cylinder);

// 添加字体精灵
let textPosition = new THREE.Vector3(
Math.sin(rotation) * 1.5,
Math.cos(rotation) * 1.5,
item.value / 2 + 0.5
);
let spriteText = new SpriteText(item.name, textPosition);
cylinder.add(spriteText.mesh);

sumRotation += rotation;
});

this.mesh.rotation.x = -Math.PI / 2;
this.addMouseMove();
this.camera = camera;
}
addMouseMove() {
this.raycaster = new THREE.Raycaster();
this.pointer = new THREE.Vector2(1, 1);
this.timeline = gsap.timeline();
this.currentPie = null;
window.addEventListener("mousemove", (e) => {
this.pointer.x = (e.clientX / window.innerWidth) * 2 - 1;
this.pointer.y =
-(e.clientY / (1080 * (window.innerWidth / 1920))) * 2 + 1;
});
}
update() {
this.raycaster.setFromCamera(this.pointer, this.camera);

// calculate objects intersecting the picking ray
const intersects = this.raycaster.intersectObjects(
this.mesh.children,
false
);
if (
intersects.length > 0 &&
this.currentPie == null &&
!this.timeline.isActive()
) {
this.currentPie = intersects[0].object;
this.timeline.to(this.currentPie.position, {
x: 1 * Math.cos(this.currentPie.rotation.z),
y: 1 * Math.sin(this.currentPie.rotation.z),
duration: 0.5,
});
}
// 如果鼠标从当前的扇形移动到另外一个扇形,那么就将之前的扇形移动回来,将当前的扇形根据当前的角度移动
if (
intersects.length > 0 &&
this.currentPie != null &&
this.currentPie != intersects[0].object &&
!this.timeline.isActive()
) {
this.timeline.to(this.currentPie.position, {
x: 0,
y: 0,
duration: 0.1,
});
this.currentPie = intersects[0].object;
this.timeline.to(this.currentPie.position, {
x: 1 * Math.cos(this.currentPie.rotation.z),
y: 1 * Math.sin(this.currentPie.rotation.z),
duration: 0.5,
});
}
// 当判断鼠标移出时,将currentPie置为null,恢复原点的位置
if (
intersects.length == 0 &&
this.currentPie &&
!this.timeline.isActive()
) {
this.timeline.to(this.currentPie.position, {
x: 0,
y: 0,
duration: 0.5,
onComplete: () => {
console.log("complete");
this.currentPie = null;
},
});
}
}
}

threePlus中定义方法

1
2
3
4
5
6
7
8
9
10
11
12
13
14
15
16
17
18
19
20
21
22
23
24
25
export default class ThreePlus {
constructor(selector) {
// xxxxx,省略代码
this.updateMeshArr = [];
}
render() {
let deltaTime = this.clock.getDelta();
// xxxx 省略代码,
if (this.updateMeshArr.length > 0) {
for (let i = 0; i < this.updateMeshArr.length; i++) {
this.updateMeshArr[i].update(deltaTime);
}
}
requestAnimationFrame(this.render.bind(this));
}
addUpdateMesh(mesh) {
this.updateMeshArr.push(mesh);
}
addPie3d(data) {
let pie3d = new Pie3d(data, this.camera);
this.scene.add(pie3d.mesh);
this.addUpdateMesh(pie3d);
return pie3d;
}
}

主函数引入

1
2
 // 创建饼图
threePlus.addPie3d();

效果图

结语

好了,本篇文章就介绍到这里

上一篇:
编辑器组件封装(一)
下一篇:
【项目配置】7-tdesign使用