前言
本篇文章将讲解我对于一个富文本编辑器的简单封装,我项目代码以及简单操作文档我放在了我的git仓库https://gitee.com/guJyang/chat-input-next
初始化
创建vite-vue项目
这个不多阐述了
修改style.css样式
清空默认样式,改成如下代码:
1
2
3
4
| *,body,html{
margin:0;
padding:0;
}
|
修改目录结构并完成初始化
- 删除HelloWorld.vue
- 创建chat-input-next.vue文件
写一个div,开启contenteditable属性,然后定义开放一个cusStyle,允许父级传样式下来,然后通过一个class类,定义初始样式
通过下面这段代码允许我们的组件导出名,为后续发包做准备1
2
3
4
5
| <script lang="ts">
export default {
name: "ChatInputNext",
};
</script>
|
1
2
3
4
5
6
7
8
9
10
11
12
13
14
15
16
17
18
19
20
21
22
23
24
25
| <template>
<div contenteditable :style="{...cusStyle}" class="chat-input-next">
</div>
</template>
<script lang="ts">
export default {
  name: "ChatInputNext",
};
</script>
<script lang="ts" setup>
import { CSSProperties,withDefaults } from 'vue';
type InlineStyles = Partial<CSSProperties>;
withDefaults(defineProps<{
cusStyle?:InlineStyles
}>(),{
});
</script>
<style scoped>
.chat-input-next{
width:500px;
height:200px;
}
</style>
|
- App.vue中引入组件
1
2
3
4
5
6
7
8
9
10
11
12
13
14
15
16
17
18
19
20
21
22
23
| <script setup lang="ts">
import ChatInputNext from './components/chat-input-next.vue'
</script>
<template>
<div class="chat-input-next-container">
输入框组件:
<ChatInputNext :cusStyle="{width:'80vw',height:'50vh',border:'1px solid #d3d3d3'}"></ChatInputNext>
</div>
</template>
<style scoped>
.chat-input-next-container{
display: flex;
flex-direction: column;
justify-content: center;
align-items: center;
width: 100vw;
height: 100vh;
background-color: #f5f5f5;
}
</style>
|

去除聚焦时的黑色粗线并且添加placeholder
在contenteditable属性下,当我们聚焦的时候,会出现一个黑色的粗线,这个是浏览器默认的样式,我们需要去除掉
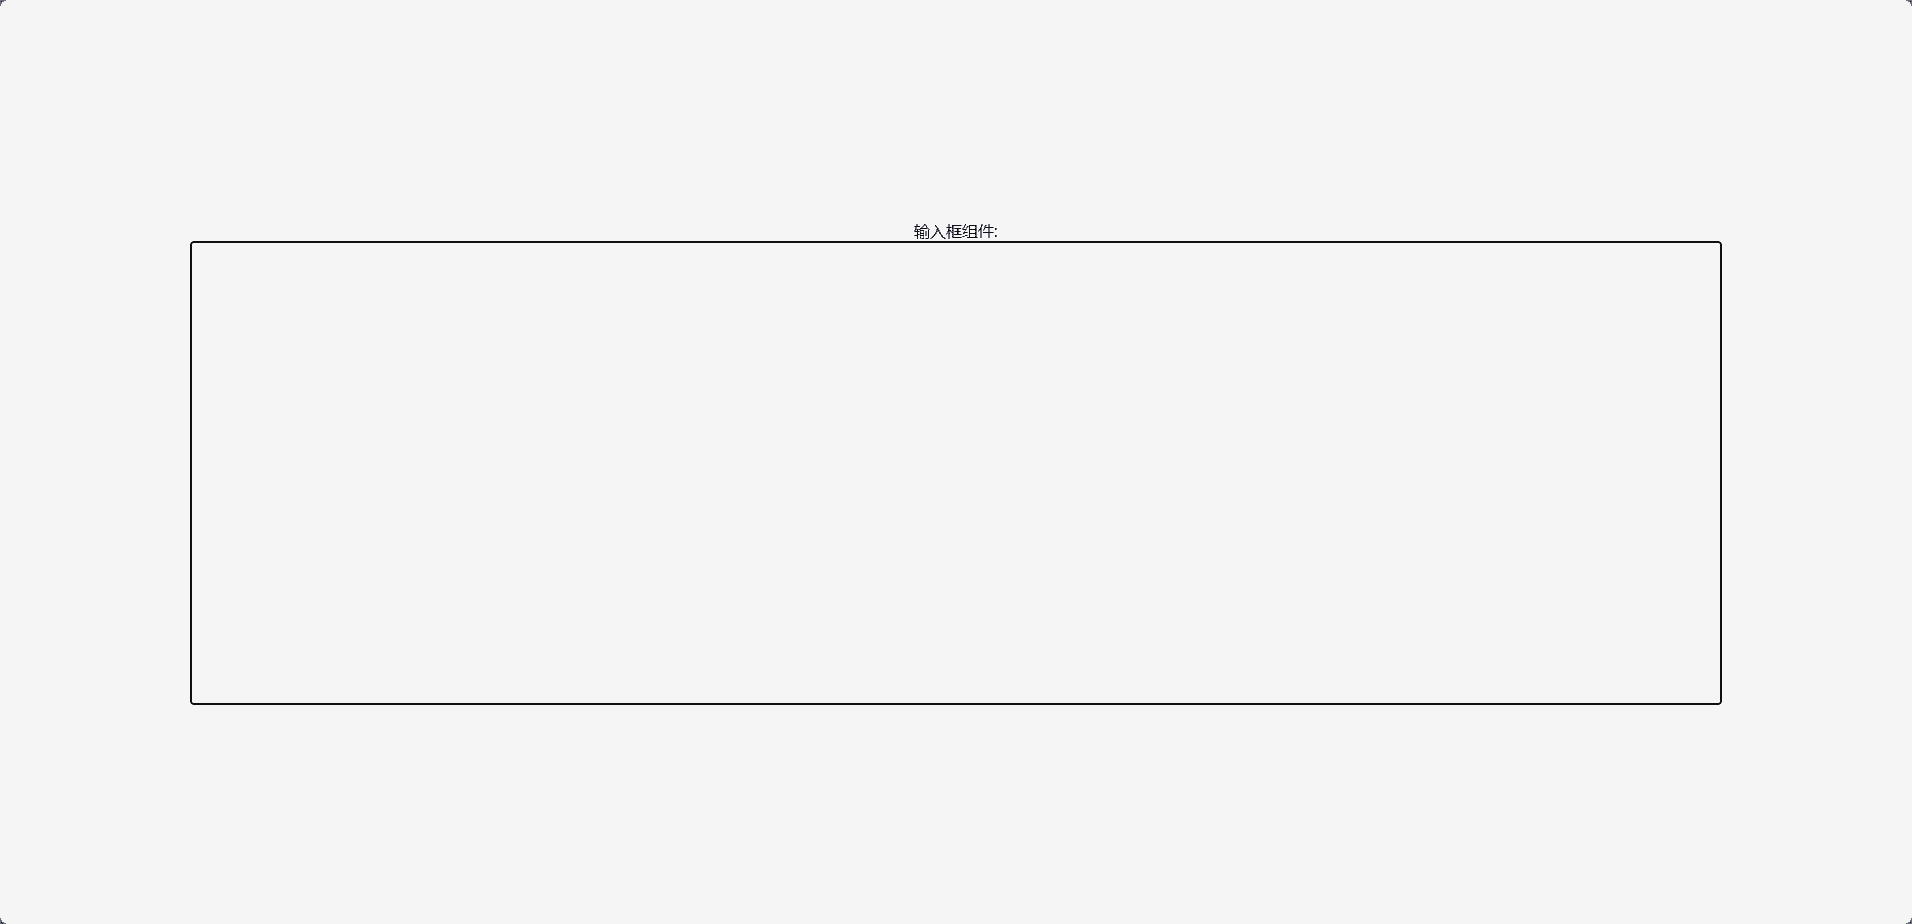
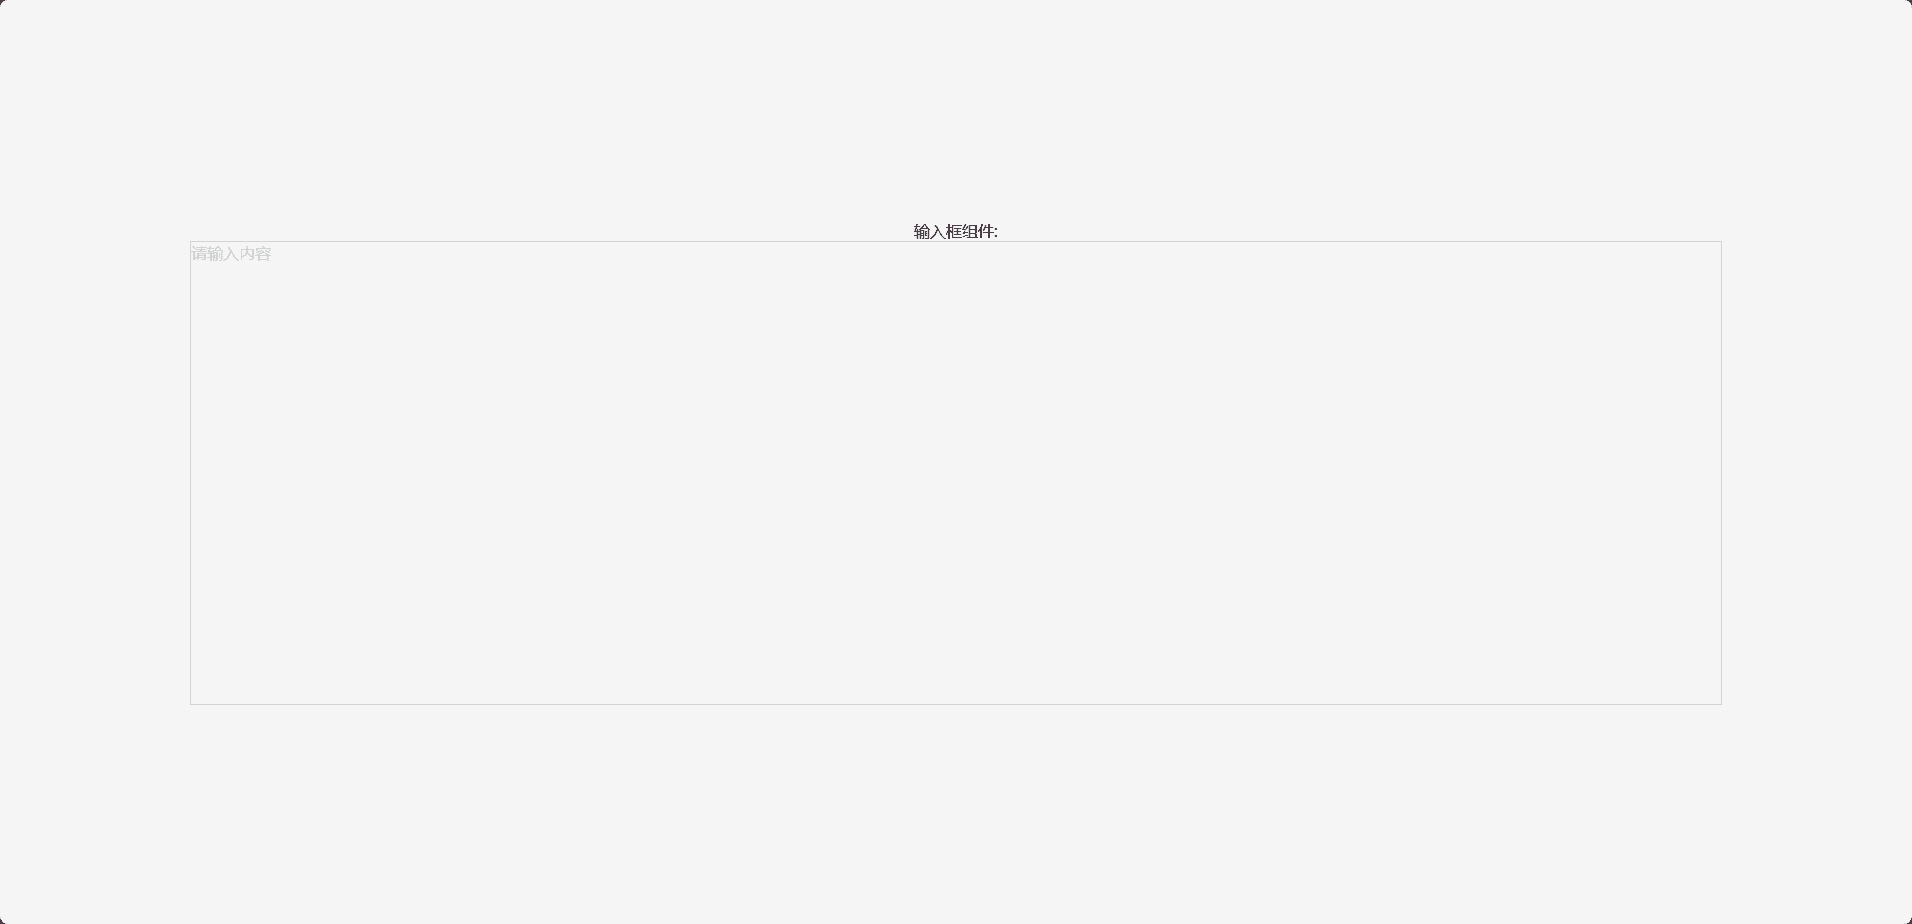
在css中添加以下代码去除outline,并且在div中添加placeholder属性
css
1
2
3
4
5
6
7
| [contenteditable]:empty:before {
content: attr(placeholder);
color: #ccc;
}
[contenteditable] {
outline: 0px solid transparent;
}
|
html
1
2
3
4
5
| <template>
<div contenteditable :style="{...cusStyle}" class="chat-input-next" placeholder="请输入内容">
</div>
</template>
|
此时就有了以下的样式效果
支持插入图片
修改样式
首先我们给编辑器加个padding,让内容看起来不会贴边
1
2
3
4
5
| .chat-input-next{
width:500px;
height:200px;
padding:5px;
}
|
然后我们适当修改下App.vue,添加一个添加图片的按钮
1
2
3
4
5
6
7
8
9
10
11
12
13
14
15
16
17
18
19
20
21
22
23
24
25
26
27
28
29
30
31
32
33
34
| <script setup lang="ts">
import ChatInputNext from './components/chat-input-next.vue'
</script>
<template>
<div class="chat-input-next-container">
输入框组件:
<div class="op-line">
<input type="file">
</div>
<ChatInputNext :cusStyle="{width:'80vw',height:'50vh',border:'1px solid #d3d3d3'}"></ChatInputNext>
</div>
</template>
<style scoped>
.chat-input-next-container{
display: flex;
flex-direction: column;
justify-content: center;
align-items: center;
gap:10px;
width: 100vw;
height: 100vh;
background-color: #f5f5f5;
}
.op-line{
display: flex;
flex-direction: row;
align-items: center;
gap:10px;
width:80vw
}
</style>
|
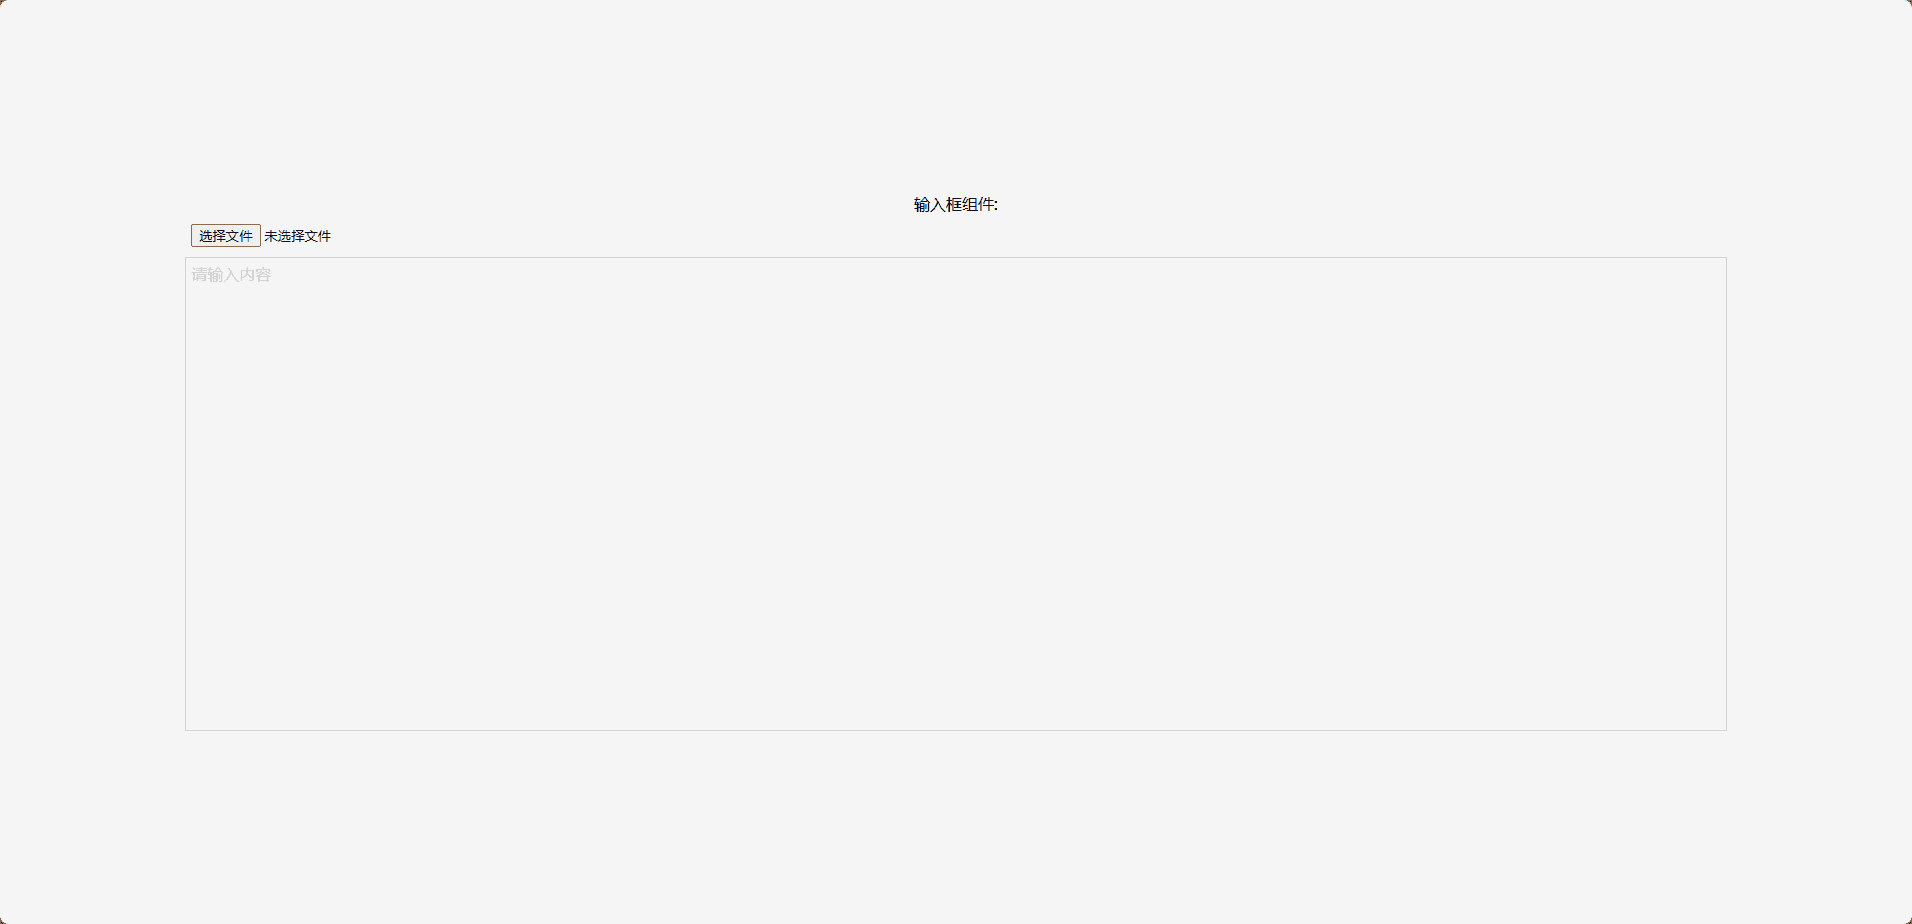
拿到图片的file对象
1
| <input type="file" @change="handleFileChange">
|
js中监听并获取file
1
2
3
4
5
6
7
| const handleFileChange = (e:Event)=>{
const target=e.target as HTMLInputElement
if(target.files&&target.files.length>0){
const file=target.files[0]
console.log(file)
}
}
|
此时,我们就可以拿到我们的图片的file了
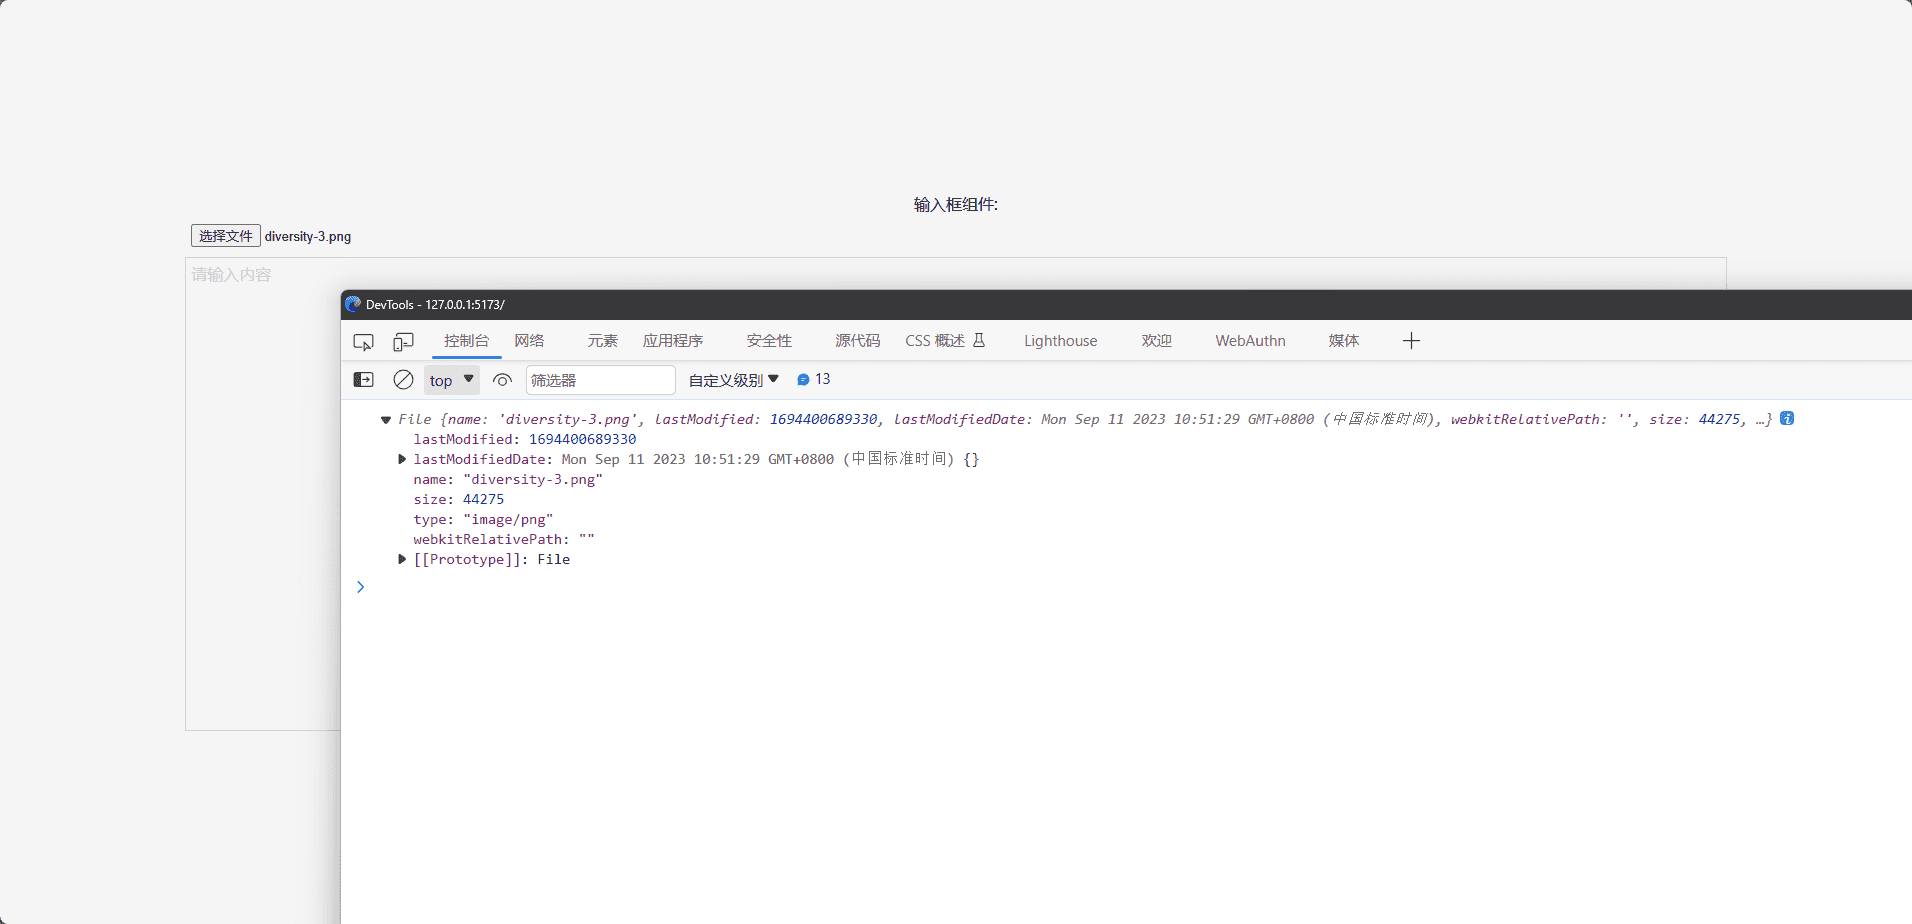
处理编辑器插入图片事件
此时,我们要做的就是要给我们的编辑器插入图片
子组件暴露方法父组件调用
父组件
定义ref然后调用
1
2
3
4
5
6
7
8
9
10
11
12
13
14
15
16
17
18
19
20
21
22
23
24
25
26
27
28
29
30
31
32
33
34
35
36
37
38
39
40
41
42
| <script setup lang="ts">
import {ref} from "vue"
import ChatInputNext from './components/chat-input-next.vue'
const chatInputNext=ref()
const handleFileChange = (e:Event)=>{
const target=e.target as HTMLInputElement
if(target.files&&target.files.length>0){
const file=target.files[0]
chatInputNext.value&&chatInputNext.value.insertFile(file)
}
}
</script>
<template>
<div class="chat-input-next-container">
输入框组件:
<div class="op-line">
<input type="file" @change="handleFileChange">
</div>
<ChatInputNext :cusStyle="{width:'80vw',height:'50vh',border:'1px solid #d3d3d3'}" ref="chatInputNext"></ChatInputNext>
</div>
</template>
<style scoped>
.chat-input-next-container{
display: flex;
flex-direction: column;
justify-content: center;
align-items: center;
gap:10px;
width: 100vw;
height: 100vh;
background-color: #f5f5f5;
}
.op-line{
display: flex;
flex-direction: row;
align-items: center;
gap:10px;
width:80vw
}
</style>
|
子组件
使用defineExpose暴露方法
1
2
3
4
5
6
7
8
9
10
11
12
13
14
15
16
17
18
19
20
21
22
23
24
25
26
27
28
29
30
31
32
33
34
35
36
37
38
39
40
41
42
| <template>
<div contenteditable :style="{...cusStyle}" class="chat-input-next" placeholder="请输入内容">
</div>
</template>
<script lang="ts">
export default {
name: "ChatInputNext",
};
</script>
<script lang="ts" setup>
import { CSSProperties,withDefaults,defineExpose } from 'vue';
type InlineStyles = Partial<CSSProperties>;
withDefaults(defineProps<{
cusStyle?:InlineStyles
}>(),{
});
const insertFile=(file:File)=>{
console.log(file)
}
defineExpose({
insertFile
})
</script>
<style scoped>
.chat-input-next{
width:500px;
height:200px;
padding:5px;
}
[contenteditable]:empty:before {
  content: attr(placeholder);
  color: #ccc;
}
[contenteditable] {
  outline: 0px solid transparent;
}
</style>
|
生成图片url
我们需要将图片转成url,然后插入到编辑器中
这里的createObjectURL方法大家可以参考文档
https://developer.mozilla.org/zh-CN/docs/Web/API/URL/createObjectURL_static
通过这个方法之后,会返回一个blob对象的url
1
2
3
4
5
| const insertFile=(file:File)=>{
const URL = window.URL || window.webkitURL;
const url = URL.createObjectURL(file);
console.log(url)
}
|
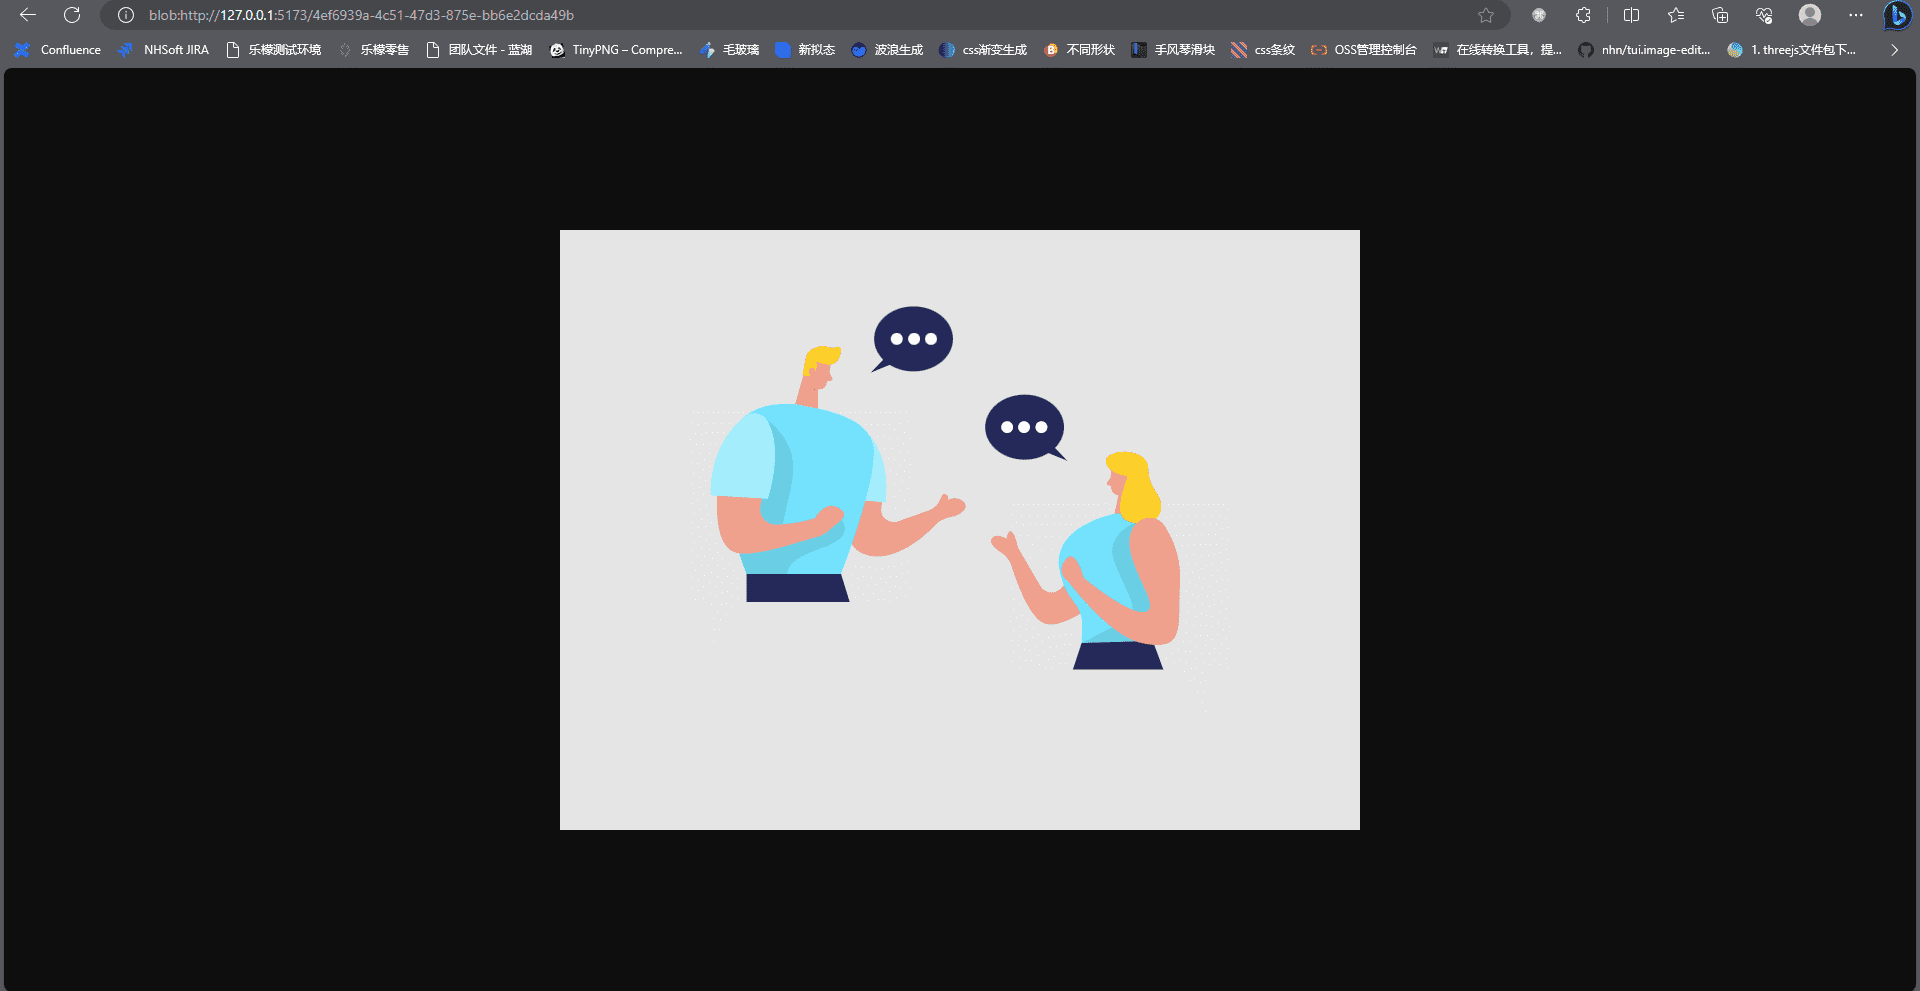
当然,这里我还定义了一个方法insertUrl,你可以通过提前上传图片得到oss地址等方式传入
传入图片url
子组件定义这个方法,并且导出,父组件进行调用,和上面的insertFile一样,这里就不过多阐述了
1
2
3
4
5
6
7
| const insertUrl=(url:string,type:'img'|'file'|'aov'='img')=>{
console.log(url,type)
}
defineExpose({
insertUrl
})
|
插入光标
这里我们需要插入光标,不然图片会插入到最后,我们需要插入到光标处,这里使用的核心逻辑是通过window.getSelection()获取到光标对象,然后通过getRangeAt(0)获取到光标对象的range,然后通过range.insertNode()插入到光标处
参考文档:
- https://developer.mozilla.org/zh-CN/docs/Web/API/Window/getSelection
- https://developer.mozilla.org/zh-CN/docs/Web/API/Selection/getRangeAt
注:
- editorKey是div的id
1
2
3
4
5
6
7
8
9
10
11
12
13
14
15
16
17
18
19
20
21
22
23
24
25
26
27
28
29
30
31
32
33
34
35
36
37
38
39
40
41
42
43
44
45
46
47
48
49
50
51
52
53
54
55
56
57
58
59
60
61
62
63
64
65
66
| export const useInput = ({
editorKey,
}: {
editorKey: string;
}) => {
const keepCursorEnd = (isReturn: boolean) => {
const curEditor = document.getElementById(editorKey);
if (window.getSelection && curEditor) {
curEditor.focus();
const sel = window.getSelection();
if(sel){
sel.selectAllChildren(curEditor);
sel.collapseToEnd();
}
if (isReturn) return sel;
}
};
const insertContent = (html: string) => {
let sel, range;
const curEditor = document.getElementById(editorKey);
if (window.getSelection && curEditor) {
sel = window.getSelection();
if (sel && sel.rangeCount) range = sel.getRangeAt(0);
if (!range) {
range = keepCursorEnd(true)?.getRangeAt(0);
} else {
const contentRange = document.createRange();
contentRange.selectNode(curEditor);
const compareStart = range?.compareBoundaryPoints(
Range.START_TO_START,
contentRange
);
const compareEnd = range?.compareBoundaryPoints(
Range.END_TO_END,
contentRange
);
const compare = compareStart !== -1 && compareEnd !== 1;
if (!compare) range = keepCursorEnd(true)?.getRangeAt(0);
}
const inputRange=range as Range
const inputSel=sel as Selection
const input = inputRange.createContextualFragment(html);
const lastNode = input.lastChild;
inputRange.insertNode(input);
if (lastNode) {
range = inputRange.cloneRange();
range.setStartAfter(lastNode);
range.collapse(true);
inputSel.removeAllRanges();
inputSel.addRange(range);
}
}
};
return {
insertContent,
};
};
|
测试插入一段html
修改下我们的组件,在这里我把图片直接插入进去
1
2
3
4
5
6
7
8
9
10
11
12
13
14
15
16
17
18
19
20
21
22
23
24
25
26
27
28
29
30
31
32
33
34
35
36
37
38
39
40
41
42
43
44
45
46
47
48
49
50
51
52
53
54
55
56
57
| <template>
<div contenteditable :style="{...cusStyle}" class="chat-input-next" placeholder="请输入内容" id="chat-input-next-editor">
</div>
</template>
<script lang="ts">
export default {
name: "ChatInputNext",
};
</script>
<script lang="ts" setup>
import { CSSProperties,withDefaults,defineExpose } from 'vue';
import { useInput } from "../hooks/useInput";
type InlineStyles = Partial<CSSProperties>;
withDefaults(defineProps<{
cusStyle?:InlineStyles
}>(),{
});
const insertFile=(file:File)=>{
const URL = window.URL || window.webkitURL;
const url = URL.createObjectURL(file);
console.log(url)
insertContent(`<img src="${url}" alt=""/>`)
}
const insertUrl=(url:string,type:'img'|'file'|'aov'='img')=>{
console.log(url,type)
}
const {insertContent} =useInput({
editorKey: "chat-input-next-editor",
})
defineExpose({
insertFile,
insertUrl
})
</script>
<style scoped>
.chat-input-next{
  width:500px;
  height:200px;
  padding:5px;
}
[contenteditable]:empty:before {
content: attr(placeholder);
color: #ccc;
}
[contenteditable] {
outline: 0px solid transparent;
}
</style>
|
此时我们可以看到我们的图片已经可以正常插入了,只是大小有点问题,我们需要调整下
定义insertImage
这里我们定义一个InsertImage方法,用来插入图片,使用imgMap来存储图片的file对象,这样我们就可以在最后提交的时候,拿到所有的图片file对象,然后将insertImage方法暴露出去
1
2
3
4
5
6
7
8
9
10
11
12
13
14
15
16
17
18
19
20
21
22
23
24
25
26
27
28
29
30
31
32
33
34
35
36
37
38
39
| const imgMap=ref({} as {[key:string]:File})
const insertImage = (url: string, file: File) => {
const img = new Image();
const imgSrc = url;
const imgElement = document.createElement("img") as any;
imgElement.src = imgSrc;
const reader = new FileReader();
reader.onload = function (event: any) {
img.onload = () => {
let originWidth = img.width;
let originHeight = img.height;
let orginScale = originWidth / originHeight;
imgElement.width = null;
imgElement.height = null;
while (originWidth > 200) {
originWidth = originWidth - 30;
originHeight = originWidth / orginScale;
}
while (originHeight > 200) {
originHeight = originHeight - 30;
originWidth = originHeight * orginScale;
}
imgElement.width = originWidth;
imgElement.height = originHeight;
imgElement.style.margin = "0 5px";
imgMap.value[imgSrc] = file;
insertContent(imgElement.outerHTML);
};
img.src = event.target.result;
};
reader.readAsDataURL(file);
};
return {
insertContent,
insertImage
};
|
调用
此时在组件里面调用
1
2
3
4
5
6
| const insertFile=(file:File)=>{
const URL = window.URL || window.webkitURL;
const url = URL.createObjectURL(file);
console.log(url)
insertImage(url,file)
}
|
这时候我们就可以看到图片已经可以正常插入了
插入文件和视频
其实实现这个也很简单,我们只需要将文件和视频也变成图片就好了,这里我用到了dom-to-image
安装dom-to-image
安装完之后有类型报错,随便搞一下,新建个types文件夹,新建domToImage.d.ts文件
1
2
3
4
5
| declare module 'dom-to-image'{
export default {
toSvg: any,
};
}
|
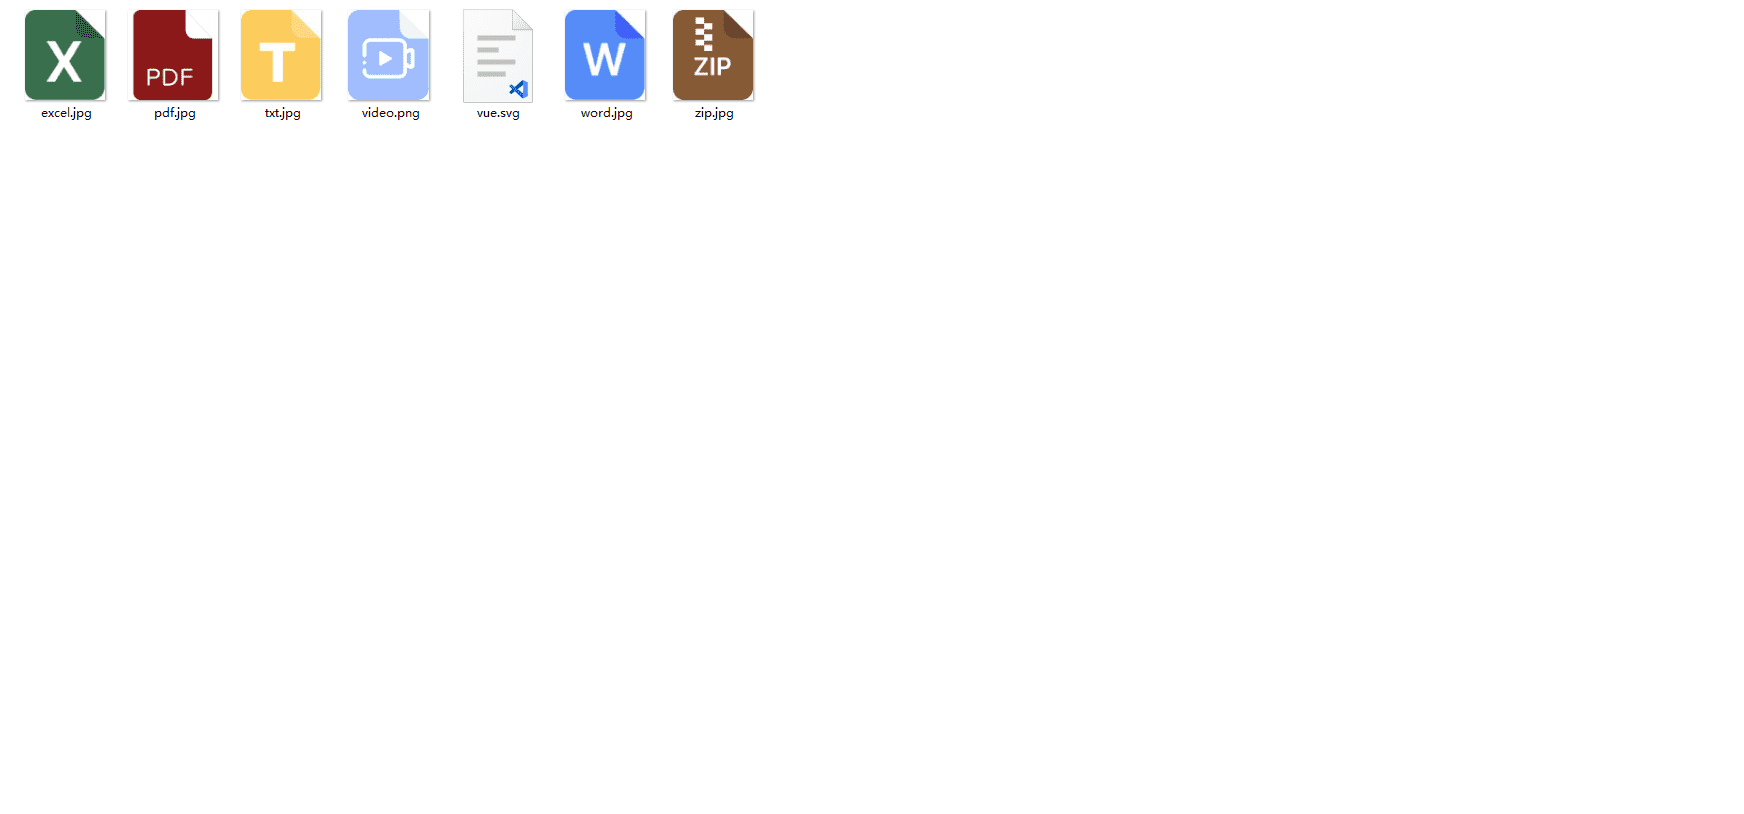
这里我不同的文件用不同的代表图片展示
定义hooks中的insertFile
这里我搞了一个img参数,这个是封面图,就是需要我从对应文件对应的封面图,isAov是一个标识,用来区分是文件还是视频
1
2
3
4
5
6
7
8
9
10
11
12
13
14
15
16
17
18
19
20
21
22
23
24
25
26
27
28
29
30
31
32
33
34
35
36
37
38
39
40
41
42
| import domtoimage from "dom-to-image";
const fileImageMap=ref({} as {[key:string]:File})
const insertFile = (img: string, file: File, isAov = false) => {
const fileElement = document.createElement("div") as any;
const random = Math.floor(Math.random() * 0xffffff).toString();
fileElement.id = random;
fileElement.setAttribute(
"style",
"display:flex;flex-direction:column;width:72px;height:100px;align-items:center;justify-content:end;"
);
fileElement.innerHTML = `
<img src=${img} style="width: 46px;height: 52px;margin-bottom:6px"/>
<div style="font-size:12px;width:72px;color:#7795C2;word-break:keep-all;white-space:nowrap;overflow:hidden;text-overflow:ellipsis; text-align:center">
${file.name}
</div>
`;
const appDom = document.querySelector("#app") as any;
appDom.appendChild(fileElement);
const cacheFile = file;
domtoimage
.toSvg(document.getElementById(random) as any, {})
.then(function (dataUrl: string) {
const imgElement = document.createElement("img") as any;
imgElement.src = dataUrl;
imgElement.width = 72;
imgElement.height = 100;
imgElement.style.margin = "0 5px";
imgElement.id = random;
if (isAov) {
imgElement.setAttribute("type", "aov");
}
fileImageMap.value[random] = cacheFile;
insertContent(imgElement.outerHTML);
appDom.removeChild(fileElement);
})
.catch(function () {
console.log("文件转化失败");
});
};
|
新建utils文件夹下的data.ts
配置@使用
- 为了使用@,我们安装依赖@types/node
- 然后修改vite.config.ts
1
2
3
4
5
6
7
8
9
10
11
12
13
14
15
| import { defineConfig } from 'vite'
import vue from '@vitejs/plugin-vue'
import { join } from "path";
const resolve = (path: string) => join(__dirname, path);
export default defineConfig({
plugins: [vue()],
resolve: {
alias: {
"@": resolve("src"),
},
},
})
|
- tsconfig.json添加
1
2
3
| "paths": {
"@/*": ["src/*"]
}
|
data.ts
1
2
3
4
5
6
7
8
9
10
11
12
13
14
15
16
|
export const acceptList:string[]=[
".jpg,.jpeg,.png,.gif,.bmp,.JPG,.JPEG,.PBG,.GIF",
".doc,.docx,.zip,.txt,.xls,.xlsx,.csv,.md,.rar,.7z,.pdf",
".mp4, .flv, .avi, .mov, .wmv"
]
export const showFileImageList:string[] = [
new URL("@/assets/word.jpg", import.meta.url).href,
new URL("@/assets/excel.jpg", import.meta.url).href,
new URL("@/assets/zip.jpg", import.meta.url).href,
new URL("@/assets/txt.jpg", import.meta.url).href,
new URL("@/assets/pdf.jpg", import.meta.url).href,
new URL("@/assets/video.png", import.meta.url).href,
];
|
修改组件中的insertFile
1
2
3
4
5
6
7
8
9
10
11
12
13
14
15
16
17
18
19
20
21
22
23
24
25
26
27
28
29
30
31
32
33
34
35
36
37
38
39
40
41
42
| import { useInput } from "@/hooks/useInput";
import {acceptList,showFileImageList} from "@/utils/data"
const emits=defineEmits(['error'])
const insertFile=(file:File)=>{
const URL = window.URL || window.webkitURL;
const url = URL.createObjectURL(file);
if(file.type.includes("image")){
insertImage(url,file)
}
else{
const fileSuffix = file.name.substring(file.name.lastIndexOf("."));
if (acceptList[1].includes(fileSuffix.toLowerCase())) {
const fileType = [
[".doc", ".docx"],
[".xlsx", ".xls", ".csv"],
[".zip", ".rar", ".7z"],
[".txt", ".md"],
[".pdf"],
];
const index = fileType.findIndex((item) =>
item.includes(fileSuffix.toLowerCase())
);
if (~index) {
const img = showFileImageList[index];
insertFiles(img,file)
} else {
emits("error", "暂不支持该文件类型进行该操作")
}
}
if (acceptList[2].includes(fileSuffix.toLowerCase())) {
const img = showFileImageList[5];
insertFiles(img,file,true)
}
}
}
const {insertImage,insertFile:insertFiles} =useInput({
editorKey: "chat-input-next-editor",
})
|
此时,我们已经实现了基础的富文本编辑器的效果
实现内容粘贴
接下来我讲解下内容的粘贴如何实现
文字的复制自然不用动,接下来我们只需要监听下触发了粘贴事件,然后进行对应的处理即可
监听粘贴事件
1
2
3
4
5
| <template>
<div contenteditable :style="{...cusStyle}" class="chat-input-next" placeholder="请输入内容" id="chat-input-next-editor" @paste="handleParse">
</div>
</template>
|
处理监听事件
这里我使用e.preventDefault()组织默认粘贴事件,然后进行判断,如果是普通文字就照常插入,使用document.execCommand(“insertText”, false, result);如果是文件类型,进行一层简单的文件大小判断就执行插入事件即可
1
2
3
4
5
6
7
8
9
10
11
12
13
14
15
16
17
18
19
20
21
22
23
24
25
26
27
28
29
30
31
32
33
34
35
36
37
38
39
40
41
42
43
44
|
const handleParse = async (e: any) => {
e.preventDefault();
try{
const result = (await onPaste(e)) as string;
if (result) {
document.execCommand("insertText", false, result);
}
}catch(err){
emits("error",err)
}
};
const onPaste = (e: any) => {
if (!(e.clipboardData && e.clipboardData.items)) {
return;
}
return new Promise((resolve, reject) => {
for (let i = 0, len = e.clipboardData.items.length; i < len; i++) {
const item = e.clipboardData.items[i];
if (item.kind === "string") {
item.getAsString((str: string) => {
resolve(str);
});
} else if (item.kind === "file") {
handleFileAndImageInsert(item);
} else {
reject(new Error("不允许复制这种类型!"));
}
}
});
};
const handleFileAndImageInsert = (item: any) => {
const file = item.getAsFile();
const isLt8M = file.size / 1024 / 1024 < 8;
if (!isLt8M) {
emits("error",'文件不能大于8M')
return;
}
insertFile(file)
};
|
实现内容拖拽
组件监听
1
2
3
4
5
6
7
8
9
10
11
12
| <template>
<div
contenteditable
:style="{...cusStyle}"
class="chat-input-next"
placeholder="请输入内容"
id="chat-input-next-editor"
@paste="handleParse"
:ondragover="handleAllowDrop"
:ondrop="handleDrop">
</div>
</template>
|
监听方法
1
2
3
4
5
6
7
8
9
10
11
12
13
14
15
16
17
18
19
20
21
22
23
24
|
const handleAllowDrop = (e: Event) => {
e.preventDefault();
};
const handleDrop = (e: any) => {
e.preventDefault();
const copyItems = e.dataTransfer.items;
for (let i = 0; i < copyItems.length; i++) {
if (copyItems[i].kind === "string") {
if (e.dataTransfer.effectAllowed === "copy") {
copyItems[i].getAsString((str: string) => {
insertContent(str);
});
}
}
if (copyItems[i].kind === "file") {
handleFileAndImageInsert(copyItems[i]);
}
}
};
|
小调整1
将placeholder通过props来传递,将error事件在父组件使用,这个不多讲解了
实现@人的逻辑
完成基础样式
简单绘制at.popover.vue
src/components目录下新建一个at.popover.vue组件
1
2
3
4
5
6
7
8
9
10
11
12
13
14
15
16
17
18
19
20
21
22
23
24
25
26
27
28
29
30
31
32
33
34
35
36
37
38
39
40
41
42
43
44
45
46
47
48
| <template>
<div class="at-popover" v-if="visible">
<div class="at-popover-content">
<ul>
<li class="at-popover-line active">codesigner</li>
<li class="at-popover-line">react</li>
<li class="at-popover-line">vue</li>
<li class="at-popover-line">webgl</li>
<li class="at-popover-line">gis</li>
</ul>
</div>
</div>
</template>
<script setup lang="ts">
import { withDefaults } from 'vue';
withDefaults(defineProps<{
visible:boolean
}>(),{
visible:false
});
</script>
<style scoped>
.at-popover {
display: block; /* 默认隐藏 */
position: absolute;
background-color: #fff;
border: 1px solid #ccc;
border-radius: 5px;
box-shadow: 0 2px 5px rgba(0, 0, 0, 0.3);
top:-155px;
left:0;
}
.at-popover-line{
display: flex;
align-items: center;
cursor: pointer;
padding: 5px 10px;
}
.at-popover-line:hover{
background-color: #f1f1f1;
}
.active{
background-color: #f1f1f1;
}
</style>
|
1
2
3
4
5
6
7
8
9
10
11
12
13
14
15
16
17
18
19
20
21
22
23
24
25
26
27
28
29
30
| <template>
<div class="chat-input-next-wrap">
<div
contenteditable
:style="{...cusStyle}"
class="chat-input-next"
:placeholder="placeholder"
id="chat-input-next-editor"
@paste="handleParse"
:ondragover="handleAllowDrop"
:ondrop="handleDrop">
</div>
<at-popover
ref="atPopoverRef"
:visible="atPopoverVisible"
/>
</div>
</template>
<script setup lang='ts'>
import atPopover from './at-popover.vue';
// @功能
// @列表是否显示
const atPopoverVisible = ref(true);
</script>
<style scoped>
.chat-input-next-wrap{
position: relative;
box-sizing: border-box;
}
</style>
|
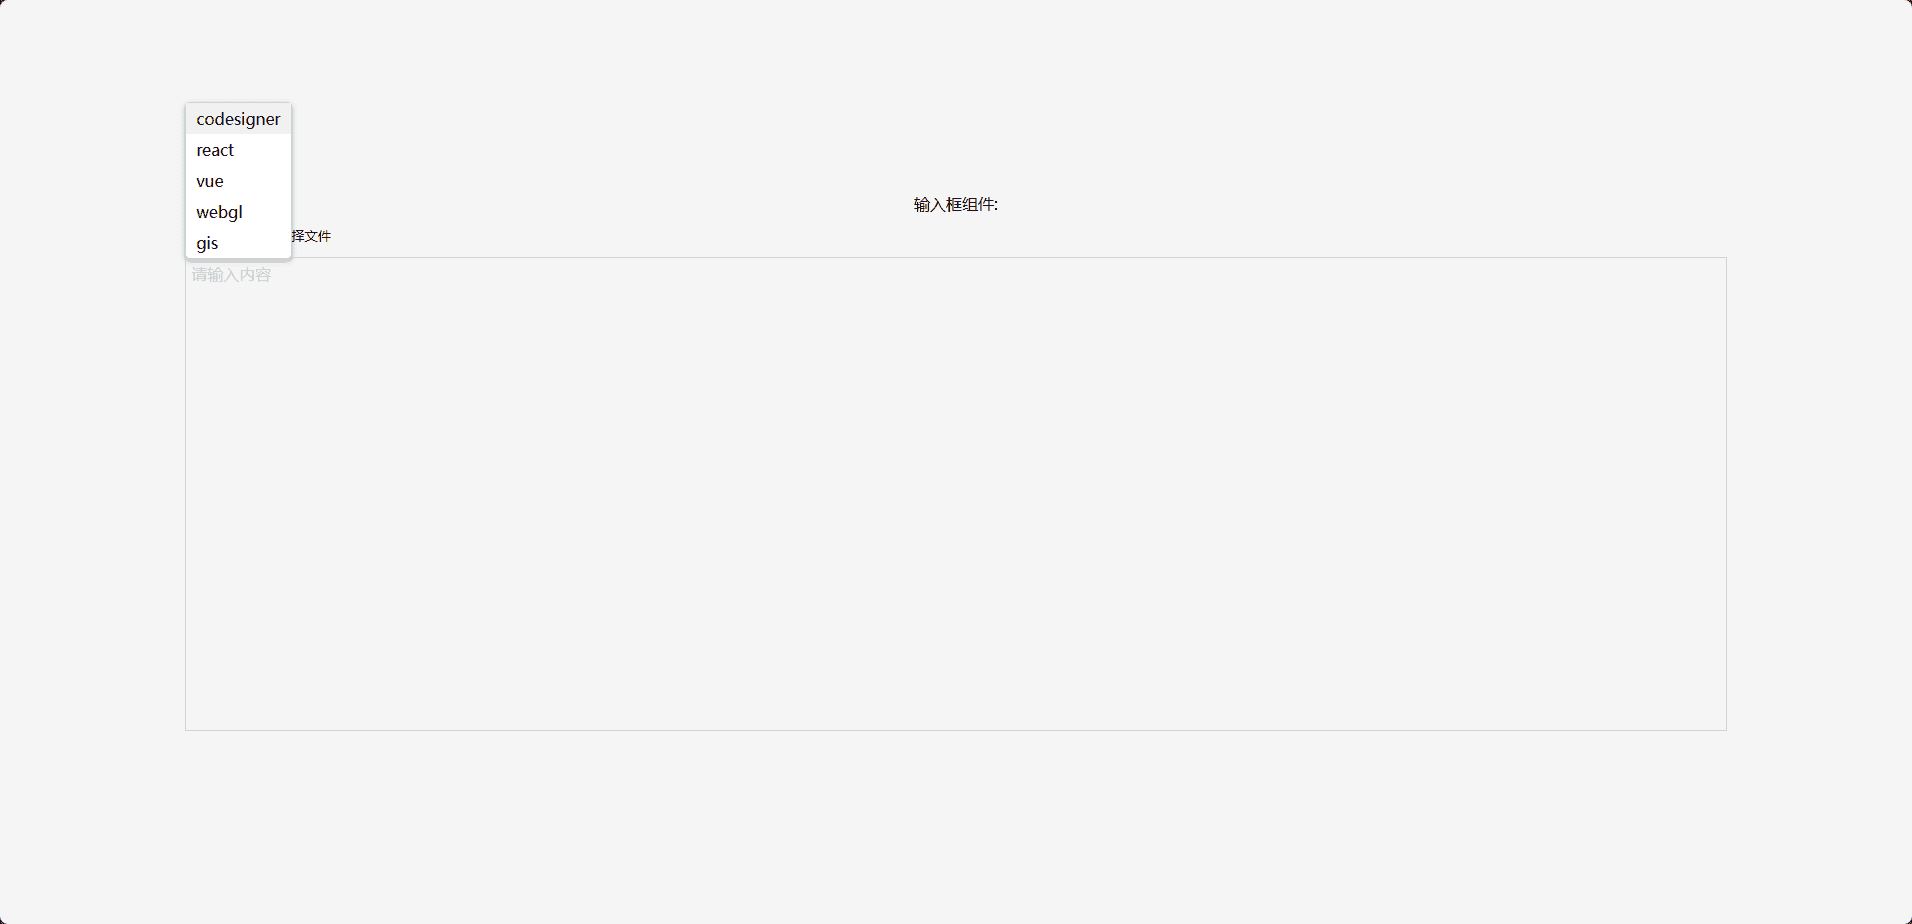
完善@功能
点击弹出列表进行内容选中点击其他地方隐藏列表
- 在popver组件中添加点击事件
我顺便将代码优化了一下,点击通过confirm传给父组件方法执行1
2
3
4
5
6
7
8
9
10
11
12
13
14
15
16
17
18
19
20
21
22
23
24
25
26
27
28
29
30
31
32
33
34
35
36
37
38
39
40
41
42
43
44
45
46
47
48
49
50
51
52
53
54
55
56
57
58
59
60
61
62
63
64
65
66
67
68
69
| <template>
<div class="at-popover" v-if="visible" id="at-popover">
<div class="at-popover-content">
<ul>
<li v-for="(item,index) in atPopoverList" :key="index" class="at-popover-line" :class="{active:index===activeLine}" @click="handleSelect(item.name)">{{item.name}}</li>
</ul>
</div>
</div>
</template>
<script setup lang="ts">
import { withDefaults,ref } from 'vue';
withDefaults(defineProps<{
visible:boolean
}>(),{
visible:false
});
// @列表
const atPopoverList = ref([{
name: 'codesigner',
},
{
name: 'react',
},
{
name: 'vue',
},
{
name: 'webgl',
},
{
name: 'gis',
}]);
// 当前选中@
const activeLine=ref(0);
// 父组件确定方法
const emits=defineEmits(['confirm'])
// 选中的人
const handleSelect=(name:string)=>{
emits("confirm",name)
}
</script>
<style scoped>
.at-popover {
display: block; /* 默认隐藏 */
position: absolute;
background-color: #fff;
border: 1px solid #ccc;
border-radius: 5px;
box-shadow: 0 2px 5px rgba(0, 0, 0, 0.3);
top:-155px;
left:0;
}
.at-popover-line{
display: flex;
align-items: center;
cursor: pointer;
padding: 5px 10px;
}
.at-popover-line:hover{
background-color: #f1f1f1;
}
.active{
background-color: #f1f1f1;
}
</style>
|
- 在input组件中添加事件
input组件接受@confirm触发handleAtConfirm并且添加点击外部popver隐藏的逻辑1
2
3
4
5
6
7
8
9
10
11
12
13
14
15
16
17
18
19
20
21
22
23
|
const handlePopoverClick=(e:Event)=>{
const target = e.target as HTMLElement;
const isSelf = document.getElementById('at-popover')?.contains(target);
if(!isSelf){
atPopoverVisible.value=false
}
}
watch(()=>atPopoverVisible.value,(newVal)=>{
if(newVal){
document.addEventListener('click',handlePopoverClick)
}
else{
document.removeEventListener('click',handlePopoverClick)
}
},{immediate:true})
const handleAtConfirm=(name:string)=>{
alert(name)
atPopoverVisible.value=false
}
|
实现键盘方向键切换popver列表选中内容
在popver组件中添加,下键就往下,如果是最后一个就不要动,上键就往上,如果是第一个就不要动,回车键就选中
1
2
3
4
5
6
7
8
9
10
11
12
13
14
15
16
17
18
19
20
21
22
23
24
25
26
27
28
29
|
const handleKeyUp = (e:KeyboardEvent) => {
if (props.visible) {
if (e.keyCode === 40) {
activeLine.value=Math.min(activeLine.value+1,atPopoverList.value.length-1)
}
else if (e.keyCode === 38) {
activeLine.value=Math.max(activeLine.value-1,0)
}
else if (e.keyCode === 13) {
handleSelect(atPopoverList.value[activeLine.value].name)
}
}
};
watch(()=>props.visible,(newVal)=>{
if(newVal){
activeLine.value=0;
document.addEventListener("keyup", handleKeyUp);
}
else{
document.removeEventListener("keyup", handleKeyUp);
}
},{
immediate:true
})
|
实现键盘方向键切换popver列表选中内容滚动优化
虽然上面我们解决了上下切换选中内容的问题,但是如果我们的@列表很长,就会出现问题
我们先增加列表长度
1
2
3
4
5
6
7
8
9
10
11
12
13
14
15
16
17
18
19
20
21
22
|
const atPopoverList = ref([{
name: 'codesigner',
},
{
name: 'react',
},
{
name: 'vue',
},
{
name: 'webgl',
},
{
name: 'gis',
},{
name:'cesium'
},{
name:'three'
},{
name:'cannon-es'
}]);
|
然后调整下样式
1
2
3
4
5
6
7
8
| .at-popover-content{
max-height: 200px;
overflow: auto;
}
.at-popover-content::-webkit-scrollbar {
display: none;
}
|
效果
这里我们可以清楚看到我们的滚动并没有跟随我们的下键将内容挤下去,这里我们需要做下优化
优化代码
我这里根据每一行的高度和容器的高度,来判断是否需要滚动,设置scrollTop
1
2
3
4
5
6
7
8
9
10
11
12
13
14
15
16
17
18
19
20
21
22
23
24
25
26
27
28
29
30
31
32
33
34
35
36
37
38
39
40
41
42
43
44
|
const atPopoverContent=ref<HTMLElement|null>(null)
const atPopoverContentHeight=computed(()=>{
return atPopoverContent.value?.clientHeight||0
})
const atPopoverLineHeight=computed(()=>{
return document.querySelector(".at-popover-line")?.clientHeight||0
})
const handleKeyScrollContainer=()=>{
const maxShowNum=Math.floor(atPopoverContentHeight.value/atPopoverLineHeight.value)
if(activeLine.value>=maxShowNum-1){
atPopoverContent.value?.scrollTo(0,(activeLine.value-maxShowNum+2)*atPopoverLineHeight.value)
}
else{
atPopoverContent.value?.scrollTo(0,0)
}
}
const handleKeyUp = (e:KeyboardEvent) => {
if (props.visible) {
if (e.keyCode === 40) {
handleKeyScrollContainer()
activeLine.value=Math.min(activeLine.value+1,atPopoverList.value.length-1)
}
else if (e.keyCode === 38) {
handleKeyScrollContainer()
activeLine.value=Math.max(activeLine.value-1,0)
}
else if (e.keyCode === 13) {
handleSelect(atPopoverList.value[activeLine.value].name)
}
}
};
|
设置@列表显示逻辑
小调整
这里先做个小调整,将我们的组件设置个最大高度
1
2
3
4
5
6
7
8
9
10
11
| .chat-input-next{
width:500px;
height:200px;
max-height: 200px;
overflow-y: auto;
padding:5px;
}
.chat-input-next::-webkit-scrollbar {
display: none;
}
|
App.vue中调用的时候样式调整
注意:这里需要设置height和maxHeight相同
1
| <ChatInputNext :cusStyle="{width:'80vw',height:'50vh',border:'1px solid #d3d3d3',maxHeight:'50vh'}" ref="chatInputNext" @error="handleError"></ChatInputNext>
|
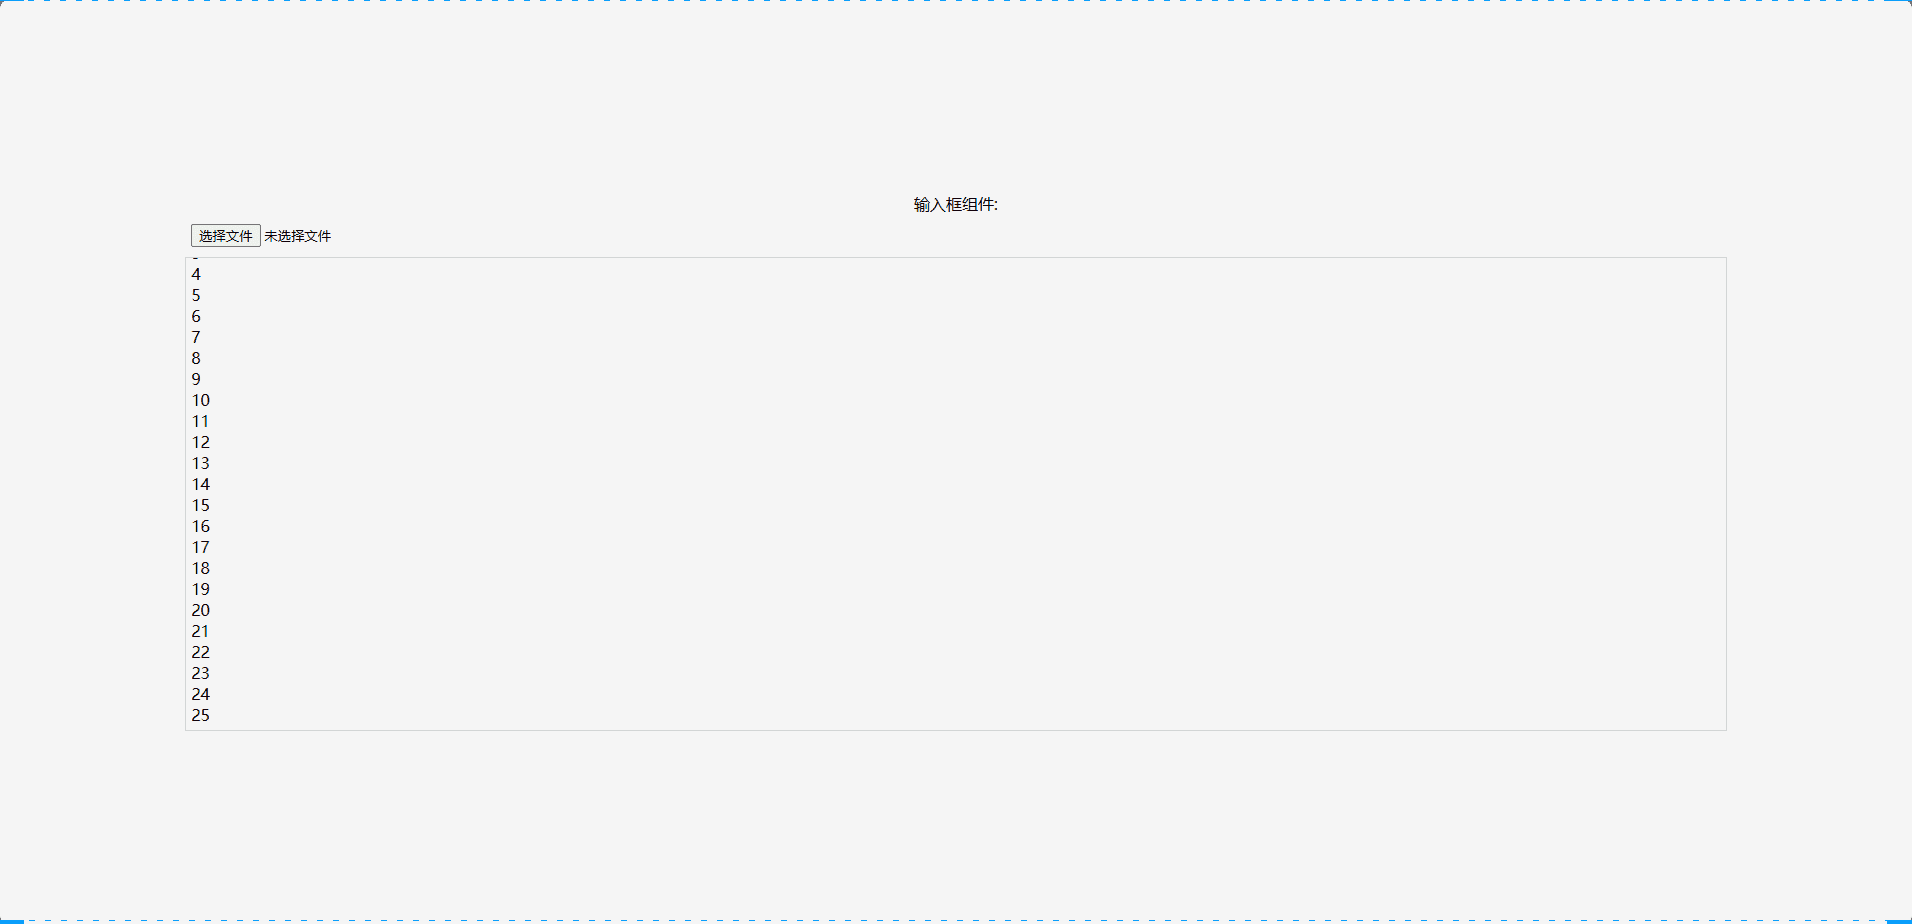
此时我们的显示效果就正常了,光标就不会跑到输入框容器外面去
添加@显示逻辑
安装loadsh和@types/lodash
1
| yarn add loadsh @types/lodash
|
添加input监听事件
html
1
2
3
4
5
6
7
8
9
10
11
12
| <div
contenteditable
:style="{...cusStyle}"
class="chat-input-next"
ref="chatInputNext"
:placeholder="placeholder"
id="chat-input-next-editor"
@paste="handleParse"
@input="handleInput"
:ondragover="handleAllowDrop"
:ondrop="handleDrop">
</div>
|
js方法
1
2
3
4
5
6
7
8
9
10
11
12
13
14
15
16
17
18
19
20
21
| import { throttle } from "lodash";
const chatInputNext=ref<HTMLElement|null>(null)
const keepScrollBottom = throttle(
() => {
const scrollEle=chatInputNext.value
if (scrollEle) {
scrollEle.scrollTop = scrollEle?.scrollHeight;
}
},
200,
{
leading: false,
trailing: true,
}
);
const handleInput=()=>{
keepScrollBottom();
}
|
通过上面这串代码就可以让我们的输入框保持滚动条在最下方了
添加@显示逻辑
在input组件中:
默认值设为false
1
2
|
const atPopoverVisible = ref(false);
|
将输入内容时的@监听,判断是@将弹窗打开
1
2
3
4
5
6
7
8
9
10
11
12
13
14
15
16
17
18
19
20
21
|
const handleInput=(e:Event)=>{
keepScrollBottom();
const inputE=e as InputEvent
if (inputE.data !== null && !inputE.data.trim()) {
atPopoverVisible.value = false;
}
else{
if (
inputE.inputType === "insertText" ||
inputE.inputType === "insertCompositionText"
){
if (inputE.data === "@") {
atPopoverVisible.value=true
}
}
}
}
|
在popover组件当中
修改样式将at-popover设置为fixed
1
2
3
4
5
6
7
8
| .at-popover {
display: block;
position: fixed;
background-color: #fff;
border: 1px solid #ccc;
border-radius: 5px;
box-shadow: 0 2px 5px rgba(0, 0, 0, 0.3);
}
|
监听显示的时候改变positionStyle,并将位置信息传递给popover组件,这里获取到的位置信息时相对于window的,为了更好的显示,y方向需要减去popover的高度
1
2
3
4
5
6
7
8
9
10
11
12
13
14
15
16
17
18
19
20
21
22
23
24
25
26
27
28
29
30
31
32
| watch(()=>props.visible,(newVal)=>{
if(newVal){
activeLine.value=0;
changePosition()
document.addEventListener("keyup", handleKeyUp);
}
else{
document.removeEventListener("keyup", handleKeyUp);
}
},{
immediate:true
})
type InlineStyles = Partial<CSSProperties>;
const positionStyle=ref<InlineStyles>({})
const changePosition = () => {
nextTick(()=>{
if(window&&window.getSelection()){
const sel= window.getSelection() as Selection;
let range = sel.getRangeAt(0);
let position = range.getBoundingClientRect();
const {x,y}=position;
positionStyle.value = {
top: y-atPopoverContentHeight.value + "px",
left: x + "px",
};
}
})
};
|
1
2
3
4
5
6
7
8
9
| <template>
<div class="at-popover" v-if="visible" id="at-popover" :style="{...positionStyle}">
<div class="at-popover-content" ref="atPopoverContent">
<ul>
<li v-for="(item,index) in atPopoverList" :key="index" class="at-popover-line" :class="{active:index===activeLine}" @click="handleSelect(item.name)">{{item.name}}</li>
</ul>
</div>
</div>
</template>
|
此时,我们就将@显示的逻辑给加上了
将@选中的内容放置到输入框
这里只需要修改@的确认事件就可以了
1
2
3
4
5
6
7
8
9
|
const handleAtConfirm=(name:string)=>{
const newAtEle = document.createElement("a");
newAtEle.setAttribute("contenteditable", "false");
newAtEle.setAttribute("style", "user-select: all");
newAtEle.innerText = `@${name} `;
insertContent(newAtEle.outerHTML)
atPopoverVisible.value=false
}
|
这里我们的@添加内容已经新增了,但是还有两个问题,一个是换行了,还有一个是之前的@没有清除
解决回车换行以及清除输入的@符号
解决回车换行
添加监听keydown事件,然后只有回车的时候把换行给阻止,但是不阻止shift+enter的组合
1
2
3
4
5
6
7
8
9
10
11
12
13
14
15
16
17
18
19
20
21
22
| <template>
<div class="chat-input-next-wrap" ref="chatInputNextWrap">
<div
contenteditable
:style="{...cusStyle}"
class="chat-input-next"
ref="chatInputNext"
:placeholder="placeholder"
id="chat-input-next-editor"
@paste="handleParse"
@input="handleInput"
@keydown="handleKeyDown"
:ondragover="handleAllowDrop"
:ondrop="handleDrop">
</div>
<at-popover
ref="atPopoverRef"
:visible="atPopoverVisible"
@confirm="handleAtConfirm"
/>
</div>
</template>
|
1
2
3
4
5
6
|
const handleKeyDown=(e:KeyboardEvent)=>{
if(e.keyCode===13&&!e.shiftKey){
e.preventDefault()
}
}
|
清除输入的@符号
记录下@的字符串并且创建内容时传入这个值
1
2
3
4
5
6
7
8
9
10
11
12
13
14
15
16
17
18
19
20
21
22
23
24
25
26
27
28
29
30
31
32
33
34
35
36
37
38
39
40
41
42
43
44
45
46
47
48
|
const atStr = ref("");
const handleInput=(e:Event)=>{
keepScrollBottom();
const inputE=e as InputEvent
const sel=window.getSelection() as Selection
if (inputE.data !== null && !inputE.data.trim()) {
atPopoverVisible.value = false;
}
else{
const inputEle = e.target as any;
let searchStr = "";
let range = sel.getRangeAt(0);
for (let i = 0; i < inputEle.childNodes.length; i++) {
const curEle = inputEle.childNodes[i];
if (curEle.nodeName === "#text" && curEle.nodeValue.includes("@")) {
const splitArr = curEle.nodeValue
.substring(0, range.endOffset)
.split("@");
searchStr = splitArr[splitArr.length - 1];
}
}
atStr.value = searchStr;
if (
inputE.inputType === "insertText" ||
inputE.inputType === "insertCompositionText"
){
if (inputE.data === "@") {
atPopoverVisible.value=true
}
}
}
}
const handleAtConfirm=(name:string)=>{
const newAtEle = document.createElement("a");
newAtEle.setAttribute("contenteditable", "false");
newAtEle.setAttribute("style", "user-select: all");
newAtEle.innerText = `@${name} `;
insertContent(newAtEle.outerHTML,atStr.value)
atPopoverVisible.value=false
}
|
修改useInput中的insertContent,支持atStr传入,isNil我使用的是loadsh的方法
1
2
3
4
5
6
7
8
9
10
11
12
13
14
15
16
17
18
19
20
21
22
23
24
25
26
27
28
29
30
31
32
33
34
35
36
37
38
39
40
41
|
const insertContent = (html: string|HTMLElement,atStr?:string) => {
let sel, range;
const curEditor = document.getElementById(editorKey);
if (window.getSelection && curEditor) {
sel = window.getSelection();
if (sel && sel.rangeCount) range = sel.getRangeAt(0);
if (!range) {
range = keepCursorEnd(true)?.getRangeAt(0);
} else {
const contentRange = document.createRange();
contentRange.selectNode(curEditor);
const compareStart = range?.compareBoundaryPoints(
Range.START_TO_START,
contentRange
);
const compareEnd = range?.compareBoundaryPoints(
Range.END_TO_END,
contentRange
);
const compare = compareStart !== -1 && compareEnd !== 1;
if (!compare) range = keepCursorEnd(true)?.getRangeAt(0);
}
const inputRange=range as Range
const inputSel=sel as Selection
const input = inputRange.createContextualFragment(html);
const lastNode = input.lastChild;
inputRange.insertNode(input);
if (lastNode) {
range = inputRange.cloneRange();
range.setStartAfter(lastNode);
range.collapse(true);
inputSel.removeAllRanges();
inputSel.addRange(range);
}
!isNil(atStr)&&removeOverrageContent(curEditor, atStr, html);
}
};
|
书写方法removeOverrageContent,判断节点,将节点是@后面跟的内容部分全部替换掉
1
2
3
4
5
6
7
8
9
10
11
12
13
14
15
16
17
18
19
20
21
22
23
24
|
const removeOverrageContent = (
editor: HTMLElement,
atStr: string,
atNode: HTMLElement
) => {
const childLen = editor.childNodes.length || 0;
for (let i = 0; i < childLen; i++) {
const curEle = editor.childNodes[i];
if (curEle && curEle.nodeName !== "#text") {
const curOuterHTML = curEle.outerHTML;
if (curOuterHTML === atNode) {
const preEle = editor.childNodes[i - 1];
if (preEle && preEle.nodeName === "#text") {
const preEleText = preEle.textContent;
const re = new RegExp(`(.*)@${atStr}`);
preEle.textContent = preEleText.replace(re, "$1");
}
}
}
}
};
|
添加@列表搜索功能
接下来我们给@列表添加一个搜索功能
这段我改动比较大,我就不一一贴代码了,直接全贴,然后讲解下我改了啥
安装依赖
首先安装下pinyin-engine用来判断搜索字符
然后自己定义一下类型
1
2
3
| declare module "pinyin-engine"{
export default Class
}
|
App.vue
这里改动不大,我将list单独提出来了
1
2
3
4
5
6
7
8
9
10
11
12
13
14
15
16
17
18
19
20
21
22
23
24
25
26
27
28
29
30
31
32
33
34
35
36
37
38
39
40
41
42
43
44
45
46
47
48
49
50
51
52
53
54
55
56
57
58
59
60
61
62
63
64
65
66
67
68
| <script setup lang="ts">
import {ref} from "vue"
import ChatInputNext from './components/chat-input-next.vue'
const chatInputNext=ref()
const handleFileChange = (e:Event)=>{
const target=e.target as HTMLInputElement
if(target.files&&target.files.length>0){
const file=target.files[0]
chatInputNext.value&&chatInputNext.value.insertFile(file)
}
}
const handleError=(msg:string)=>{
console.log(msg)
}
// @列表
const atPopoverList = ref([{
name: 'codesigner',
},
{
name: 'react',
},
{
name: 'vue',
},
{
name: 'webgl',
},
{
name: 'gis',
},{
name:'cesium'
},{
name:'three'
},{
name:'cannon-es'
}]);
</script>
<template>
<div class="chat-input-next-container">
输入框组件:
<div class="op-line">
<input type="file" @change="handleFileChange">
</div>
<ChatInputNext :cusStyle="{width:'80vw',height:'50vh',border:'1px solid #d3d3d3',maxHeight:'50vh'}" ref="chatInputNext" @error="handleError" :atUserList="atPopoverList"></ChatInputNext>
</div>
</template>
<style scoped>
.chat-input-next-container{
display: flex;
flex-direction: column;
justify-content: center;
align-items: center;
gap:10px;
width: 100vw;
height: 100vh;
background-color: #f5f5f5;
}
.op-line{
display: flex;
flex-direction: row;
align-items: center;
gap:10px;
width:80vw
}
</style>
|
类型定义
我将类型定义提取了出来
1
2
3
4
5
6
7
| import { CSSProperties } from 'vue';
export type InlineStyles = Partial<CSSProperties>;
export type AtEachMember ={
name: string;
id?: string;
avatar?: string;
};
|
这里我引入了PinyinEngine进行查询使用,然后将不同的值传给@的组件
1
2
3
4
5
6
7
8
9
10
11
12
13
14
15
16
17
18
19
20
21
22
23
24
25
26
27
28
29
30
31
32
33
34
35
36
37
38
39
40
41
42
43
44
45
46
47
48
49
50
51
52
53
54
55
56
57
58
59
60
61
62
63
64
65
66
67
68
69
70
71
72
73
74
75
76
77
78
79
80
81
82
83
84
85
86
87
88
89
90
91
92
93
94
95
96
97
98
99
100
101
102
103
104
105
106
107
108
109
110
111
112
113
114
115
116
117
118
119
120
121
122
123
124
125
126
127
128
129
130
131
132
133
134
135
136
137
138
139
140
141
142
143
144
145
146
147
148
149
150
151
152
153
154
155
156
157
158
159
160
161
162
163
164
165
166
167
168
169
170
171
172
173
174
175
176
177
178
179
180
181
182
183
184
185
186
187
188
189
190
191
192
193
194
195
196
197
198
199
200
201
202
203
204
205
206
207
208
209
210
211
212
213
214
215
216
217
218
219
220
221
222
223
224
225
226
227
228
229
230
231
232
233
234
235
236
237
238
239
240
241
242
243
244
245
246
247
248
249
250
251
252
253
254
255
256
257
258
259
260
261
262
263
264
265
266
267
268
269
270
271
272
273
274
275
276
277
278
279
280
281
282
283
284
285
286
287
288
289
290
291
292
293
294
295
296
297
298
299
300
301
302
303
304
305
| <template>
<div class="chat-input-next-wrap" ref="chatInputNextWrap">
<div
contenteditable
:style="{...cusStyle}"
class="chat-input-next"
ref="chatInputNext"
:placeholder="placeholder"
id="chat-input-next-editor"
@paste="handleParse"
@input="handleInput"
@keydown="handleKeyDown"
:ondragover="handleAllowDrop"
:ondrop="handleDrop">
</div>
<at-popover
v-if="!isEmpty(atUserList)"
ref="atPopoverRef"
:visible="atPopoverVisible"
@confirm="handleAtConfirm"
:list="atStr?searchAtList:atUserList"
/>
</div>
</template>
<script lang="ts">
export default {
name: "ChatInputNext",
};
</script>
<script lang="ts" setup>
import { withDefaults,defineExpose,defineEmits,ref,watch } from 'vue';
import { useInput } from "@/hooks/useInput";
import {acceptList,showFileImageList} from "@/utils/data"
import { throttle,isEmpty } from "lodash";
import PinyinEngine from "pinyin-engine";
import atPopover from './at-popover.vue';
import type {InlineStyles,AtEachMember} from "./types/index"
const props=withDefaults(defineProps<{
cusStyle?:InlineStyles
placeholder?:string
atUserList?:Array<AtEachMember>
}>(),{
placeholder:"请输入内容",
atUserList:()=>[]
});
const emits=defineEmits(['error'])
// 插入文件
const insertFile=(file:File)=>{
const URL = window.URL || window.webkitURL;
const url = URL.createObjectURL(file);
if(file.type.includes("image")){
insertImage(url,file)
}
else{
const fileSuffix = file.name.substring(file.name.lastIndexOf("."));
if (acceptList[1].includes(fileSuffix.toLowerCase())) {
const fileType = [
[".doc", ".docx"],
[".xlsx", ".xls", ".csv"],
[".zip", ".rar", ".7z"],
[".txt", ".md"],
[".pdf"],
];
const index = fileType.findIndex((item) =>
item.includes(fileSuffix.toLowerCase())
);
if (~index) {
const img = showFileImageList[index];
insertFiles(img,file)
} else {
emits("error", "暂不支持该文件类型进行该操作")
}
}
// 视频文件
if (acceptList[2].includes(fileSuffix.toLowerCase())) {
const img = showFileImageList[5];
insertFiles(img,file,true)
}
}
}
// 插入文件地址
const insertUrl=(url:string,type:'img'|'file'|'aov'='img')=>{
console.log(url,type)
}
// 处理粘贴
const handleParse = async (e: Event) => {
e.preventDefault();
try{
const result = (await onPaste(e)) as string;
if (result) {
document.execCommand("insertText", false, result);
}
}catch(err){
emits("error",err)
}
};
// 粘贴
const onPaste = (e: any) => {
if (!(e.clipboardData && e.clipboardData.items)) {
return;
}
return new Promise((resolve, reject) => {
for (let i = 0, len = e.clipboardData.items.length; i < len; i++) {
const item = e.clipboardData.items[i];
if (item.kind === "string") {
item.getAsString((str: string) => {
resolve(str);
});
} else if (item.kind === "file") {
handleFileAndImageInsert(item);
} else {
reject(new Error("不允许复制这种类型!"));
}
}
});
};
// 处理图片和文件在input框中的显示逻辑
const handleFileAndImageInsert = (item: any) => {
const file = item.getAsFile();
const isLt8M = file.size / 1024 / 1024 < 8;
if (!isLt8M) {
emits("error",'文件不能大于8M')
return;
}
insertFile(file)
};
// 阻止默认事件
const handleAllowDrop = (e: Event) => {
e.preventDefault();
};
// 放置
const handleDrop = (e: any) => {
e.preventDefault();
const copyItems = e.dataTransfer.items;
for (let i = 0; i < copyItems.length; i++) {
// 字符串
if (copyItems[i].kind === "string") {
if (e.dataTransfer.effectAllowed === "copy") {
copyItems[i].getAsString((str: string) => {
insertContent(str);
});
}
}
// 文件
if (copyItems[i].kind === "file") {
handleFileAndImageInsert(copyItems[i]);
}
}
};
const {insertImage,insertFile:insertFiles,insertContent} =useInput({
editorKey: "chat-input-next-editor",
})
// @功能
// @列表是否显示
const atPopoverVisible = ref(false);
// popver的ref
const atPopoverRef=ref<any>(null)
// 点击popver外部隐藏
const handlePopoverClick=(e:Event)=>{
const target = e.target as HTMLElement;
const isSelf = document.getElementById('at-popover')?.contains(target);
if(!isSelf){
atPopoverVisible.value=false
}
}
// 监听@列表显示时的点击事件
watch(()=>atPopoverVisible.value,(newVal)=>{
if(newVal){
document.addEventListener('click',handlePopoverClick)
}
else{
document.removeEventListener('click',handlePopoverClick)
}
},{immediate:true})
// 去除默认事件
const handleKeyDown=(e:KeyboardEvent)=>{
if(e.keyCode===13&&!e.shiftKey){
e.preventDefault()
}
}
// 处理@确定事件
const handleAtConfirm=(name:string)=>{
const newAtEle = document.createElement("a");
newAtEle.setAttribute("contenteditable", "false");
newAtEle.setAttribute("style", "user-select: all");
newAtEle.innerText = `@${name} `;
insertContent(newAtEle.outerHTML,atStr.value)
atPopoverVisible.value=false
}
const chatInputNext=ref<HTMLElement|null>(null)
// 保持输入框滚动条在最下方
const keepScrollBottom = throttle(
() => {
const scrollEle=chatInputNext.value
if (scrollEle) {
scrollEle.scrollTop = scrollEle?.scrollHeight;
}
},
200,
{
leading: false,
trailing: true,
}
);
// @的字符串
const atStr = ref("");
// 搜索出来的@列表
const searchAtList = ref<Array<AtEachMember>>([]);
// 处理input事件
const handleInput=(e:Event)=>{
// 保持输入框滚动条在最底部
keepScrollBottom();
const inputE=e as InputEvent
const sel=window.getSelection() as Selection
// 如果没有内容则隐藏@列表
if (inputE.data !== null && !inputE.data.trim()) {
atPopoverVisible.value = false;
}
else{
const inputEle = e.target as any;
let searchStr = "";
let range = sel.getRangeAt(0); // 获取当前光标
// 如果当前光标所在位置的节点类型是文本节点,且文本内容包含@符号,则获取@符号后面的文本就是搜索的内容
for (let i = 0; i < inputEle.childNodes.length; i++) {
const curEle = inputEle.childNodes[i];
if (curEle.nodeName === "#text" && curEle.nodeValue.includes("@")) {
const splitArr = curEle.nodeValue
.substring(0, range.endOffset)
.split("@");
searchStr = splitArr[splitArr.length - 1];
}
}
atStr.value = searchStr;
if (
inputE.inputType === "insertText" ||
inputE.inputType === "insertCompositionText"
){
// 输入字符
if (inputE.data === "@") {
atPopoverVisible.value=true
}else{
const pinyinSearchList = new PinyinEngine(props.atUserList, [
"name",
]); // 拼音搜索
const newList = pinyinSearchList.query(searchStr);
searchAtList.value = newList;
if (searchStr && newList.length !== 0) {
atPopoverVisible.value=true
} else if (newList.length === 0) {
atPopoverVisible.value = false;
}
}
}
}
}
defineExpose({
insertFile,
insertUrl
})
</script>
<style scoped>
.chat-input-next-wrap{
position: relative;
box-sizing: border-box;
}
.chat-input-next{
width:500px;
height:200px;
max-height: 200px;
overflow-y: auto;
padding:5px;
}
.chat-input-next::-webkit-scrollbar {
display: none;
}
[contenteditable]:empty:before {
content: attr(placeholder);
color: #ccc;
}
[contenteditable] {
outline: 0px solid transparent;
}
</style>
|
at-popover组件
这个组件我修改了获取组件高度的逻辑,获取传下来的list
1
2
3
4
5
6
7
8
9
10
11
12
13
14
15
16
17
18
19
20
21
22
23
24
25
26
27
28
29
30
31
32
33
34
35
36
37
38
39
40
41
42
43
44
45
46
47
48
49
50
51
52
53
54
55
56
57
58
59
60
61
62
63
64
65
66
67
68
69
70
71
72
73
74
75
76
77
78
79
80
81
82
83
84
85
86
87
88
89
90
91
92
93
94
95
96
97
98
99
100
101
102
103
104
105
106
107
108
109
110
111
112
113
114
115
116
117
118
119
120
121
122
123
124
125
126
127
128
129
130
131
132
133
134
135
136
137
138
139
140
141
142
143
144
145
146
147
148
149
| <template>
<div class="at-popover" v-if="visible" id="at-popover" :style="{...positionStyle}">
<div class="at-popover-content" ref="atPopoverContent">
<ul>
<li v-for="(item,index) in list" :key="index" class="at-popover-line" :class="{active:index===activeLine}" @click="handleSelect(item.name)">{{item.name}}</li>
</ul>
</div>
</div>
</template>
<script setup lang="ts">
import { withDefaults,ref,watch,computed,nextTick } from 'vue';
import type {InlineStyles,AtEachMember} from "./types/index"
const props=withDefaults(defineProps<{
visible:boolean
list:AtEachMember[]
}>(),{
visible:false
});
// 当前选中@
const activeLine=ref(0);
// 父组件确定方法
const emits=defineEmits(['confirm'])
// 选中的人
const handleSelect=(name:string)=>{
emits("confirm",name)
}
// 容器
const atPopoverContent=ref<HTMLElement|null>(null)
// 容器的高度
const atPopoverContentHeight=ref(0)
// 每一行的高度
const atPopoverLineHeight=computed(()=>{
return document.querySelector(".at-popover-line")?.clientHeight||0
})
// 处理键盘上下键长度较长滚动
const handleKeyScrollContainer=()=>{
// 多少时会超出范围
const maxShowNum=Math.floor(atPopoverContentHeight.value/atPopoverLineHeight.value)
if(activeLine.value>=maxShowNum-1){
atPopoverContent.value?.scrollTo(0,(activeLine.value-maxShowNum+2)*atPopoverLineHeight.value)
}
else{
atPopoverContent.value?.scrollTo(0,0)
}
}
// @功能上下键切换
const handleKeyUp = (e:KeyboardEvent) => {
if (props.visible) {
// 下键
if (e.keyCode === 40) {
handleKeyScrollContainer()
activeLine.value=Math.min(activeLine.value+1,props.list.length-1)
}
// 上键
else if (e.keyCode === 38) {
handleKeyScrollContainer()
activeLine.value=Math.max(activeLine.value-1,0)
}
// 回车键
else if (e.keyCode === 13) {
handleSelect(props.list[activeLine.value].name)
}
}
};
watch(()=>props.visible,(newVal)=>{
if(newVal){
activeLine.value=0;
document.addEventListener("keyup", handleKeyUp);
}
else{
document.removeEventListener("keyup", handleKeyUp);
}
})
watch(()=>[props.list.length,props.visible,atPopoverContent.value],([newVal1,newVal2,newVal3])=>{
if([newVal1,newVal2,newVal3].some(item=>item)){
activeLine.value=0;
nextTick(()=>{
atPopoverContentHeight.value=atPopoverContent.value?.clientHeight||0
changePosition()
})
}
},{
deep:true
})
// 改变popover弹出的位置
// 位置样式
const positionStyle=ref<InlineStyles>({})
// 改变位置样式
const changePosition = () => {
nextTick(()=>{
if(window&&window.getSelection()){
const sel= window.getSelection() as Selection;
let range = sel.getRangeAt(0); // 获取当前光标
let position = range.getBoundingClientRect(); // 获取标签位置
const {x,y}=position;
positionStyle.value = {
top: y-atPopoverContentHeight.value + "px",
left: x + "px",
};
}
})
};
</script>
<style scoped>
.at-popover {
display: block; /* 默认隐藏 */
position: fixed;
background-color: #fff;
border: 1px solid #ccc;
border-radius: 5px;
box-shadow: 0 2px 5px rgba(0, 0, 0, 0.3);
top:-200px;
left:0;
}
.at-popover-line{
display: flex;
align-items: center;
cursor: pointer;
padding: 5px 10px;
}
.at-popover-content{
max-height: 200px;
overflow: auto;
}
.at-popover-content::-webkit-scrollbar {
display: none;
}
.at-popover-line:hover{
background-color: #f1f1f1;
}
.active{
background-color: #f1f1f1;
}
</style>
|
此时就能够实现@搜索的功能了
添加删除事件
我就搜索方法单独拆了出来
1
2
3
4
5
6
| const previousNode = range.startContainer.childNodes[range.startOffset - 1];
if(previousNode&&previousNode.nodeName==='A'){
e.preventDefault();
previousNode.remove();
}
|
上面一段代码是为了避免a标签换行时无法删除的问题
1
2
3
4
5
6
7
8
9
10
11
12
13
14
15
16
17
18
19
20
21
22
23
24
25
26
27
28
29
30
31
32
33
34
35
36
37
38
39
40
41
42
43
44
45
46
47
48
49
50
51
52
53
54
55
56
57
58
59
60
61
62
63
64
65
66
67
68
69
70
|
const searchFun=(searchStr:string)=>{
const pinyinSearchList = new PinyinEngine(props.atUserList, [
"name",
]);
const newList = pinyinSearchList.query(searchStr);
searchAtList.value = newList;
if (searchStr && newList.length !== 0) {
atPopoverVisible.value=true
} else if (newList.length === 0) {
atPopoverVisible.value = false;
}
}
const handleInput=(e:Event)=>{
keepScrollBottom();
const inputE=e as InputEvent
const sel=window.getSelection() as Selection
if (inputE.data !== null && !inputE.data.trim()) {
atPopoverVisible.value = false;
}
else{
const inputEle = e.target as any;
let searchStr = "";
let range = sel.getRangeAt(0);
let isOnlyAt=false
for (let i = 0; i < inputEle.childNodes.length; i++) {
const curEle = inputEle.childNodes[i];
if (curEle.nodeName === "#text" && curEle.nodeValue.includes("@")) {
const splitArr = curEle.nodeValue
.substring(0, range.endOffset)
.split("@");
searchStr = splitArr[splitArr.length - 1];
if (!searchStr || !searchStr.length) {
isOnlyAt = true;
}
}
}
atStr.value = searchStr;
if (
inputE.inputType === "insertText" ||
inputE.inputType === "insertCompositionText"
){
if (inputE.data === "@") {
atPopoverVisible.value=true
}else{
searchFun(searchStr)
}
}else if (inputE.inputType === "deleteContentBackward") {
const previousNode = range.startContainer.childNodes[range.startOffset - 1];
if(previousNode&&previousNode.nodeName==='A'){
e.preventDefault();
previousNode.remove();
}
else if (!searchStr&&!isOnlyAt) {
atPopoverVisible.value = false;
} else {
searchFun(searchStr)
}
}
}
}
|
发布
这里可以参考我之前的npm发包文章
结语
本篇文章已经内容太长了,我先到这里,后续的文章继续封装这个组件


