【可视化学习】52-元宇宙未来智慧城(一)
发表于:2023-11-08 |

前言

大家好啊,好久没更新可视化学习这一模块了,从今天开始给大家带来一个基于之前元宇宙基础知识学习的小案例,接下来一起来学习吧

初始化项目

这里我就不多介绍了,之前讲了很多次了。
这里我稍微改造了初始化的代码,给大家看一下代码,相信看我文章的同学应该都可以看懂我在这里写了什么,我就不多解释了

主页面

1
2
3
4
5
6
7
8
9
10
11
12
13
14
15
16
17
18
19
20
21
22
23
24
25
26
27
28
29
30
31
32
33
34
35
36
37
38
39
40
41
42
43
<template>
<div class="home" ref="screenDom">
<div class="canvas-container"></div>
</div>
</template>
<script setup>
import {ref,onMounted} from 'vue';
import * as THREE from "three";
import ThreePlus from "./three/index";
let screenDom = ref(null);
const resizeFn = () => {
let scale = window.innerWidth / 1920;
screenDom.value.style.transform = `scale(${scale})`;
};
onMounted(() => {
resizeFn();
window.addEventListener("resize", resizeFn);
let threePlus = new ThreePlus(".canvas-container");
});
</script>
<style>
* {
margin: 0;
padding: 0;
}

body {
background-color: #1e1a20;
}
::-webkit-scrollbar {
display: none;
}

.home {
width: 1920px;
height: 1080px;
transform-origin: 0 0;
}
.canvas-container {
width: 100%;
height: 100%;
}
</style>

threePlus

1
2
3
4
5
6
7
8
9
10
11
12
13
14
15
16
17
18
19
20
21
22
23
24
25
26
27
28
29
30
31
32
33
34
35
36
37
38
39
40
41
42
43
44
45
46
47
48
49
50
51
52
53
54
55
56
57
58
59
60
61
62
63
64
65
66
67
import * as THREE from "three";
// 导入轨道控制器
import { OrbitControls } from "three/examples/jsm/controls/OrbitControls";

export default class ThreePlus {
constructor(selector) {
this.clock = new THREE.Clock();
this.domElement = document.querySelector(selector);
this.width = this.domElement.clientWidth;
this.height = this.domElement.clientHeight;
this.updateMeshArr = [];
this.init();
}
init() {
this.initScene();
this.initCamera();
this.initRenderer();
this.initControl();
this.render();
this.addAxis()
}
initScene() {
this.scene = new THREE.Scene();
}
initCamera() {
this.camera = new THREE.PerspectiveCamera(
45,
this.width / this.height,
0.000001,
10000
);
this.camera.position.set(0, 10, 50);

this.camera.aspect = this.width / this.height;
// 更新摄像机的投影矩阵
this.camera.updateProjectionMatrix();
}
initRenderer() {
this.renderer = new THREE.WebGLRenderer({
logarithmicDepthBuffer: true,
antialias: true,
});
this.renderer.setSize(this.width, this.height);
this.renderer.shadowMap.enabled = true;
this.renderer.gammaOutput = true;
this.renderer.physicallyCorrectLights = true;
this.renderer.toneMapping = THREE.ACESFilmicToneMapping;
this.renderer.toneMappingExposure = 0.75;
this.renderer.sortObjects = true;
this.domElement.appendChild(this.renderer.domElement);
}
initControl() {
this.control = new OrbitControls(this.camera, this.renderer.domElement);
}
render() {
this.control && this.control.update();
this.renderer.render(this.scene, this.camera);
requestAnimationFrame(this.render.bind(this));
}
// 添加辅助坐标轴
addAxis() {
let axis = new THREE.AxesHelper(20);
this.scene.add(axis);
}

}

效果图

加载环境贴图

这里我把辅助坐标轴去了,把环境贴图加上

threePlus

1
2
3
4
5
6
7
8
9
10
11
12
13
14
15
16
17
18
19
20
21
22
23
24
25
26
27
28
29
30
31
32
33
// hdr加载器
import { RGBELoader } from "three/examples/jsm/loaders/RGBELoader";

export default class ThreePlus {
// xxxx 此处省略代码
// 将addAxis注释掉
init() {
this.initScene();
this.initCamera();
this.initRenderer();
this.initControl();
this.render();
// this.addAxis()
}
hdrLoader(url) {
const hdrLoader = new RGBELoader();
return new Promise((resolve, reject) => {
hdrLoader.load(url, (hdr) => {
resolve(hdr);
});
});
}
// 设置环境贴图
setBg(url) {
this.hdrLoader(url).then((texture) => {
texture.mapping = THREE.EquirectangularReflectionMapping;
texture.anisotropy = 16;
texture.format = THREE.RGBAFormat;
this.scene.background = texture;
this.scene.environment = texture;
});
}
}

主页面

后续主页面代码都是默认在onMounted里面的

1
2
3
4
5
6
onMounted(() => {
resizeFn();
window.addEventListener("resize", resizeFn);
let threePlus = new ThreePlus(".canvas-container");
threePlus.setBg("./assets/textures/sky11.hdr");
});

此时我们的环境贴图就加上了

添加云雾效果

使用图片

接下来我将基于这三张图片进行云雾效果的添加

主页面

1
threePlus.addClouds();

threePlus

后续我添加的方法都是在threePlus这个类里面的,后面就省略那些没必要的代码了

1
2
3
4
5
6
7
// 导入云
import { Clouds } from "./Clouds";
// 添加云效果
addClouds() {
let clouds = new Clouds();
this.scene.add(clouds.mesh);
}

Clouds

这里我设置了一个随机生成云的效果,我将材质设为了随机的

1
2
3
4
5
6
7
8
9
10
11
12
13
14
15
16
17
18
19
20
21
22
23
24
25
26
27
28
29
30
31
32
33
34
35
36
37
38
39
40
41
42
43
44
45
46
47
48
49
50
51
52
53
54
55
56
57
58
59
60
61
62
63
64
65
66
67
68
69
70
71
72
73
import * as THREE from "three";
import gsap from "gsap";

export class Clouds {
// height设置云朵的高度,num设置云朵的数量
constructor(
height = 10,
num = 300,
size = 15,
scale = 10,
autoRotate = true
) {
let textureLoader = new THREE.TextureLoader();
const map1 = textureLoader.load("./textures/cloud/cloud1.jfif");
const map2 = textureLoader.load("./textures/cloud/cloud2.jfif");
const map3 = textureLoader.load("./textures/cloud/cloud3.jpg");

let material1 = new THREE.SpriteMaterial({
map: map2,
color: 0xffffff,
alphaMap: map1,
transparent: true,
blending: THREE.AdditiveBlending,
depthWrite: false,
depthTest: false,
});
let material2 = new THREE.SpriteMaterial({
map: map3,
color: 0xffffff,
alphaMap: map2,
transparent: true,
blending: THREE.AdditiveBlending,
depthWrite: false,
depthTest: false,
});
let material3 = new THREE.SpriteMaterial({
map: map1,
color: 0xffffff,
alphaMap: map3,
transparent: true,
blending: THREE.AdditiveBlending,
depthWrite: false,
depthTest: false,
});

this.materials = [material1, material2, material3];
this.mesh = new THREE.Group();
for (let i = 0; i < num; i++) {
let index = Math.floor(Math.random() * 3);
let material = this.materials[index];
let sprite = new THREE.Sprite(material);
// 随机设置精灵的大小
let randomSize = Math.random() * size;
sprite.scale.set(randomSize, randomSize, randomSize);
// 随机设置精灵的位置
let randomX = (Math.random() - 0.5) * 2 * scale;
let randomY = Math.random() * (height / 2) + height;
let randomZ = (Math.random() - 0.5) * 2 * scale;
sprite.position.set(randomX, randomY, randomZ);
this.mesh.add(sprite);
}
if (autoRotate) {
this.animate();
}
}
animate() {
gsap.to(this.mesh.rotation, {
duration: 120,
repeat: -1,
y: Math.PI * 2,
});
}
}

效果展示

另外一种写法

当然我们的云也可以用另外一种写法,两种写法是一个意思

1
2
3
4
5
6
7
8
9
10
11
12
13
14
15
16
17
18
19
20
21
22
23
24
25
26
27
28
29
30
31
32
33
34
35
36
37
38
39
40
41
42
43
44
45
46
47
48
49
50
51
52
53
54
55
56
57
58
59
60
61
62
63
64
65
66
67
68
69
70
71
72
73
74
75
76
77
78
79
80
81
82
83
84
85
86
87
88
89
90
91
92
93
94
95
96
97
98
99
100
101
102
103
104
105
106
107
108
109
export class CloudsPlus {
// height设置云朵的高度,num设置云朵的数量
constructor(
height = 20,
num = 100,
size = 400,
scale = 100,
autoRotate = true
) {
this.height = height;
this.num = num;
this.size = size;
this.scale = scale;
this.autoRotate = autoRotate;
let textureLoader = new THREE.TextureLoader();
const map1 = textureLoader.load("./textures/cloud/cloud1.jfif");
const map2 = textureLoader.load("./textures/cloud/cloud2.jfif");
const map3 = textureLoader.load("./textures/cloud/cloud3.jpg");

let materials = [];

let material1 = new THREE.PointsMaterial({
map: map1,
color: 0xffffff,
alphaMap: map2,
transparent: true,
blending: THREE.AdditiveBlending,
depthWrite: false,
depthTest: false,
size: 0.2 * size,
});
let material2 = new THREE.PointsMaterial({
map: map2,
color: 0xffffff,
alphaMap: map3,
transparent: true,
blending: THREE.AdditiveBlending,
depthWrite: false,
depthTest: false,
size: 0.5 * size,
});
let material3 = new THREE.PointsMaterial({
map: map3,
color: 0xffffff,
alphaMap: map1,
transparent: true,
blending: THREE.AdditiveBlending,
depthWrite: false,
depthTest: false,
size: 0.8 * size,
});
let material4 = new THREE.PointsMaterial({
map: map2,
color: 0xffffff,
alphaMap: map1,
transparent: true,
blending: THREE.AdditiveBlending,
depthWrite: false,
depthTest: false,
size: 1 * size,
});
materials.push(material1, material2, material3, material4);
this.mesh = new THREE.Group();

for (let i = 0; i < materials.length; i++) {
let material = materials[i];
let geometry = this.generateGeometry(this.num);
let points = new THREE.Points(geometry, material);

this.mesh.add(points);
}
if (autoRotate) {
this.animate();
}
}
generateGeometry(num = 300) {
const vertices = [];
// 创建点位置
for (let i = 0; i < num; i++) {
// 随机设置精灵的位置
let randomX = (Math.random() - 0.5) * 2 * this.scale;
let randomY = Math.random() * (this.height / 2) + this.height;
let randomZ = (Math.random() - 0.5) * 2 * this.scale;
vertices.push(randomX, randomY, randomZ);
}
const geometry = new THREE.BufferGeometry();
geometry.setAttribute(
"position",
new THREE.Float32BufferAttribute(vertices, 3)
);
return geometry;
}
animate() {
let i = 1;
this.mesh.traverse((item) => {
let speed = 40 * i;

if (item instanceof THREE.Points) {
// console.log(speed);
gsap.to(item.rotation, {
duration: speed,
repeat: -1,
y: Math.PI * 2,
});
}
i++;
});
}
}

添加海洋效果

threePlus

1
2
3
4
5
6
// 导入海洋
import Ocean from "./Ocean";
addOcean() {
let ocean = new Ocean();
this.scene.add(ocean.mesh);
}

主页面

1
2
// 添加海洋
threePlus.addOcean();

Ocean

这里我创建了一个水球,然后修改了水球的颜色

1
2
3
4
5
6
7
8
9
10
11
12
13
14
15
16
17
18
19
20
21
22
23
24
25
26
27
28
29
30
31
32
33
import * as THREE from "three";
import { Water } from "three/examples/jsm/objects/Water2.js";

export default class Ocean {
constructor(radius = 1000) {
// 创建水平
this.waterGeometry = new THREE.CircleGeometry(radius, 128);
this.water = new Water(this.waterGeometry, {
textureWidth: 1024,
textureHeight: 1024,
color: 0x08dbea,
flowDirection: new THREE.Vector2(1, 1),
scale: 100,
});
this.water.position.y = -5;
this.water.rotation.x = -Math.PI / 2;
this.mesh = this.water;
this.water.renderOrder = -1;

// 修改水面的颜色
// console.log(this.water.material.fragmentShader);
this.water.material.fragmentShader =
this.water.material.fragmentShader.replace(
"gl_FragColor = vec4( color, 1.0 ) * mix( refractColor, reflectColor, reflectance );",
`
gl_FragColor = vec4( color, 1.0 ) * mix( refractColor, reflectColor, reflectance );
gl_FragColor = mix( gl_FragColor, vec4( 0.05, 0.3, 0.7, 1.0 ), vToEye.z*0.0005+0.5 );

`
);
}
}

加载模型

加载模型的前置工作我这次就不说了,就还是将对应文件拿到public下,具体的可以参考我之前的文章

主页面

1
2
3
4
5
6
7
8
// 加载模型
threePlus.gltfLoader("./model/city/metaScene03.glb").then((gltf) => {

let planeGroup = new THREE.Group();
planeGroup.position.copy(gltf.scene.children[0].position);
gltf.scene.add(planeGroup);
threePlus.scene.add(gltf.scene);
})

threePlus

1
2
3
4
5
6
7
8
9
10
11
12
13
14
15
16
import { GLTFLoader } from "three/examples/jsm/loaders/GLTFLoader";
import { DRACOLoader } from "three/examples/jsm/loaders/DRACOLoader";
gltfLoader(url) {
const gltfLoader = new GLTFLoader();
const dracoLoader = new DRACOLoader();
dracoLoader.setDecoderPath("./draco/gltf/");
dracoLoader.setDecoderConfig({ type: "js" });
dracoLoader.preload();
gltfLoader.setDRACOLoader(dracoLoader);

return new Promise((resolve, reject) => {
gltfLoader.load(url, (gltf) => {
resolve(gltf);
});
});
}

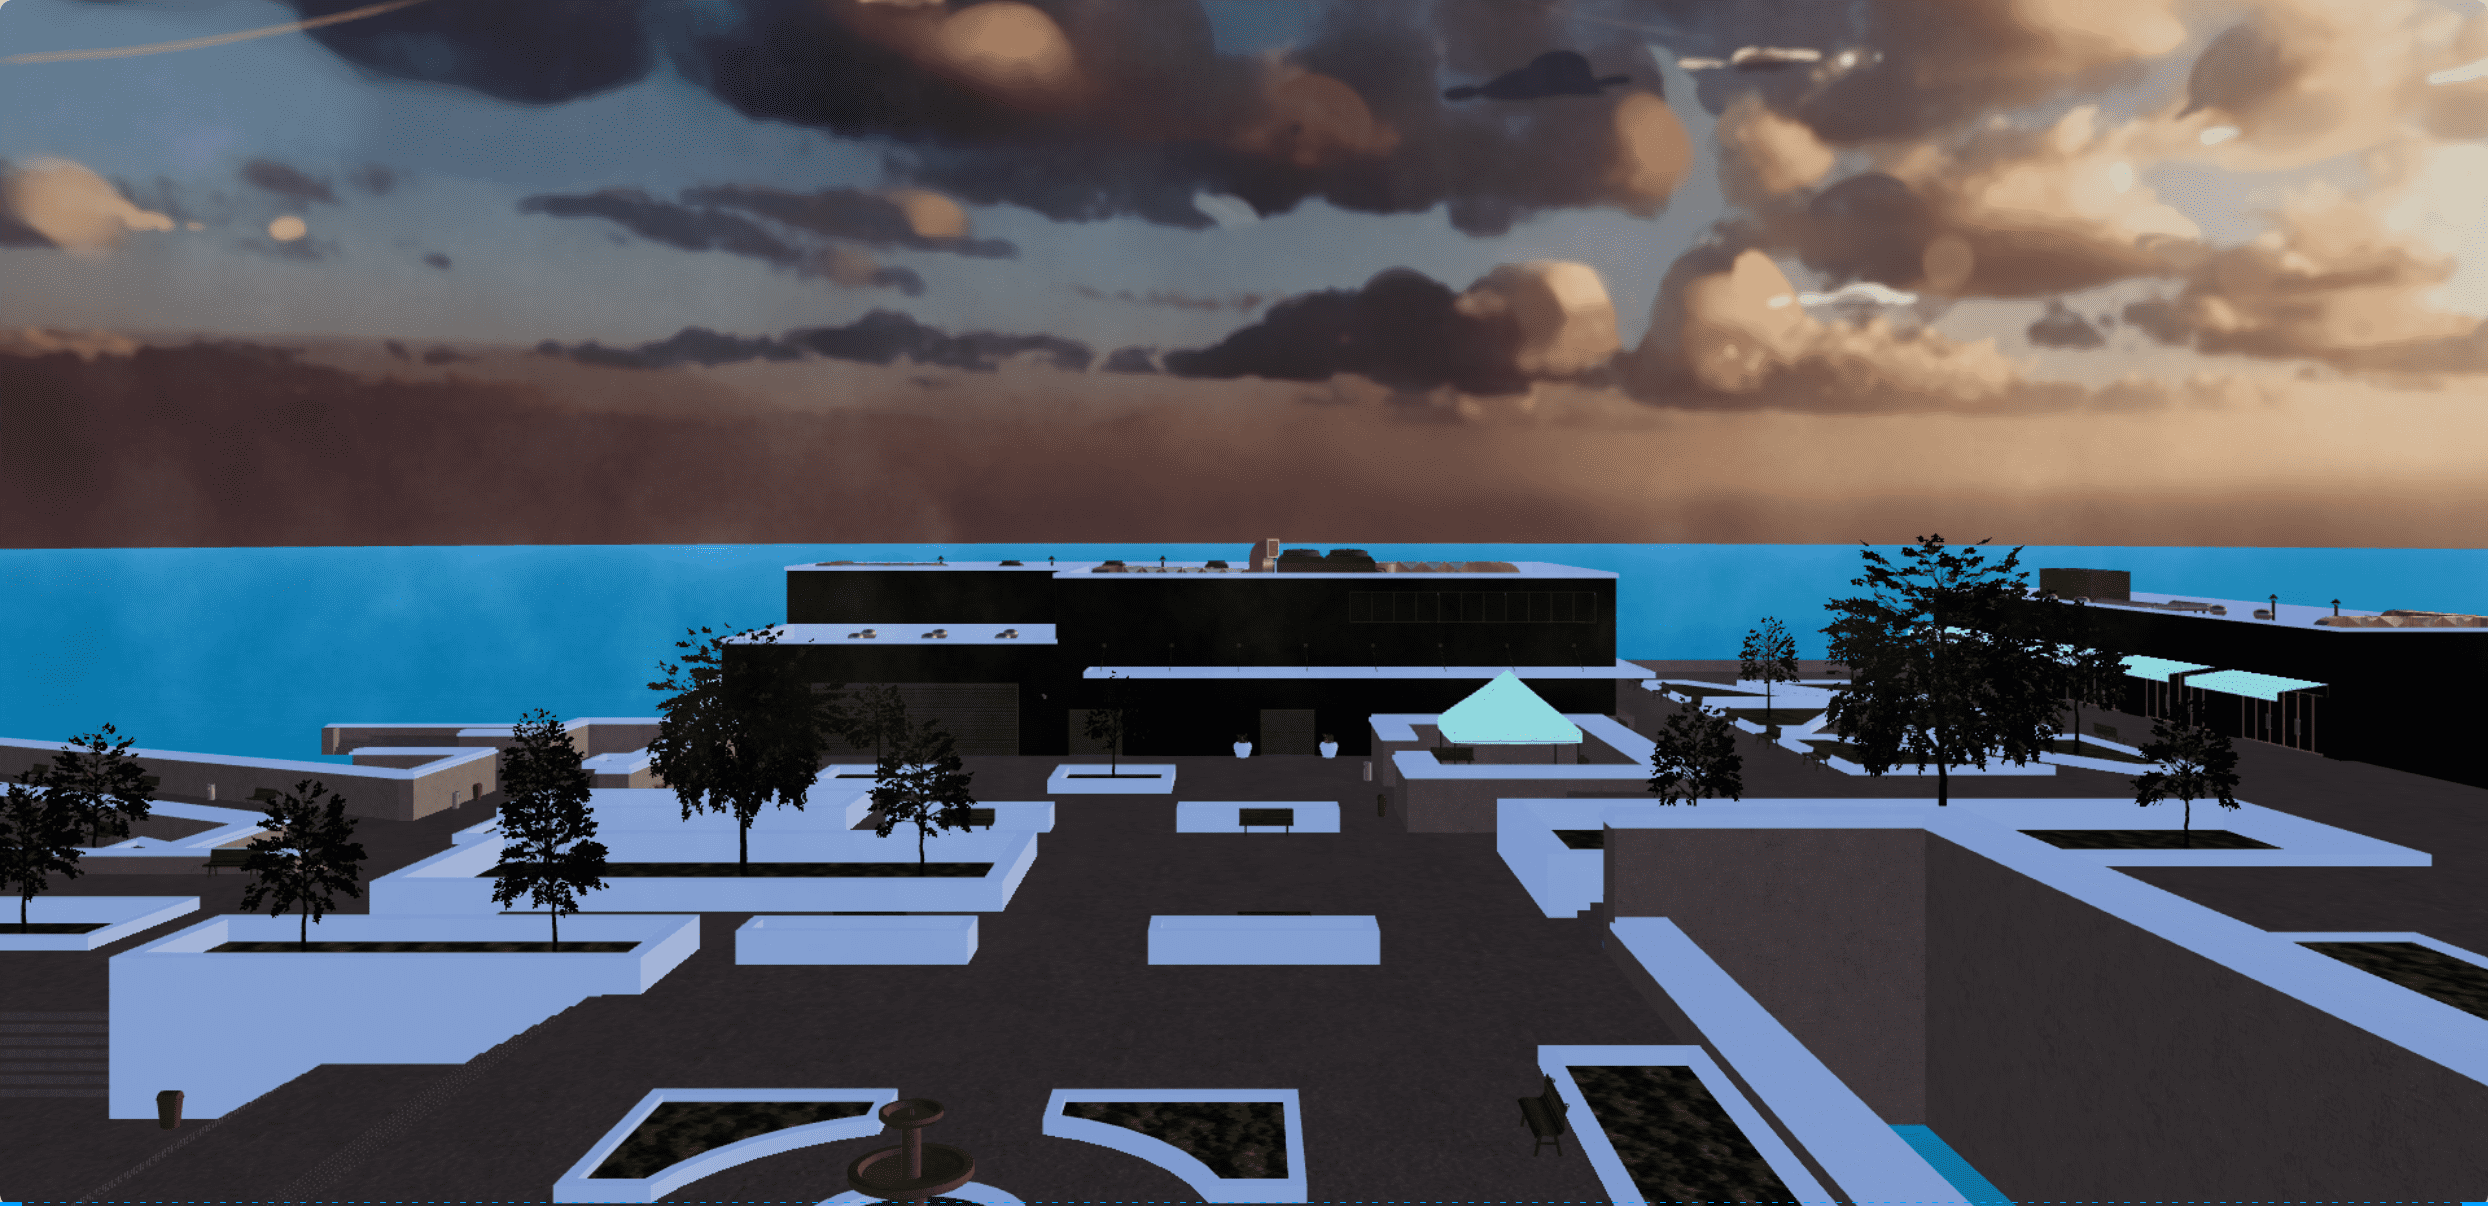
注意:为了效果展示,此时就不要控制器了,注释掉this.initControl();
模型加载

结语

本篇文章就先到这里了,更多内容敬请期待~~~

上一篇:
解决异步传染性问题
下一篇:
yarn等不生效