【可视化学习】57-Cesium实时天气
发表于:2023-12-28 |

前言

这个我在研究一个天气的api和风天气的时候,想到了这个idea,趁着摸鱼,说搞就搞~

项目准备

  1. Cesium的密钥
  2. 和风天气的密钥
  3. 天地图的密钥

Cesium的密钥

首先是Cesium的密钥,这个我不多说了,在我之前的文章里面有教程:cesium基础学习(一)

和风天气的密钥

地址是这个:和风天气
没注册的小伙伴先去注册一个,如果注册好了的点击控制台前往登录
和风主页

添加和风天气的密钥

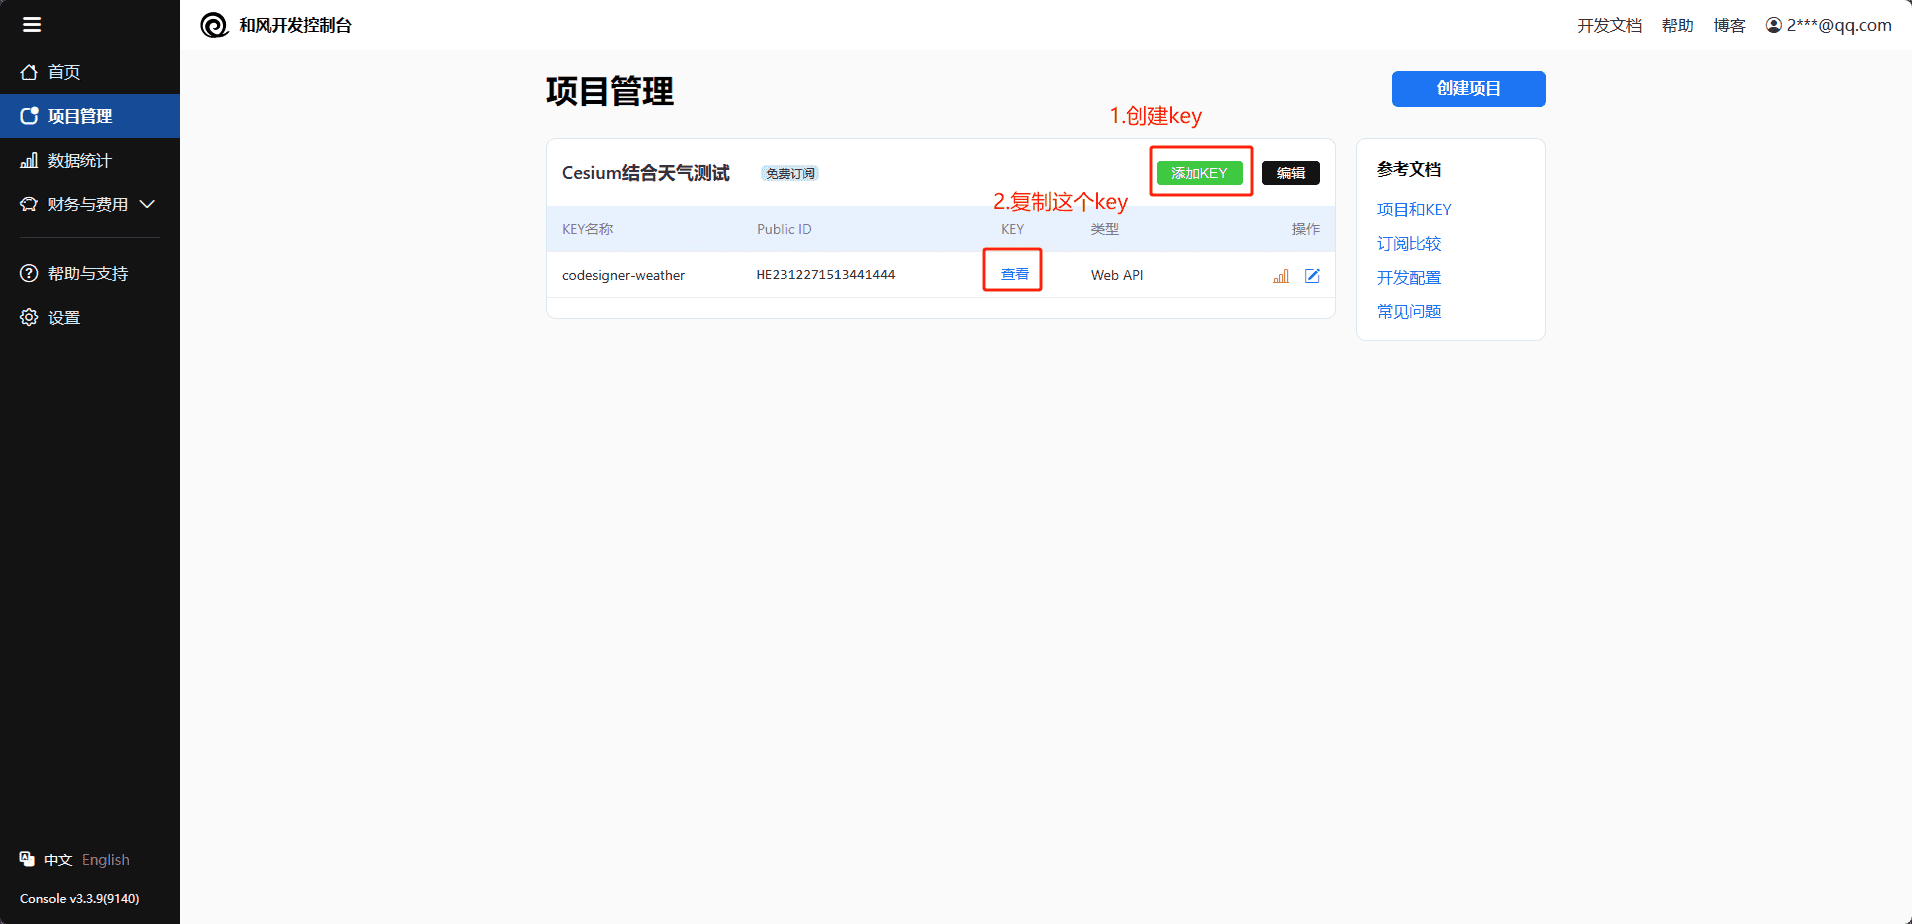
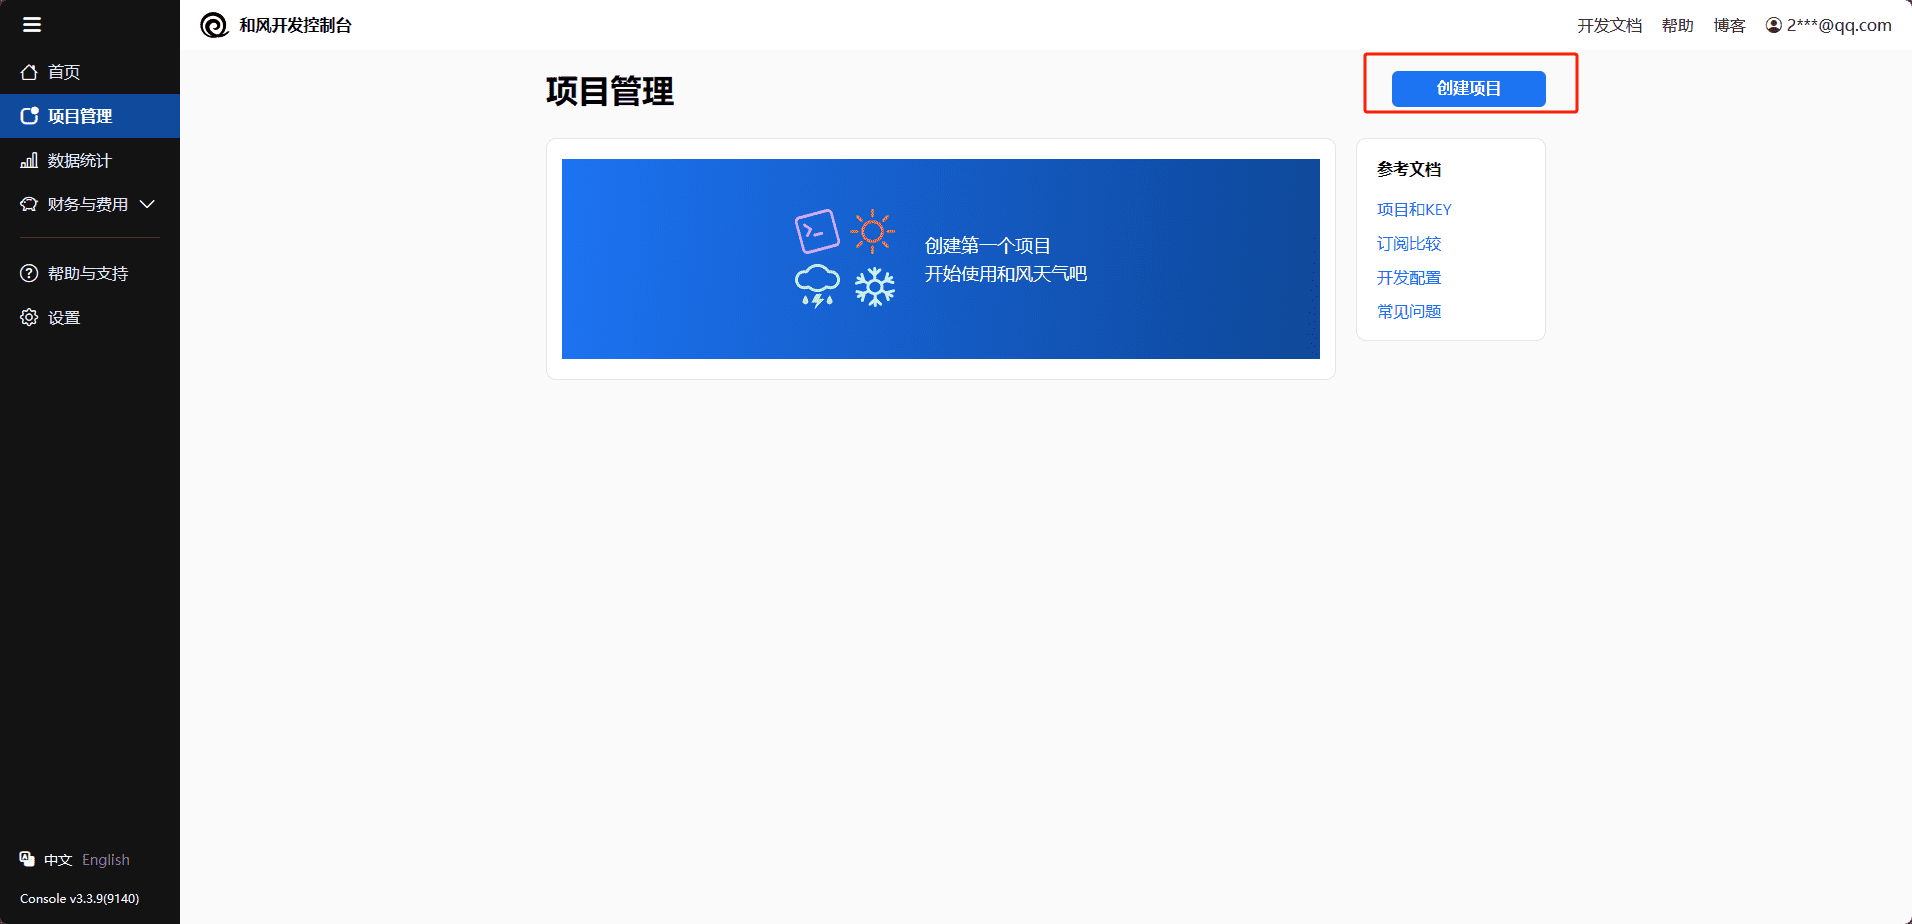
我们点击项目管理,如果没有创建项目,就点击创建项目,然后添加一个key,创建完成之后点击这个查看就可以得到和风天气的密钥了
添加复制密钥
添加复制密钥

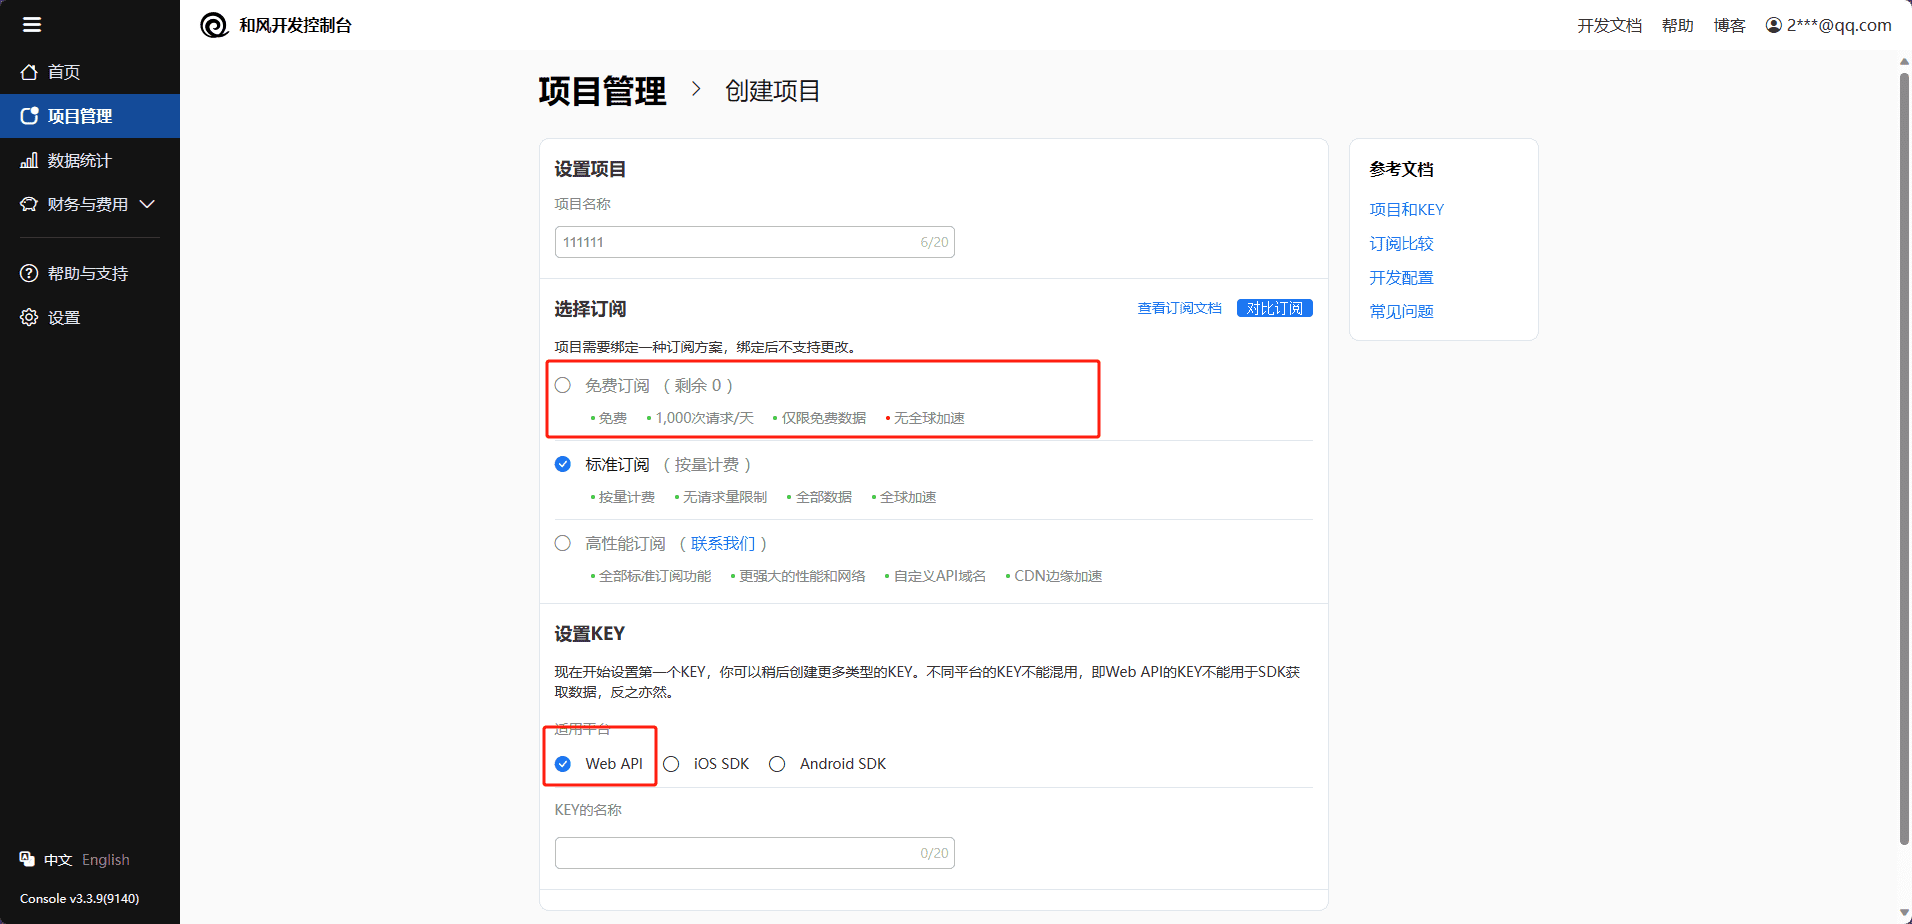
注意点

记得选择webApi和免费的那个可以,不然会收费
注意点

天地图的密钥

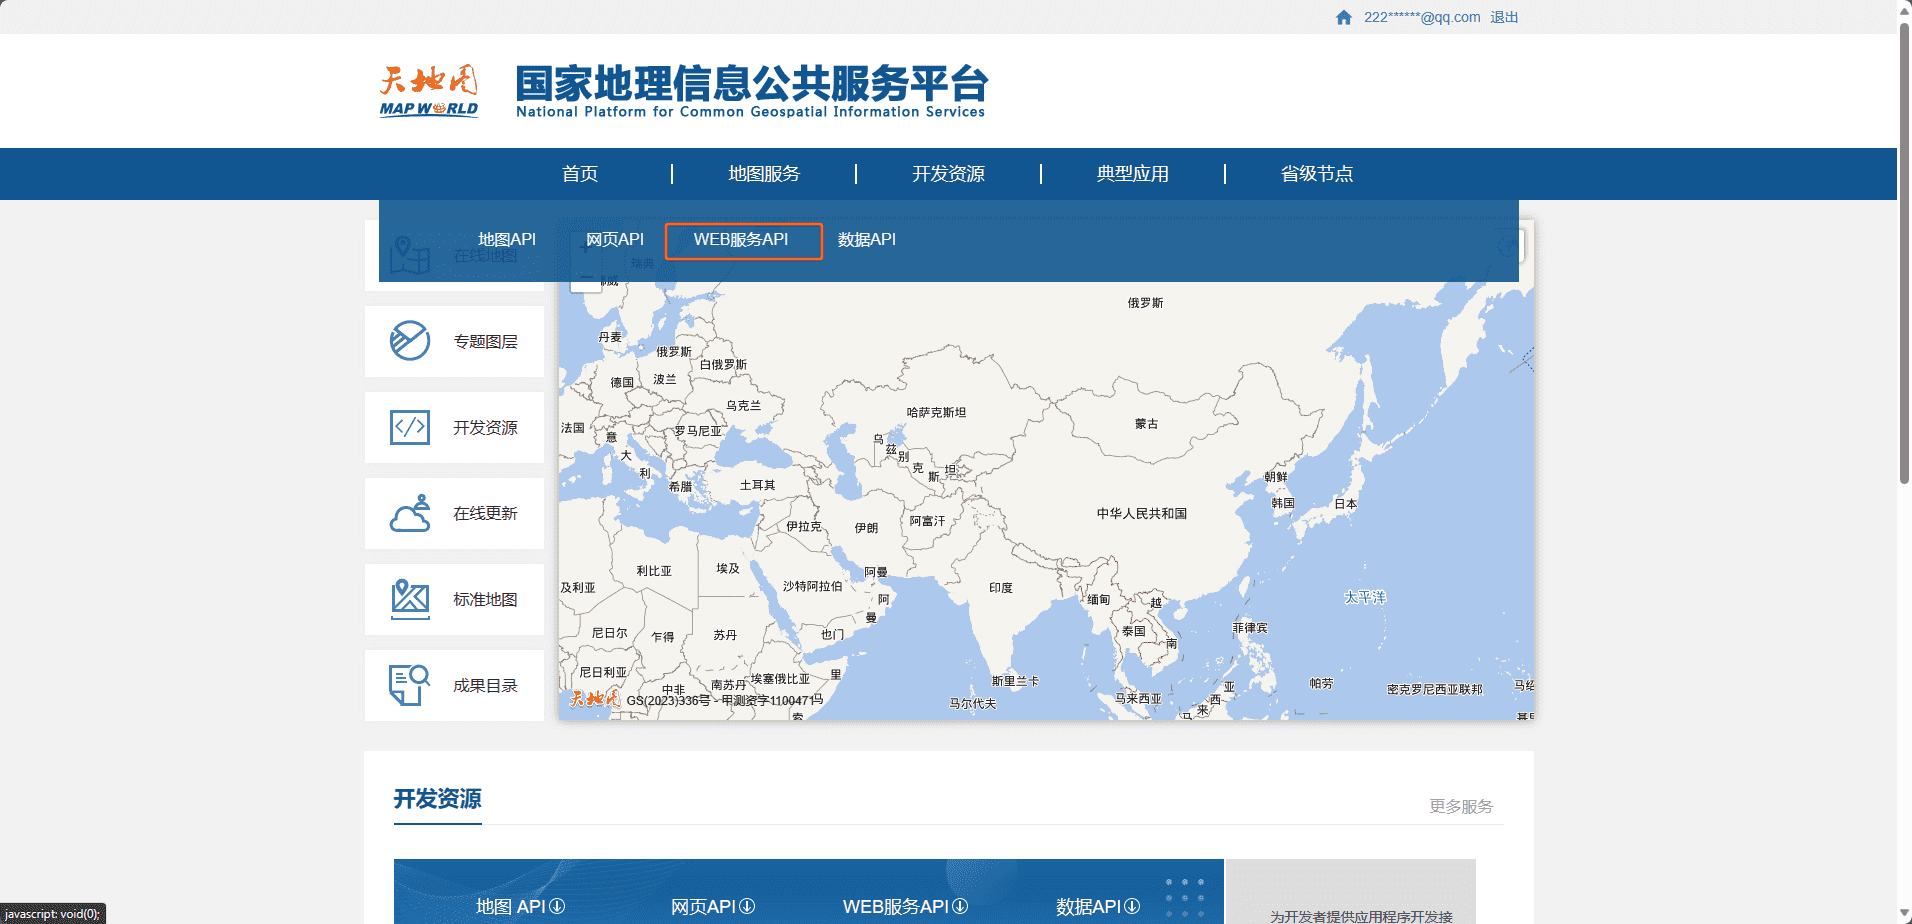
地址是这个:天地图
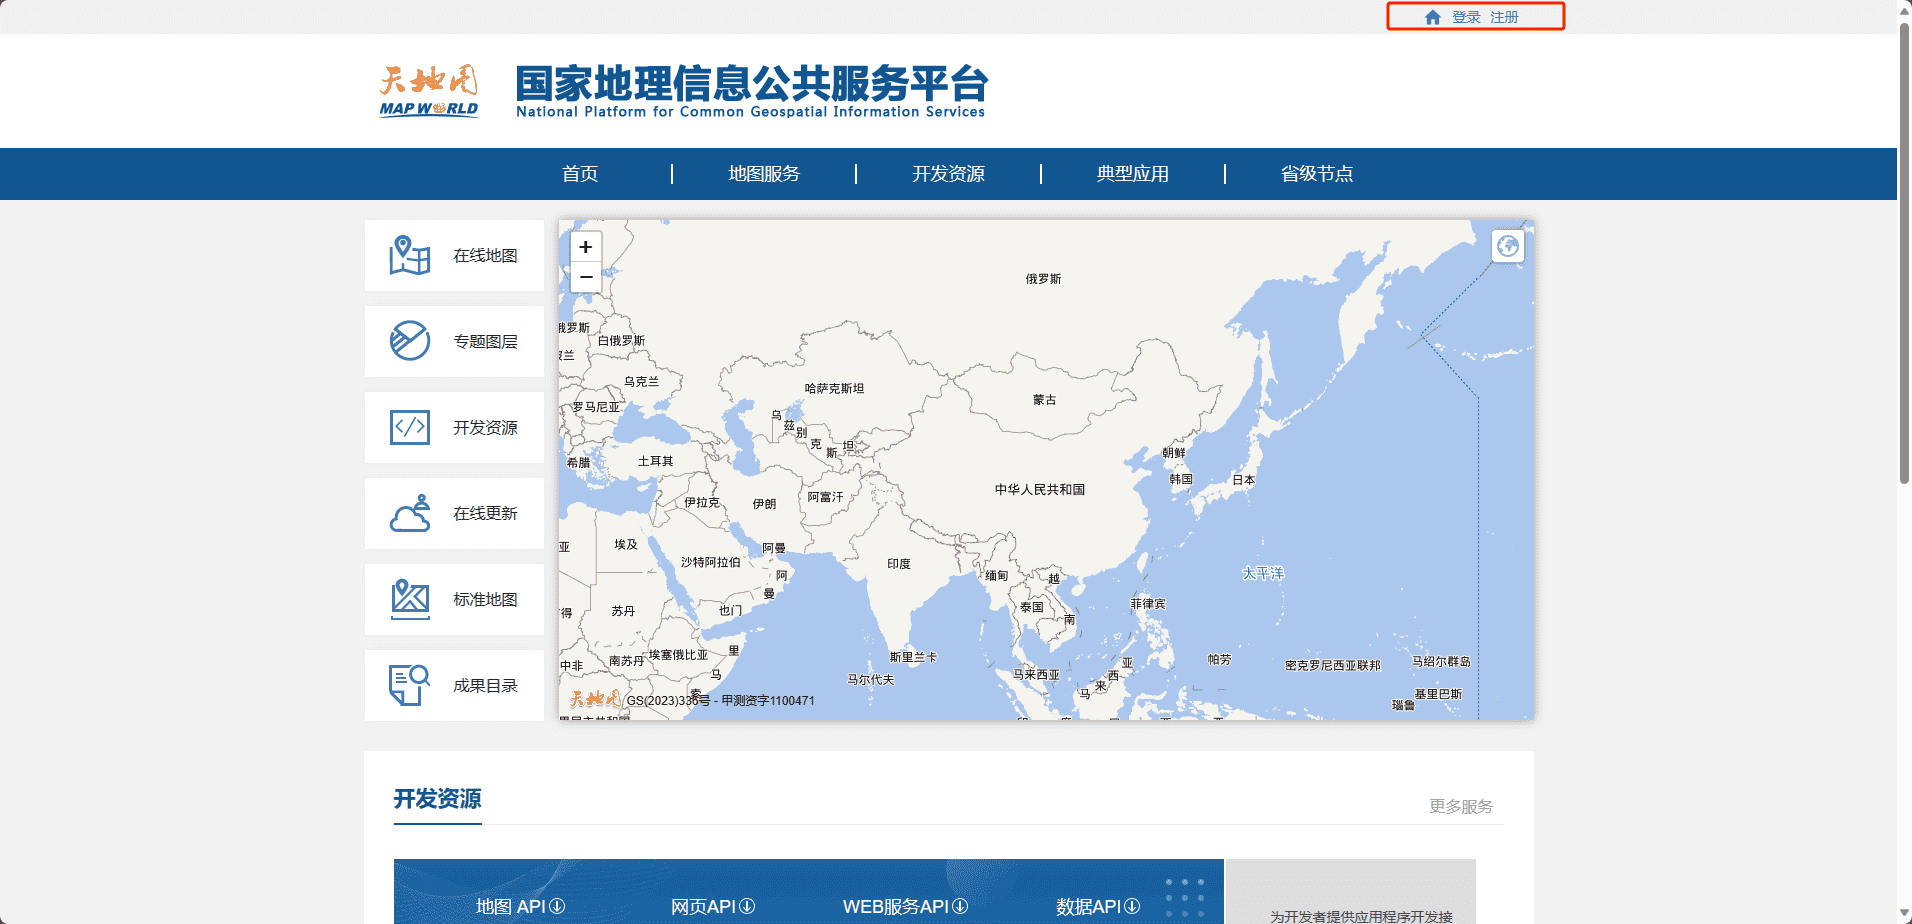
没注册的小伙伴先去注册一个,如果注册好了的点击登录
天地图主页
进入webApi
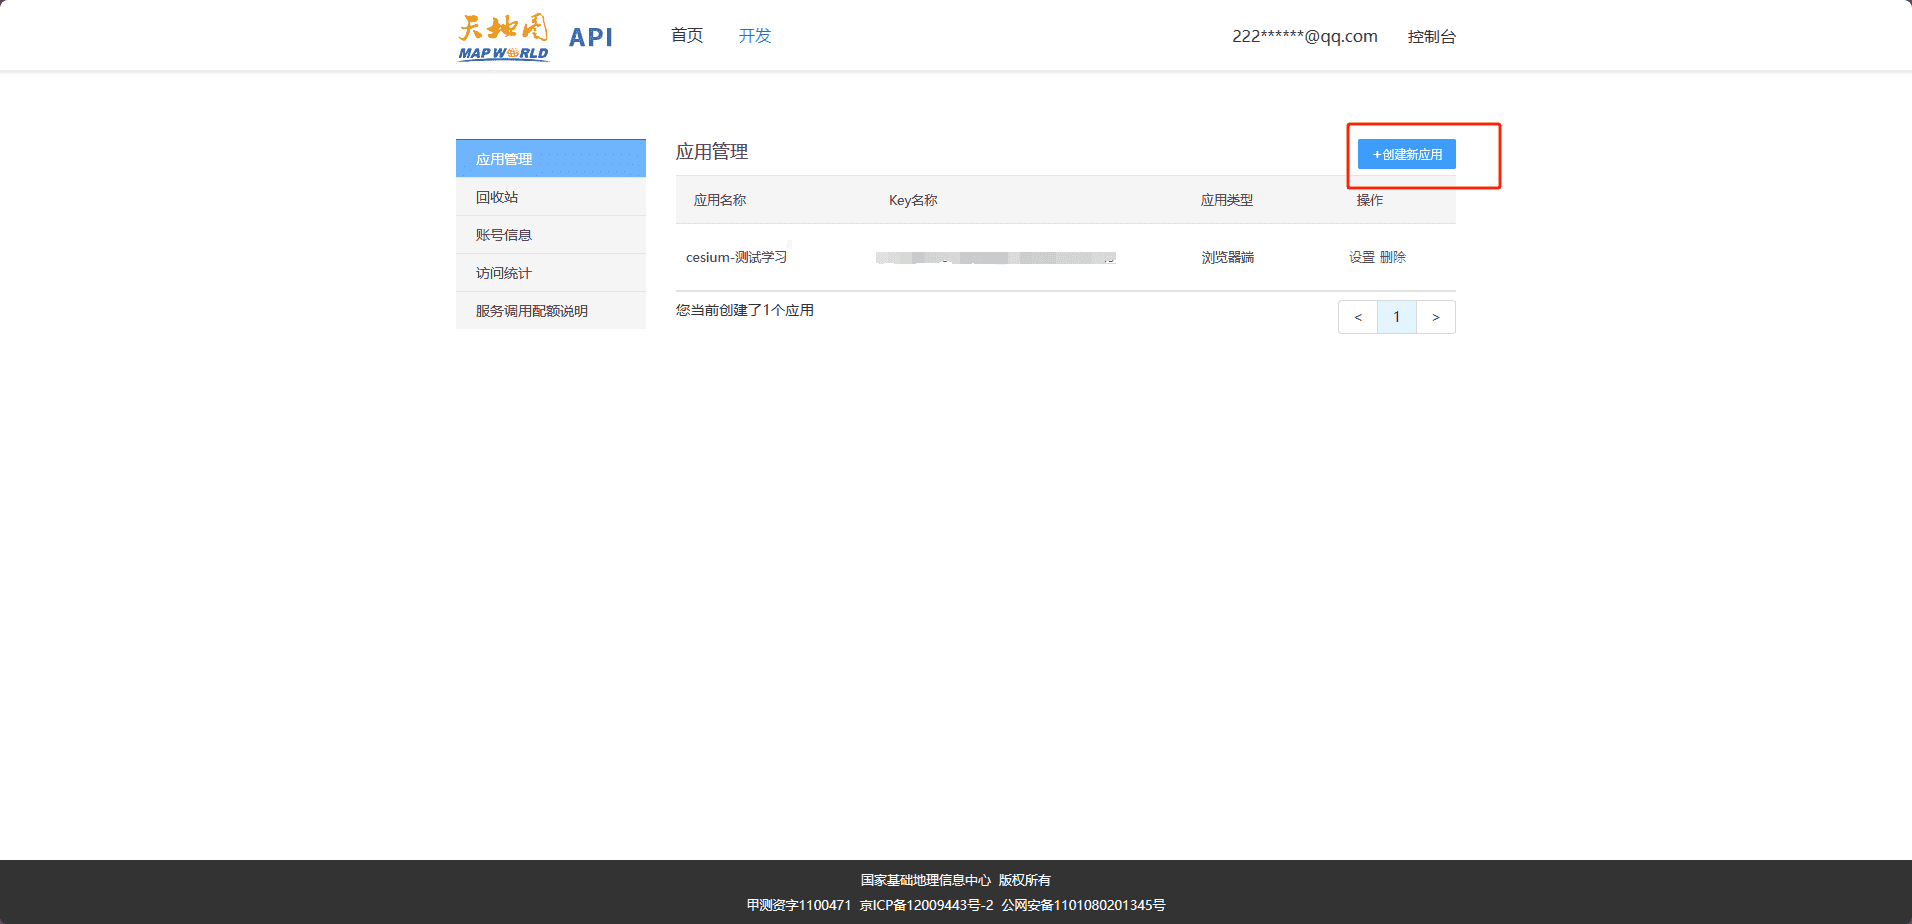
然后我们进入控制台创建新应用
创建新应用

项目初始化

这个就是cesium的初始化,大家可以参考我之前的cesium文章:

  1. cesium基础学习(一)
  2. cesium基础学习(二)
    注意一点,cesium的版本别太新,我这里用的是1.93版本,因为我之前学习时候用的就是这个版本,新版本很多语法都换了,我暂时懒得去看
    1
    npm i cesium@1.93
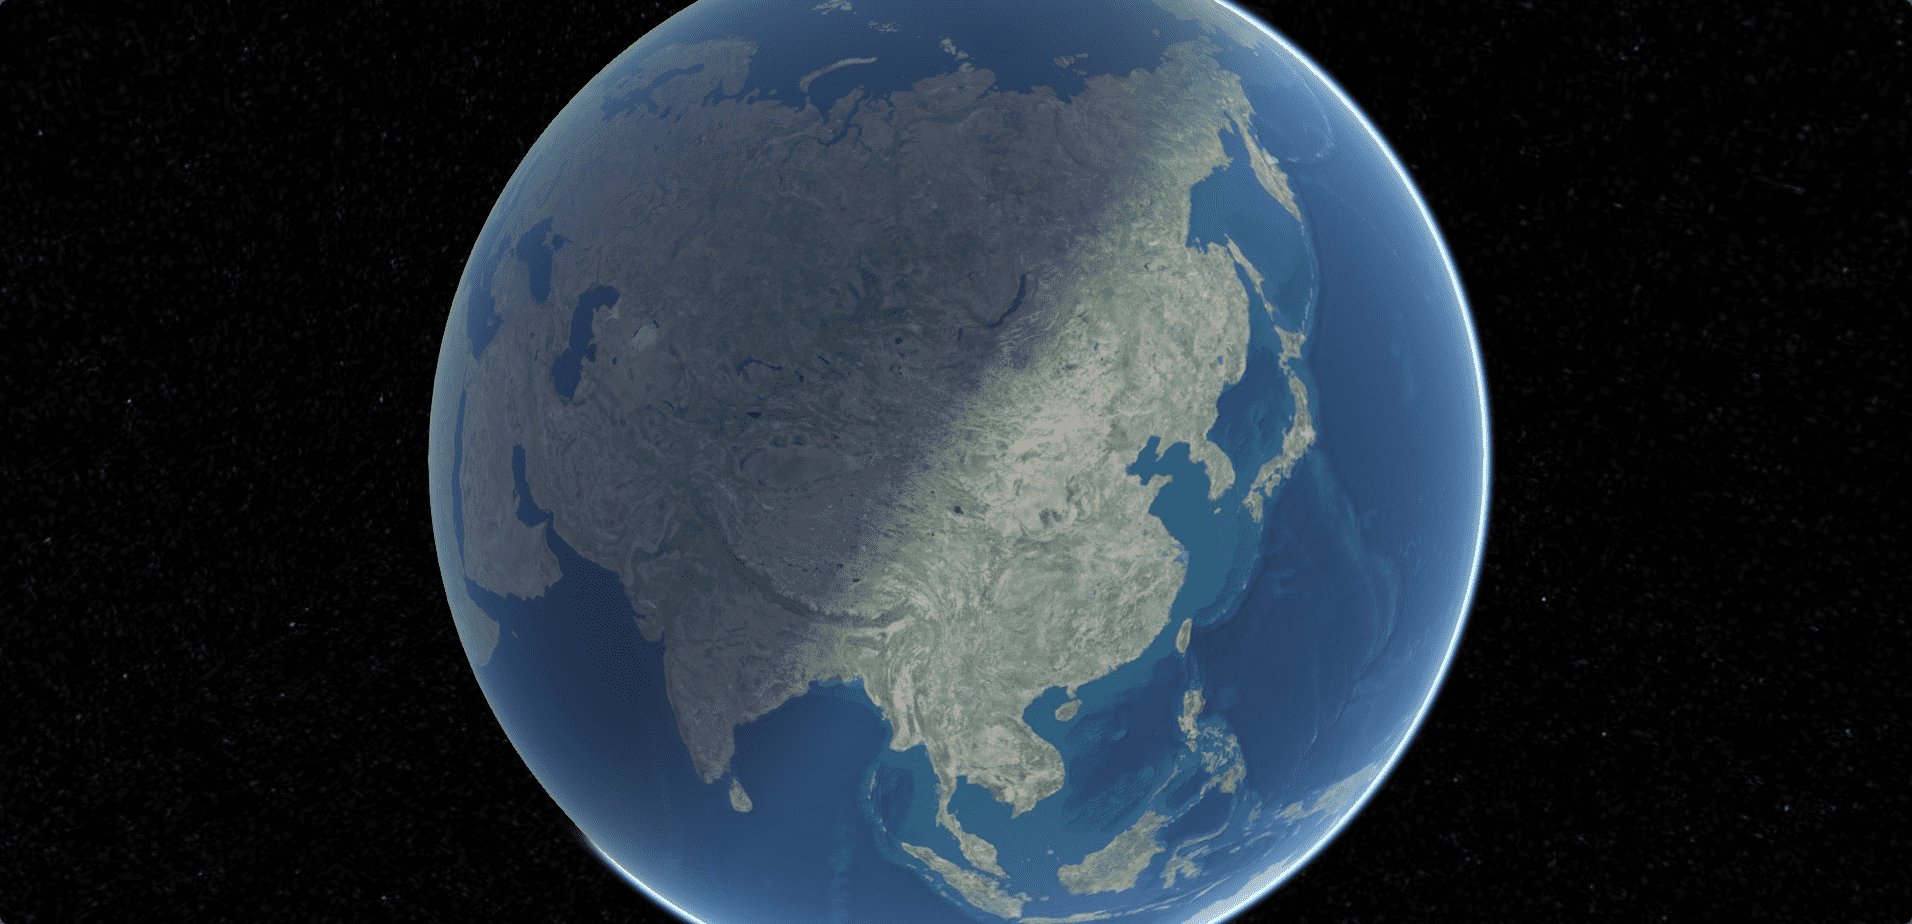
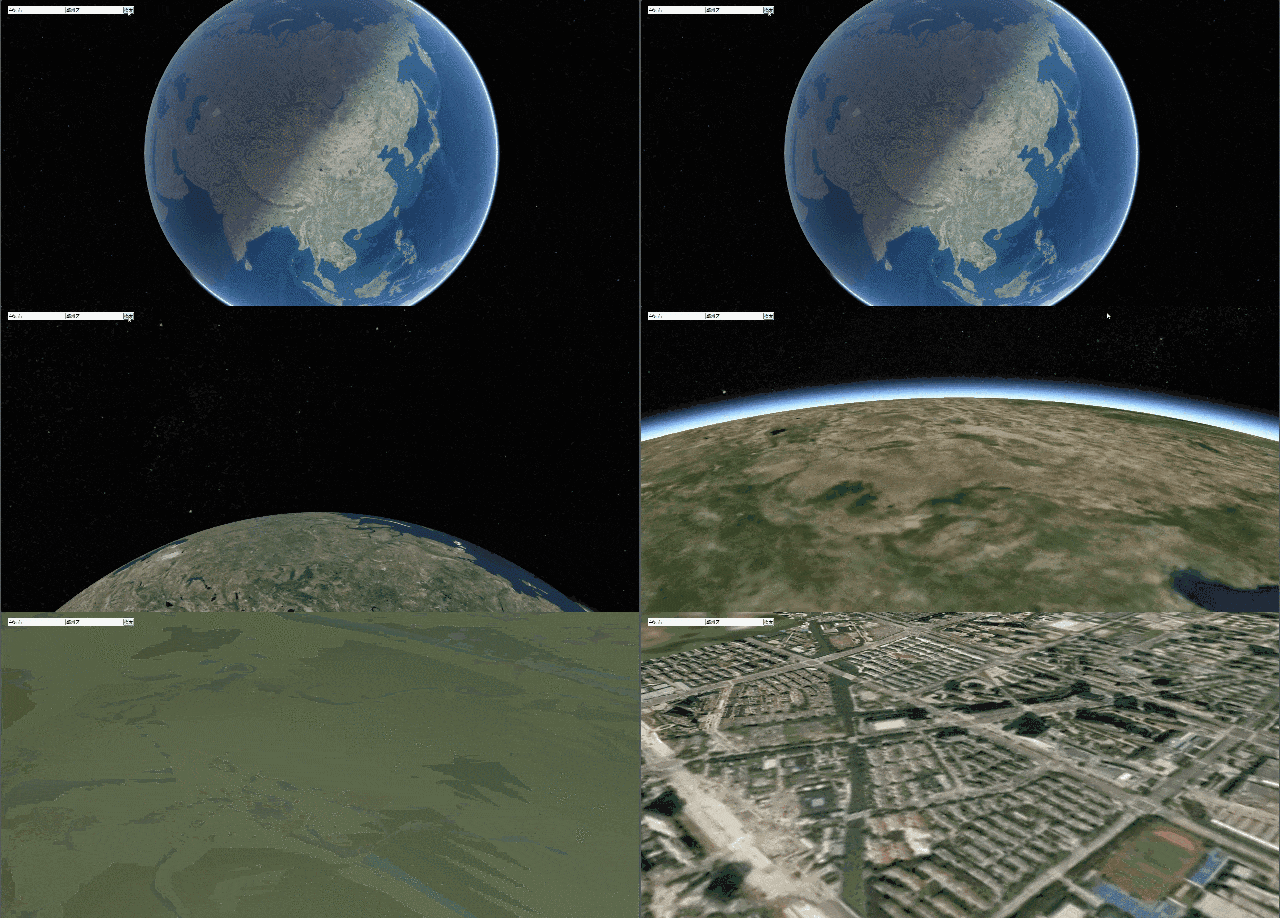
    此时,我们根据之前的配置,得到的球体是这样的:
    球体

添加搜索逻辑

样式

1
2
3
4
5
6
7
8
9
10
11
12
13
14
15
16
17
18
19
20
21
22
23
24
25
26
27
28
<template>
<div id="cesiumContainer" ref="cesiumContainer">
<div class="searchBar">
<input type="text" placeholder="请输入城市" v-model="searchParam.city" />
<input placeholder="请输入地址" v-model="searchParam.address" />
<button @click="handleSearchLatAndLng">搜索</button>
</div>
</div>
</template>
<style>
* {
margin: 0;
padding: 0;
}
#cesiumContainer {
width: 100vw;
height: 100vh;
position:fixed;
}

.searchBar{
position:fixed;
top:20px;
left:20px;
z-index: 9999;
background-color: #fff;
}
</style>

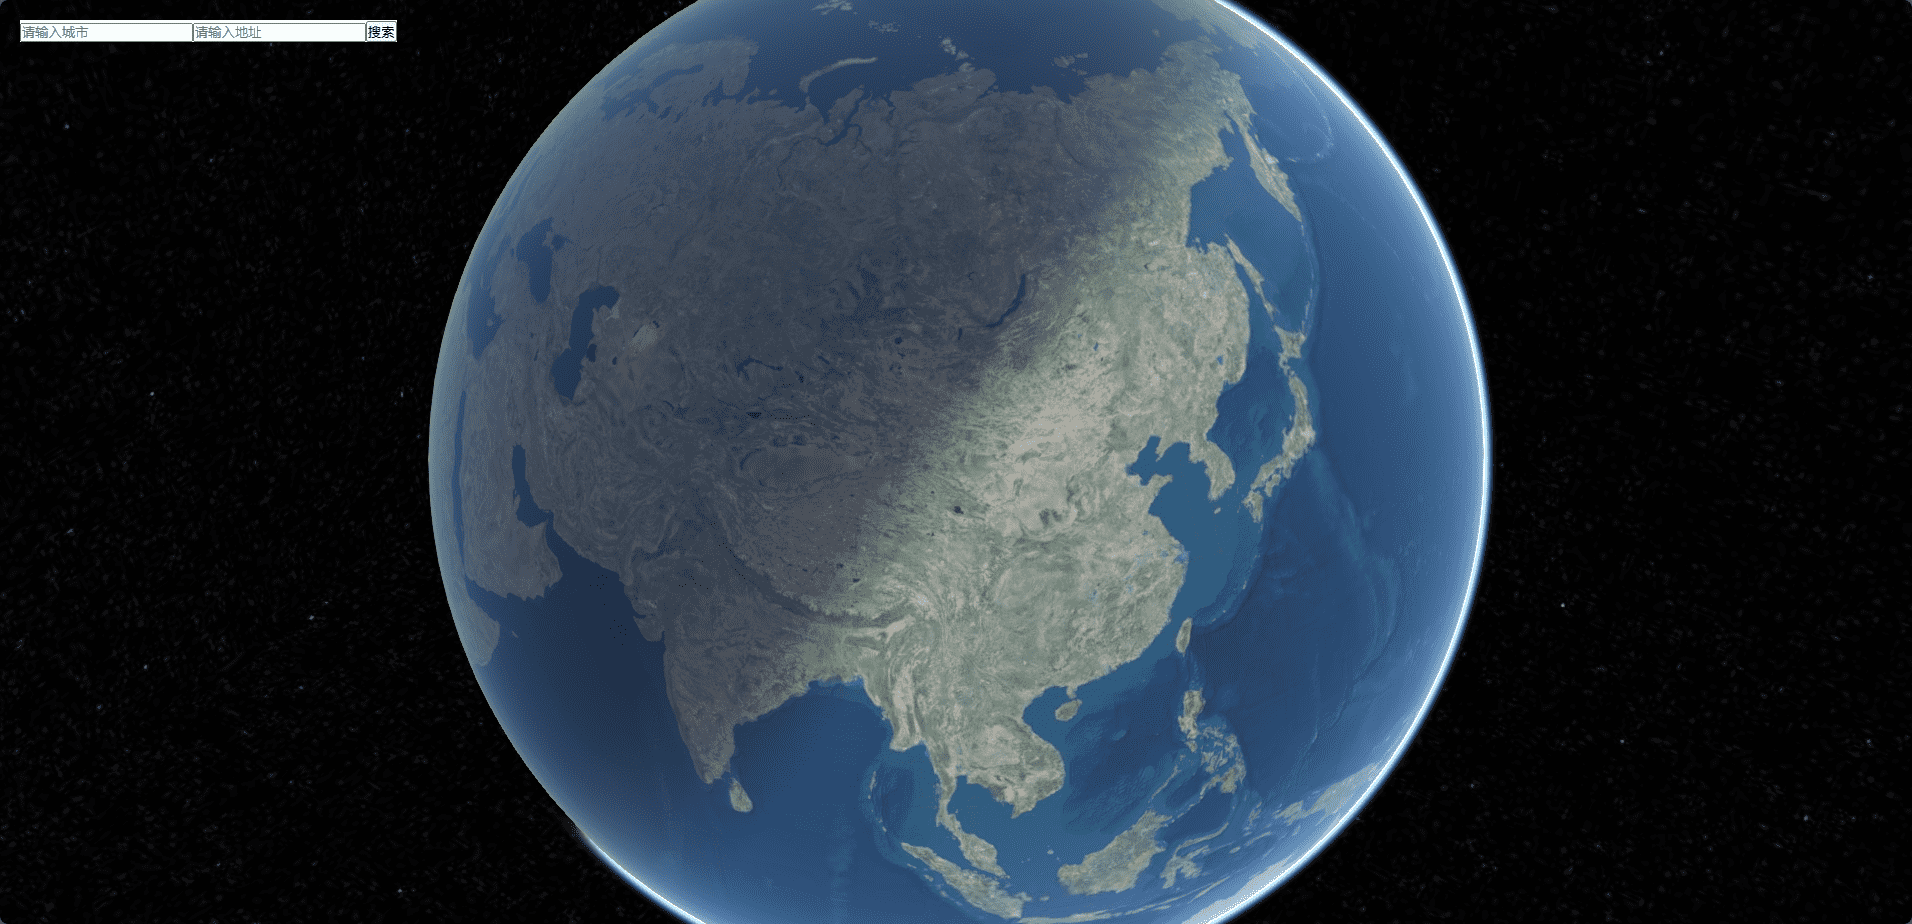
搜索栏
这里我就简单表示一下,后续有空,我会将样式什么的优化一下,这里就不多说了

搜索逻辑

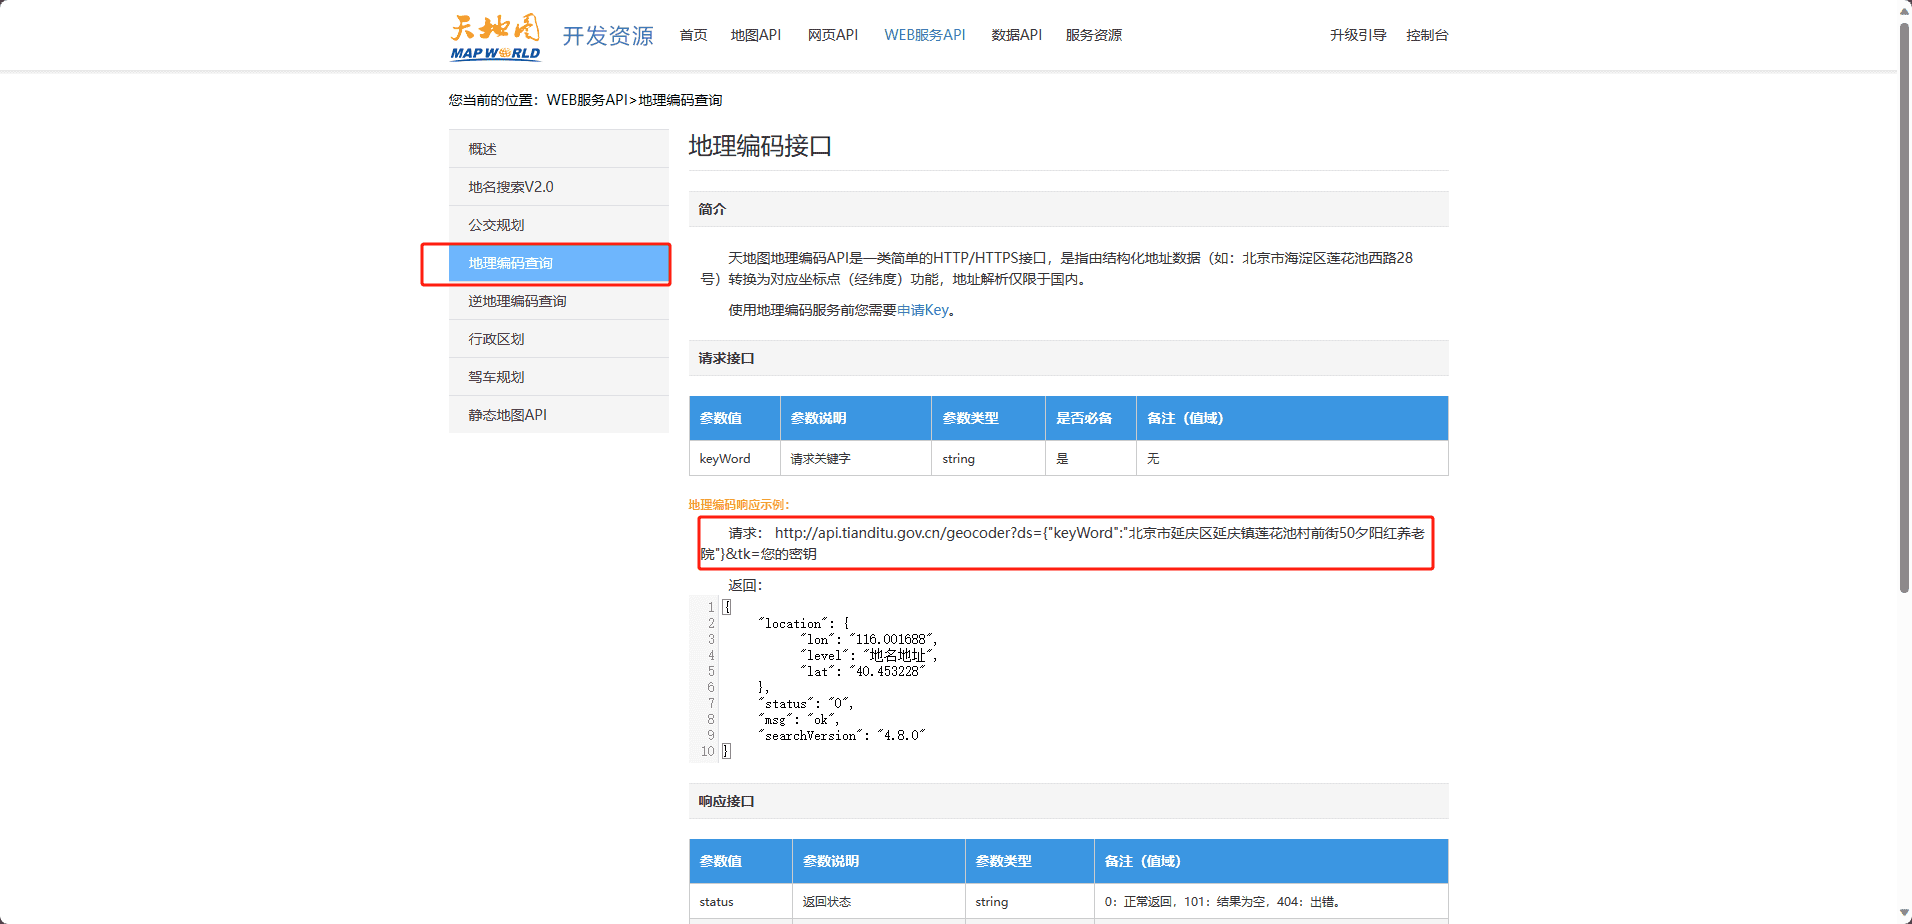
这里调用了天地图的api,根据位置搜索经纬度,然后飞行到指定位置
天地图api

1
2
3
4
5
6
7
8
9
10
11
12
13
14
15
16
17
18
19
20
21
22
23
24
25
26
27
28
29
30
31
32
33
34
35
36
37
38
39
40
41
42
43
44
45
46
47
import {queryAreaLatAndLng} from "./api/index"
// 搜索参数
const searchParam = reactive({
address: "",
city: "",
});

/**
@description 搜索经纬度
@param {string} address 地址
@param {string} city 城市
*/
const handleSearchLatAndLng=()=>{
const {address,city}=searchParam;
// 判断是否输入地址和城市
if(!address || !city){
alert("请输入地址和城市");
return;
}
// 查询经纬度
queryAreaLatAndLng({address,city}).then((res)=>{
console.log(res,'res')
const {lat,lon}=res.data.location;
// 根据经纬度飞行到指定位置
if(lat && lon){
viewer.value.camera.flyTo({
destination: Cesium.Cartesian3.fromDegrees(lon, lat, 500),
orientation: {
heading: Cesium.Math.toRadians(-45),
pitch: Cesium.Math.toRadians(-30),
roll: 0,
},
duration: 2,
});
}
})
}

/**
* @description 根据位置查询地区的经纬度
* @param {*} address 地址
* @param {*} city 城市
*/
export function queryAreaLatAndLng(param) {
const { address, city } = param
return axios.get(`http://api.tianditu.gov.cn/geocoder?ds={"keyWord":"${city}${address}"}&tk=${ak}`)
}

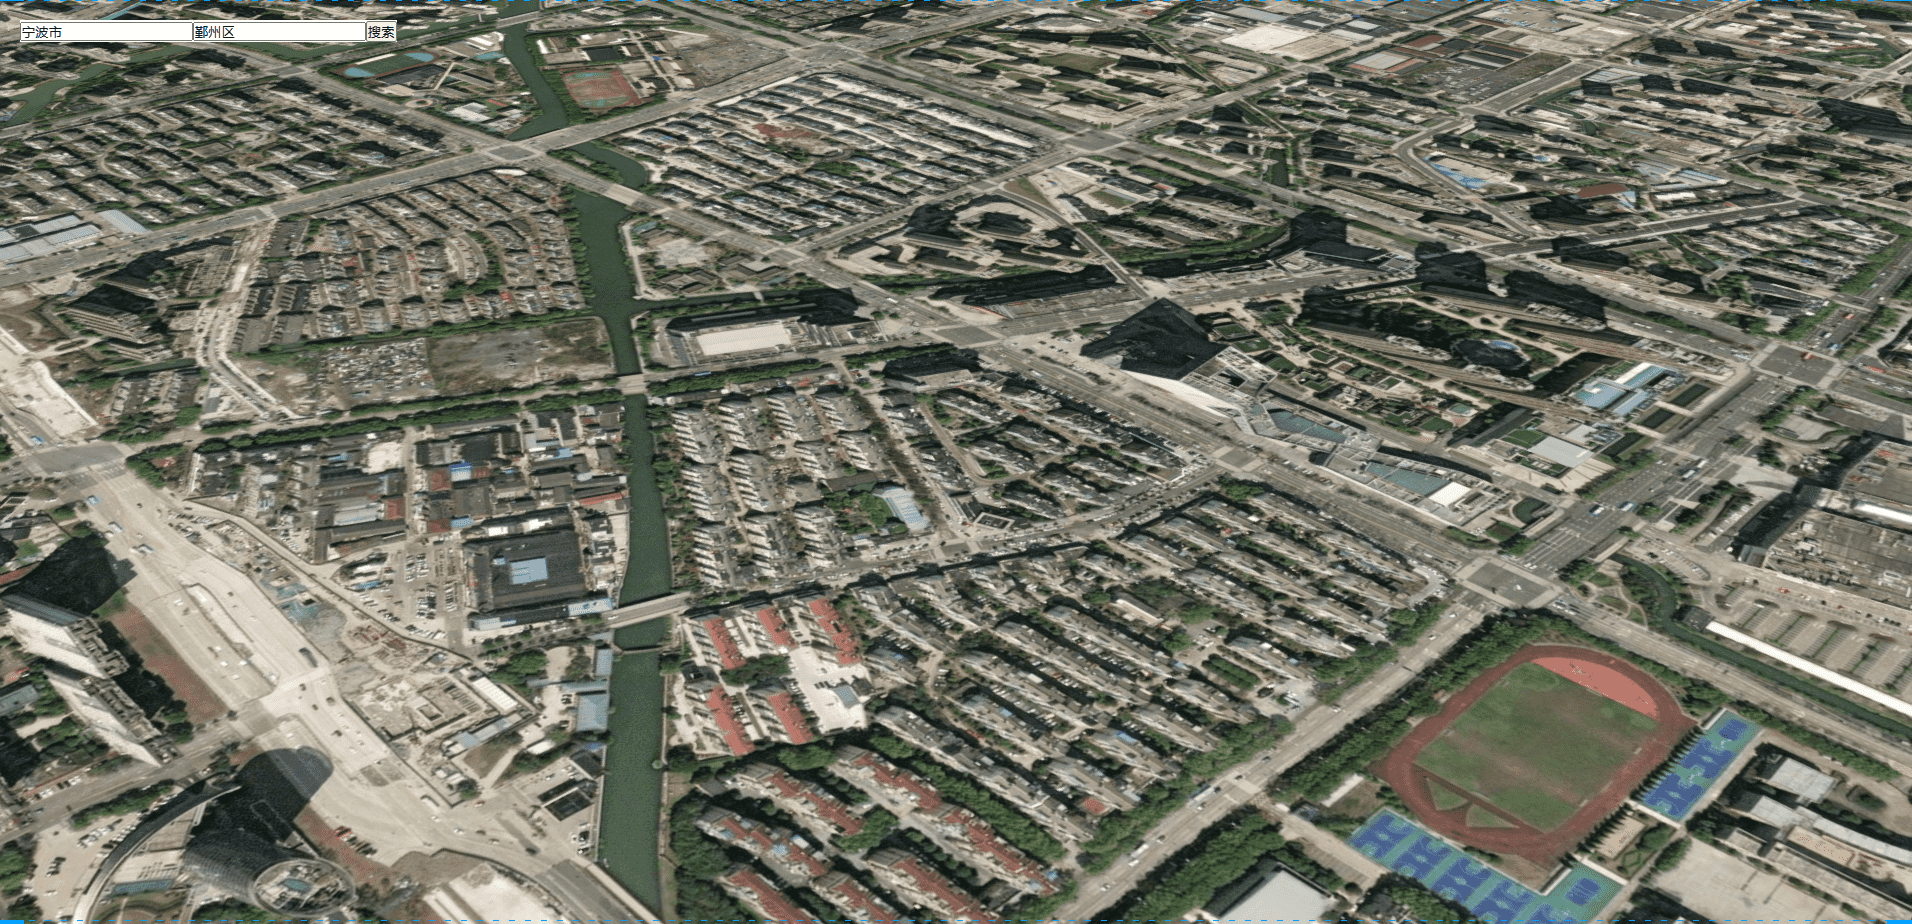
这样一个简单的根据经纬度搜索跳转就完成了,其实cesium中的search自带这个效果,但是我想着自己写一个自定义程度高一点,后续也可以持续优化

搜索效果预览

搜索效果

添加天气逻辑

首先我们写一下天气的样式,这里我就暂时加了这几种效果,后续有空我也会优化一下

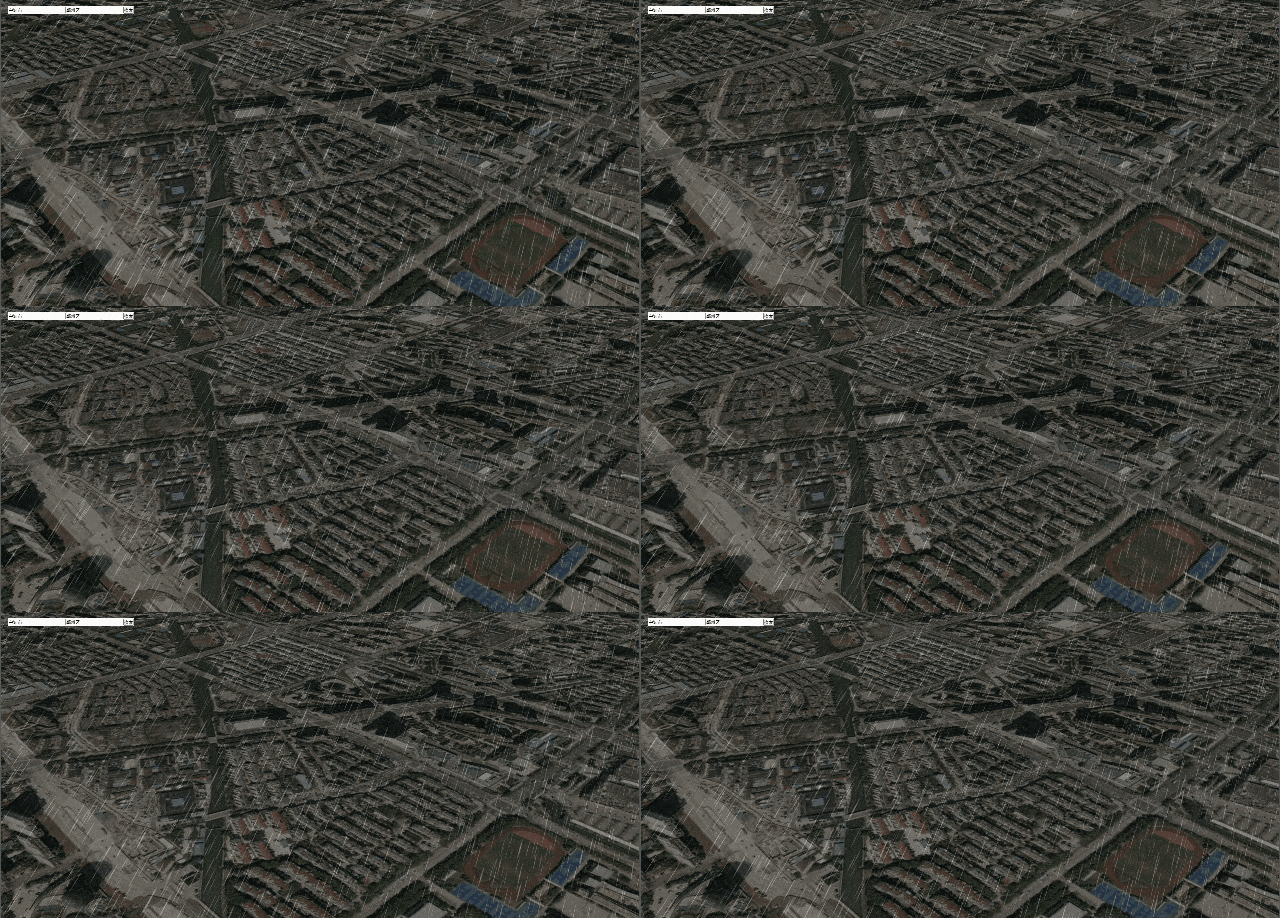
雨天

1
2
3
4
5
6
7
8
9
10
11
12
13
14
15
16
17
18
19
20
21
22
23
24
25
26
27
28
29
30
31
32
33
34
35
36
37
38
viewer.value.shadowMap.darkness = 0.9;//阴影强度
let collection = viewer.value.scene.postProcessStages;
let rain = new Cesium.PostProcessStage({
name: 'czm_rain',
fragmentShader: `
uniform sampler2D colorTexture;//输入的场景渲染照片
varying vec2 v_textureCoordinates;
uniform float vrain;

float hash(float x){
return fract(sin(x*133.3)*13.13);
}

void main(void){
float time = czm_frameNumber / vrain;
vec2 resolution = czm_viewport.zw;

vec2 uv=(gl_FragCoord.xy*2.-resolution.xy)/min(resolution.x,resolution.y);
vec3 c=vec3(.6,.7,.8);
float a=0.4;
float si=sin(a),co=cos(a);
uv*=mat2(co,-si,si,co);
uv*=length(uv+vec2(0,4.9))*.3+1.;

float v=1.-sin(hash(floor(uv.x*100.))*2.);
float b=clamp(abs(sin(20.*time*v+uv.y*(5./(2.+v))))-.95,0.,1.)*20.;

c*=v*b; //屏幕上雨的颜色
gl_FragColor = mix(texture2D(colorTexture, v_textureCoordinates), vec4(c,1), 0.5); //将雨和三维场景融合
}
`,
uniforms: {
vrain: function () {
return 30//value:时间
}
}
});
collection.add(rain);

效果图

雪天

1
2
3
4
5
6
7
8
9
10
11
12
13
14
15
16
17
18
19
20
21
22
23
24
25
26
27
28
29
30
31
32
33
34
35
36
37
38
39
40
41
viewer.value.shadowMap.darkness = 0.9;//阴影强度
let collection = viewer.value.scene.postProcessStages;
let snow = new Cesium.PostProcessStage({
name: 'czm_snow',
fragmentShader: `
uniform sampler2D colorTexture;
varying vec2 v_textureCoordinates;
uniform float vsnow;

float snow(vec2 uv,float scale)
{ float time = czm_frameNumber / vsnow;
float w=smoothstep(1.,0.,-uv.y*(scale/10.));if(w<.1)return 0.;
uv+=time/scale;uv.y+=time*2./scale;uv.x+=sin(uv.y+time*.5)/scale;
uv*=scale;vec2 s=floor(uv),f=fract(uv),p;float k=3.,d;
p=.5+.35*sin(11.*fract(sin((s+p+scale)*mat2(7,3,6,5))*5.))-f;d=length(p);k=min(d,k);
k=smoothstep(0.,k,sin(f.x+f.y)*0.01);
return k*w;
}
void main(void){
vec2 resolution = czm_viewport.zw;
vec2 uv=(gl_FragCoord.xy*2.-resolution.xy)/min(resolution.x,resolution.y);
vec3 finalColor=vec3(0);
float c = 0.0;
c+=snow(uv,30.)*.0;
c+=snow(uv,20.)*.0;
c+=snow(uv,15.)*.0;
c+=snow(uv,10.);
c+=snow(uv,8.);
c+=snow(uv,6.);
c+=snow(uv,5.);
finalColor=(vec3(c));
gl_FragColor = mix(texture2D(colorTexture, v_textureCoordinates), vec4(finalColor,1), 0.5);
}
`,
uniforms: {
vsnow: function () {
return 60//value:时间,其他为固定值
}
}
});
collection.add(snow);

效果图

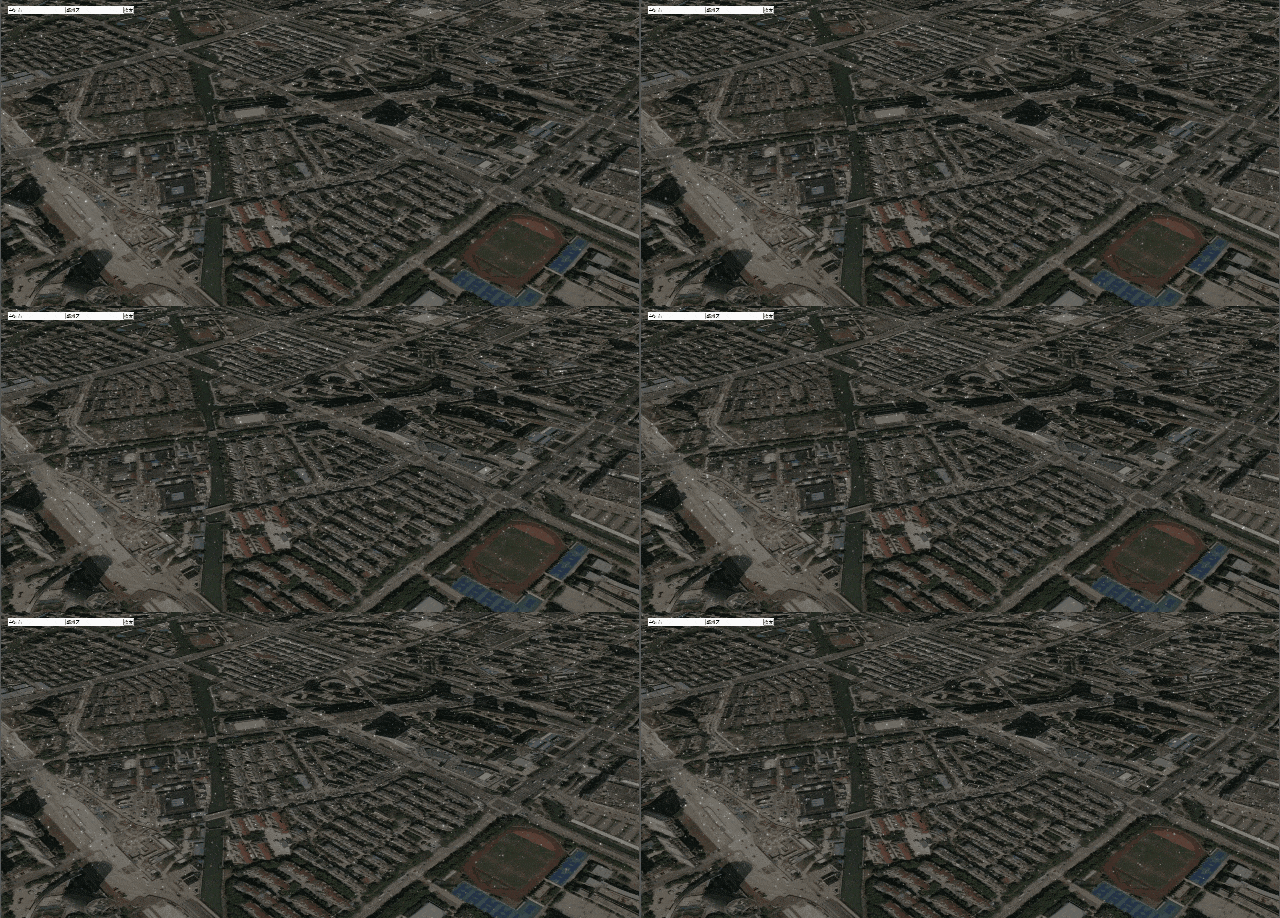
晴天

1
2
3
4
5
6
7
8
viewer.value.shadows = true; //阴影
viewer.value.shadowMap.enabled = true;
viewer.value.shadowMap.size = 2048*2;
viewer.value.shadowMap.darkness = 0.6;//阴影强度
viewer.value.shadowMap.softShadows = true;
viewer.value.shadowMap.maximumDistance = 10000.0;
//设置当前时间,阴影角度随时间变化
viewer.value.clock.currentTime = Cesium.JulianDate.fromDate(new Date());

效果图

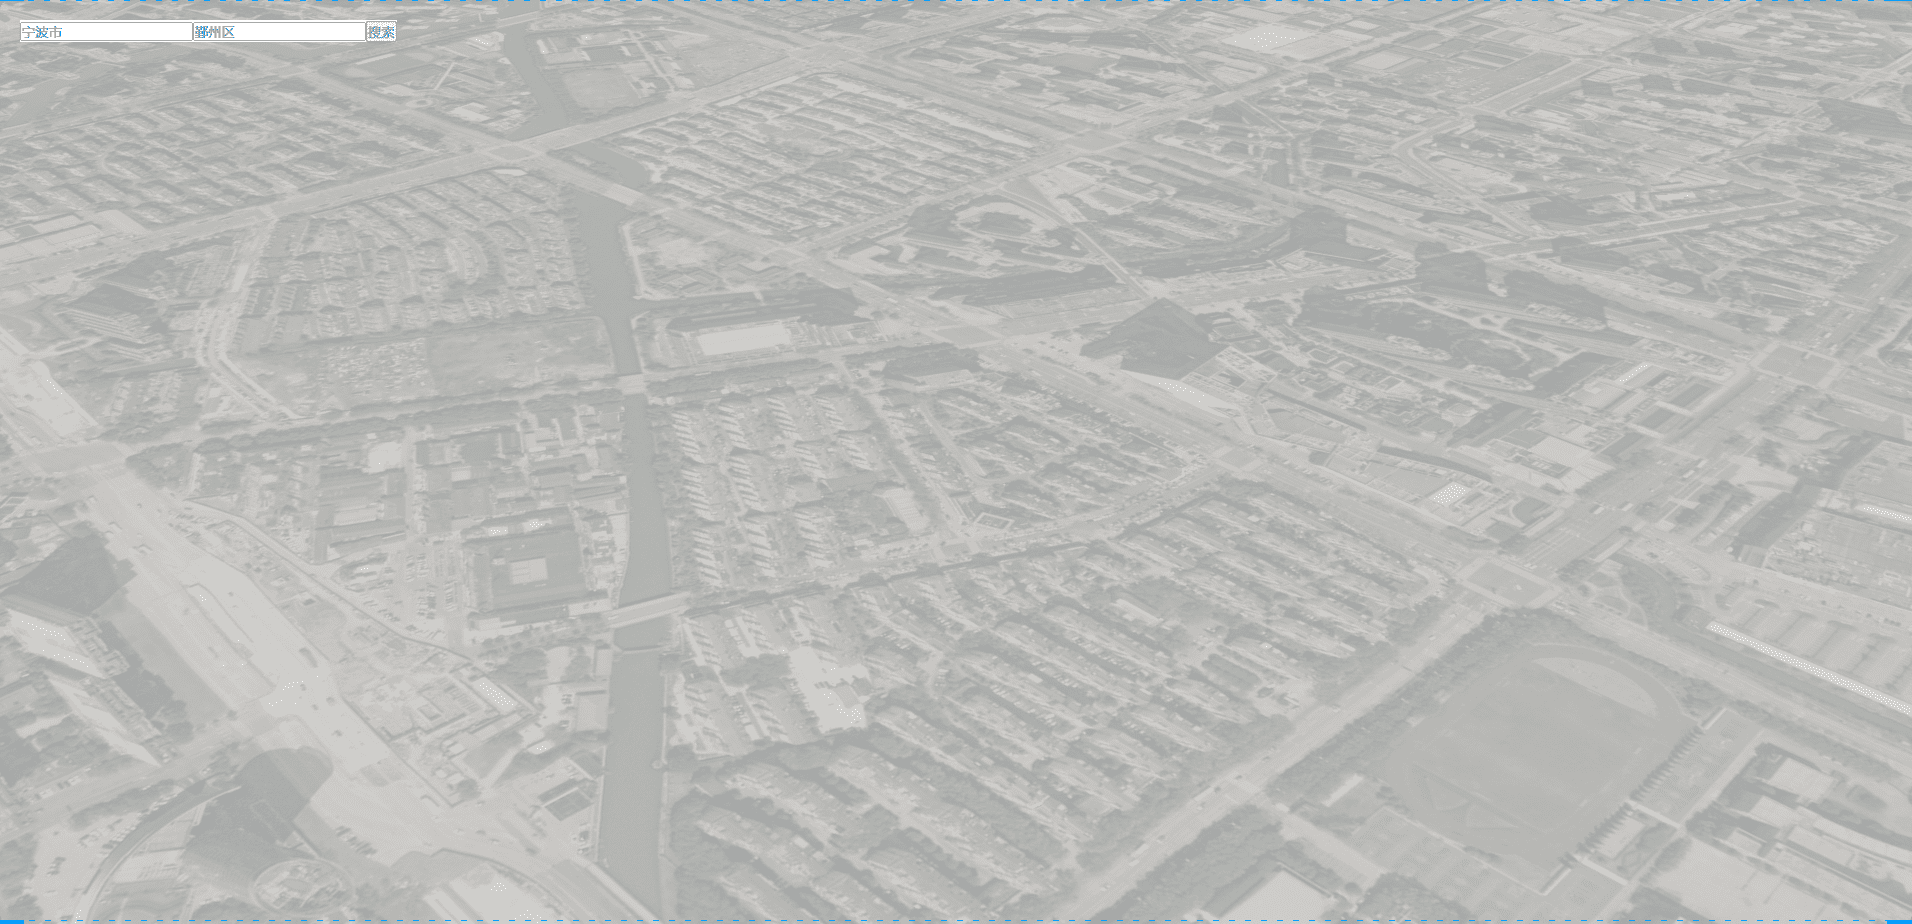
雾天

1
2
3
4
5
6
7
8
9
10
11
12
13
14
15
16
17
18
19
20
21
22
23
24
25
26
27
28
29
30
viewer.value.shadowMap.darkness = 0.9;//阴影强度
let collection = viewer.value.scene.postProcessStages;
let flog = new Cesium.PostProcessStage({
name: 'czm_fog',
fragmentShader: `
uniform sampler2D colorTexture;\n\
uniform sampler2D depthTexture;\n\
uniform float vfog;\n\
uniform vec4 fogColor;\n\
varying vec2 v_textureCoordinates; \n\
void main(void) \n\
{ \n\
vec4 origcolor = texture2D(colorTexture, v_textureCoordinates); \n\
float depth = czm_readDepth(depthTexture, v_textureCoordinates); \n\
vec4 depthcolor = texture2D(depthTexture, v_textureCoordinates); \n\
float f = vfog * (depthcolor.r - 0.3) / 0.2; \n\
if (f < 0.0) f = 0.3; \n\
else if (f > 1.0) f = 0.8; \n\
gl_FragColor = mix(origcolor, fogColor, f); \n\
}\n`,
uniforms: {
vfog: function () {
return 0.5 //value:强度,其他为固定值
},
fogColor: function () {
return new Cesium.Color(0.8, 0.8, 0.8, 0.5)
},
}
});
collection.add(flog);

效果图

调用天气api

我们通过这个地址就可以知道了
天气api地址
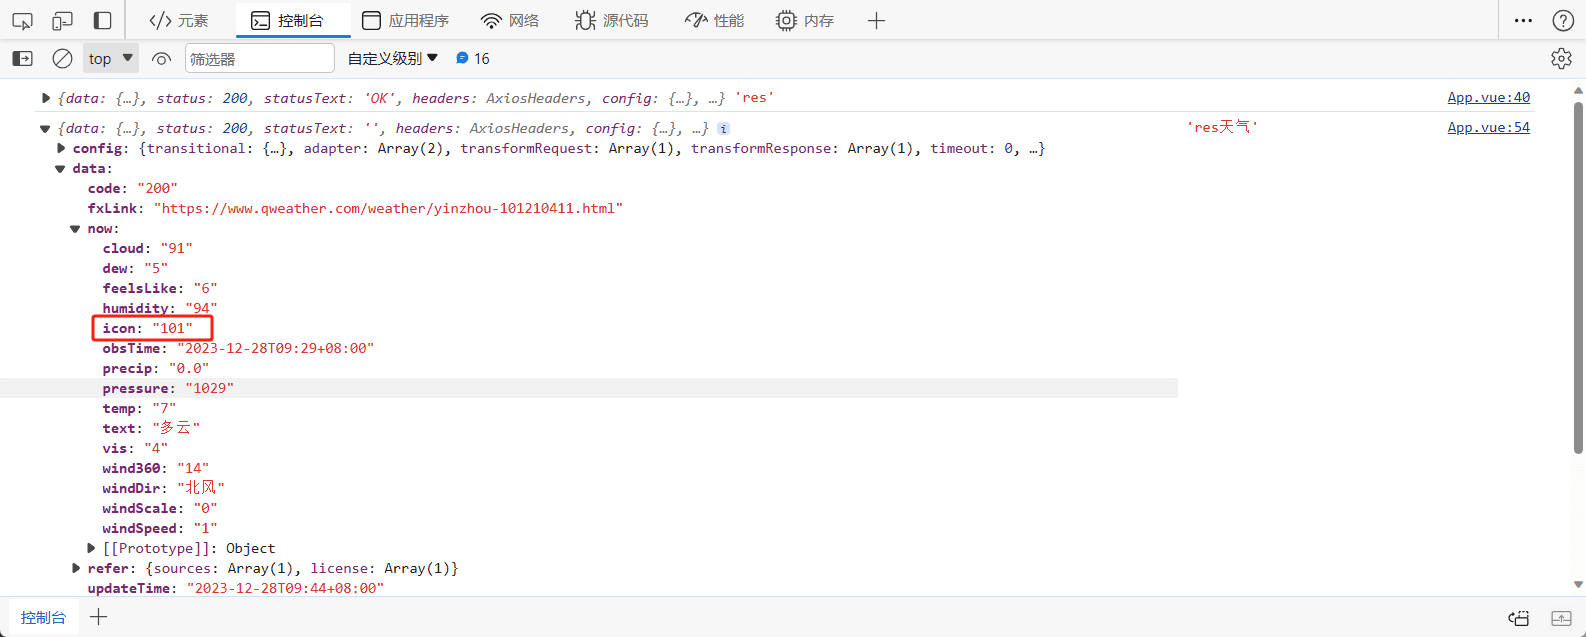
然后我们根据图标代码就可以显示当前天气
图标代码

请求

在我们根据天地图得到经纬度之后,我们就可以根据这个经纬度去请求天气了

1
2
3
4
5
6
7
8
9
10
11
12
13
queryAreaWeather({lat,lng:lon}).then((res)=>{
console.log(res,'res天气')
})
/**
* @description 根据经纬度查询地区的天气
* @param {*} lng 经度
* @param {*} lat 纬度
*/

export function queryAreaWeather(param) {
const { lng, lat } = param
return axios.get(`https://devapi.qweather.com/v7/weather/now?key=${weatherKey}&location=${lng},${lat}`)
}

然后我们根据icon去匹配我们的天气
控制台图

代码整理

好了,到这里我们逻辑都走完了,接下来我把代码整理一下

简单封装一个天气类

1
2
3
4
5
6
7
8
9
10
11
12
13
14
15
16
17
18
19
20
21
22
23
24
25
26
27
28
29
30
31
32
33
34
35
36
37
38
39
40
41
42
43
44
45
46
47
48
49
50
51
52
53
54
55
56
57
58
59
60
61
62
63
64
65
66
67
68
69
70
71
72
73
74
75
76
77
78
79
80
81
82
83
84
85
86
87
88
89
90
91
92
93
94
95
96
97
98
99
100
101
102
103
104
105
106
107
108
109
110
111
112
113
114
115
116
117
118
119
120
121
122
123
124
125
126
127
128
129
130
131
132
133
134
135
136
137
138
139
140
141
142
143
144
145
146
147
148
149
150
151
152
153
154
155
156
157
158
159
160
161
162
163
164
165
166
167
168
169
170
171
172
173
174
175
176
177
178
179
180
import * as Cesium from "cesium";
// 我根据和风天气的文档,将1开头设为晴天,3开头设置为雨天,4开头设置为雪天,5开头设置为雾天
// 后续优化可以考虑天气的强度什么的
export default class WeatherChange {
constructor(viewer) {
this.viewer = viewer;
}

/** 天气状态 */
status = 0;

/** 下雪阶段4 */
snowStage = null;

/** 下雨阶段3 */
rainStage = null;

/** 雾霾阶段5 */
fogStage = null;

/** 晴天阶段1 */
sunnyStage = null;

/** 移除天气 */
remove() {
if (this.status == 0) return;
this.viewer.shadowMap.darkness = 0.0;//阴影强度
this.viewer.shadows = false; //阴影
let collection = this.viewer.scene.postProcessStages;
switch (this.status) {
case 4:
collection.remove(this.snowStage);
case 3:
collection.remove(this.rainStage);
case 5:
collection.remove(this.fogStage);
}
this.status = 0;
}

/** 下雪 */
snow(vsnow = 60) {
console.log("下雪咯~")
this.remove()
this.viewer.shadowMap.darkness = 0.9;//阴影强度
let collection = this.viewer.scene.postProcessStages;
this.snowStage = new Cesium.PostProcessStage({
name: 'czm_snow',
fragmentShader: `
uniform sampler2D colorTexture;
varying vec2 v_textureCoordinates;
uniform float vsnow;

float snow(vec2 uv,float scale)
{ float time = czm_frameNumber / vsnow;
float w=smoothstep(1.,0.,-uv.y*(scale/10.));if(w<.1)return 0.;
uv+=time/scale;uv.y+=time*2./scale;uv.x+=sin(uv.y+time*.5)/scale;
uv*=scale;vec2 s=floor(uv),f=fract(uv),p;float k=3.,d;
p=.5+.35*sin(11.*fract(sin((s+p+scale)*mat2(7,3,6,5))*5.))-f;d=length(p);k=min(d,k);
k=smoothstep(0.,k,sin(f.x+f.y)*0.01);
return k*w;
}
void main(void){
vec2 resolution = czm_viewport.zw;
vec2 uv=(gl_FragCoord.xy*2.-resolution.xy)/min(resolution.x,resolution.y);
vec3 finalColor=vec3(0);
float c = 0.0;
c+=snow(uv,30.)*.0;
c+=snow(uv,20.)*.0;
c+=snow(uv,15.)*.0;
c+=snow(uv,10.);
c+=snow(uv,8.);
c+=snow(uv,6.);
c+=snow(uv,5.);
finalColor=(vec3(c));
gl_FragColor = mix(texture2D(colorTexture, v_textureCoordinates), vec4(finalColor,1), 0.5);
}
`,
uniforms: {
vsnow: vsnow
}
});
this.status = 4;
collection.add(this.snowStage);
}

/** 起雾 */
fog(fogColor = [0.8, 0.8, 0.8, 0.5], vfog = 0.5) {
console.log("起雾咯~")
this.remove()
this.viewer.shadowMap.darkness = 0.9;//阴影强度
let collection = this.viewer.scene.postProcessStages;
this.fogStage = new Cesium.PostProcessStage({
name: 'czm_fog',
fragmentShader: `uniform sampler2D colorTexture;\n\
uniform sampler2D depthTexture;\n\
uniform float vfog;\n\
uniform vec4 fogColor;\n\
varying vec2 v_textureCoordinates; \n\
void main(void) \n\
{ \n\
vec4 origcolor = texture2D(colorTexture, v_textureCoordinates); \n\
float depth = czm_readDepth(depthTexture, v_textureCoordinates); \n\
vec4 depthcolor = texture2D(depthTexture, v_textureCoordinates); \n\
float f = vfog * (depthcolor.r - 0.3) / 0.2; \n\
if (f < 0.0) f = 0.3; \n\
else if (f > 1.0) f = 0.8; \n\
gl_FragColor = mix(origcolor, fogColor, f); \n\
}\n`,
uniforms: {
vfog: vfog,
fogColor: function () {
return new Cesium.Color(fogColor[0], fogColor[1], fogColor[2], fogColor[3])
},
}
});
this.status = 5;
collection.add(this.fogStage);
}

/** 下雨 */
rain() {
console.log("下雨咯~")
this.remove()
this.viewer.shadowMap.darkness = 0.9;//阴影强度
let collection = this.viewer.scene.postProcessStages;
this.rainStage = new Cesium.PostProcessStage({
name: 'czm_rain',
fragmentShader: `
uniform sampler2D colorTexture;//输入的场景渲染照片
varying vec2 v_textureCoordinates;
uniform float vrain;

float hash(float x){
return fract(sin(x*133.3)*13.13);
}

void main(void){
float time = czm_frameNumber / vrain;
vec2 resolution = czm_viewport.zw;

vec2 uv=(gl_FragCoord.xy*2.-resolution.xy)/min(resolution.x,resolution.y);
vec3 c=vec3(.6,.7,.8);
float a=0.4;
float si=sin(a),co=cos(a);
uv*=mat2(co,-si,si,co);
uv*=length(uv+vec2(0,4.9))*.3+1.;

float v=1.-sin(hash(floor(uv.x*100.))*2.);
float b=clamp(abs(sin(20.*time*v+uv.y*(5./(2.+v))))-.95,0.,1.)*20.;

c*=v*b; //屏幕上雨的颜色
gl_FragColor = mix(texture2D(colorTexture, v_textureCoordinates), vec4(c,1), 0.5); //将雨和三维场景融合
}
`,
uniforms: {
vrain: function () {
return 30//value:时间
}
}
});
this.status = 3;
collection.add(this.rainStage);
}

/** 晴天 */
sun(darkness = 0.6) {
console.log("大晴天~")
this.remove()
this.viewer.shadows = true; //阴影
this.viewer.shadowMap.enabled = true;
this.viewer.shadowMap.size = 2048 * 2;
this.viewer.shadowMap.darkness = darkness;//阴影强度
this.viewer.shadowMap.softShadows = true; //软阴影
this.viewer.shadowMap.maximumDistance = 10000.0;
//设置当前时间,阴影角度随时间变化
this.viewer.clock.currentTime = Cesium.JulianDate.fromDate(new Date());
this.status = 1;
}
}

App.vue完整代码

1
2
3
4
5
6
7
8
9
10
11
12
13
14
15
16
17
18
19
20
21
22
23
24
25
26
27
28
29
30
31
32
33
34
35
36
37
38
39
40
41
42
43
44
45
46
47
48
49
50
51
52
53
54
55
56
57
58
59
60
61
62
63
64
65
66
67
68
69
70
71
72
73
74
75
76
77
78
79
80
81
82
83
84
85
86
87
88
89
90
91
92
93
94
95
96
97
98
99
100
101
102
103
104
105
106
107
108
109
110
111
112
113
114
115
116
117
118
119
120
121
122
123
124
125
126
127
128
129
130
131
132
133
<template>
<div id="cesiumContainer" ref="cesiumContainer">
<div class="searchBar">
<input type="text" placeholder="请输入城市" v-model="searchParam.city" />
<input placeholder="请输入地址" v-model="searchParam.address" />
<button @click="handleSearchLatAndLng">搜索</button>
<button @click="handleChangeWeatherBySelf('3')" >
我想看下雨
</button>
<button @click="handleChangeWeatherBySelf('4')">
我想看下雪
</button>
<button @click="handleChangeWeatherBySelf('5')">
我想看雾
</button>
<button @click="handleChangeWeatherBySelf('1')">
我想看晴天
</button>
<button @click="handleChangeWeatherBySelf('0')">
移除天气
</button>
</div>
</div>
</template>

<script setup>
// yarn add cesium
// 将cesium目录下的Build/Cesium4个目录拷贝到public,然后将widgets目录拷贝一份到src下
import * as Cesium from "cesium";
import "./Widgets/widgets.css";
import { onMounted,reactive,ref } from "vue";
import initViewer from "./cesium/initViewer";
import {queryAreaLatAndLng,queryAreaWeather} from "./api/index"
import WeatherChange from "./cesium/weather";

// 搜索参数
const searchParam = reactive({
address: "鄞州区",
city: "宁波市",
});

/**
@description 搜索经纬度
@param {string} address 地址
@param {string} city 城市
*/
const handleSearchLatAndLng=()=>{
const {address,city}=searchParam;
// 判断是否输入地址和城市
if(!address || !city){
alert("请输入地址和城市");
return;
}
// 查询经纬度
queryAreaLatAndLng({address,city}).then((res)=>{
console.log(res,'res经纬度')
const {lat,lon}=res.data.location;
// 根据经纬度飞行到指定位置
if(lat && lon){
viewer.value.camera.flyTo({
destination: Cesium.Cartesian3.fromDegrees(lon, lat, 500),
orientation: {
heading: Cesium.Math.toRadians(-45),
pitch: Cesium.Math.toRadians(-30),
roll: 0,
},
duration: 2,
});
queryAreaWeather({lat,lng:lon}).then((res)=>{
console.log(res,'res天气')
const icon=res.data.now.icon;
const firstStr=icon.charAt(0);
handleChangeWeatherBySelf(firstStr);
})
}
})
}

const weather=ref()
/**
@description 自定义天气
@param {string} type 天气类型
*/
const handleChangeWeatherBySelf=(type)=>{
switch (type) {
case '4':
weather.value.snow();
break;
case '3':
weather.value.rain();
break;
case '5':
weather.value.fog()
break;
case '1':
weather.value.sun();
break;
default:
weather.value.remove();
break;
}
}

const viewer=ref(null)

// 页面挂载完毕初始化viewer
onMounted(() => {
const view=initViewer();
viewer.value=view;
weather.value=new WeatherChange(viewer.value);
});
</script>

<style>
* {
margin: 0;
padding: 0;
}
#cesiumContainer {
width: 100vw;
height: 100vh;
position:fixed;
}

.searchBar{
position:fixed;
top:20px;
left:20px;
z-index: 9999;
background-color: #fff;
}
</style>

上一篇:
JSON.parse使用中我遇到的bug
下一篇:
回顾2023年展望2024年