前言 接着之前内容继续学习我们的java
新增员工java代码 controller中 首先在controller中新增一个员工的接口,加了postMapping注解,代表是一个post请求,@RequestBody注解代表接收的是一个json格式的数据
1 2 3 4 5 6 7 8 9 10 11 12 @PostMapping @ApiOperation("新增员工") public Result save (@RequestBody EmployeeDTO employeeDTO) { log.info("新增员工:{}" ,employeeDTO); employeeService.save(employeeDTO); return Result.success(); }
service中 然后在service中新增一个员工的方法
1 2 3 4 5 void save (EmployeeDTO employeeDTO) ;
serviceImpl中 然后在serviceImpl中实现这个方法,这里将employeeDTO的数据进行了对象拷贝,将值给了employee
1 2 3 4 5 6 7 8 9 10 11 12 13 14 15 16 17 18 19 20 21 22 23 24 25 26 27 public void save (EmployeeDTO employeeDTO) { Employee employee=new Employee (); BeanUtils.copyProperties(employeeDTO,employee); employee.setStatus(StatusConstant.ENABLE); employee.setPassword(DigestUtils.md5DigestAsHex(PasswordConstant.DEFAULT_PASSWORD.getBytes())); employee.setCreateTime(LocalDateTime.now()); employee.setUpdateTime(LocalDateTime.now()); employee.setCreateUser(10L ); employee.setUpdateUser(10L ); employeeMapper.insert(employee); }
Mapper中 写一段sql语句,将employee插入到数据库中
1 2 3 4 5 6 7 8 9 10 @Insert("insert into employee (name,username,password,phone,sex" + ",id_number,create_time,update_time,create_user,update_user,status)" + "values"+ "(#{name},#{username},#{password},#{phone},#{sex},#{idNumber},#{createTime},#{updateTime},#{createUser},#{updateUser},#{status})" ) void insert (Employee employee) ;
新增员工测试 swagger中设置全局属性 首先,我们要加上token,不然我们的请求会被jwt令牌校验拦截
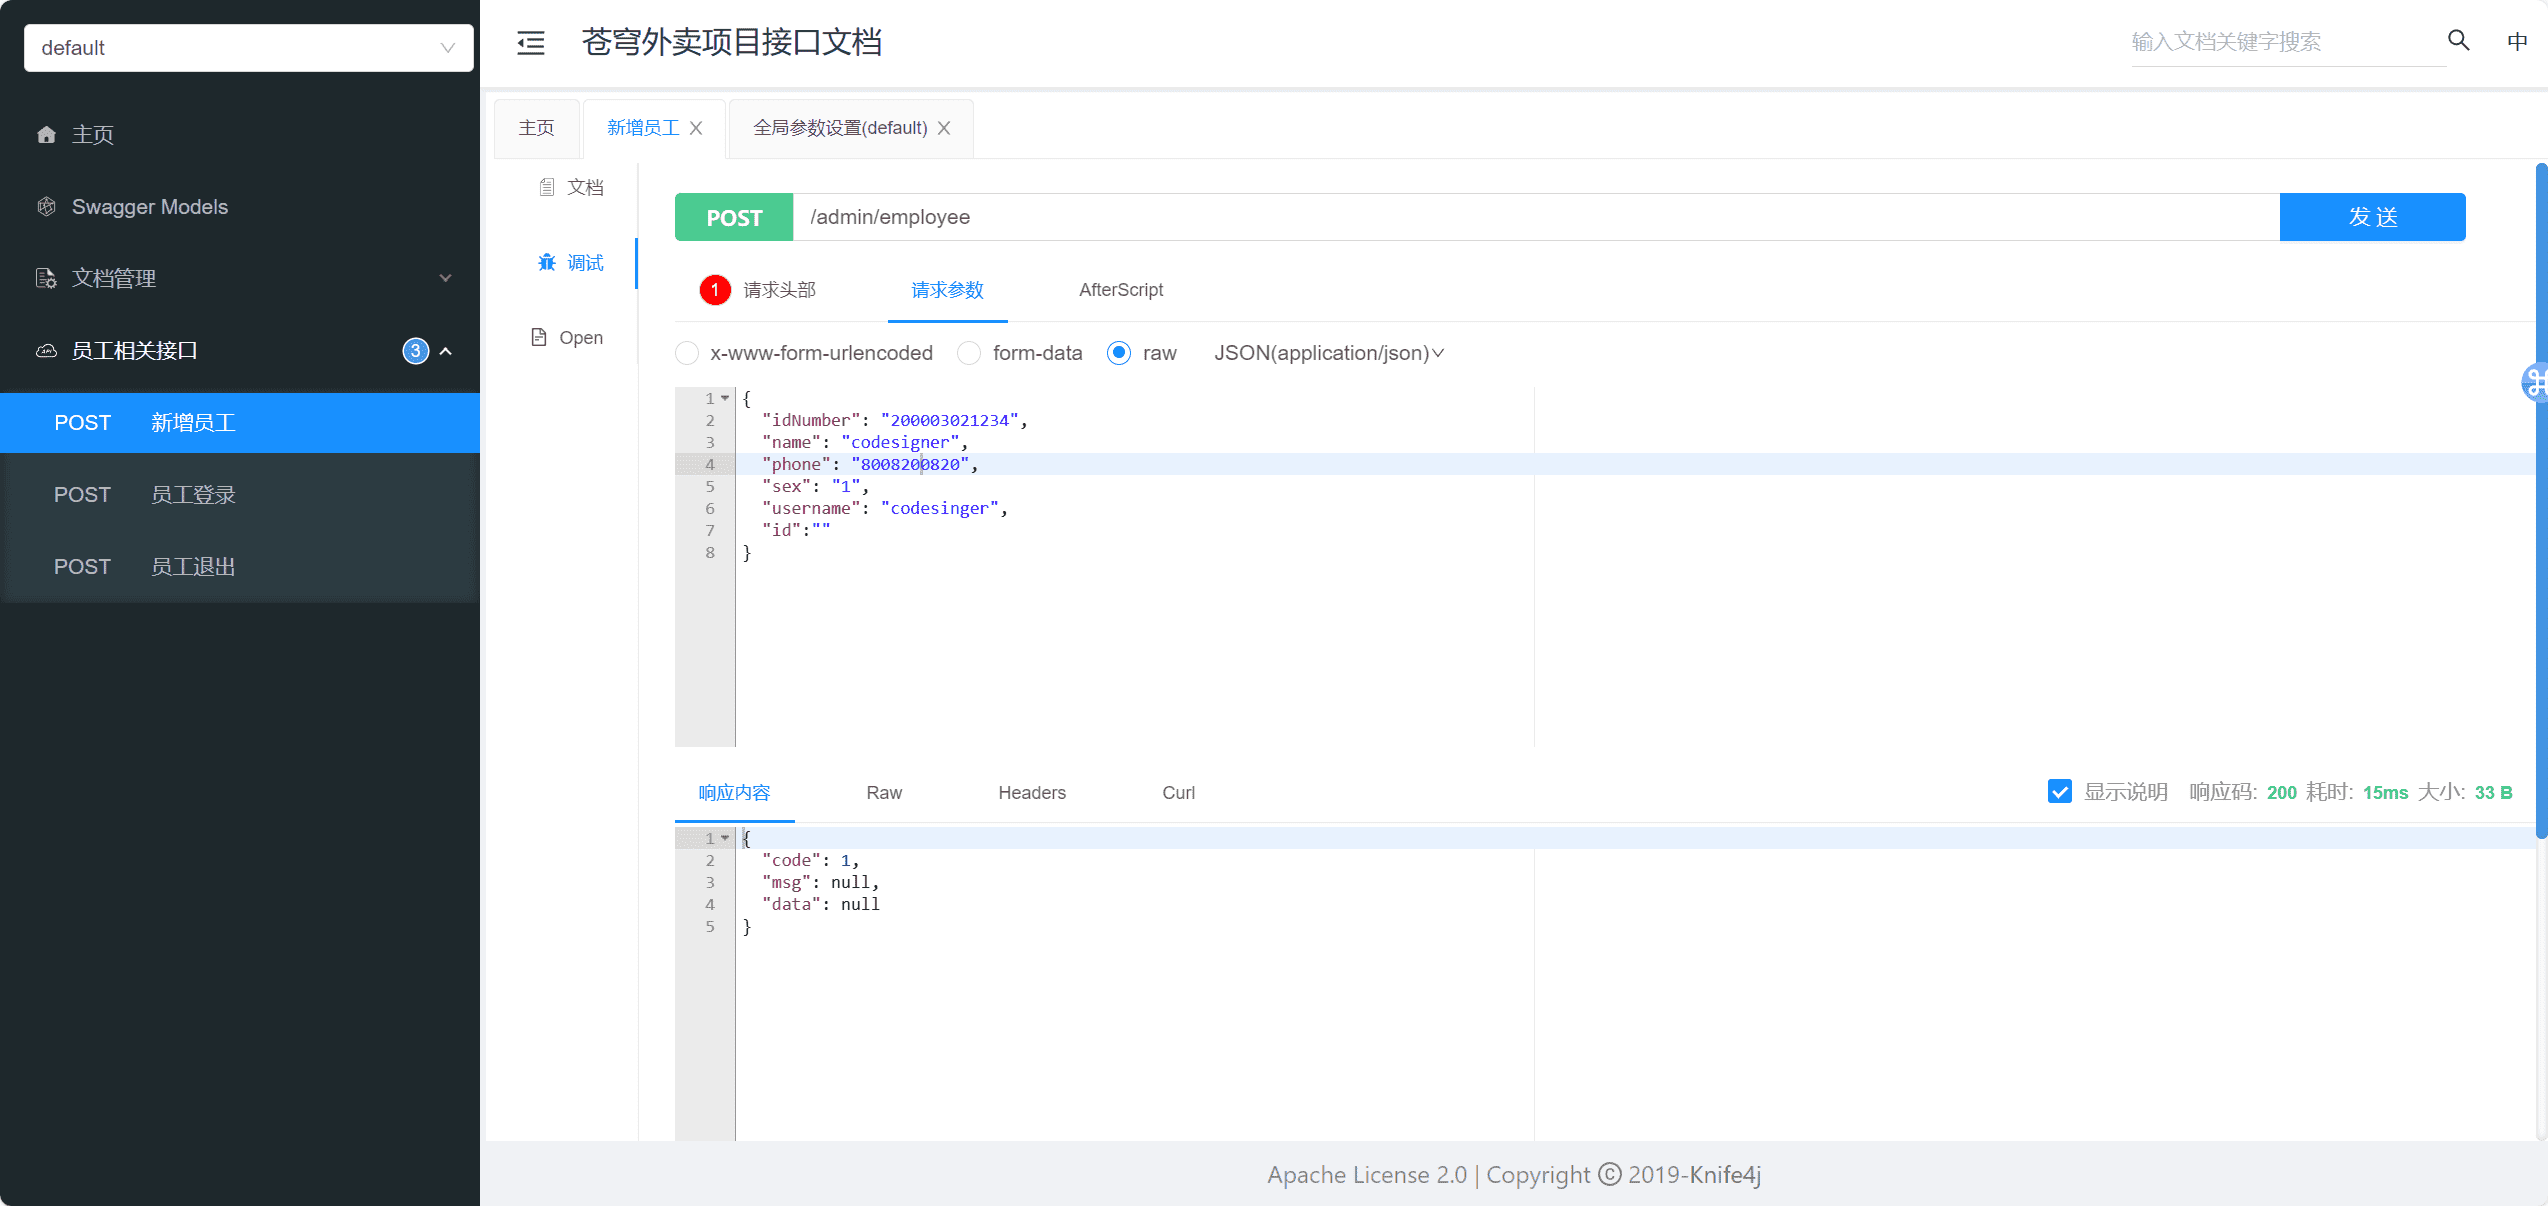
测试请求 然后我们输入数据进行测试请求
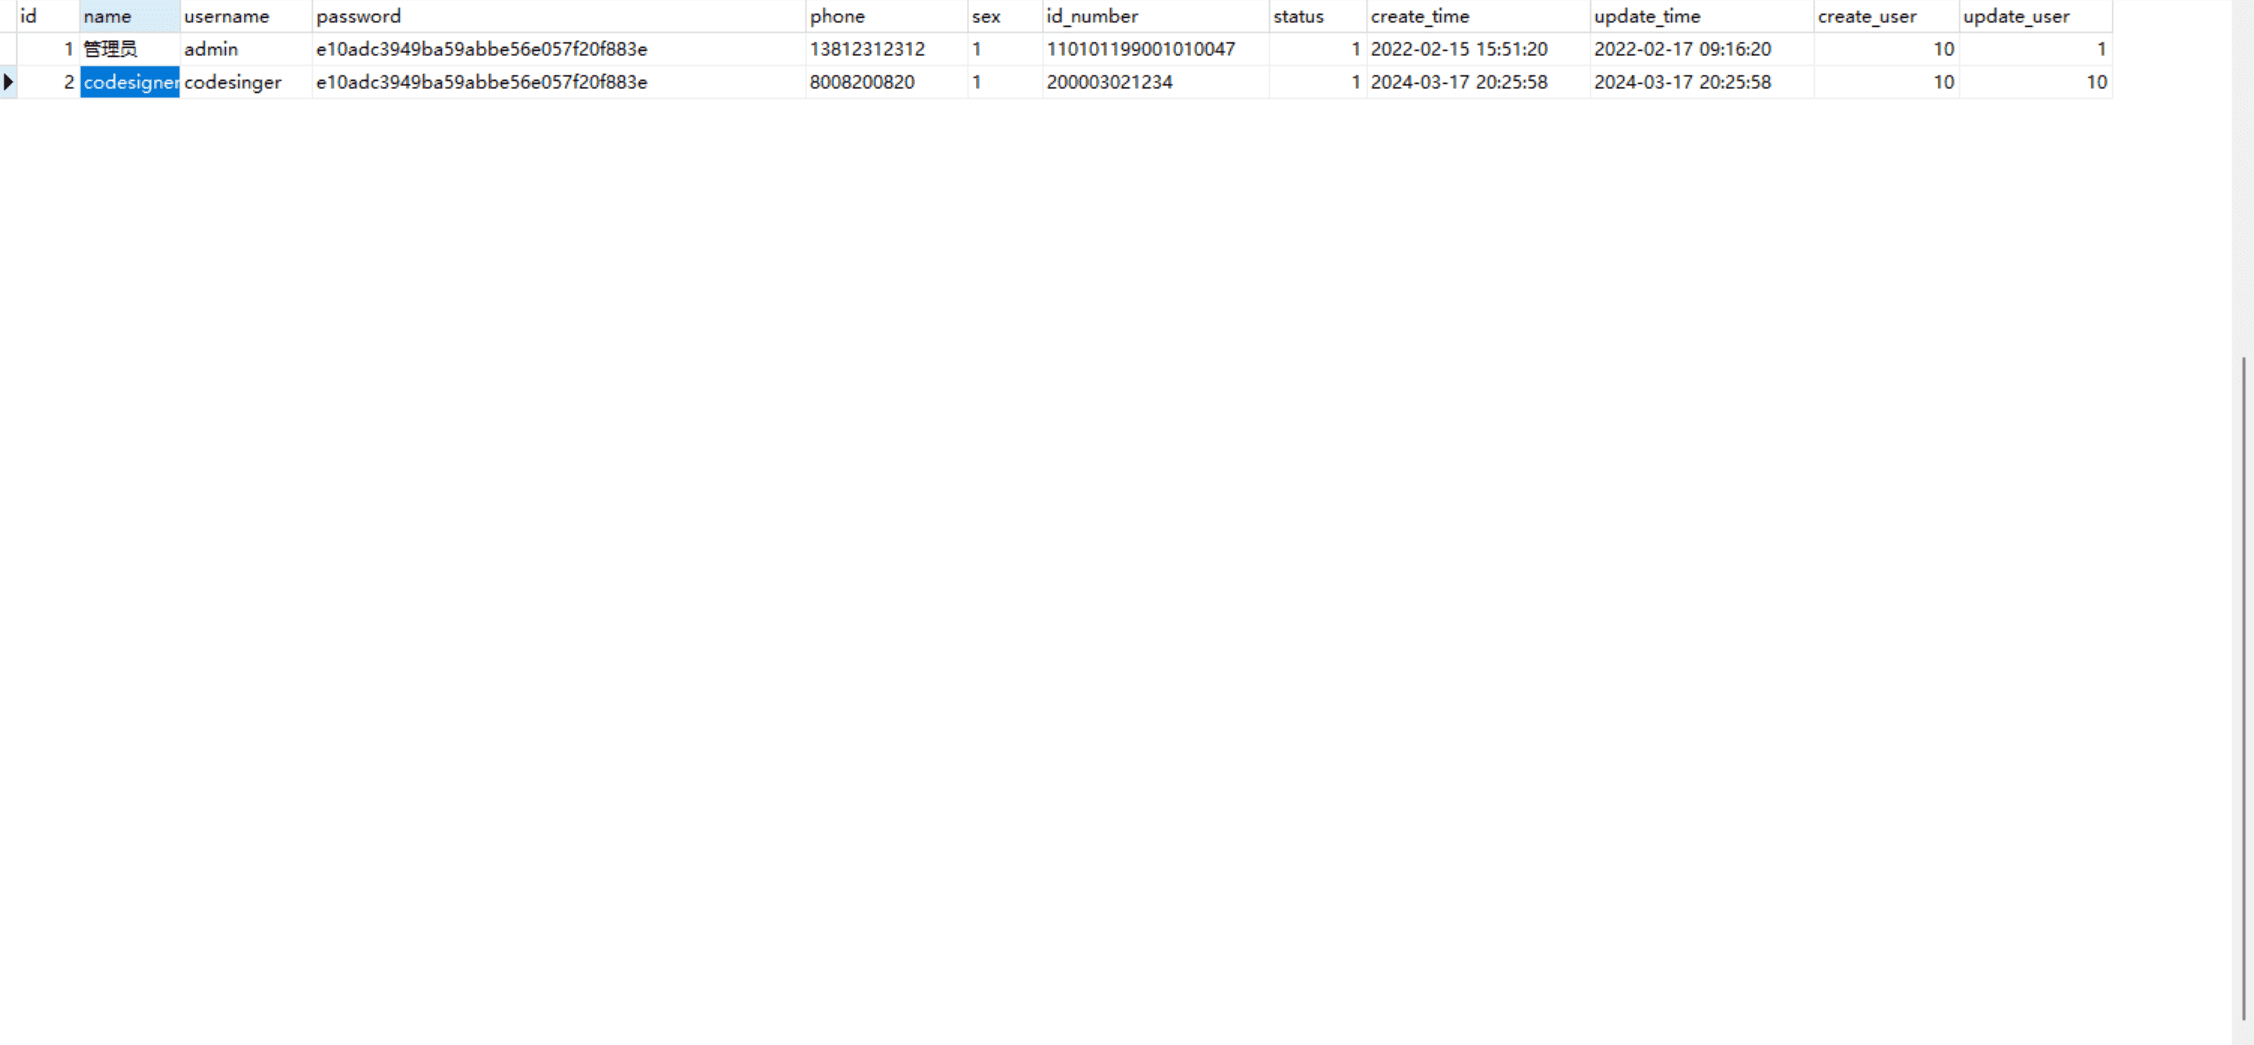
测试结果 最后我们可以看到测试结果,数据库中成功添加了一条数据
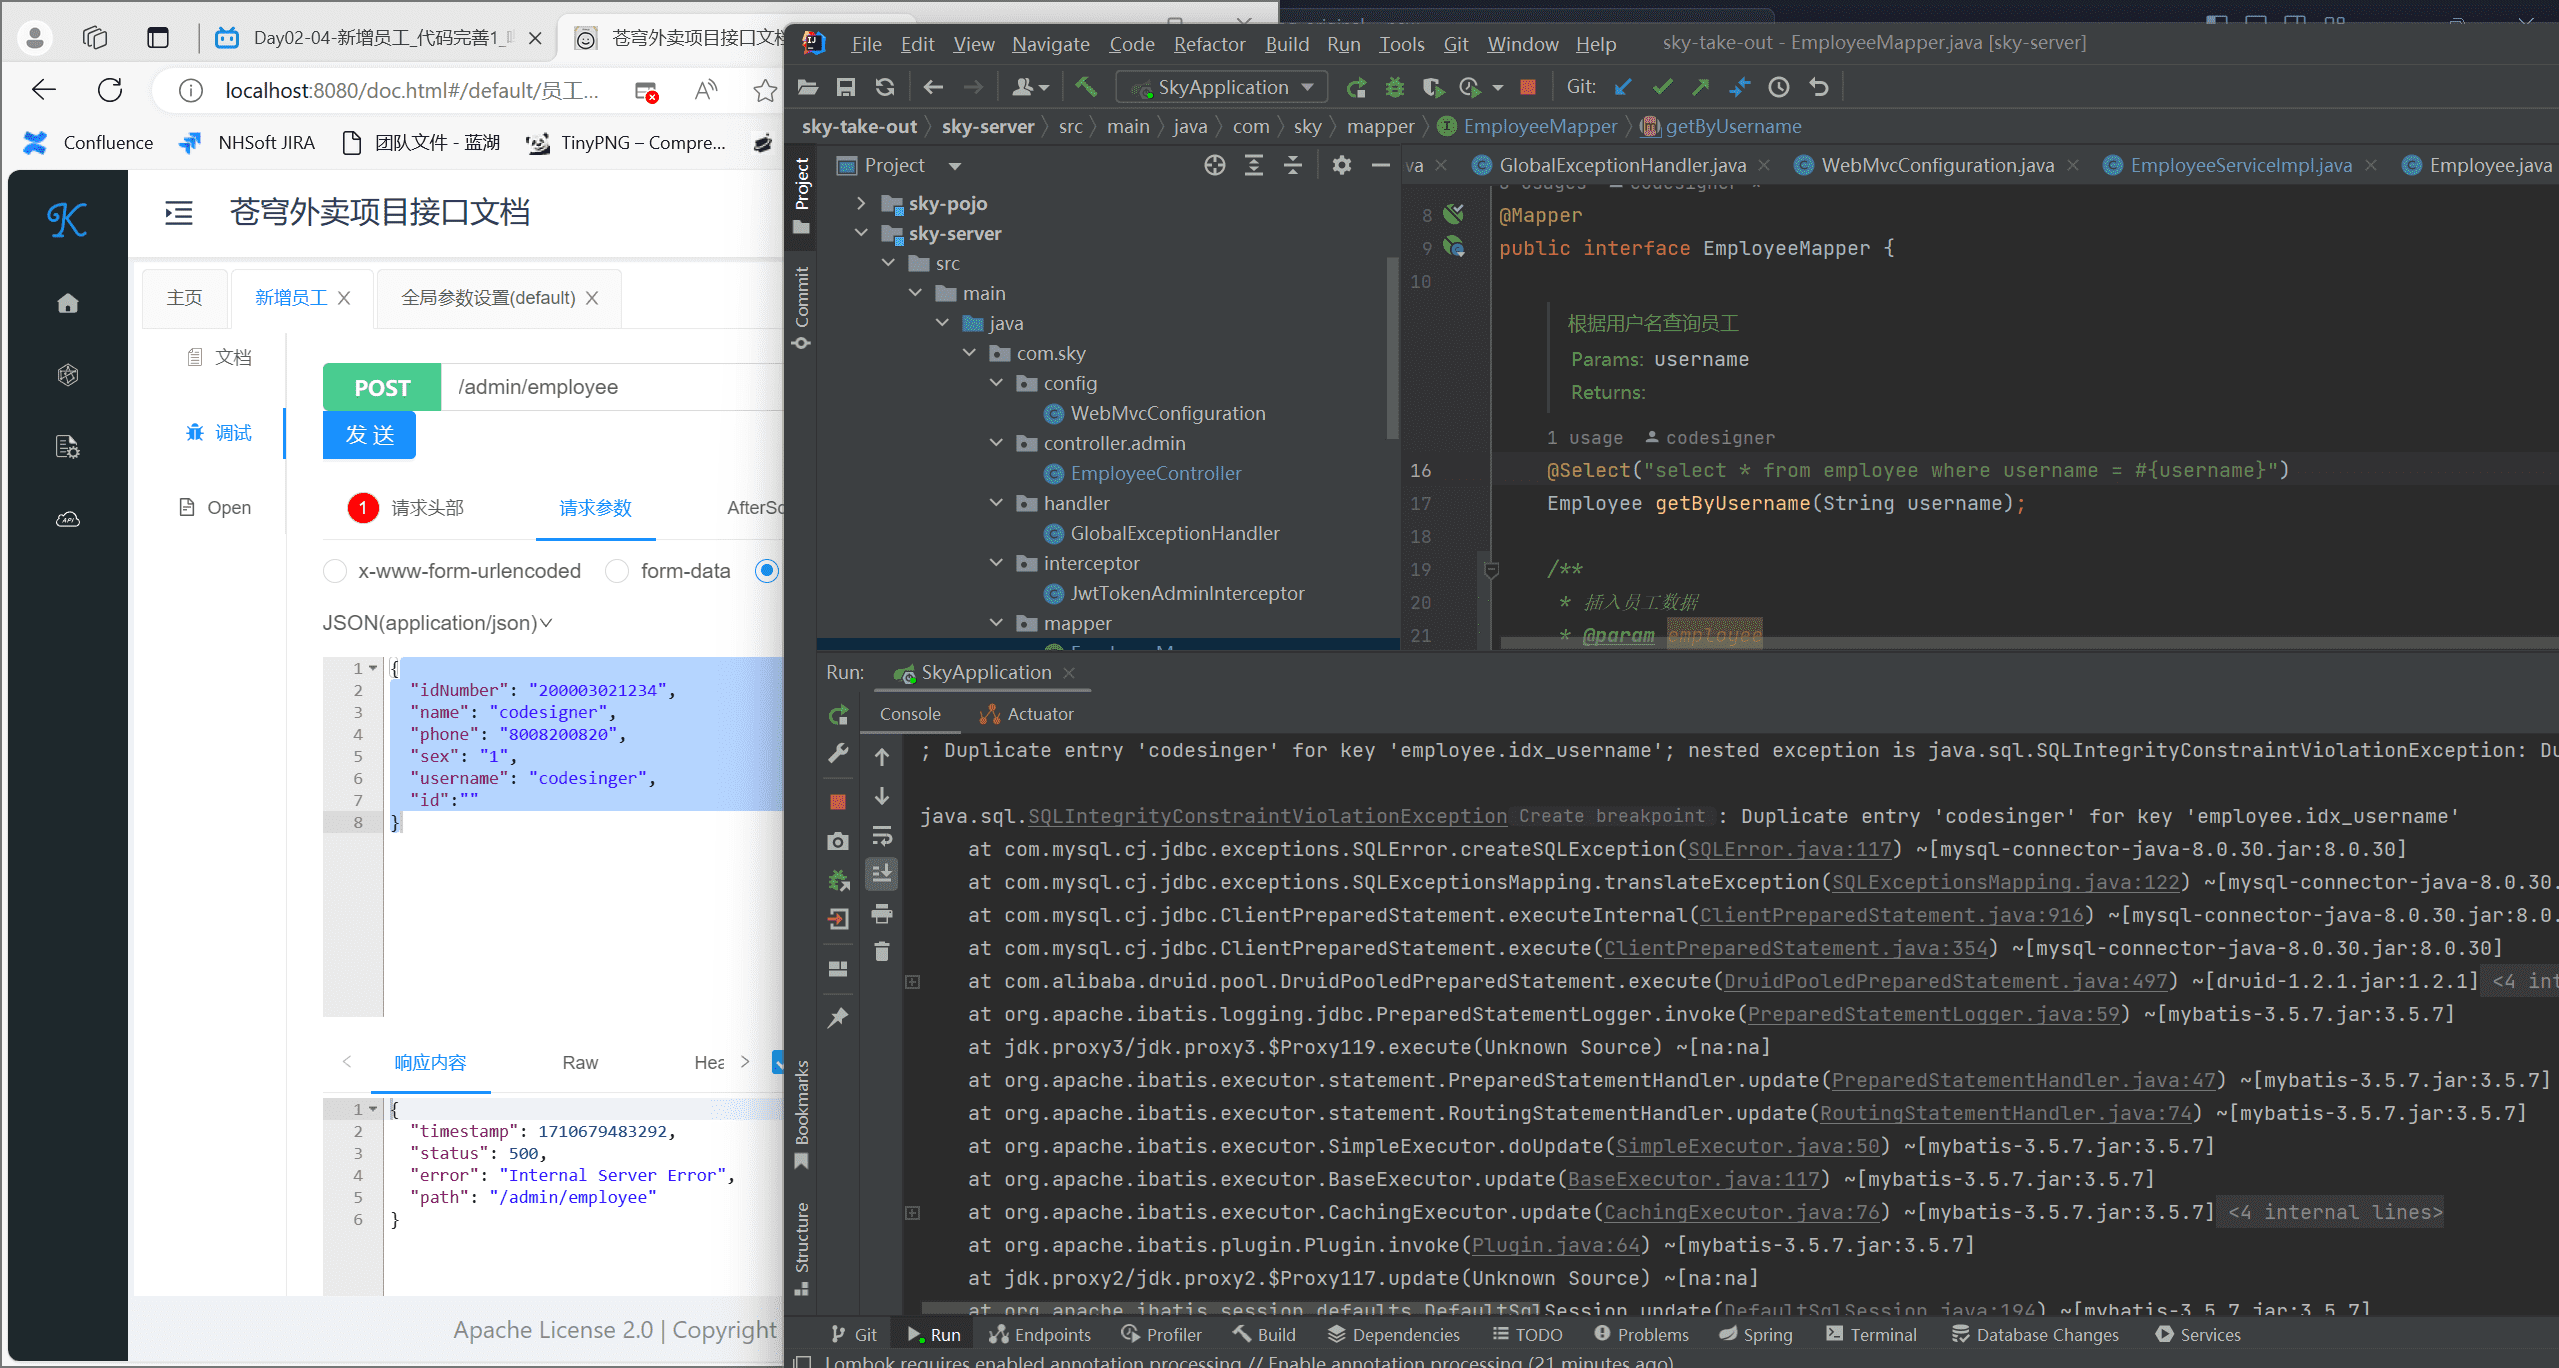
新增员工-代码完善 处理用户名重复异常 当我们重复注册一个账号的时候,就会进行报错,这里我们要进行处理
1
2
3
4
5
6
7
8
9
10
11
12
13
14
15
@ExceptionHandler public Result exceptionHandler (SQLIntegrityConstraintViolationException ex) { String message=ex.getMessage(); if (message.contains("Duplicate entry" )){ String [] split=message.split(" " ); String username=split[2 ]; String msg=username+ MessageConstant.ALREADY_EXISTS; return Result.error(msg); }else { return Result.error(MessageConstant.UNKNOWN_ERROR); } }
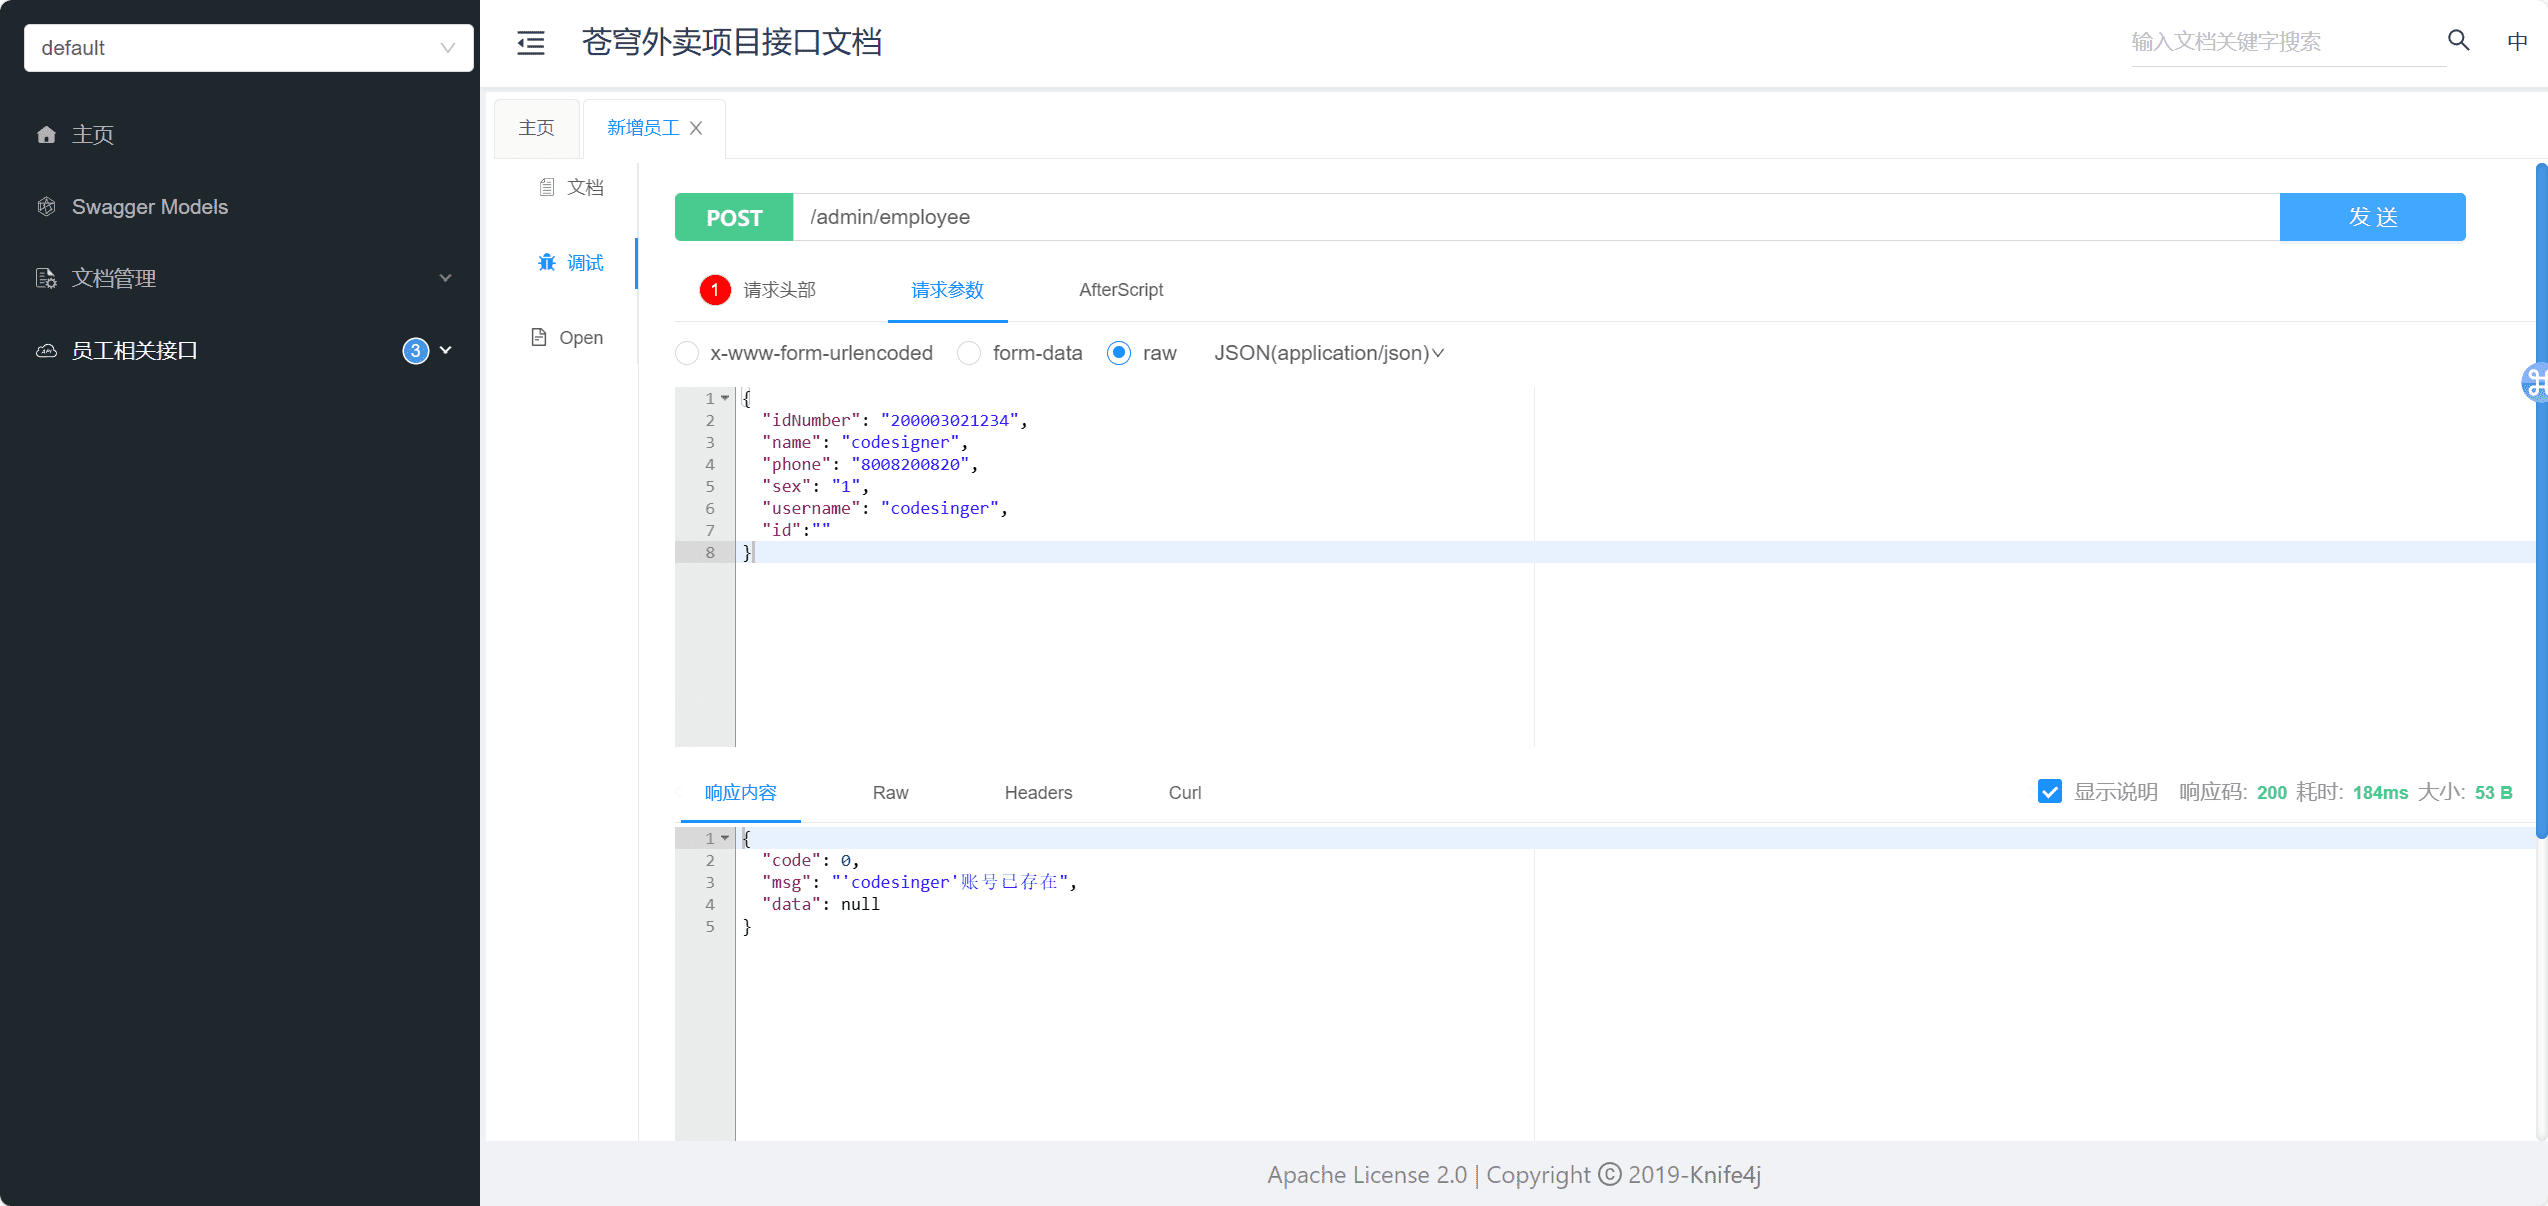
此时,我们再请求,就会有报错信息了
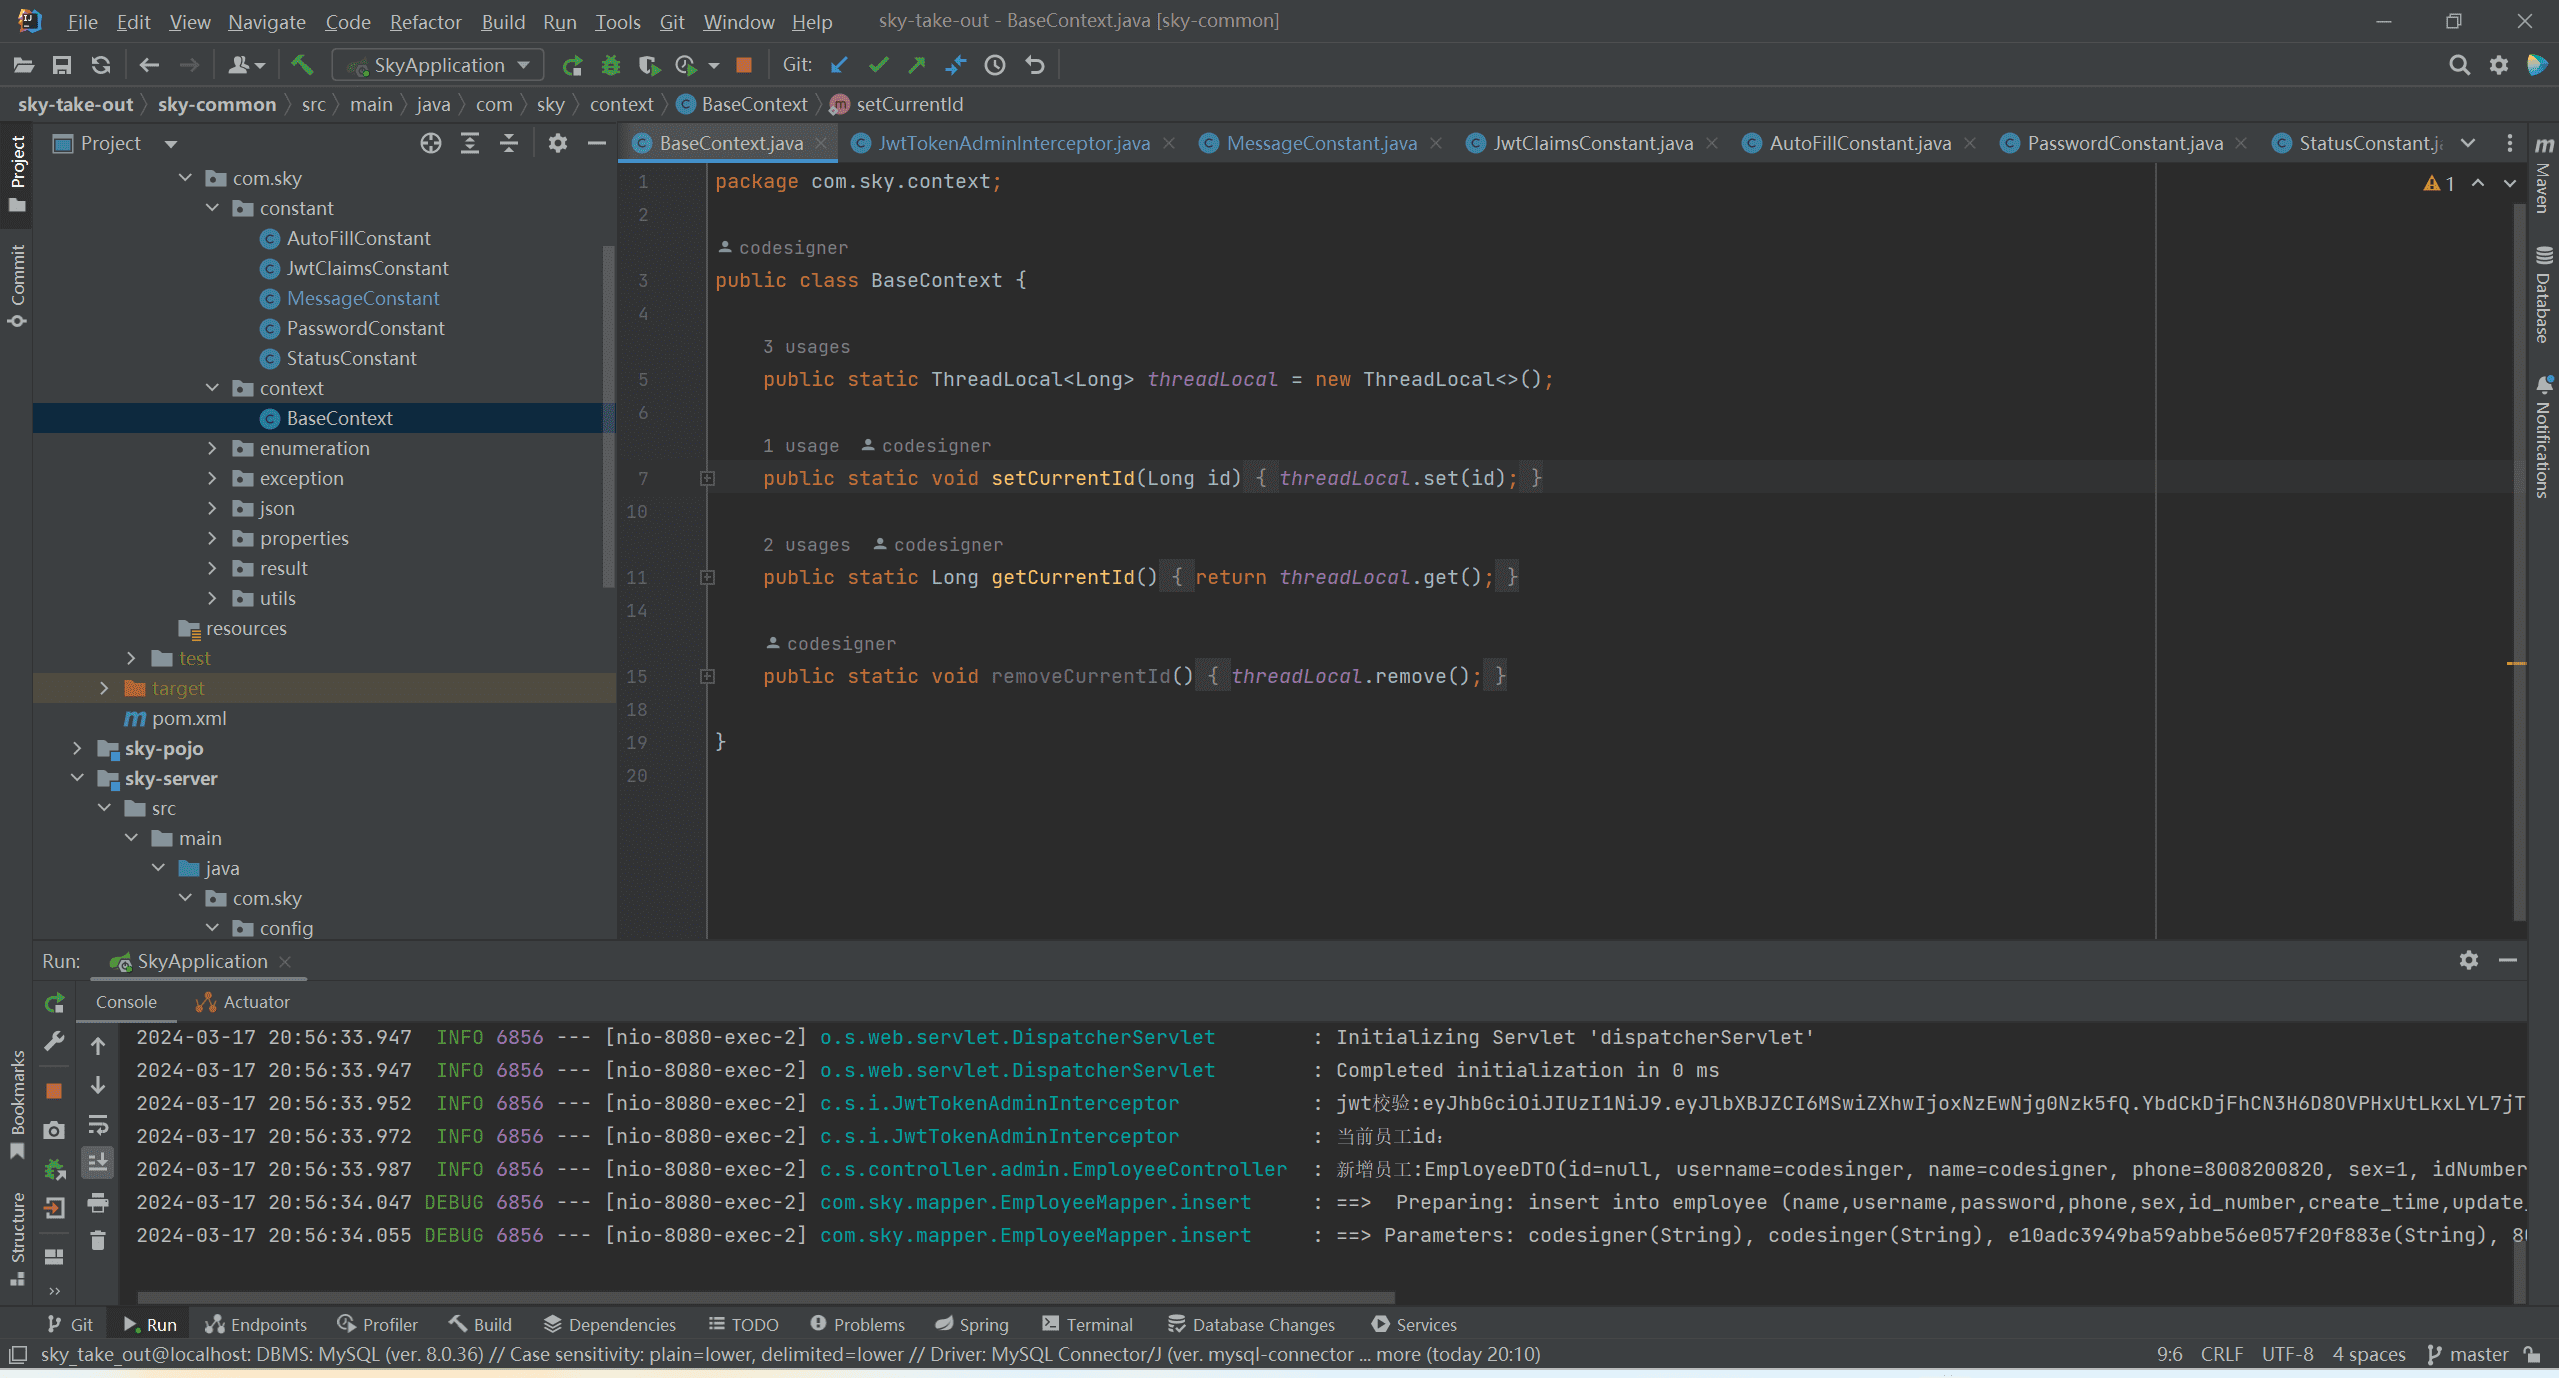
处理用户修改和创建的用户id 这里使用了ThreadLocal这个线程的知识,我们封装一个类
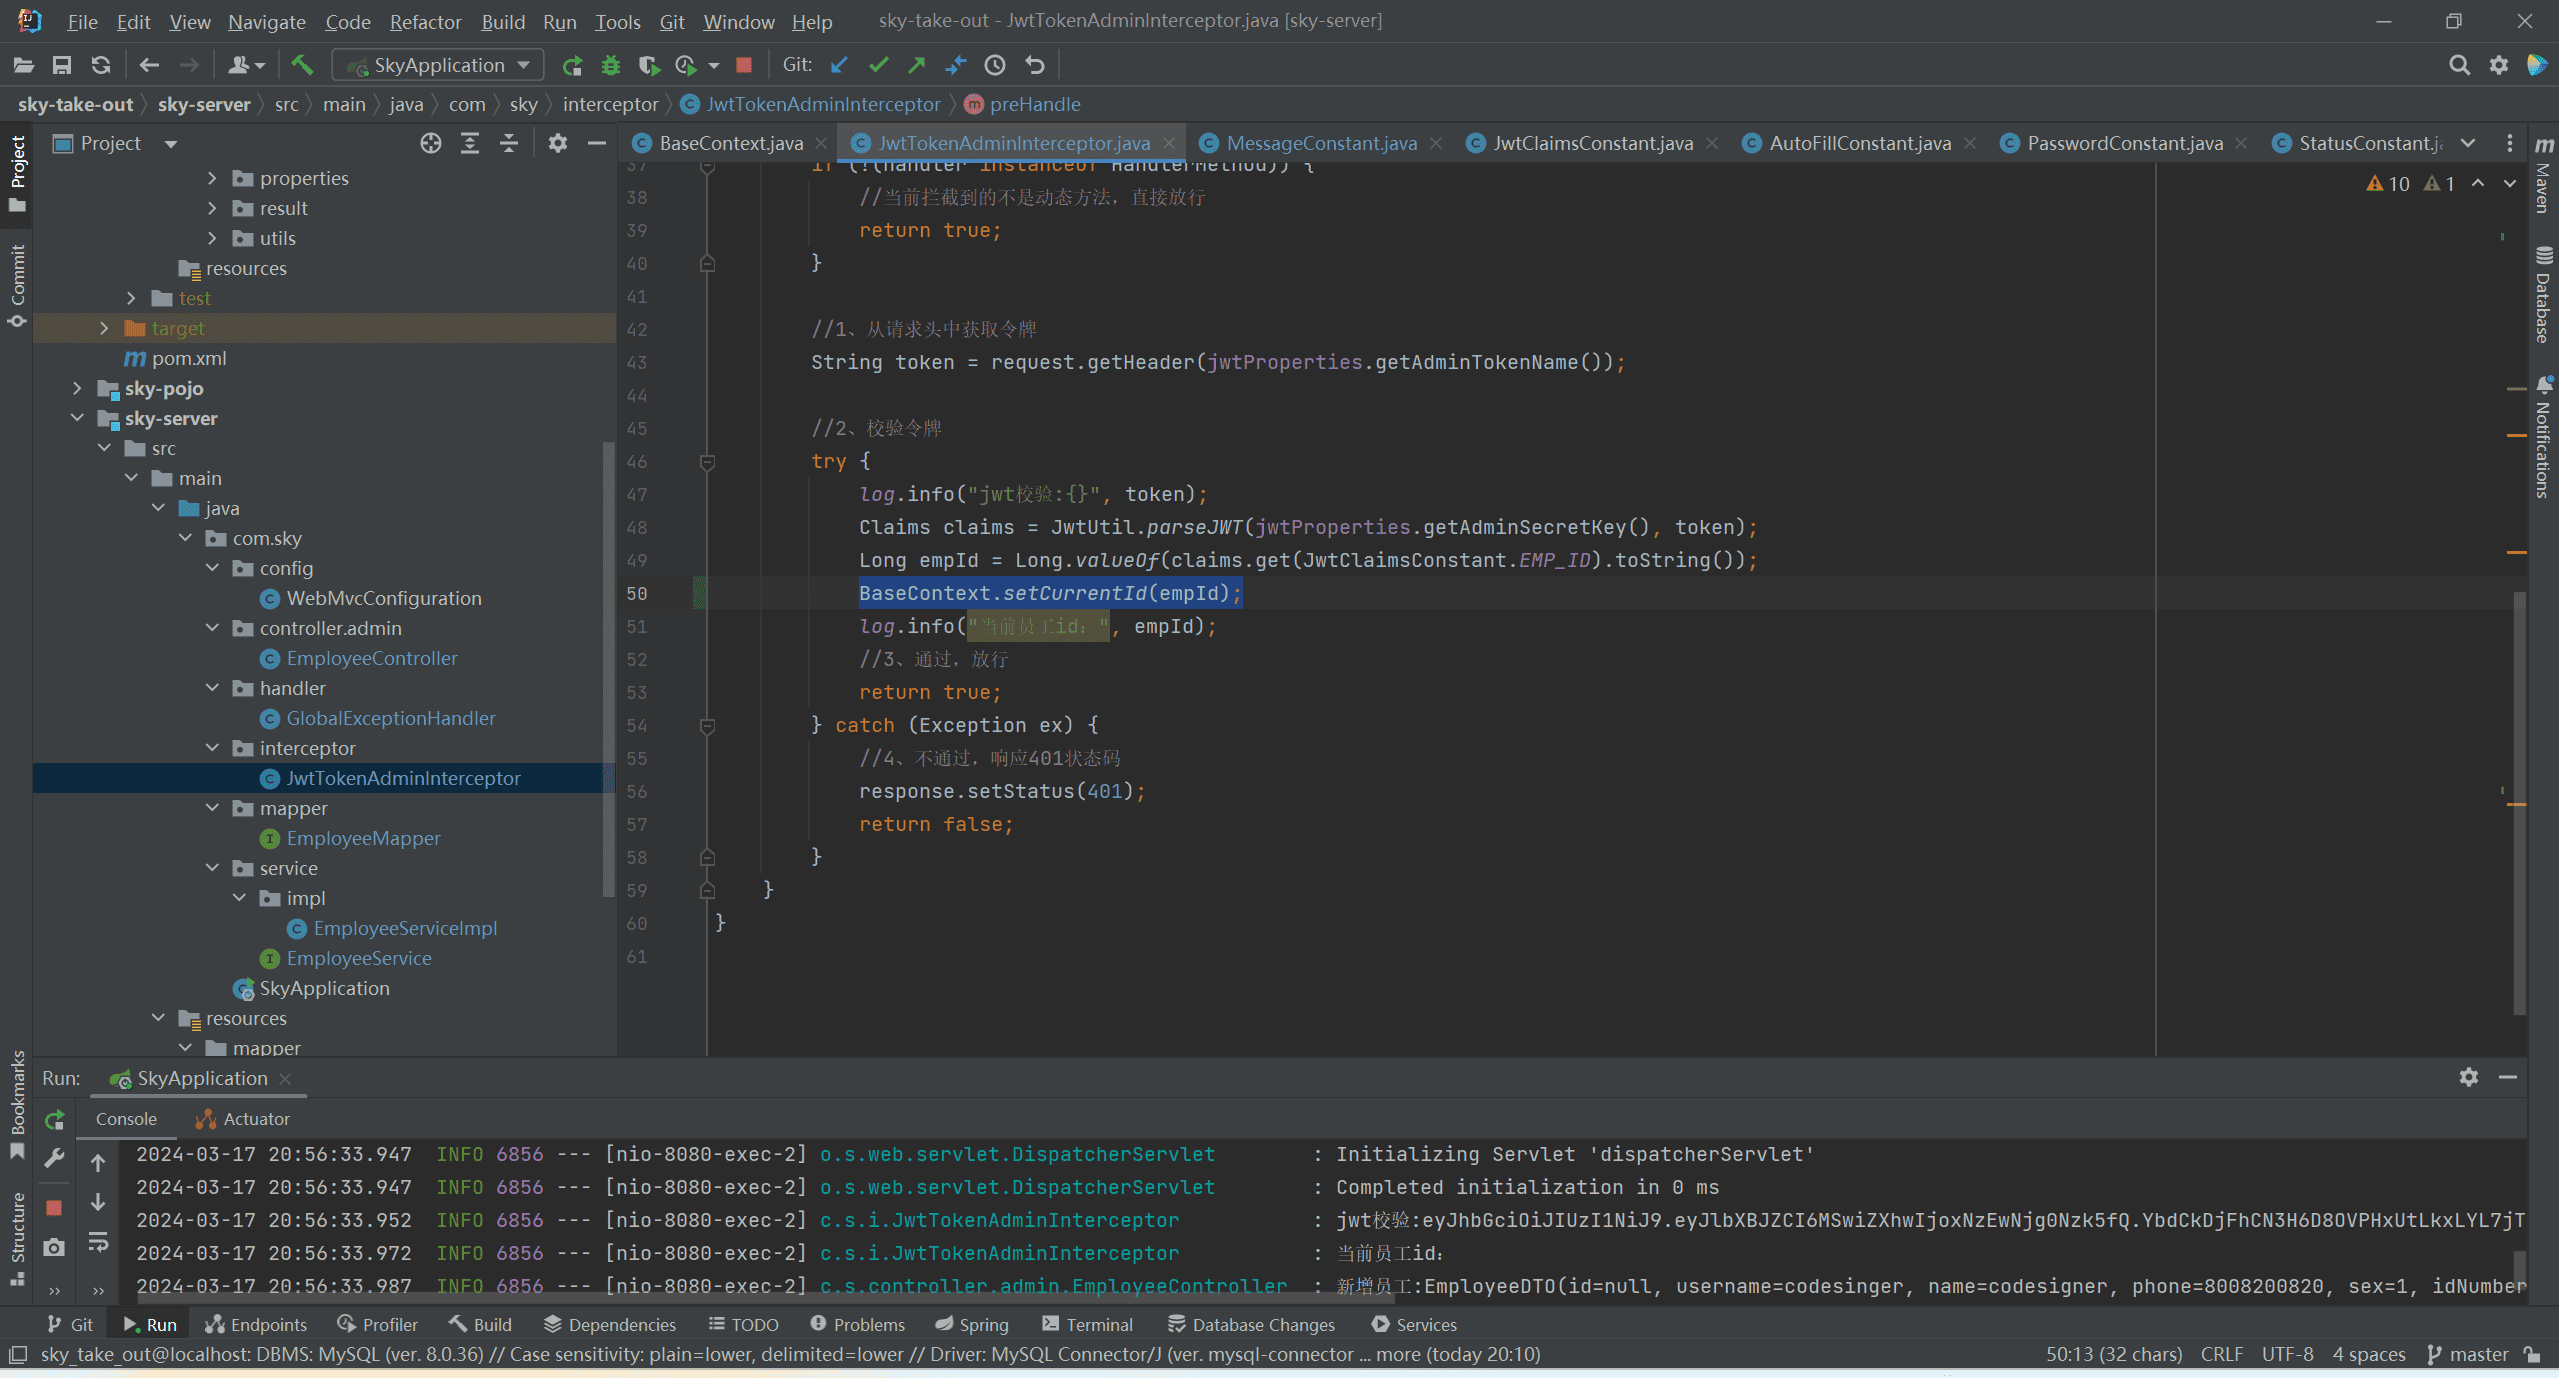
然后在jwt校验令牌的时候将id存储进去
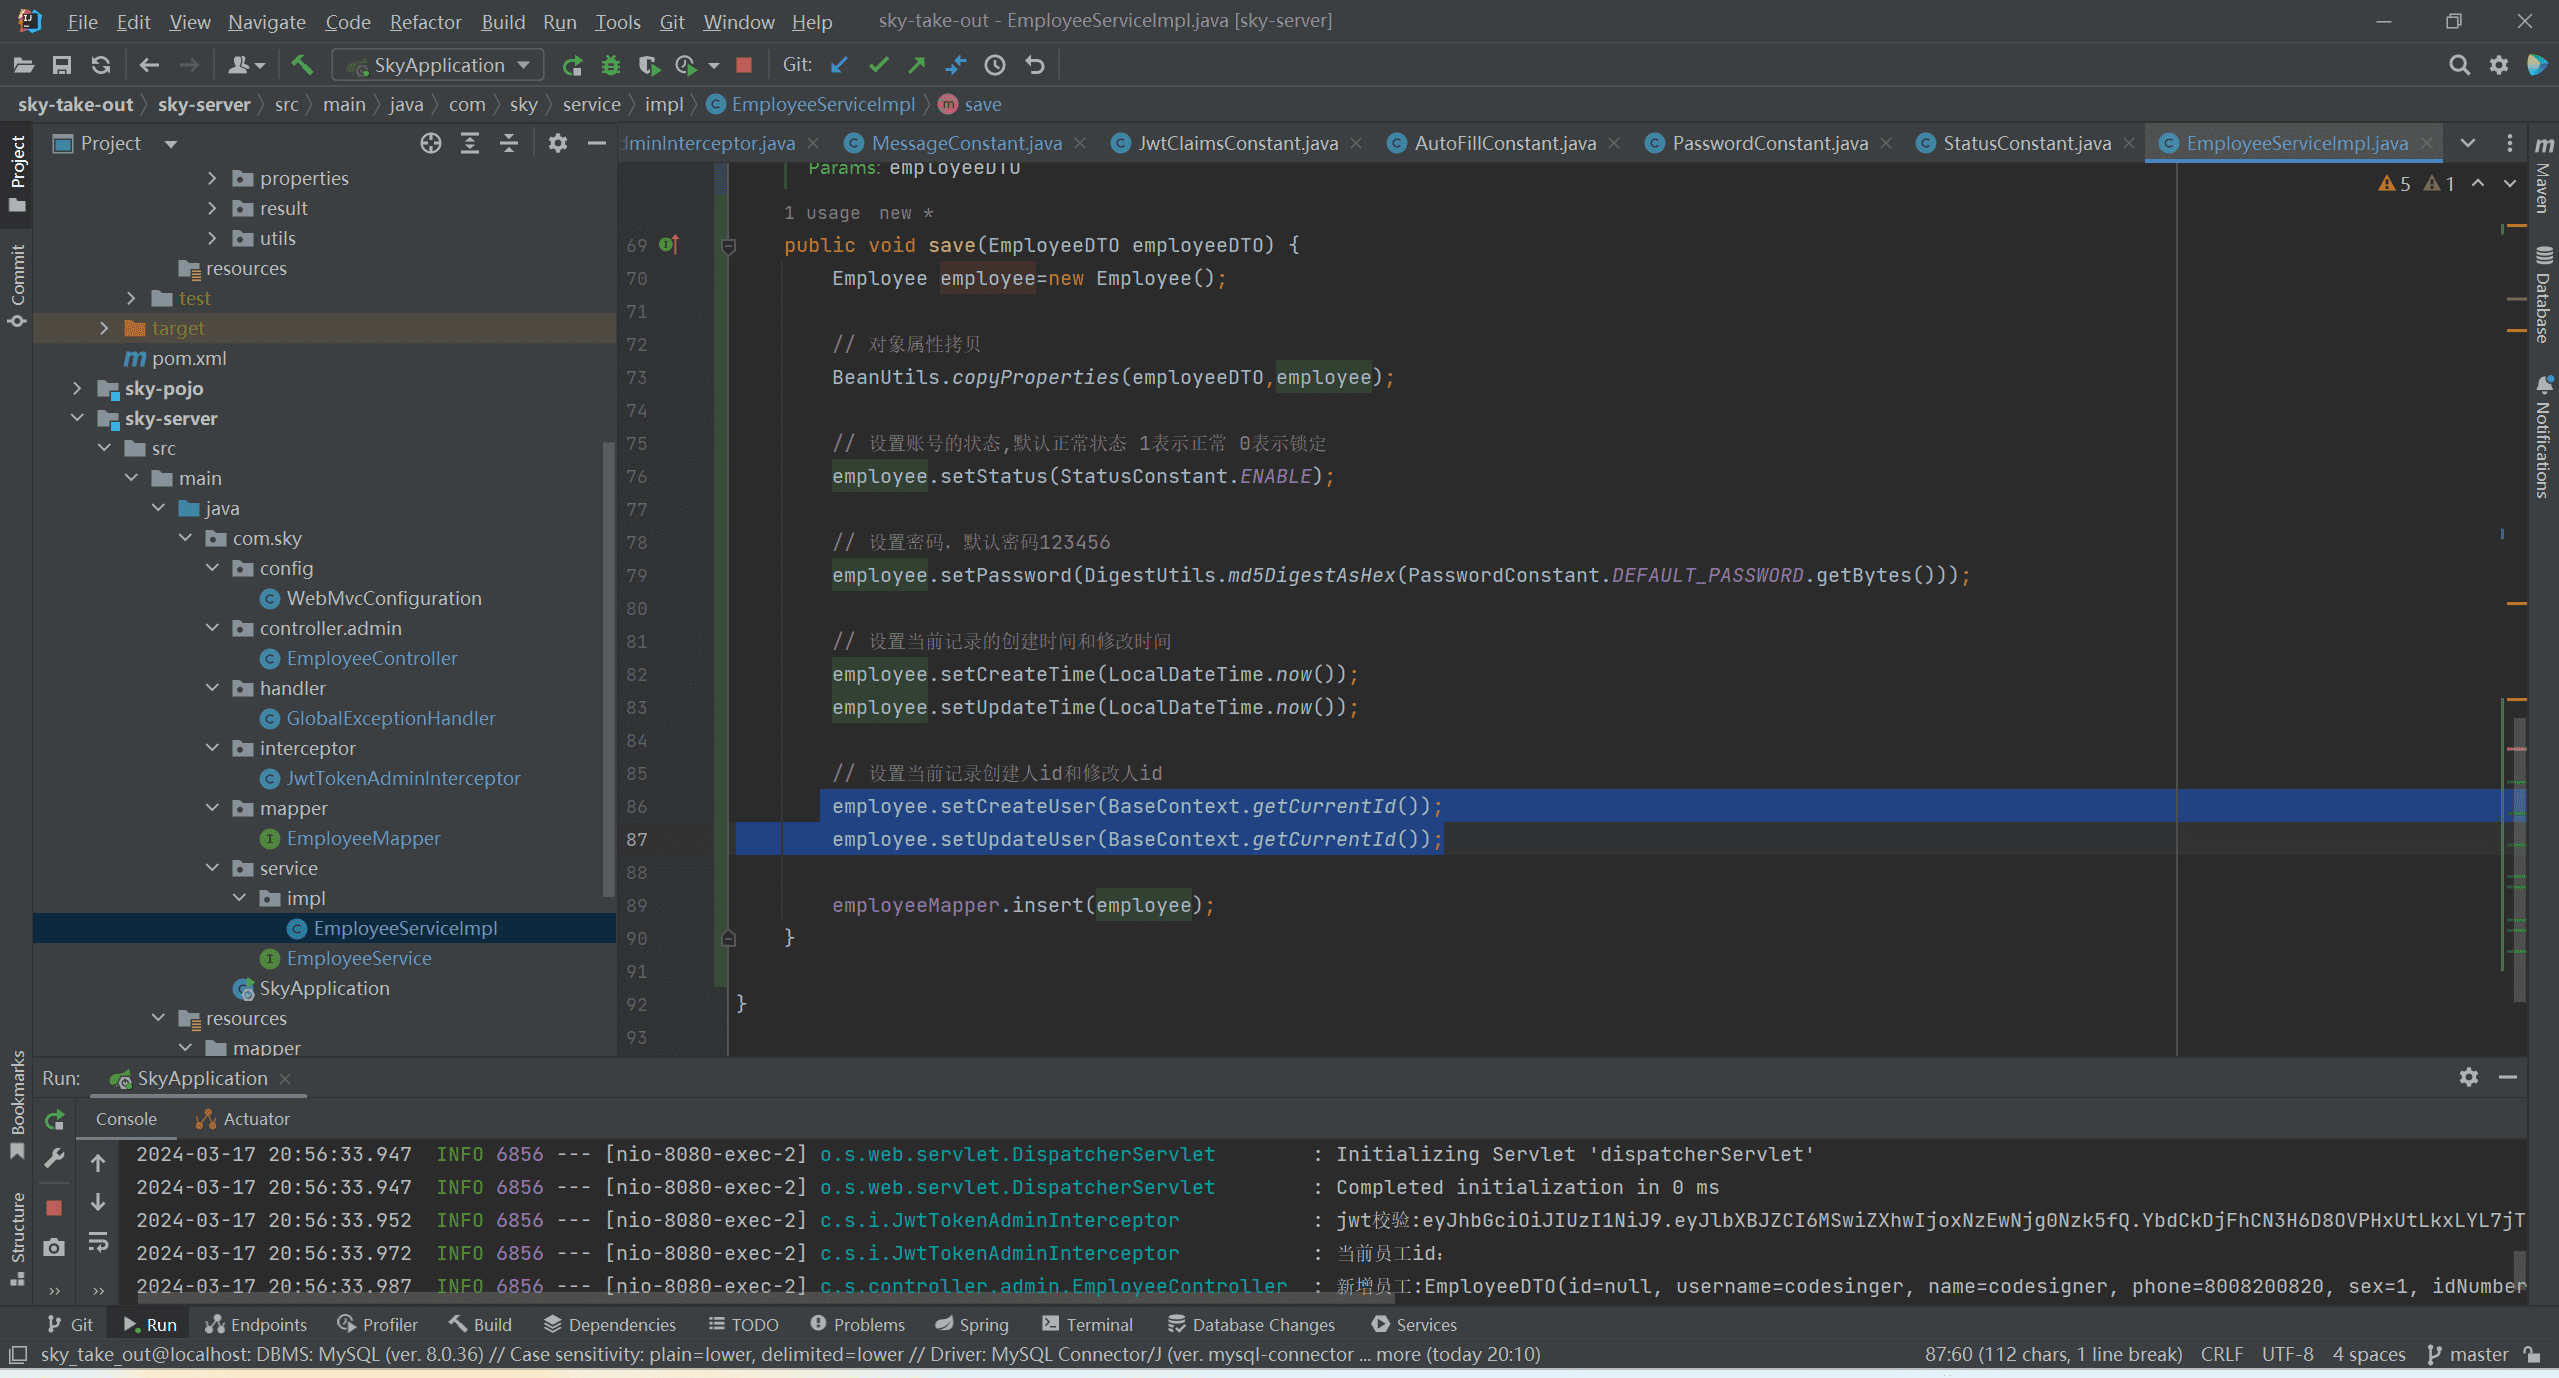
最后在插入数据的时候,我们就可以获取到id了
员工分页查询代码 controller 这里的PageResult是一个自定义的分页查询的返回结果,类型是total,records,其中的records是一个list集合,employeePageQueryDTO是三个参数,pageNo,pageSize,name
1 2 3 4 5 6 7 8 9 10 11 12 @GetMapping("/page") @ApiOperation("员工分页查询") public Result<PageResult> page (EmployeePageQueryDTO employeePageQueryDTO) { log.info("员工分页查询,参数为:{}" ,employeePageQueryDTO); PageResult pageResult=employeeService.pageQuery(employeePageQueryDTO); return Result.success(pageResult); }
service 1 2 3 4 5 6 PageResult pageQuery (EmployeePageQueryDTO employeePageQueryDTO) ;
serviceImpl 这里使用了PageHelper这个分页插件,然后调用了employeeMapper中的pageQuery方法,然后得到了total和records,最后new一个PageResult返回
1 2 3 4 <dependency > <groupId > com.github.pagehelper</groupId > <artifactId > pagehelper-spring-boot-starter</artifactId > </dependency >
然后在ServiceImpl中写以下代码
1 2 3 4 5 6 7 8 9 10 11 12 13 14 public PageResult pageQuery (EmployeePageQueryDTO employeePageQueryDTO) { PageHelper.startPage(employeePageQueryDTO.getPage(),employeePageQueryDTO.getPageSize()); Page<Employee> page=employeeMapper.pageQuery(employeePageQueryDTO); long total=page.getTotal(); List<Employee> records =page.getResult(); return new PageResult (total,records); }
Mapper 因为这里有name的动态查询,就不直接写sql,而是把sql写到xml中
1 2 3 4 5 6 Page<Employee> pageQuery (EmployeePageQueryDTO employeePageQueryDTO) ;
xml 在xml中写sql语句
1 2 3 4 5 6 7 8 9 10 11 <mapper namespace ="com.sky.mapper.EmployeeMapper" > <select id ="pageQuery" resultType ="com.sky.entity.Employee" > select * from employee <where > <if test ="name != null and name != ''" > and name like concat('%',#{name},'%') </if > </where > order by create_time desc </select > </mapper >
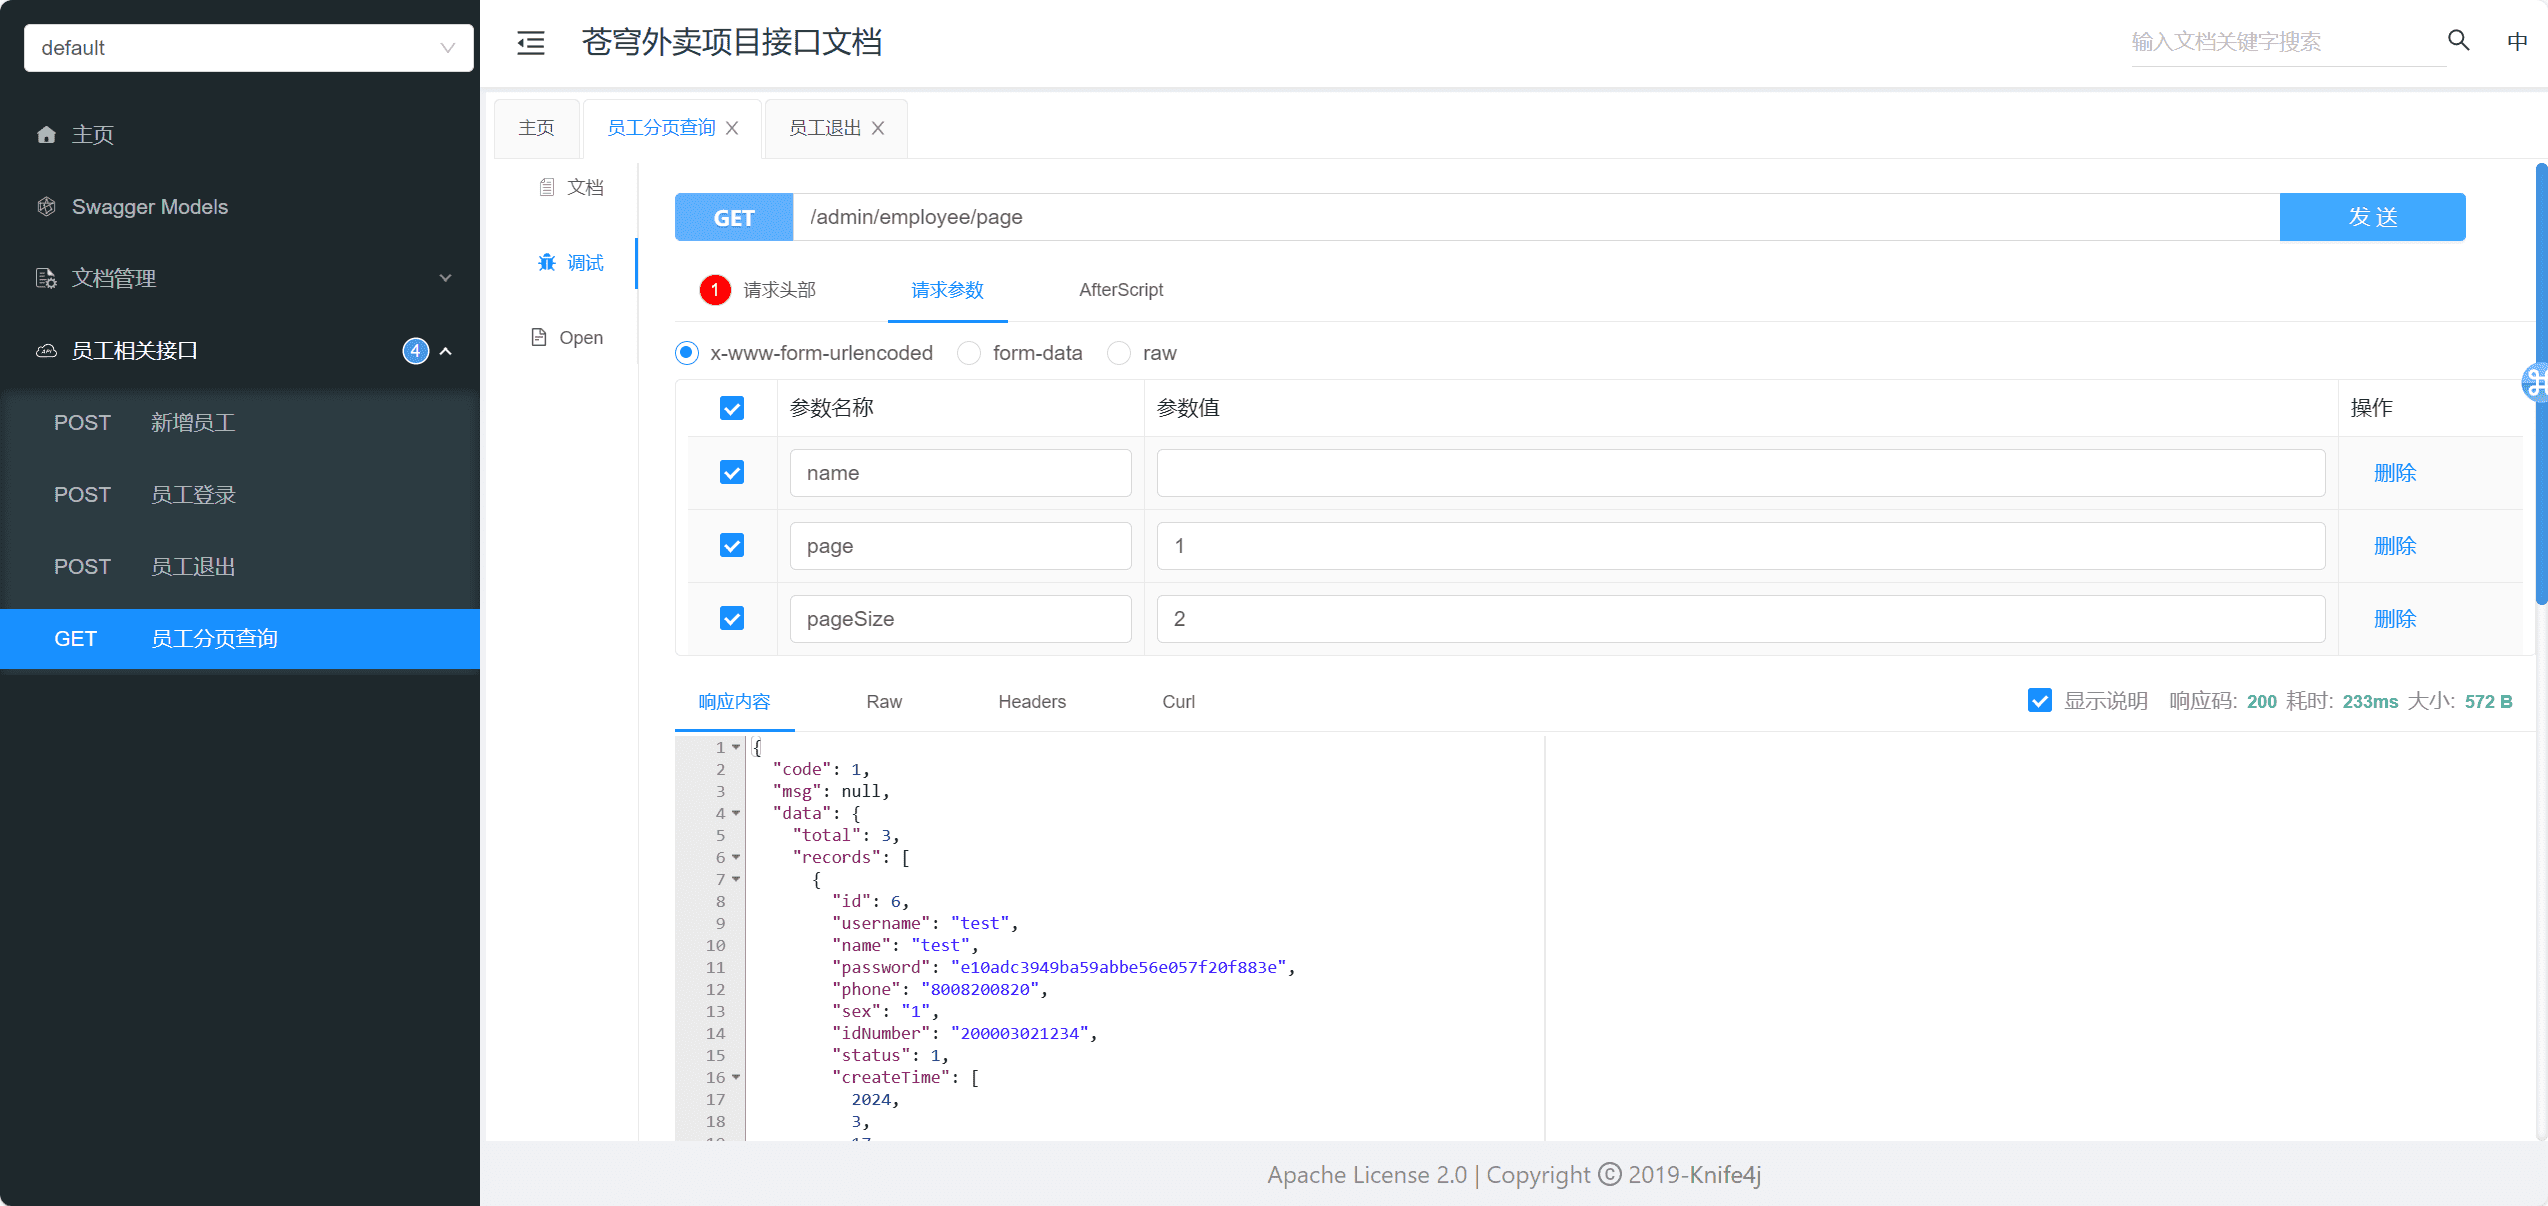
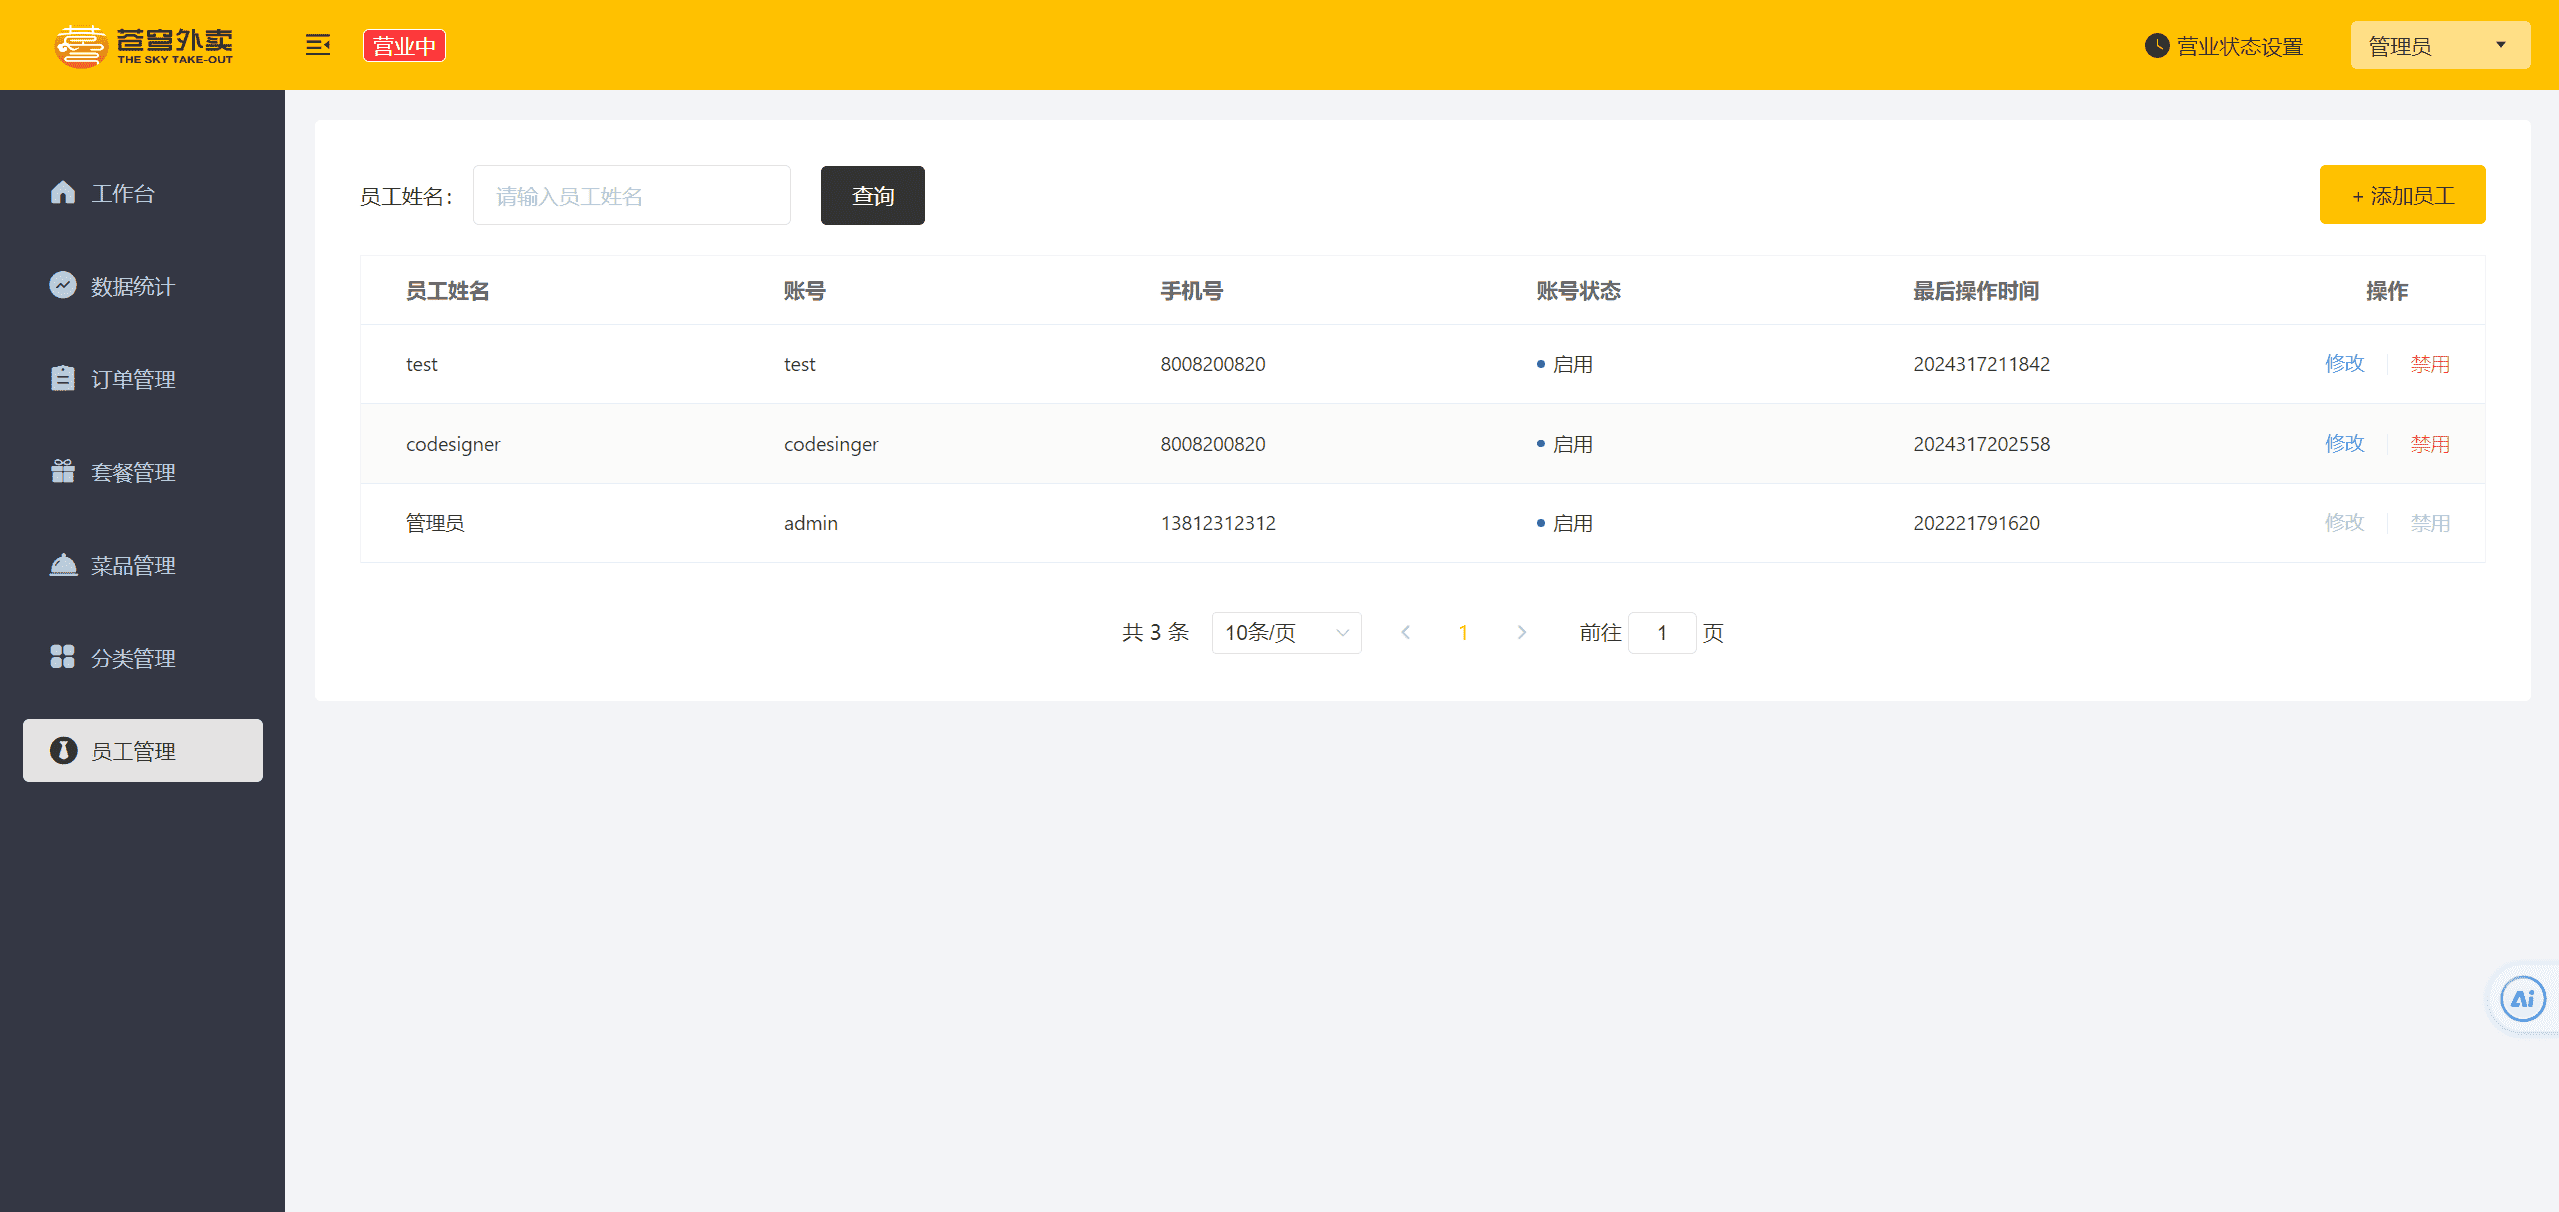
员工分页查询测试
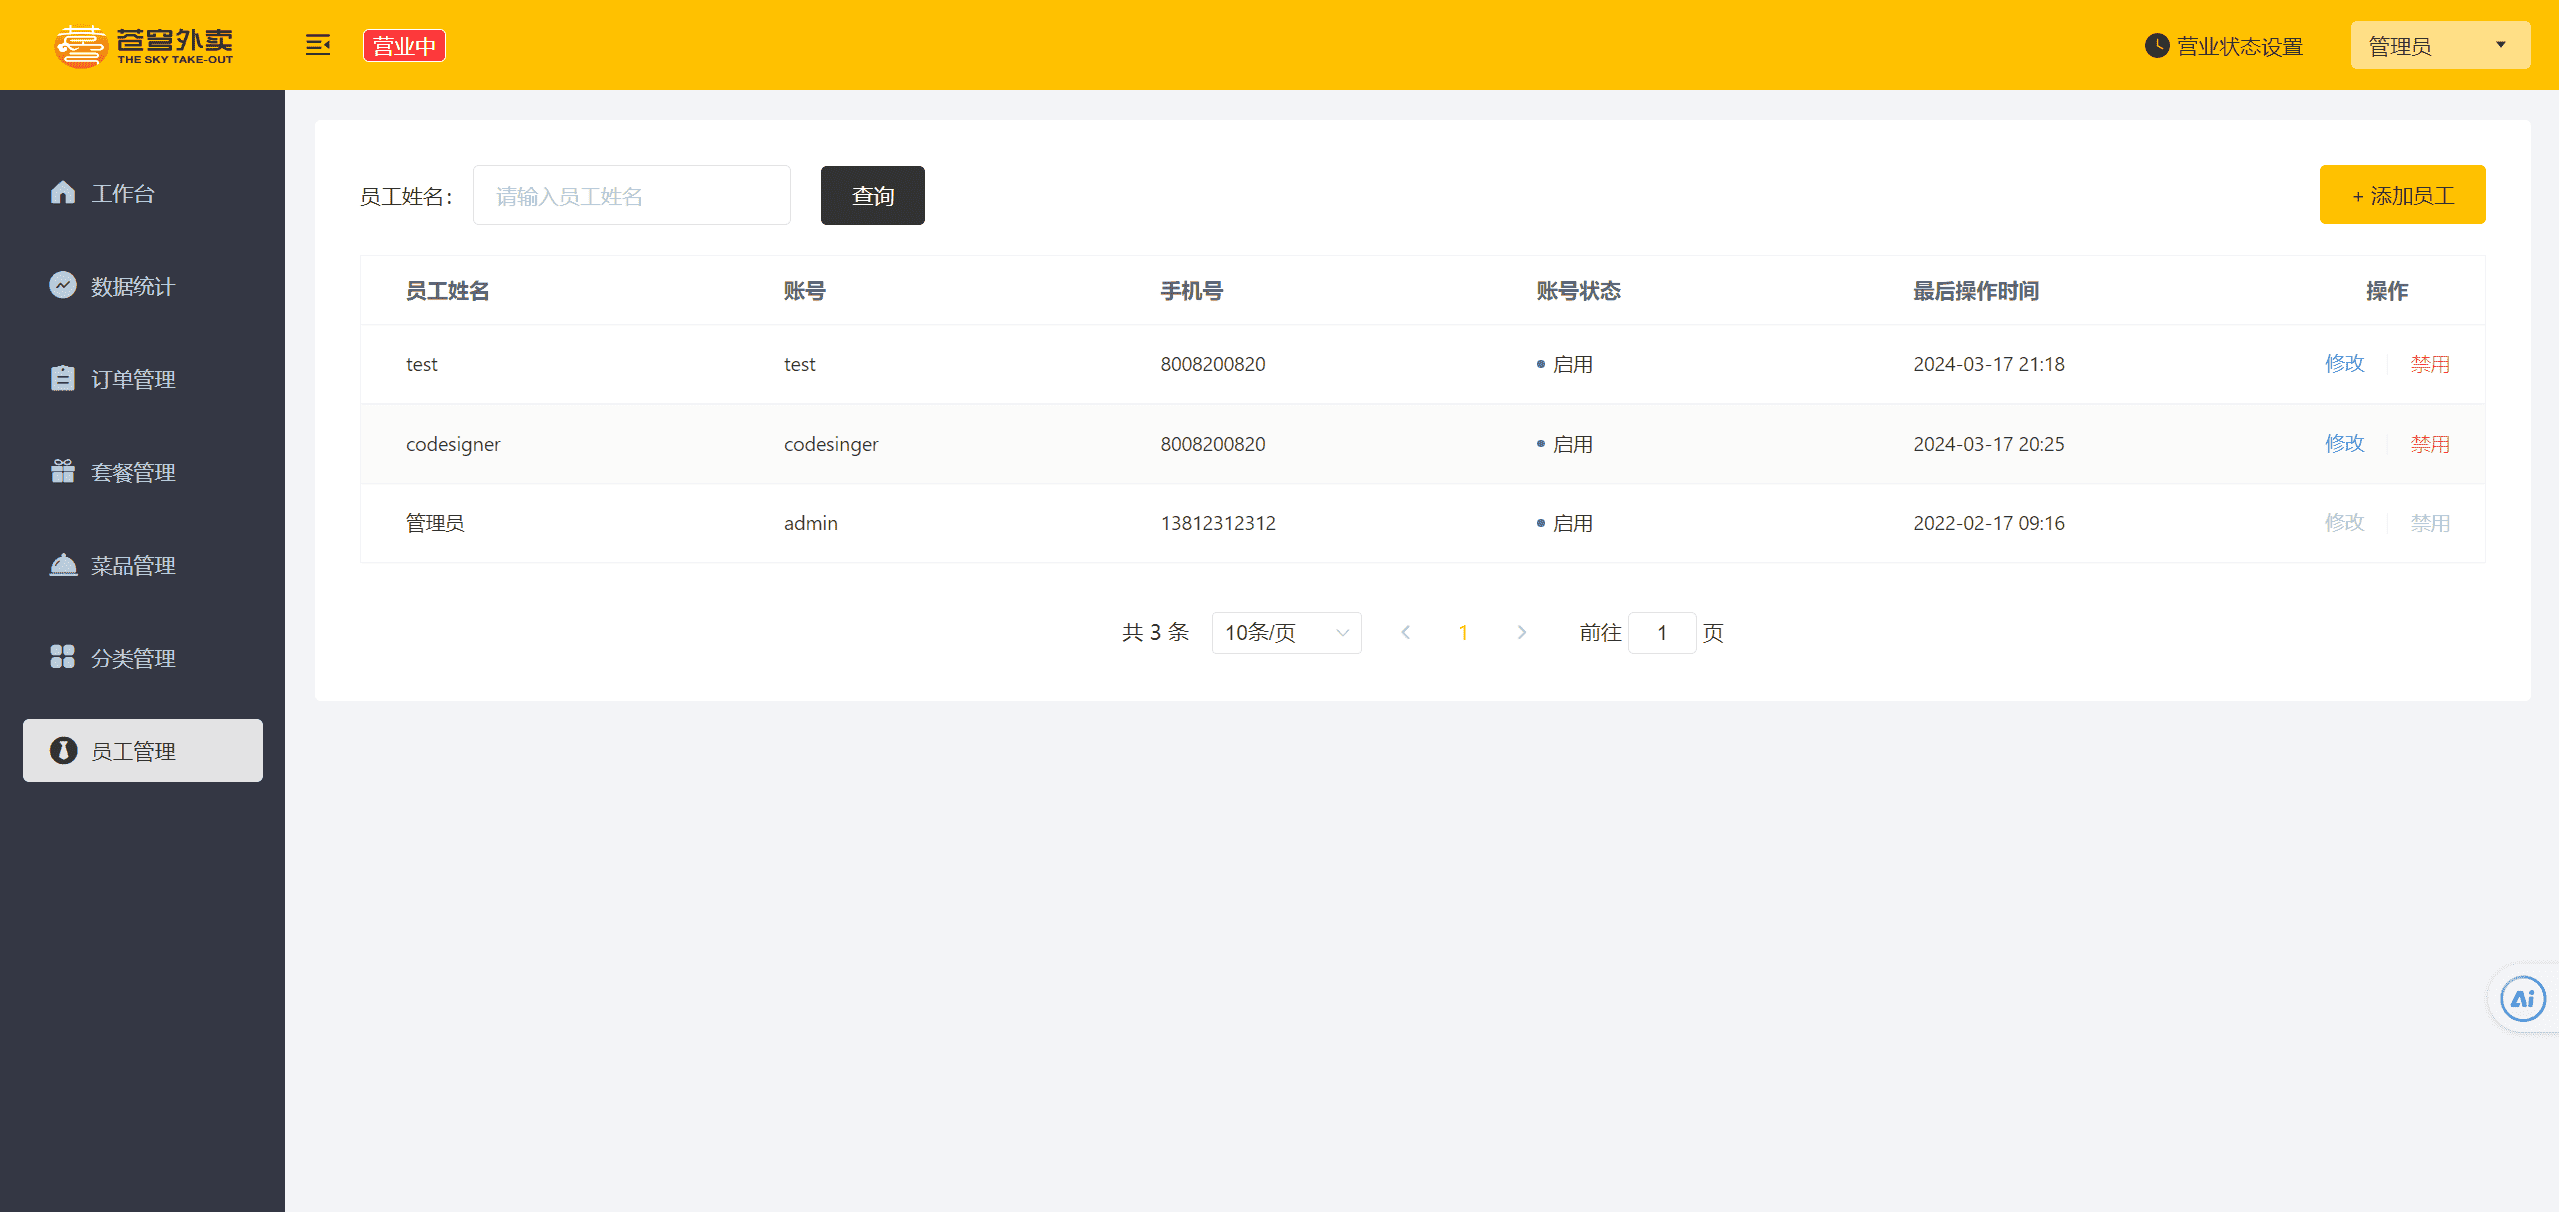
员工分页查询-时间格式化 时间格式化有两种方式
1 2 3 4 5 6 7 8 9 10 11 12 13 protected void extendMessageConverters (List<HttpMessageConverter<?>> converters) { log.info("扩展消息转化器" ); MappingJackson2HttpMessageConverter converter=new MappingJackson2HttpMessageConverter (); converter.setObjectMapper(new JacksonObjectMapper ()); converters.add(0 ,converter); }
其中这个JacksonObjectMapper是一个自定义的时间格式化类
1 2 3 4 5 6 7 8 9 10 11 12 13 14 15 16 17 18 19 20 21 22 23 24 25 26 27 28 29 30 31 32 33 public class JacksonObjectMapper extends ObjectMapper { public static final String DEFAULT_DATE_FORMAT = "yyyy-MM-dd" ; public static final String DEFAULT_DATE_TIME_FORMAT = "yyyy-MM-dd HH:mm" ; public static final String DEFAULT_TIME_FORMAT = "HH:mm:ss" ; public JacksonObjectMapper () { super (); this .configure(FAIL_ON_UNKNOWN_PROPERTIES, false ); this .getDeserializationConfig().withoutFeatures(DeserializationFeature.FAIL_ON_UNKNOWN_PROPERTIES); SimpleModule simpleModule = new SimpleModule () .addDeserializer(LocalDateTime.class, new LocalDateTimeDeserializer (DateTimeFormatter.ofPattern(DEFAULT_DATE_TIME_FORMAT))) .addDeserializer(LocalDate.class, new LocalDateDeserializer (DateTimeFormatter.ofPattern(DEFAULT_DATE_FORMAT))) .addDeserializer(LocalTime.class, new LocalTimeDeserializer (DateTimeFormatter.ofPattern(DEFAULT_TIME_FORMAT))) .addSerializer(LocalDateTime.class, new LocalDateTimeSerializer (DateTimeFormatter.ofPattern(DEFAULT_DATE_TIME_FORMAT))) .addSerializer(LocalDate.class, new LocalDateSerializer (DateTimeFormatter.ofPattern(DEFAULT_DATE_FORMAT))) .addSerializer(LocalTime.class, new LocalTimeSerializer (DateTimeFormatter.ofPattern(DEFAULT_TIME_FORMAT))); this .registerModule(simpleModule); } }
这样我们的时间格式化就做好了
启用禁用员工账号 controller 我也不知道为什么要这么设计接口,他的接口是status/{status},然后id是通过参数传递的
1 2 3 4 5 6 7 8 9 10 11 12 13 @PostMapping("/status/{status}") @ApiOperation("启用禁用员工账号") public Result startOrStop (@PathVariable Integer status,Long id) { log.info("启用禁用员工账号:{},{}" ,status,id); employeeService.startOrStop(status,id); return Result.success(); }
service 1 2 3 4 5 6 7 void startOrStop (Integer status,Long id) ;
serviceImpl 这里有两种方式来传参
1 2 3 4 5 6 7 8 9 10 11 12 13 14 15 16 17 18 public void startOrStop (Integer status,Long id) { Employee employee = Employee.builder() .status(status) .id(id) .build(); employeeMapper.update(employee); }
映射xml中 1 2 3 4 5 6 7 8 9 10 11 12 13 14 15 16 17 18 19 20 21 22 23 24 25 26 27 28 29 30 31 32 33 34 <update id ="update" parameterType ="Employee" > update employee <set > <if test ="name!=null" > name=#{name}, </if > <if test ="username!=null" > username=#{username}, </if > <if test ="password!=null" > password=#{password}, </if > <if test ="phone!=null" > phone=#{phone}, </if > <if test ="sex!=null" > sex = #{sex}, </if > <if test ="idNumber!=null" > id_number=#{idNumber}, </if > <if test ="updateTime!=null" > update_time = #{updateTime}, </if > <if test ="updateUser!=null" > update_user=#{updateUser}, </if > <if test ="status!=null" > status=#{status}, </if > </set > where id =#{id} </update >
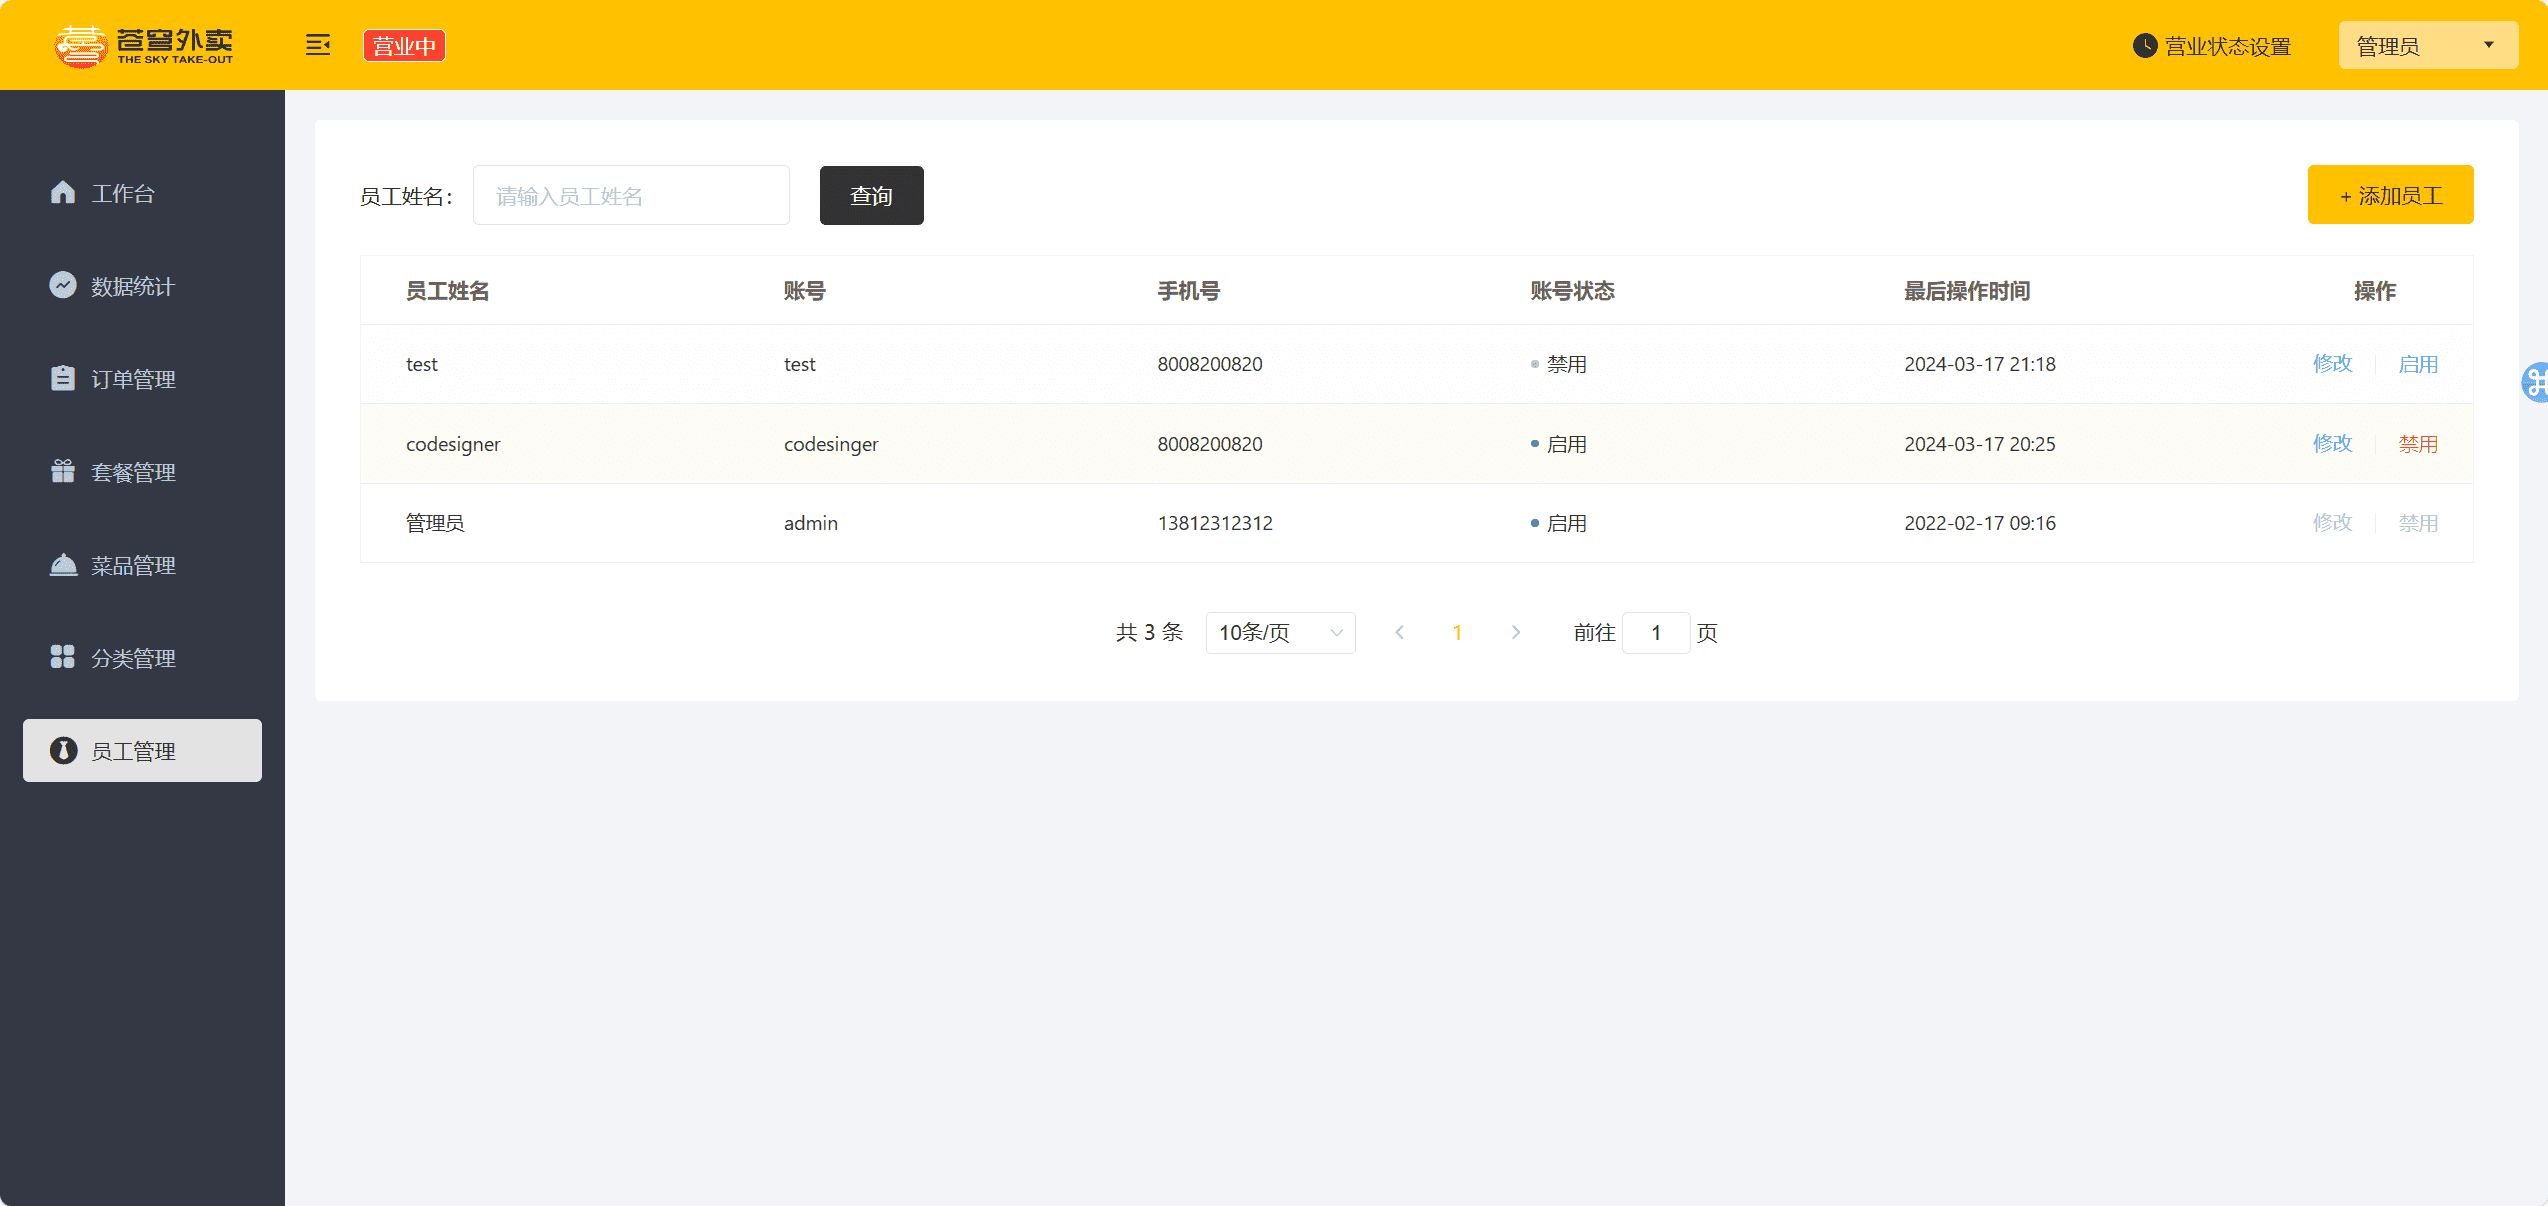
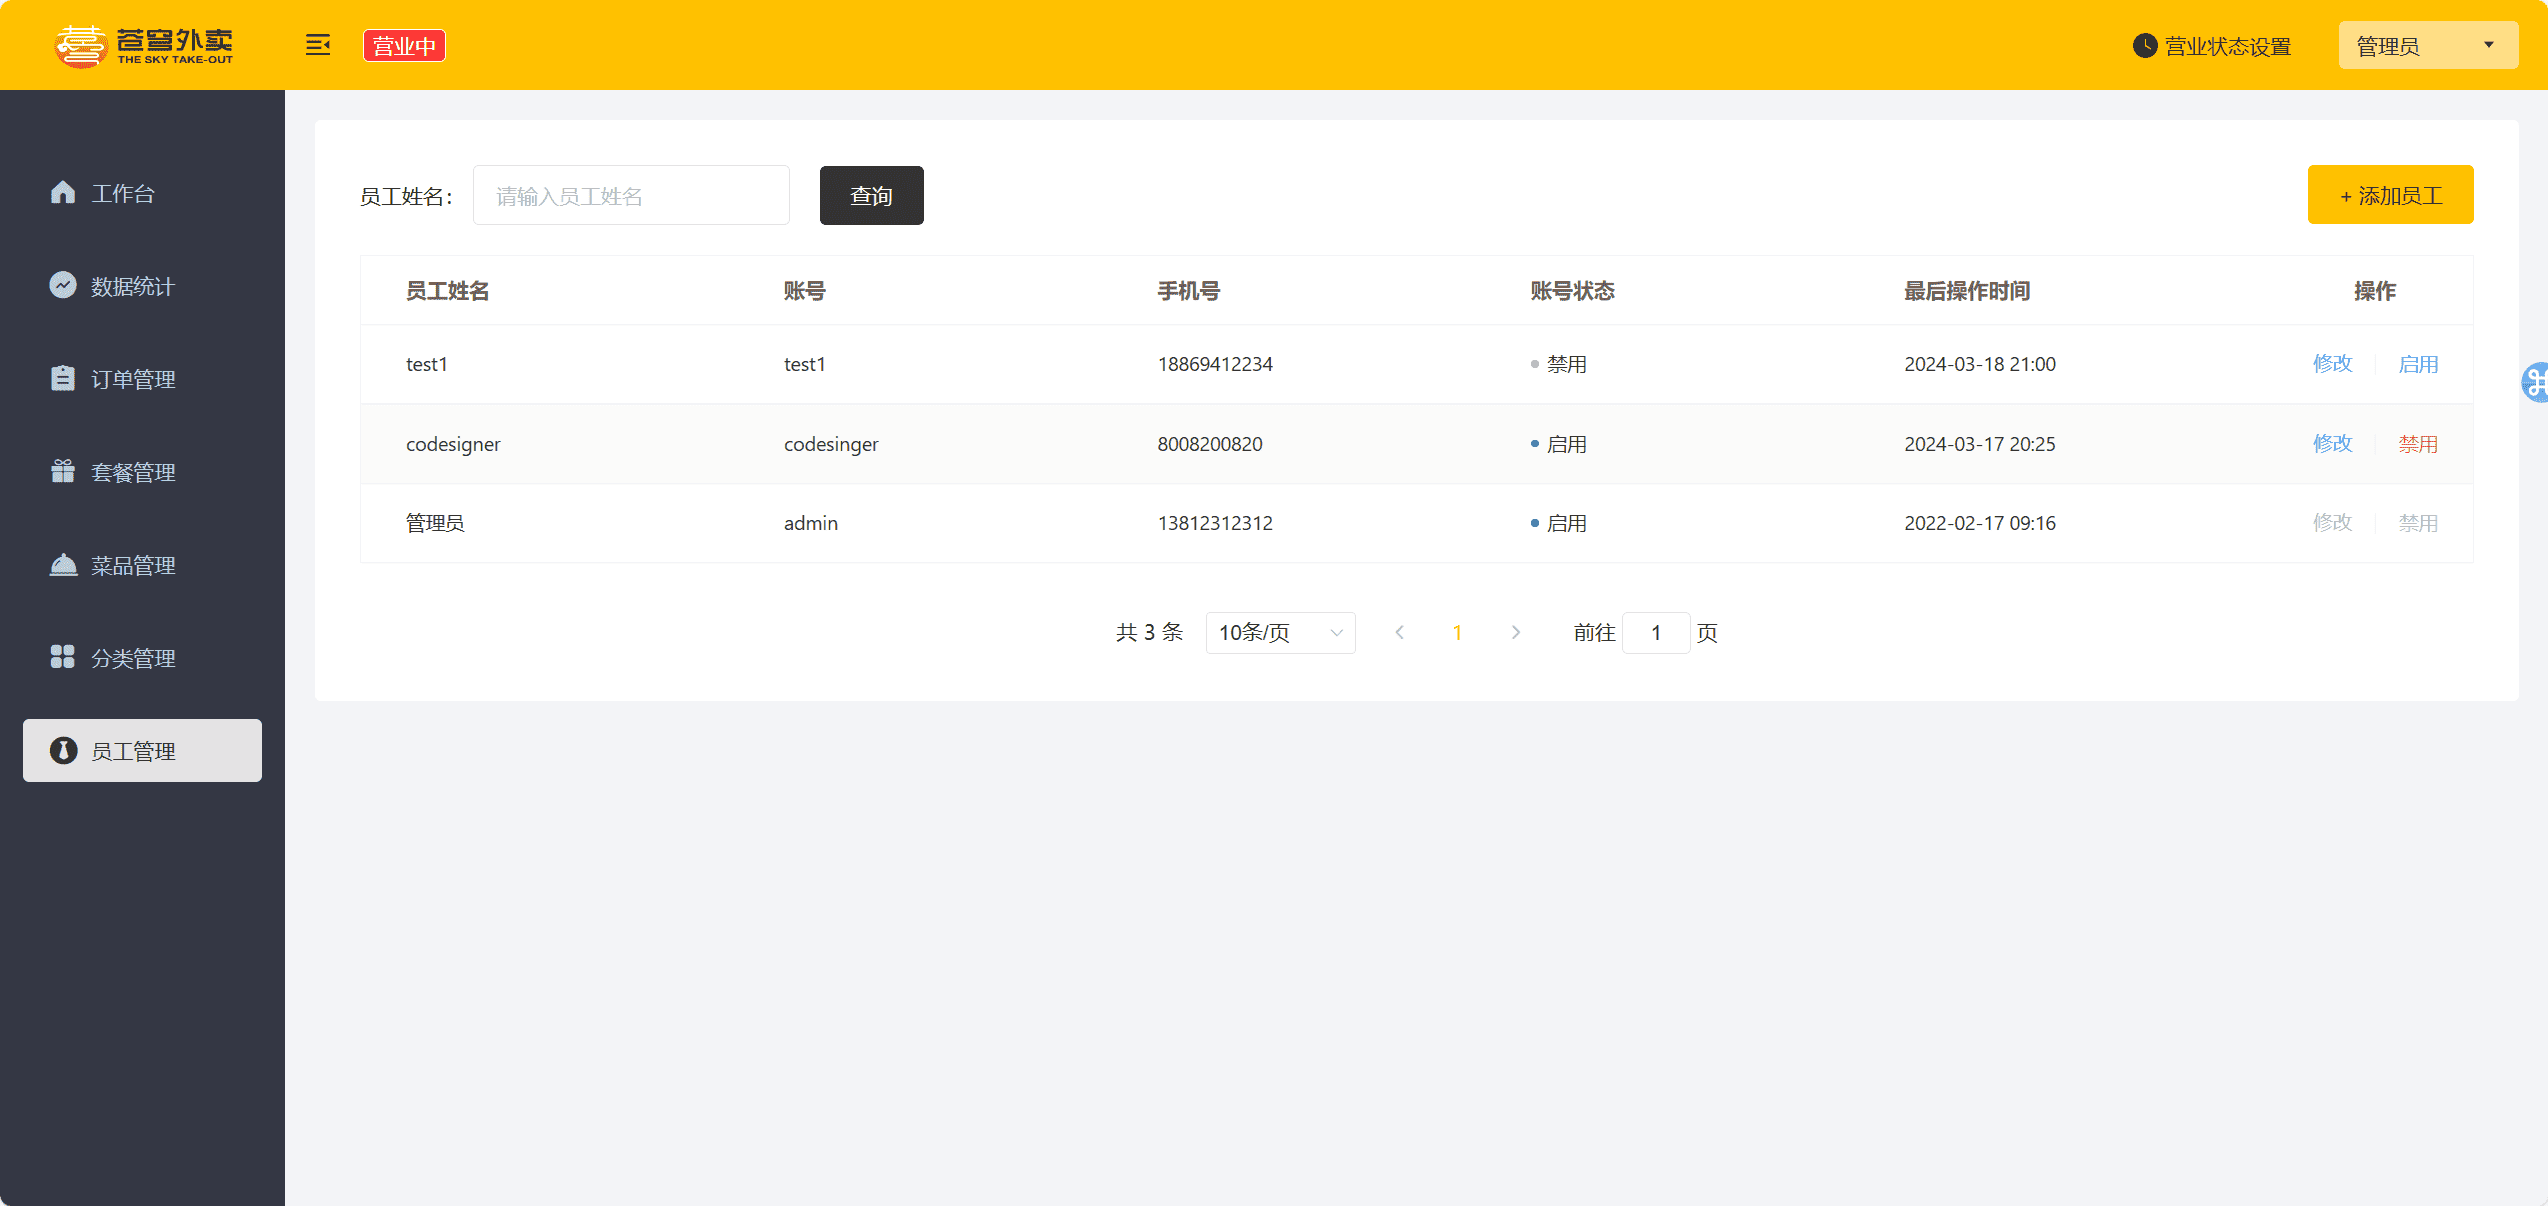
测试 可以看到,我们成功的修改了status,将test账号给禁用了
编辑员工 根据id查询员工信息 首先我们要根据id查询员工信息
controller 1 2 3 4 5 6 7 8 9 10 @GetMapping("/{id}") @ApiOperation("根据id查询员工信息") public Result<Employee> getById (@PathVariable Long id) { Employee employee=employeeService.getById(id); return Result.success(employee); }
service 1 2 3 4 5 Employee getById (Long id) ;
serviceImpl 1 2 3 4 5 6 7 8 9 public Employee getById (Long id) { Employee employee=employeeMapper.getById(id); employee.setPassword("****" ); return employee; }
Mapper 1 2 3 4 5 6 @Select("select * from employee where id = #{id}") Employee getById (Long id) ;
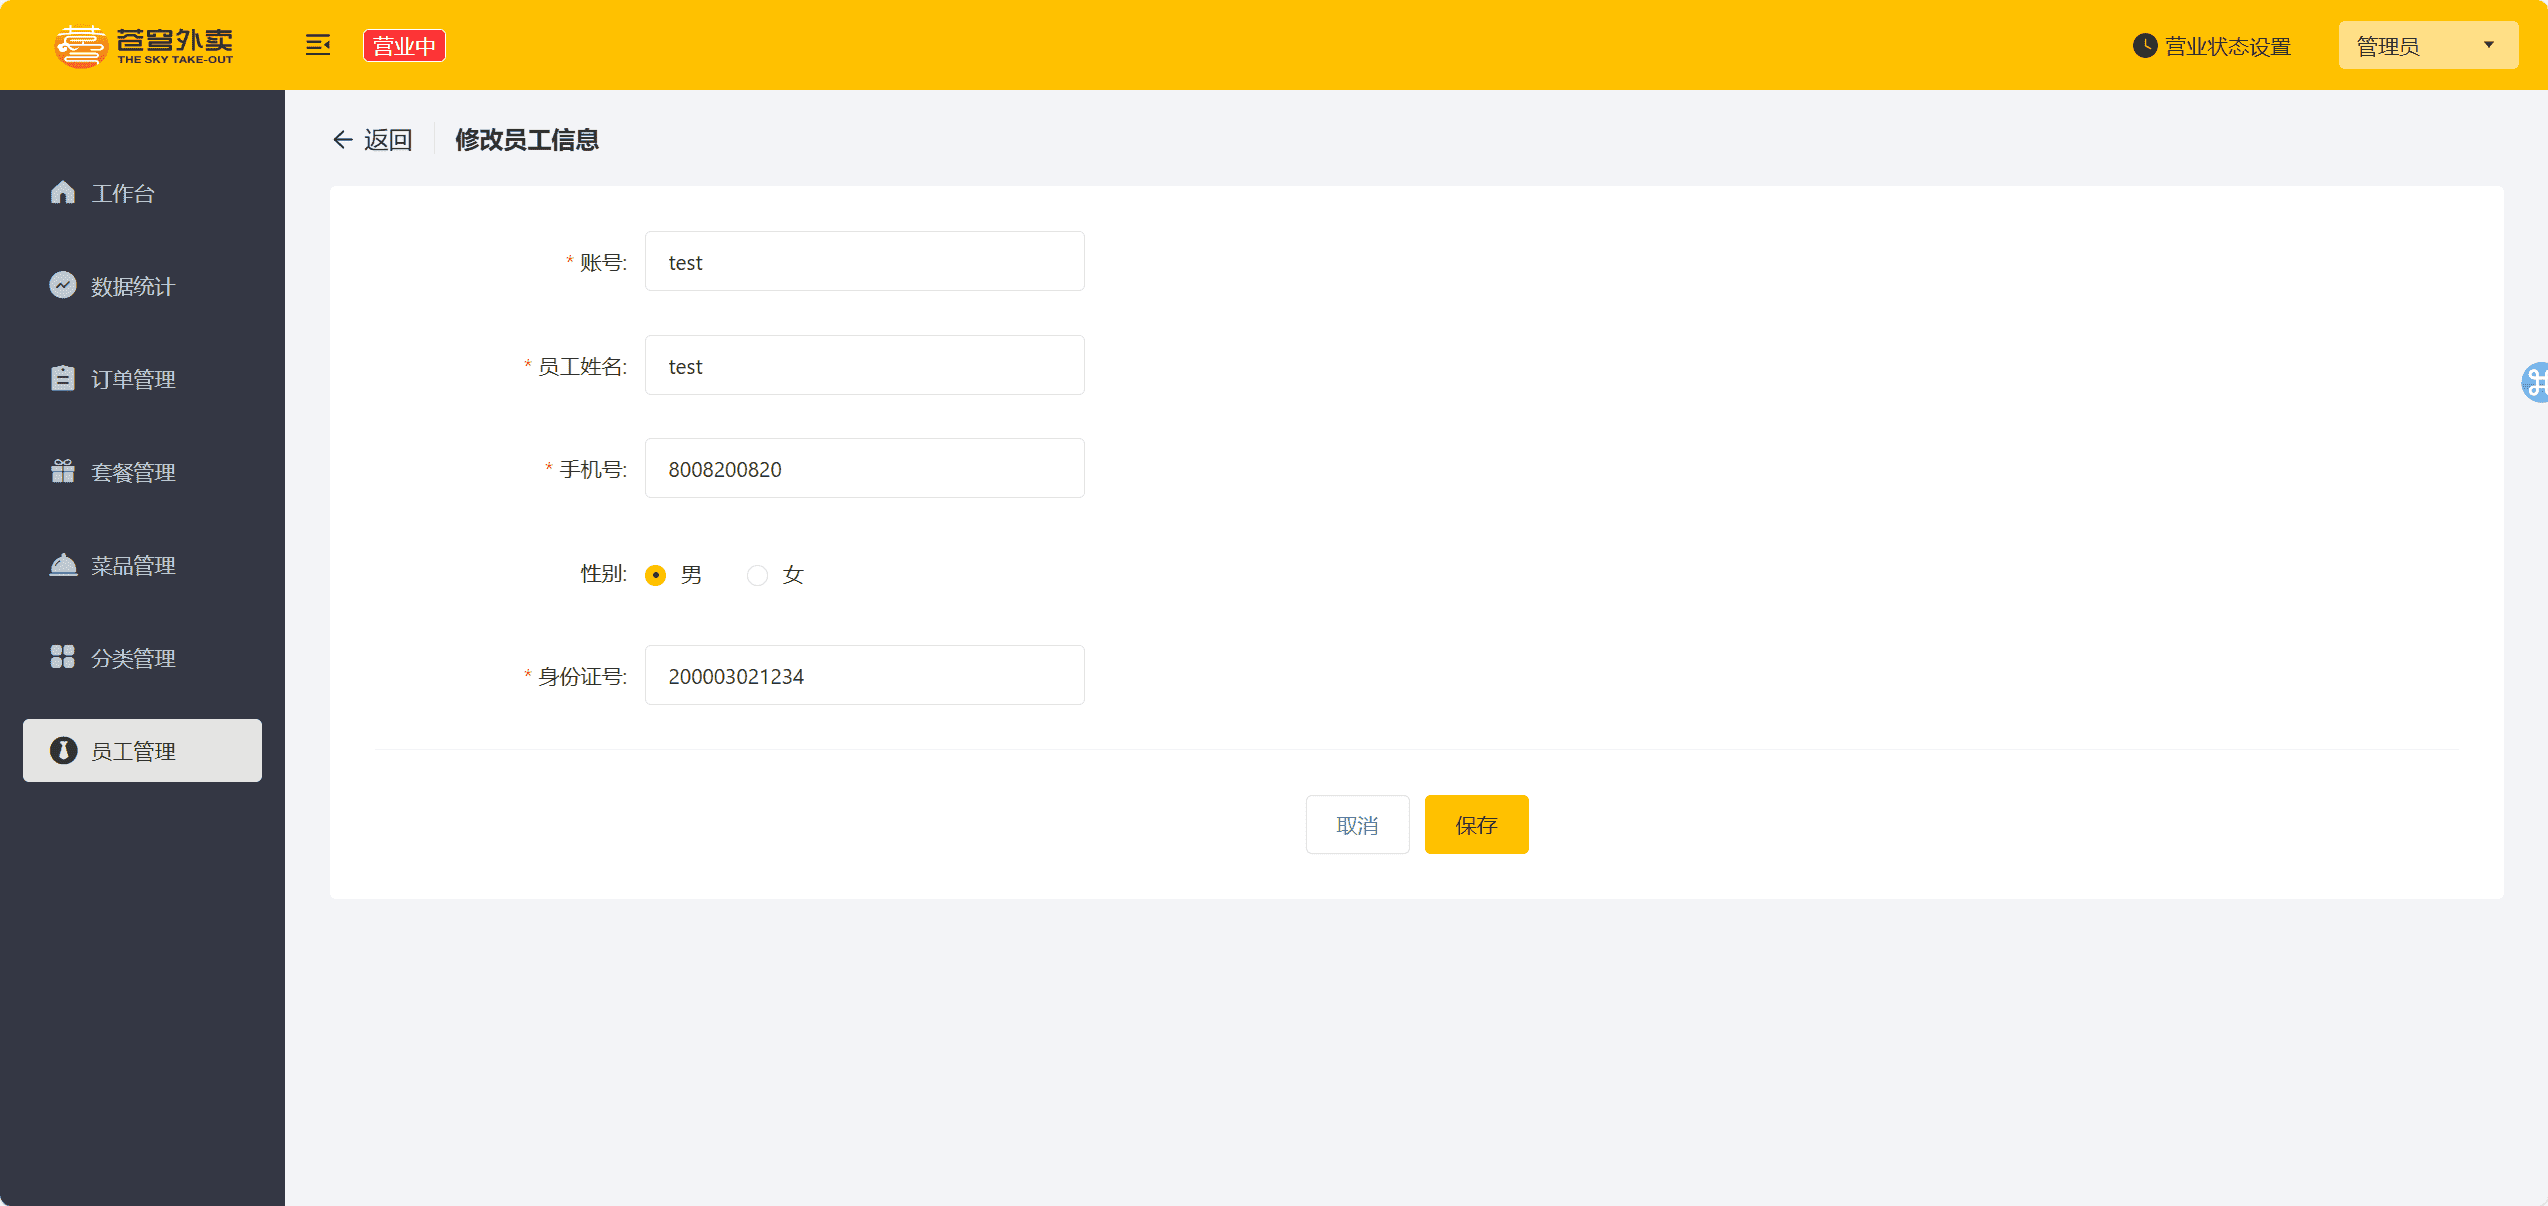
测试 点击修改按钮,我们可以看到我们的数据已经成功的查询出来,回显在前端页面上了
修改员工信息 controller 1 2 3 4 5 6 7 8 9 10 11 @PutMapping @ApiOperation("编辑员工信息") public Result update (@RequestBody EmployeeDTO employeeDTO) { log.info("编辑员工信息:{}" ,employeeDTO); employeeService.update(employeeDTO); return Result.success(); }
service 1 2 3 4 5 void update (EmployeeDTO employeeDTO) ;
serviceImpl 1 2 3 4 5 6 7 8 9 10 11 public void update (EmployeeDTO employeeDTO) { Employee employee = new Employee (); BeanUtils.copyProperties(employeeDTO,employee); employee.setUpdateTime(LocalDateTime.now()); employee.setUpdateUser(BaseContext.getCurrentId()); employeeMapper.update(employee); }
Mapper之前写修改状态的时候已经写过了,这里就不再写了
测试 我们修改了员工的信息,然后点击保存,我们可以看到我们的数据已经成功的修改了
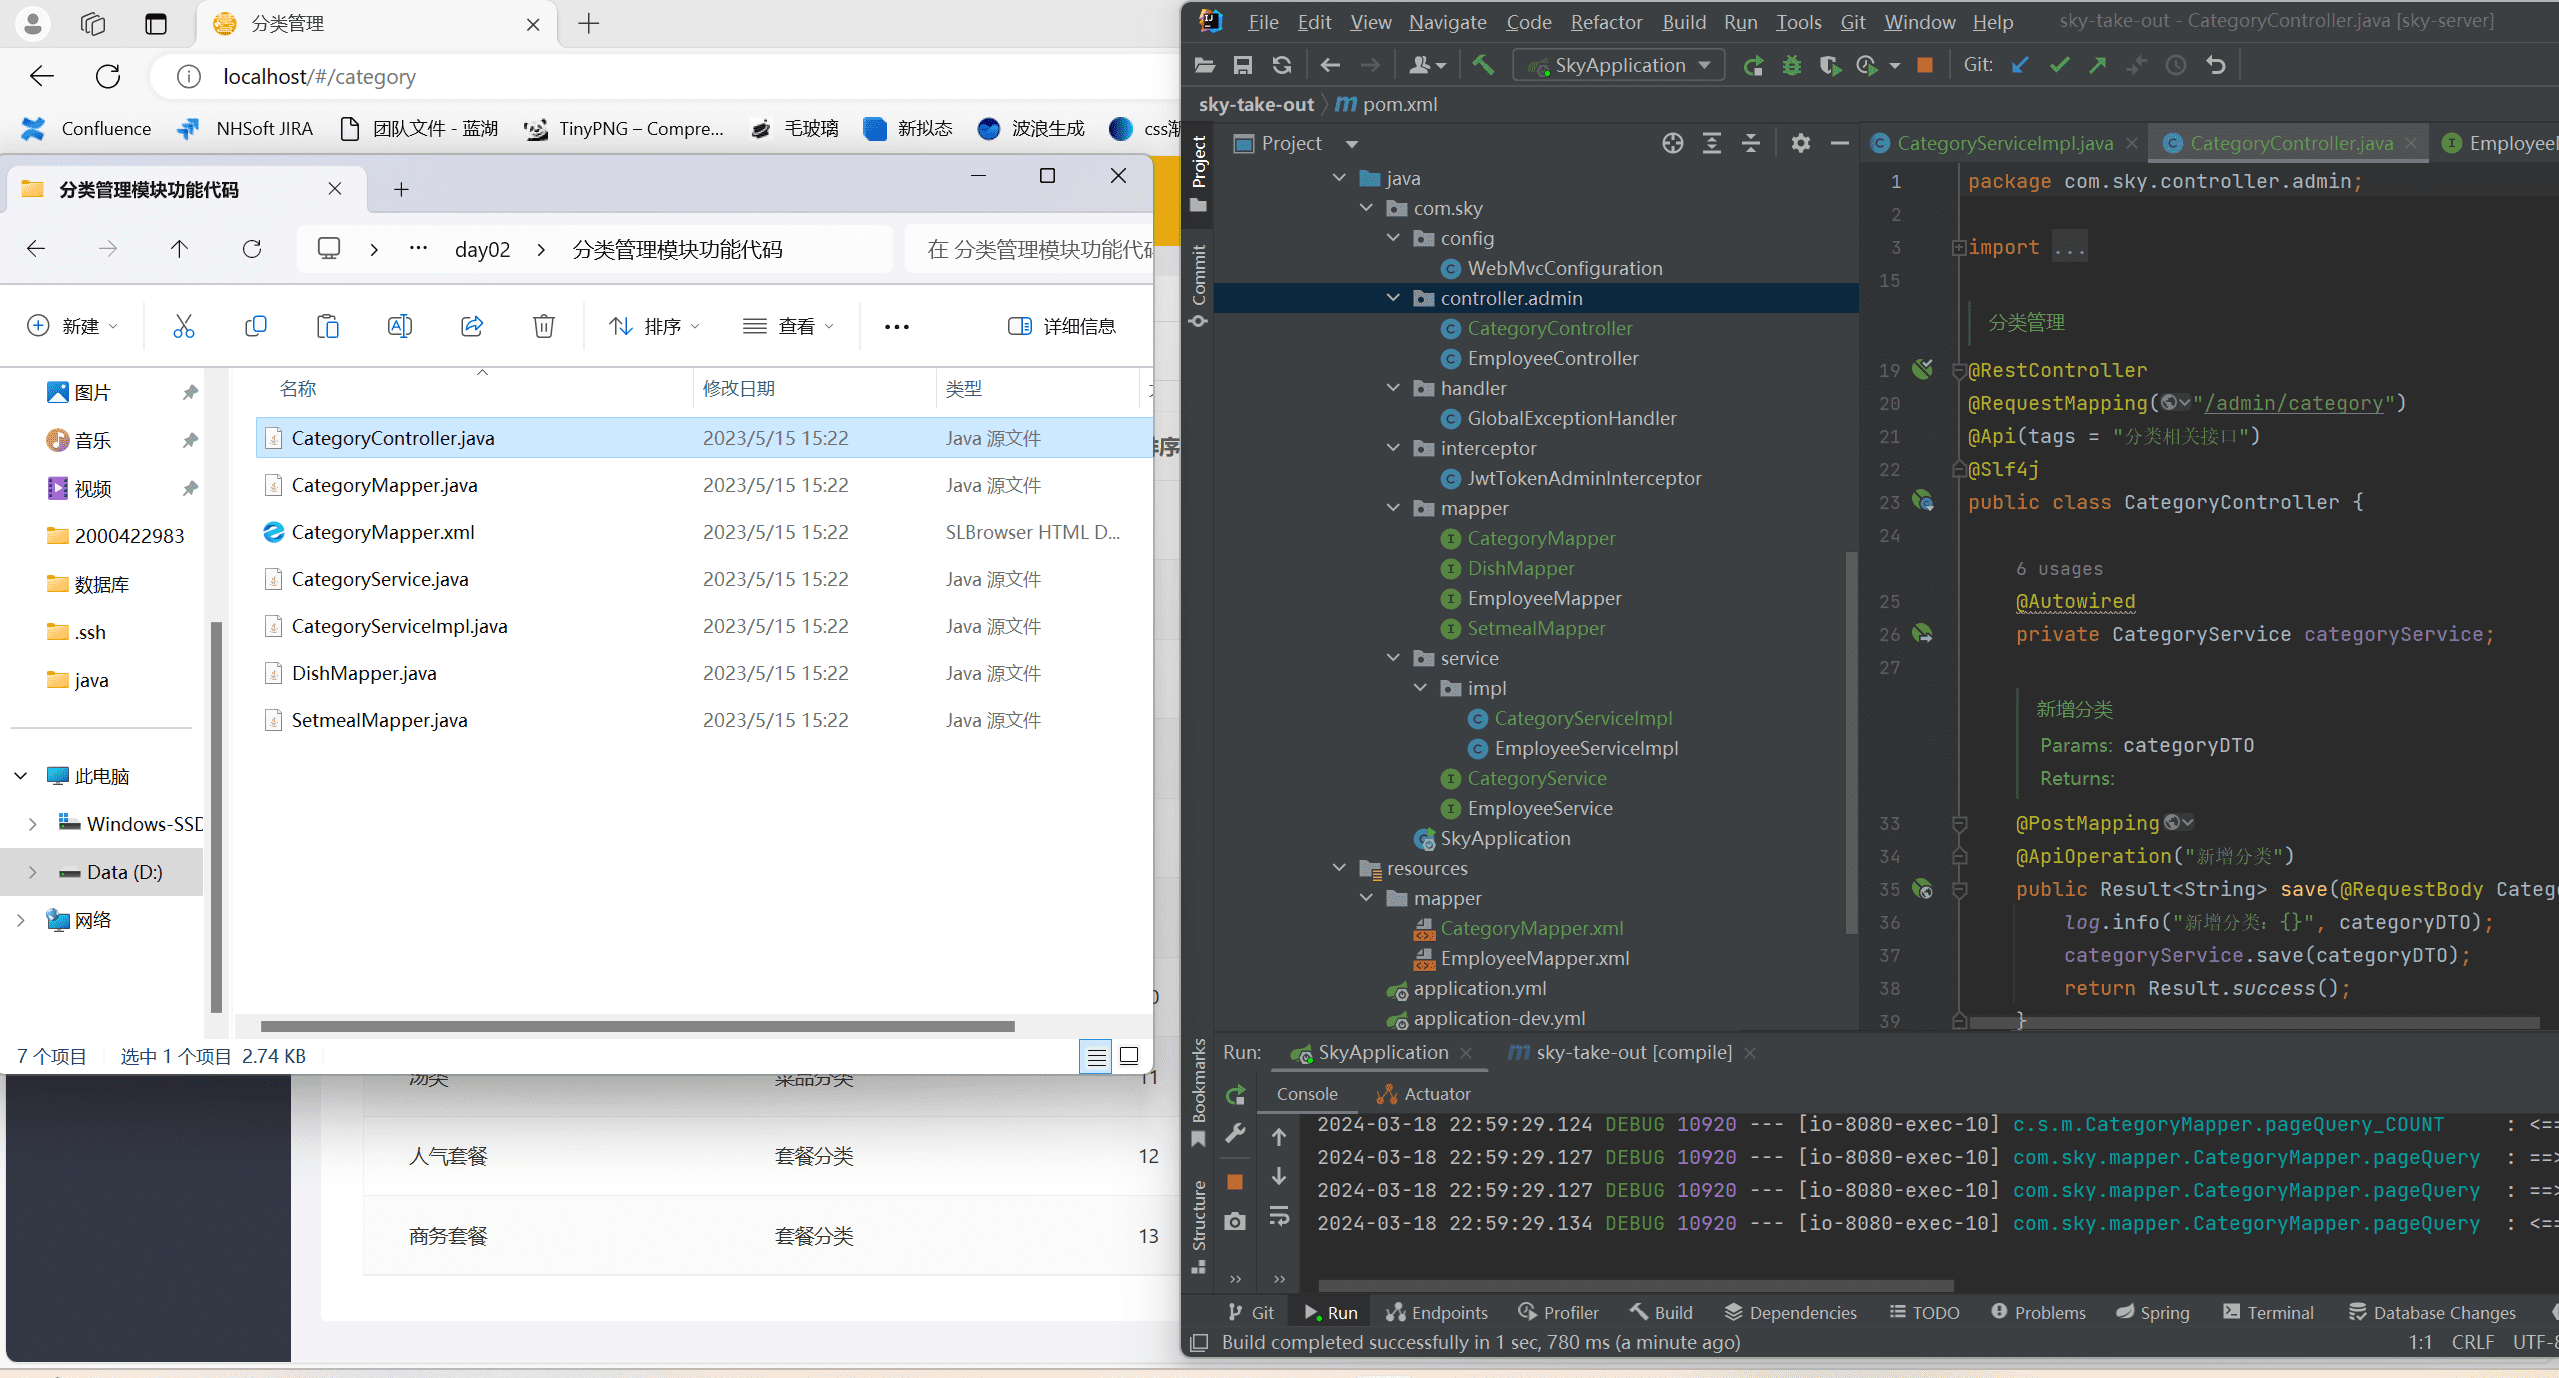
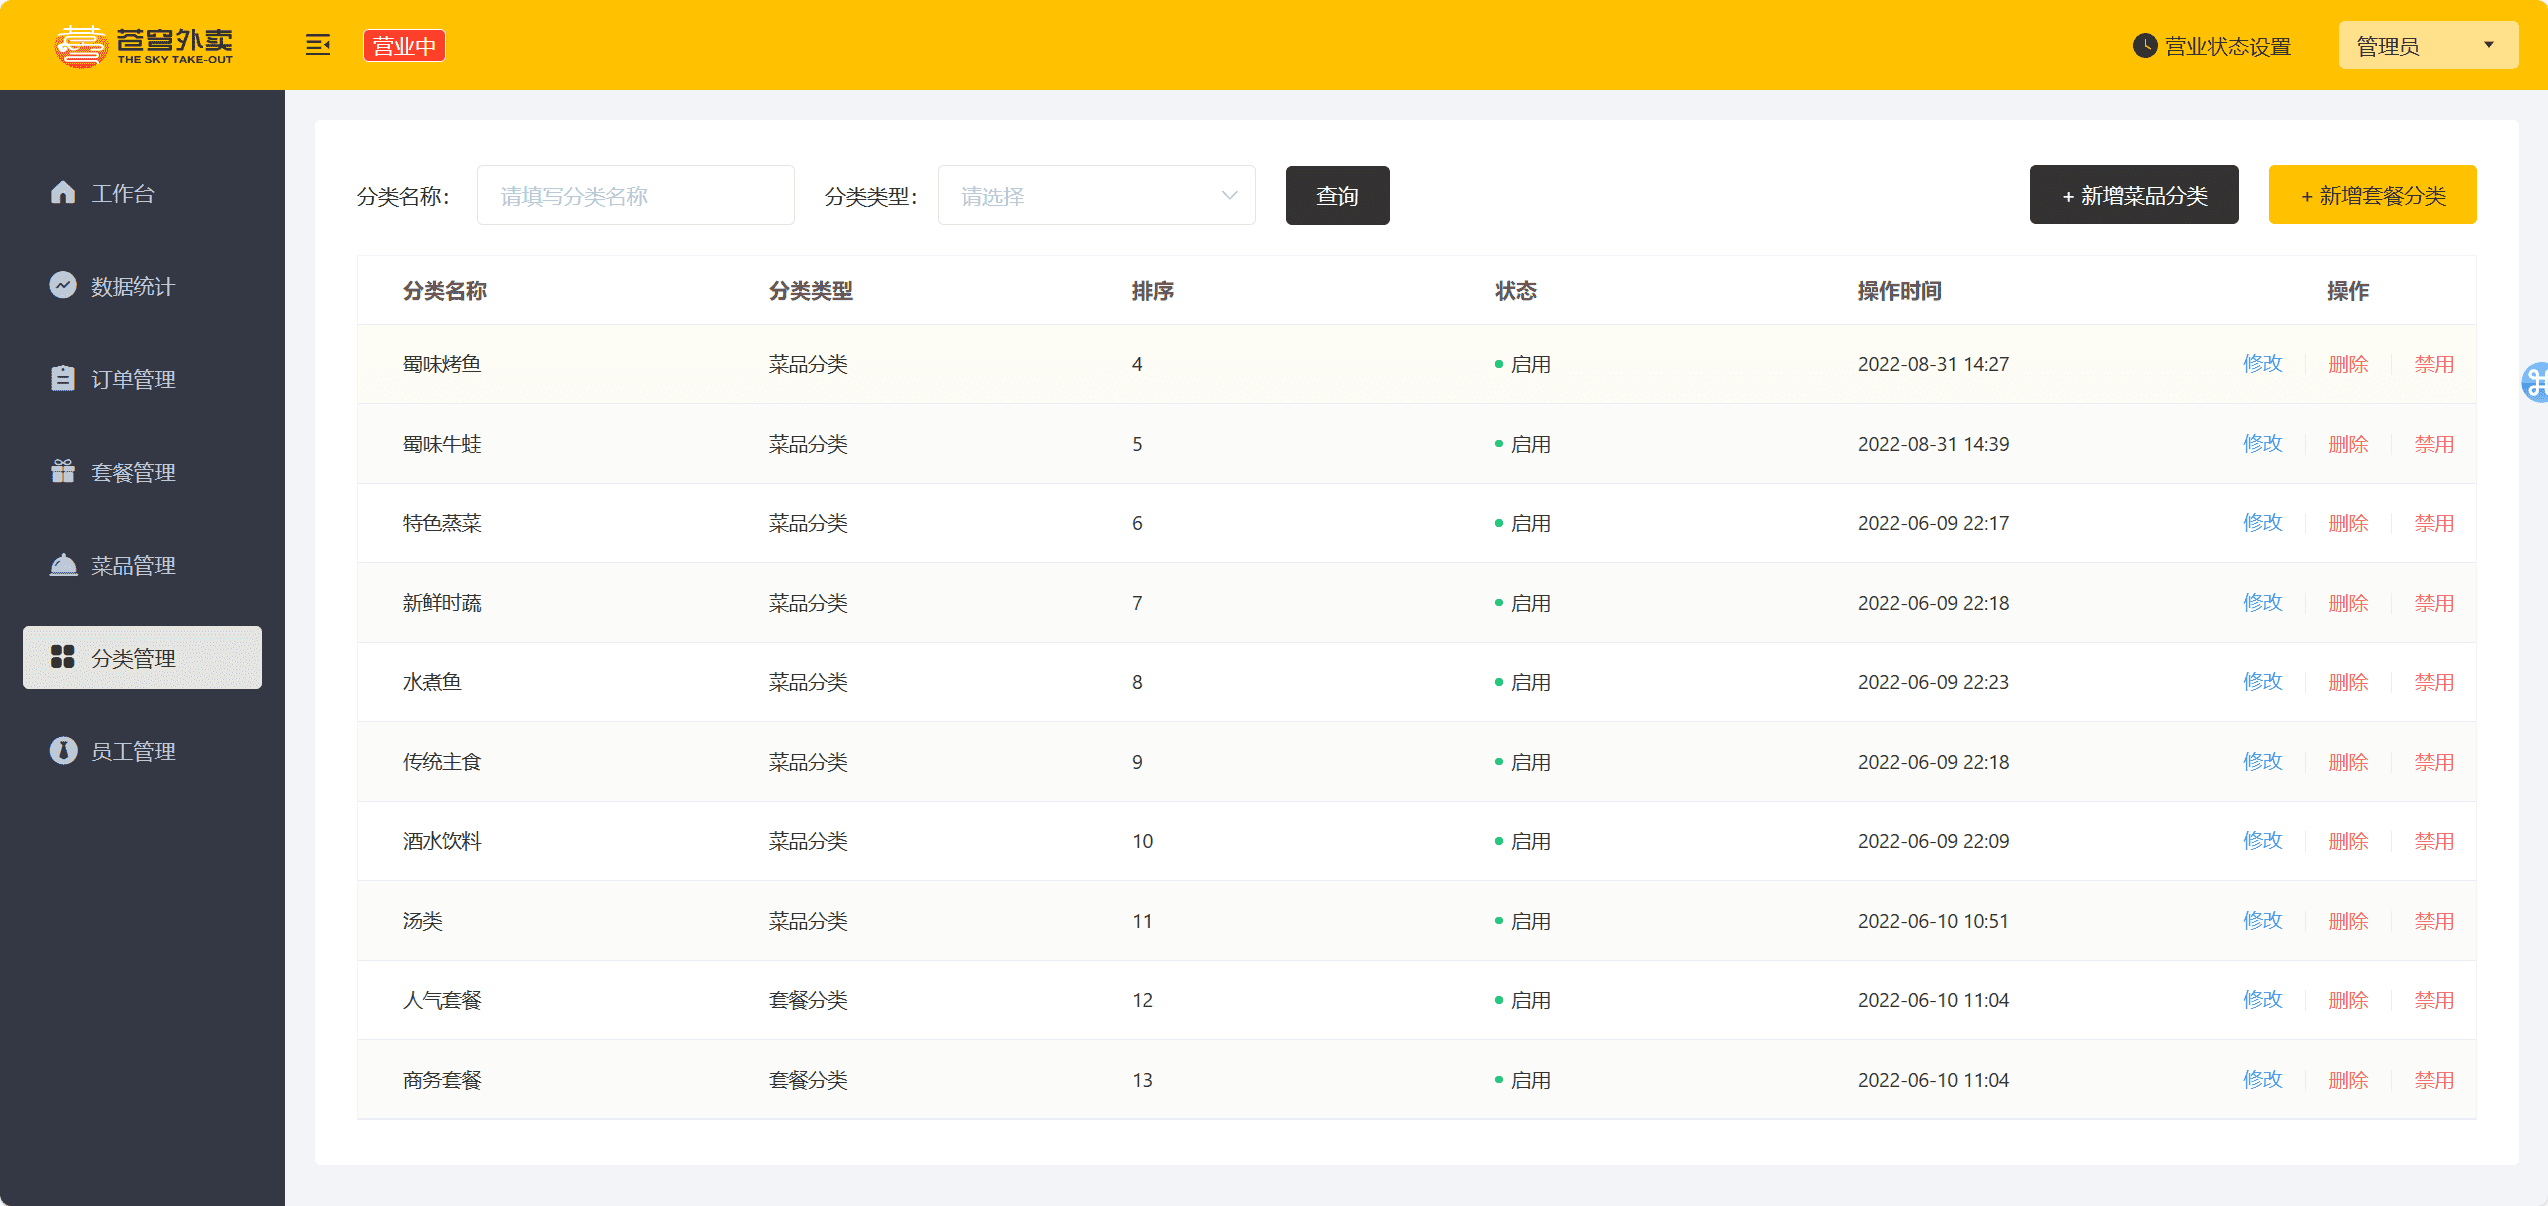
导入分类管理代码 这里也是增删改查,我跟着视频一样,直接导入了.
导入结构
导入效果
结语 本篇文章就到这里,更多内容敬请期待

