前言
Hello,大家好,我们将继续学习 WebGL,本篇文章内容主要为js与着色器间的数据传输,让我们直接进入正题
attribute 变量
回顾一下我们上一篇中点的定位:
1
| gl_Position = vec4(0, 0, 0, 1);
|
这是一种将数据写死了的硬编码,缺乏可扩展性。
我们要让这个点位可以动态改变,那就得把它变成 attribute 变量。
attribute 变量是只有顶点着色器才能使用它的。
js 可以通过 attribute 变量向顶点着色器传递与顶点相关的数据。
js 向 attribute 变量传参的步骤
在顶点着色器中声明 attribute 变量。
- attribute 是存储限定符,是专门用于向外部导出与点位相关的对象的,这类似于 es6 模板语法中 export 。
- vec4 是变量类型,vec4 是 4 维矢量对象。
- a_Position 是变量名,之后在 js 中会根据这个变量名导入变量。这个变量名是一个指针,指向实际数据的存储位置。也是说,我们如果在着色器外部改变了 a_Position 所指向的实际数据,那么在着色器中 a_Position 所对应的数据也会修改。
1
2
3
4
5
6
7
| <script id="vertexShader" type="x-shader/x-vertex">
attribute vec4 a_Position;
void main(){
gl_Position = a_Position;
gl_PointSize = 50.0;
}
</script>
|
在 js 中获取 attribute 变量
我们在 js 里不能直接写 a_Position 来获取着色器中的变量。
因为着色器和 js 是两个不同的语种,着色器无法通过 window.a_Position 原理向全局暴露变量。
那我们要在 js 里获取着色器暴露的变量,就需要找人来翻译,这个人就是程序对象。
- gl 是 webgl 的上下文对象。
- gl.getAttribLocation() 是获取着色器中 attribute 变量的方法。
- getAttribLocation() 方法的参数中:
- gl.program 是初始化着色器时,在上下文对象上挂载的程序对象。
- ‘a_Position’ 是着色器暴露出的变量名。
这个过程翻译过来就是:gl 上下文对象对 program 程序对象说,你去顶点着色器里找一个名叫’a_Position’ 的 attribute 变量。
1
| const a_Position = gl.getAttribLocation(gl.program, "a_Position");
|
修改 attribute 变量
attribute 变量即使在 js 中获取了,他也是一个只会说 GLSL ES 语言的人,他不认识 js 语言,所以我们不能用 js 的语法来修改 attribute 变量的值:
错误用法
我们得用特定的方法改变 a_Position 的值:
gl.vertexAttrib3f() 是改变变量值的方法。
gl.vertexAttrib3f() 方法的参数中:
a_Position 就是咱们之前获取的着色器变量。
后面的 3 个参数是顶点的 x、y、z 位置
正确用法
1
| gl.vertexAttrib3f(a_Position, 0.0, 0.5, 0.0);
|
拓展
gl.vertexAttrib3f()这个方法也有他的同族方法,比如 gl.vertexAttrib1f,gl.vertexAttrib2f,gl.vertexAttrib4f,他们分别修改 x,xy,xyzw(w 是不透明度)
webgl 函数的命名规律
GLSL ES 里函数的命名结构是:<基础函数名><参数个数><参数类型>
以 vertexAttrib3f(location,v0,v1,v2,v3) 为例:
- vertexAttrib:基础函数名
- 3:参数个数,这里的参数个数是要传给变量的参数个数,而不是当前函数的参数个数
- f:参数类型,f 代表 float 浮点类型,除此之外还有 i 代表整型,v 代表数字……
js 控制点位
接下来,我们写一个 webgl 代码,来画一个我们定位的点位(0.8,0.8,0)
1
2
3
4
5
6
7
8
9
10
11
12
13
14
15
16
17
18
19
20
21
22
23
24
25
26
27
28
29
30
31
32
33
34
35
36
37
38
39
40
41
42
43
44
45
46
47
48
49
50
51
52
53
54
55
56
57
58
59
60
61
62
63
64
65
66
67
68
69
| <!DOCTYPE html>
<html lang="en">
<head>
<meta charset="UTF-8" />
<title>js改变点位</title>
<style>
body {
margin: 0;
overflow: hidden;
}
#canvas {
background-color: antiquewhite;
}
</style>
</head>
<body>
<canvas id="canvas"></canvas>
<script id="vertexShader" type="x-shader/x-vertex">
attribute vec4 a_Position;
void main(){
gl_Position=a_Position;
gl_PointSize=50.0;
}
</script>
<script id="fragmentShader" type="x-shader/x-fragment">
void main(){
gl_FragColor=vec4(1,1,0,1);
}
</script>
<script type="module">
import { initShaders } from "../jsm/Utils.js";
const canvas = document.querySelector("#canvas");
canvas.width = window.innerWidth;
canvas.height = window.innerHeight;
const vsSource = document.querySelector("#vertexShader").innerText;
const fsSource = document.querySelector("#fragmentShader").innerText;
const gl = canvas.getContext("webgl");
initShaders(gl, vsSource, fsSource);
gl.clearColor(0, 0, 0, 1);
gl.clear(gl.COLOR_BUFFER_BIT);
const a_Position = gl.getAttribLocation(gl.program, "a_Position");
gl.vertexAttrib3f(a_Position, 0.8, 0.8, 0);
gl.drawArrays(gl.POINTS, 0, 1);
</script>
</body>
</html>
|

js 控制顶点大小
同样的,我们可以使用 js 来控制顶点的大小
1
2
3
4
5
6
7
8
9
10
11
12
13
14
15
16
17
18
19
20
21
22
23
24
25
26
27
28
29
30
31
32
33
34
35
36
37
38
39
40
41
42
43
44
45
46
47
48
49
50
51
52
53
54
55
56
57
58
59
60
61
62
63
64
65
66
67
68
69
70
71
| <!DOCTYPE html>
<html lang="en">
<head>
<meta charset="UTF-8" />
<title>js改变顶点尺寸</title>
<style>
body {
margin: 0;
overflow: hidden;
}
#canvas {
background-color: antiquewhite;
}
</style>
</head>
<body>
<canvas id="canvas"></canvas>
<script id="vertexShader" type="x-shader/x-vertex">
attribute vec4 a_Position;
attribute float a_PointSize;
void main(){
gl_Position=a_Position;
gl_PointSize=a_PointSize;
}
</script>
<script id="fragmentShader" type="x-shader/x-fragment">
void main(){
gl_FragColor=vec4(1,1,0,1);
}
</script>
<script type="module">
import { initShaders } from "../jsm/Utils.js";
const canvas = document.querySelector("#canvas");
canvas.width = window.innerWidth;
canvas.height = window.innerHeight;
const vsSource = document.querySelector("#vertexShader").innerText;
const fsSource = document.querySelector("#fragmentShader").innerText;
const gl = canvas.getContext("webgl");
initShaders(gl, vsSource, fsSource);
const a_Position = gl.getAttribLocation(gl.program, "a_Position");
const a_PointSize = gl.getAttribLocation(gl.program, "a_PointSize");
gl.vertexAttrib1f(a_Position, 0.1);
gl.vertexAttrib1f(a_PointSize, 10);
gl.clearColor(0, 0, 0, 1);
gl.clear(gl.COLOR_BUFFER_BIT);
gl.drawArrays(gl.POINTS, 0, 1);
</script>
</body>
</html>
|
鼠标点击生成随机大小的点
这我们首先就要想到了,我们鼠标点击的时候,获得的点击的位置是我们的 CSS 位置,而不是 webgl 的位置,所以我们要点位的换算,用我们上一篇的知识,我封装了一个函数:
1
2
3
4
5
6
7
8
9
10
11
12
13
14
15
| function getMousePosInWebgl({ clientX, clientY }, canvas) {
const { left, top, width, height } = canvas.getBoundingClientRect();
const [cssX, cssY] = [clientX - left, clientY - top];
const [halfWidth, halfHeight] = [width / 2, height / 2];
const [xBaseCenter, yBaseCenter] = [cssX - halfWidth, cssY - halfHeight];
const yBaseCenterTop = -yBaseCenter;
return {
x: xBaseCenter / halfWidth,
y: yBaseCenterTop / halfHeight,
};
}
|
实现鼠标点击生成点
此时代码如下:
1
2
3
4
5
6
7
8
9
10
11
12
13
14
15
16
17
18
19
20
21
22
23
24
25
26
27
28
29
30
31
32
33
34
35
36
37
38
39
40
41
42
43
44
45
46
47
48
49
50
51
52
53
54
55
56
57
58
59
60
61
62
63
64
65
66
67
68
69
70
71
72
73
74
75
76
77
| <!DOCTYPE html>
<html lang="en">
<head>
<meta charset="UTF-8" />
<title>js改变点位</title>
<style>
body {
margin: 0;
overflow: hidden;
}
#canvas {
background-color: antiquewhite;
}
</style>
</head>
<body>
<canvas id="canvas"></canvas>
<script id="vertexShader" type="x-shader/x-vertex">
attribute vec4 a_Position;
void main(){
gl_Position=a_Position;
gl_PointSize=50.0;
}
</script>
<script id="fragmentShader" type="x-shader/x-fragment">
void main(){
gl_FragColor=vec4(1,1,0,1);
}
</script>
<script type="module">
import { initShaders, getMousePosInWebgl } from "../jsm/Utils.js";
const canvas = document.querySelector("#canvas");
canvas.width = window.innerWidth;
canvas.height = window.innerHeight;
const vsSource = document.querySelector("#vertexShader").innerText;
const fsSource = document.querySelector("#fragmentShader").innerText;
const gl = canvas.getContext("webgl");
initShaders(gl, vsSource, fsSource);
const a_Position = gl.getAttribLocation(gl.program, "a_Position");
gl.vertexAttrib1f(a_Position, 0.1);
gl.clearColor(0, 0, 0, 1);
gl.clear(gl.COLOR_BUFFER_BIT);
gl.drawArrays(gl.POINTS, 0, 1);
canvas.addEventListener("click", (event) => {
const { x, y } = getMousePosInWebgl(event, canvas);
gl.vertexAttrib2f(a_Position, x, y);
gl.clear(gl.COLOR_BUFFER_BIT);
gl.drawArrays(gl.POINTS, 0, 1);
});
</script>
</body>
</html>
|
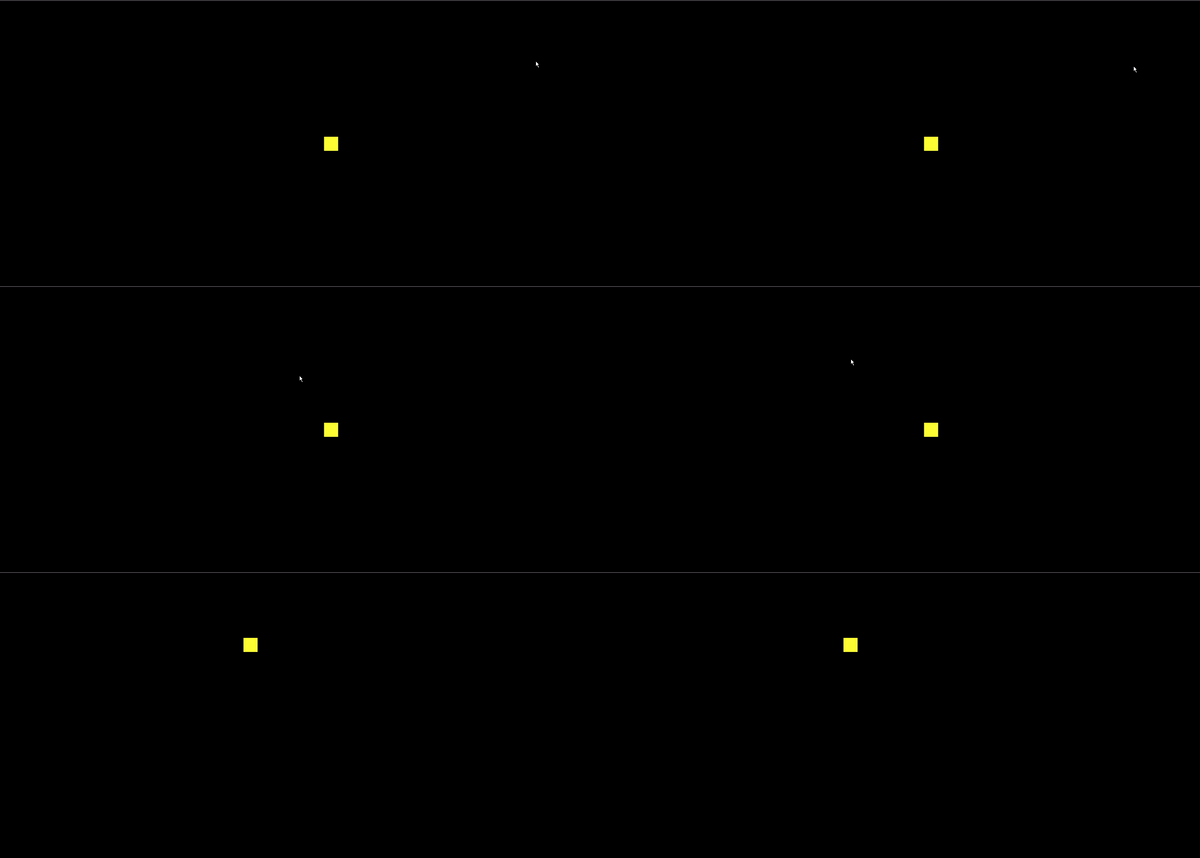
我们惊奇的发现,鼠标点击的点位虽然出来了,但是原来的点没了,这是为什么呢???
webgl 同步绘图原理
具备 canvas 2d 可能会认为无法画出多点是 gl.clear(gl.COLOR_BUFFER_BIT) 清理画布导致,因为我们在用 canvas 2d 做动画时,其中就有一个 ctx.clearRect() 清理画布的方法。
那咱们将 gl.clear() 方法注释掉试试。
1
2
3
4
5
6
7
|
canvas.addEventListener("click", (event) => {
const { x, y } = getMousePosInWebgl(event, canvas);
gl.vertexAttrib2f(a_Position, x, y);
gl.drawArrays(gl.POINTS, 0, 1);
});
|
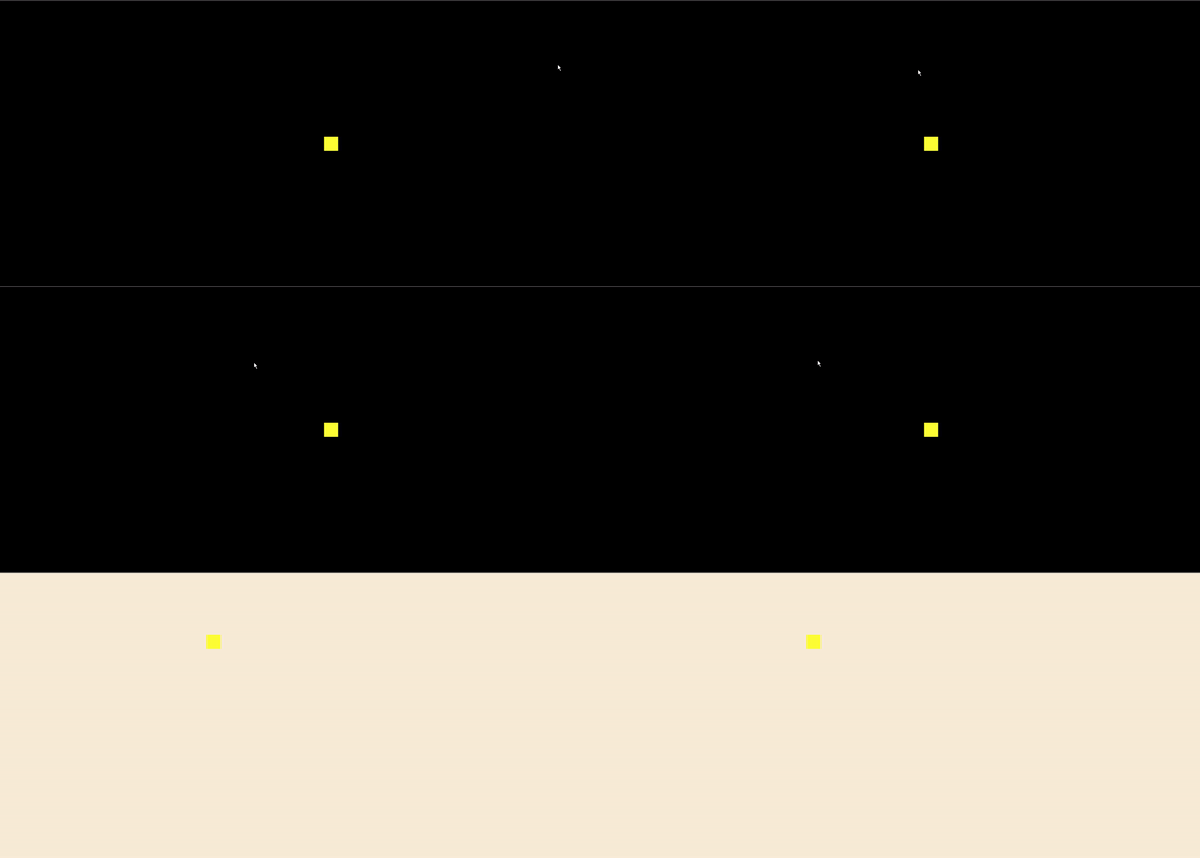
这时候不仅原来的点没了,而且我们的底色也没了
我们分析一下。
gl.drawArrays(gl.POINTS, 0, 1) 方法和 canvas 2d 里的 ctx.draw() 方法是不一样的,ctx.draw() 真的像画画一样,一层一层的覆盖图像。
gl.drawArrays() 方法只会同步绘图,走完了 js 主线程后,再次绘图时,就会从头再来。也就说,异步执行的 drawArrays() 方法会把画布上的图像都刷掉。
举个例子:
我直接画两个点
1
2
3
4
5
6
7
| const a_Position = gl.getAttribLocation(gl.program, "a_Position");
gl.clearColor(0.0, 0.0, 0.0, 1.0);
gl.clear(gl.COLOR_BUFFER_BIT);
gl.vertexAttrib2f(a_Position, 0.1, 0);
gl.drawArrays(gl.POINTS, 0, 1);
gl.vertexAttrib2f(a_Position, -0.1, 0);
gl.drawArrays(gl.POINTS, 0, 1);
|
我们可以看到,两个点都是在的
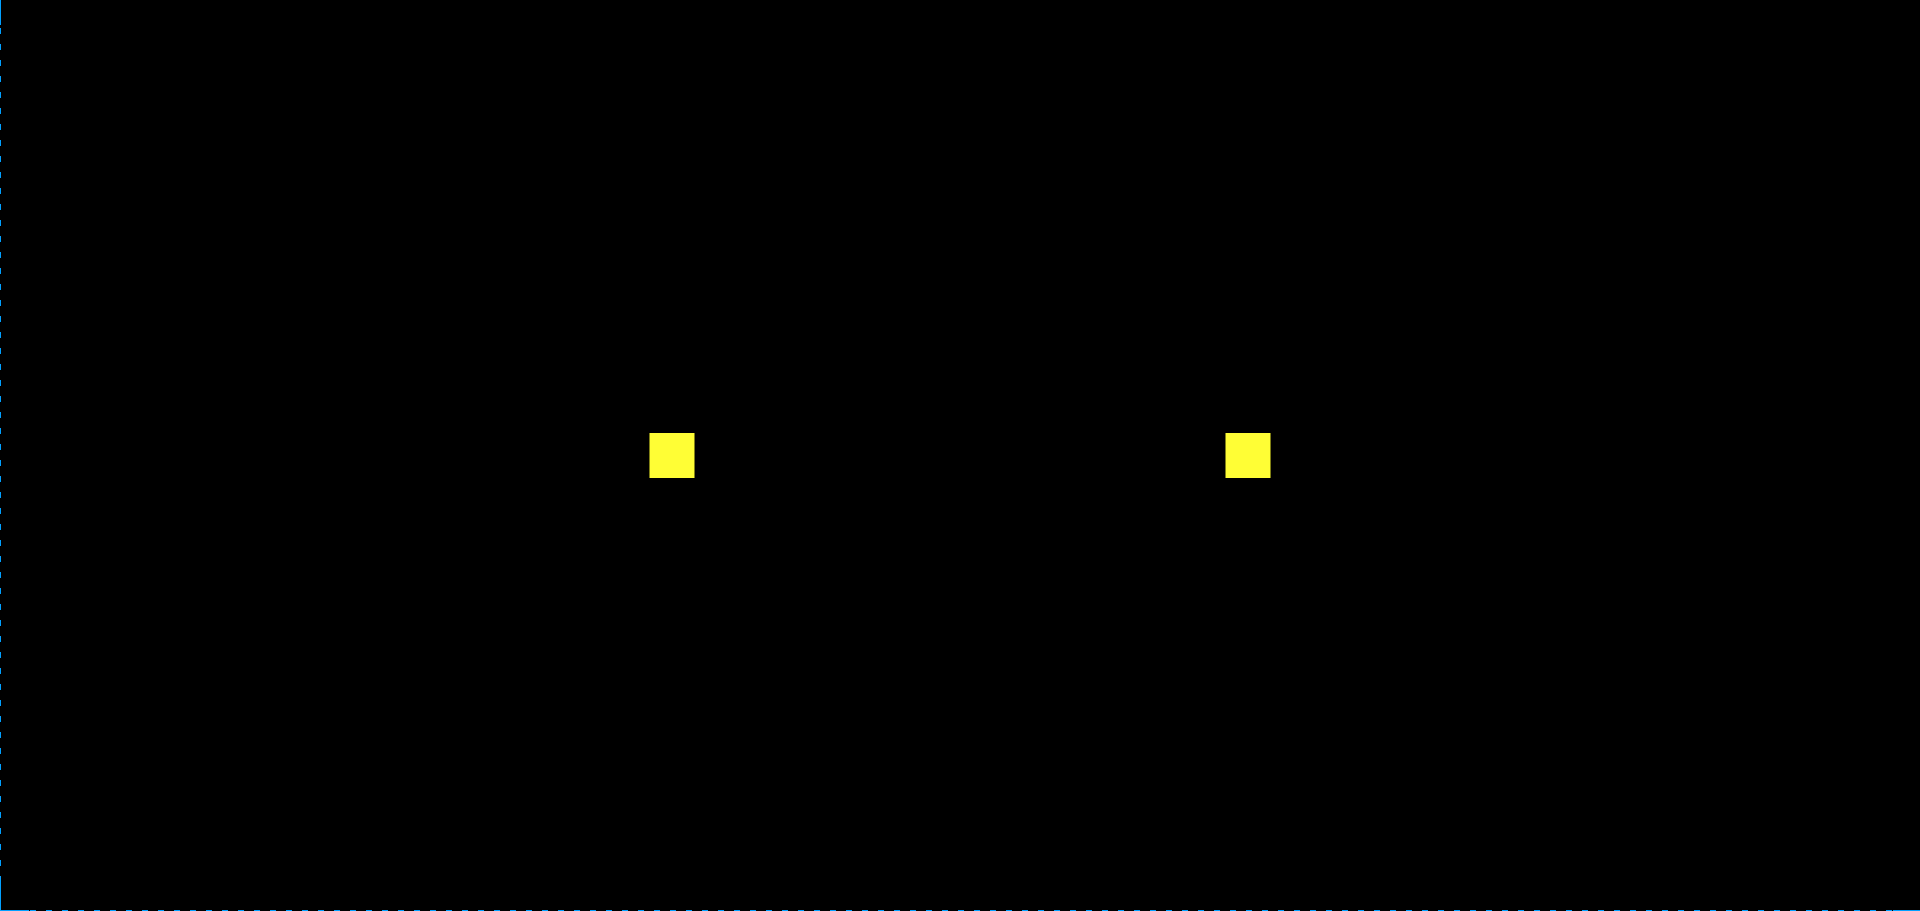
但是如果我在一秒后再画一个点
1
2
3
4
5
6
7
8
9
10
11
| const a_Position = gl.getAttribLocation(gl.program, "a_Position");
gl.clearColor(0.0, 0.0, 0.0, 1.0);
gl.clear(gl.COLOR_BUFFER_BIT);
gl.vertexAttrib2f(a_Position, 0.1, 0);
gl.drawArrays(gl.POINTS, 0, 1);
gl.vertexAttrib2f(a_Position, -0.1, 0);
gl.drawArrays(gl.POINTS, 0, 1);
setTimeout(() => {
gl.vertexAttrib2f(a_Position, 0, 0);
gl.drawArrays(gl.POINTS, 0, 1);
}, 1000);
|
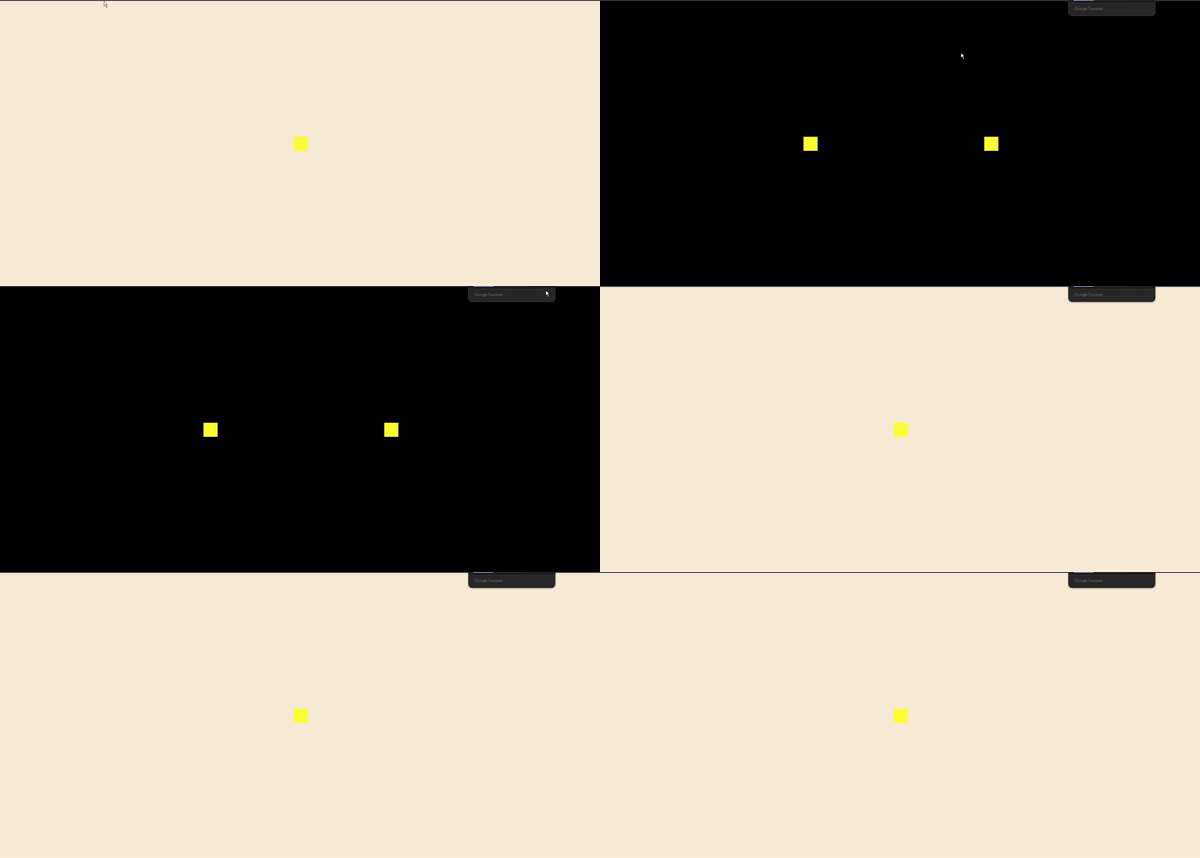
这个恰好证明了我们的假设
那我们该如何异步画多个点呢,其实很简单,只需要将之前的点给存起来就可以了
1
2
3
4
5
6
7
8
9
10
11
12
13
14
15
16
17
18
19
| const a_Position = gl.getAttribLocation(gl.program, "a_Position");
gl.clearColor(0.0, 0.0, 0.0, 1.0);
gl.clear(gl.COLOR_BUFFER_BIT);
const g_points = [
{ x: 0.1, y: 0 },
{ x: -0.1, y: 0 },
];
render();
setTimeout(() => {
g_points.push({ x: 0, y: 0 });
render();
}, 1000);
function render() {
gl.clear(gl.COLOR_BUFFER_BIT);
g_points.forEach(({ x, y }) => {
gl.vertexAttrib2f(a_Position, x, y);
gl.drawArrays(gl.POINTS, 0, 1);
});
}
|
真实实现鼠标点击生成随机大小的点
到这里,我们就可以真实实现我们需要的效果了。
1
2
3
4
5
6
7
8
9
10
11
12
13
14
15
16
17
18
19
20
21
22
23
24
25
26
27
28
29
30
31
32
33
34
35
36
37
38
39
40
41
42
43
44
45
46
47
48
49
50
51
52
53
54
55
56
57
58
59
60
61
62
63
64
65
66
67
68
69
70
71
72
73
74
75
76
77
78
79
80
81
82
83
84
85
86
87
88
89
90
91
92
93
94
| <!DOCTYPE html>
<html lang="en">
<head>
<meta charset="UTF-8" />
<title>随机改变顶点尺寸</title>
<style>
body {
margin: 0;
overflow: hidden;
}
#canvas {
background-color: antiquewhite;
}
</style>
</head>
<body>
<canvas id="canvas"></canvas>
<script id="vertexShader" type="x-shader/x-vertex">
attribute vec4 a_Position;
attribute float a_PointSize;
void main(){
gl_Position=a_Position;
gl_PointSize=a_PointSize;
}
</script>
<script id="fragmentShader" type="x-shader/x-fragment">
void main(){
gl_FragColor=vec4(1,1,0,1);
}
</script>
<script type="module">
import { initShaders, getMousePosInWebgl } from "../jsm/Utils.js";
const canvas = document.querySelector("#canvas");
canvas.width = window.innerWidth;
canvas.height = window.innerHeight;
const vsSource = document.querySelector("#vertexShader").innerText;
const fsSource = document.querySelector("#fragmentShader").innerText;
const gl = canvas.getContext("webgl");
initShaders(gl, vsSource, fsSource);
const a_Position = gl.getAttribLocation(gl.program, "a_Position");
const a_PointSize = gl.getAttribLocation(gl.program, "a_PointSize");
const a_points = [{ x: 0, y: 0, size: 10 }];
gl.clearColor(0, 0, 0, 1);
gl.clear(gl.COLOR_BUFFER_BIT);
render();
canvas.addEventListener("click", (event) => {
const { x, y } = getMousePosInWebgl(event, canvas);
const size = Math.random() * 50 + 10;
a_points.push({ x, y, size });
render();
});
function render() {
gl.clear(gl.COLOR_BUFFER_BIT);
a_points.forEach(({ x, y, size }) => {
gl.vertexAttrib2f(a_Position, x, y);
gl.vertexAttrib1f(a_PointSize, size);
gl.drawArrays(gl.POINTS, 0, 1);
});
}
</script>
</body>
</html>
|
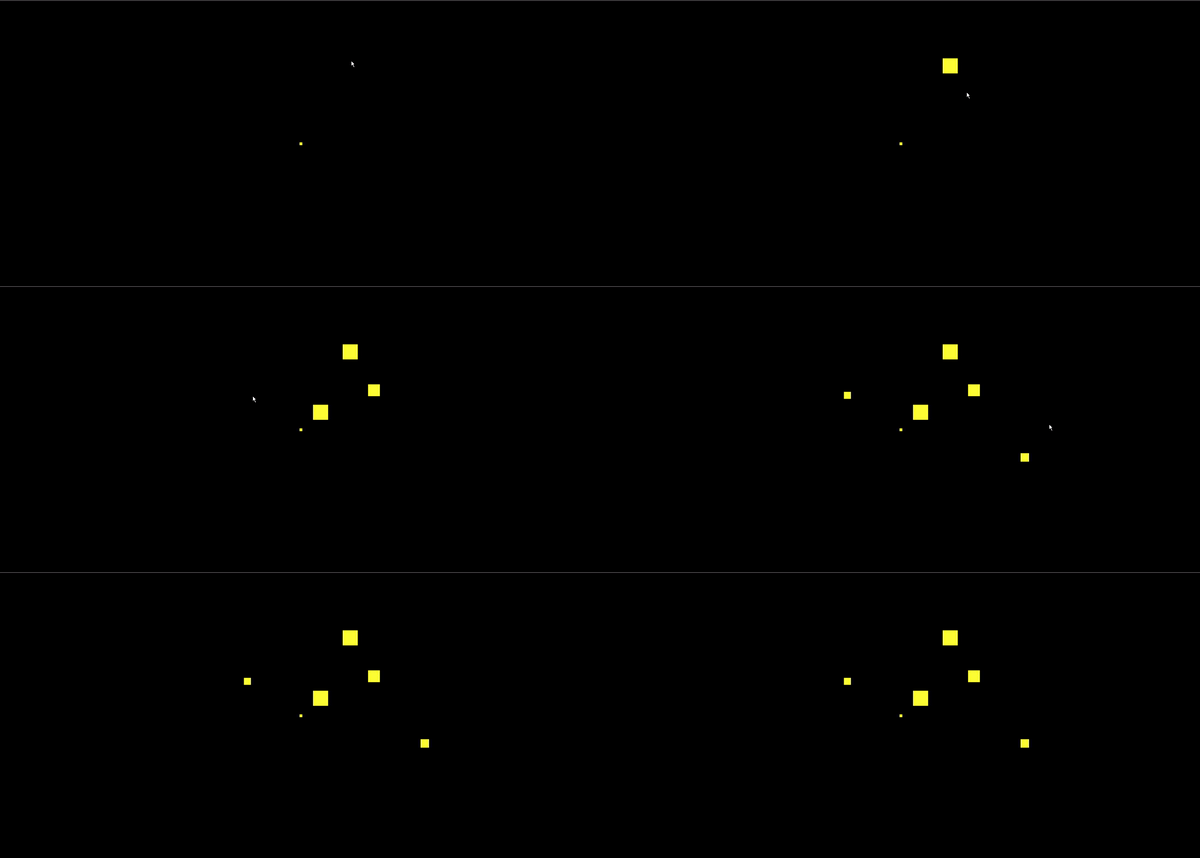
js 改变顶点颜色
在片元着色器里把控制顶点颜色的变量暴露出来。
这里的 uniform 就是咱们刚才说过的限定符,vec4 是 4 维的变量类型,u_FragColor 就是变量名。
这里还要注意一下,第一行的 precision mediump float 是对浮点数精度的定义,mediump 是中等精度的意思,这个必须要有,不然画不出东西来。
1
2
3
4
5
6
7
| <script id="fragmentShader" type="x-shader/x-fragment">
precision mediump float;
uniform vec4 u_FragColor;
void main() {
gl_FragColor = u_FragColor;
}
</script>
|
getUniformLocation() 方法就是用于获取片元着色器暴露出的 uniform 变量的,其第一个参数是程序对象,第二个参数是变量名。这里的参数结构和获取 attribute 变量的 getAttributeLocation() 方法是一样的。
1
| const u_FragColor = gl.getUniformLocation(gl.program, "u_FragColor");
|
1
| gl.uniform4f(u_FragColor, 1.0, 1.0, 0.0, 1.0);
|
生成随机颜色点
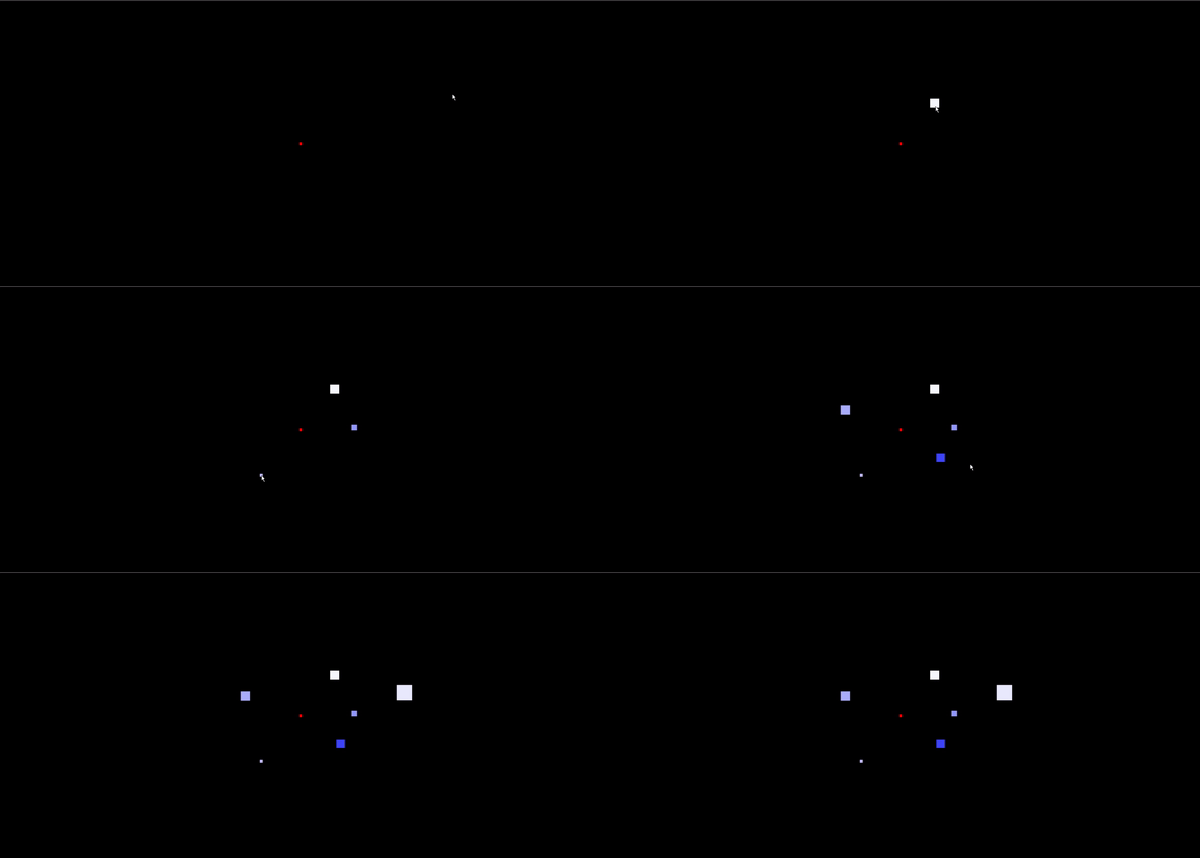
然后我们将修改颜色的代码和点击生成随机点结合起来
1
2
3
4
5
6
7
8
9
10
11
12
13
14
15
16
17
18
19
20
21
22
23
24
25
26
27
28
29
30
31
32
33
34
35
36
37
38
39
40
41
42
43
44
45
46
47
48
49
50
51
52
53
54
55
56
57
58
59
60
61
62
63
64
65
66
67
68
69
70
71
72
73
74
75
76
77
78
79
80
81
82
83
84
85
86
87
88
89
90
91
92
93
94
95
96
97
98
99
100
101
102
103
104
| <!DOCTYPE html>
<html lang="en">
<head>
<meta charset="UTF-8" />
<title>随机点</title>
<style>
body {
margin: 0;
overflow: hidden;
}
#canvas {
background-color: antiquewhite;
}
</style>
</head>
<body>
<canvas id="canvas"></canvas>
<script id="vertexShader" type="x-shader/x-vertex">
attribute vec4 a_Position;
attribute float a_PointSize;
void main(){
gl_Position=a_Position;
gl_PointSize=a_PointSize;
}
</script>
<script id="fragmentShader" type="x-shader/x-fragment">
precision mediump float;
uniform vec4 u_FragColor;
void main(){
gl_FragColor=u_FragColor;
}
</script>
<script type="module">
import { initShaders, getMousePosInWebgl } from "../jsm/Utils.js";
const canvas = document.querySelector("#canvas");
canvas.width = window.innerWidth;
canvas.height = window.innerHeight;
const vsSource = document.querySelector("#vertexShader").innerText;
const fsSource = document.querySelector("#fragmentShader").innerText;
const gl = canvas.getContext("webgl");
initShaders(gl, vsSource, fsSource);
const a_Position = gl.getAttribLocation(gl.program, "a_Position");
const a_PointSize = gl.getAttribLocation(gl.program, "a_PointSize");
const u_FragColor = gl.getUniformLocation(gl.program, "u_FragColor");
const a_points = [
{ x: 0, y: 0, size: 10, color: { r: 1, g: 0, b: 0, a: 1 } },
];
gl.clearColor(0, 0, 0, 1);
gl.clear(gl.COLOR_BUFFER_BIT);
render();
canvas.addEventListener("click", (event) => {
const { x, y } = getMousePosInWebgl(event, canvas);
const size = Math.random() * 50 + 10;
const n = Math.random();
const color = { r: n, g: n, b: 1, a: 1 };
a_points.push({ x, y, size, color });
render();
});
function render() {
gl.clear(gl.COLOR_BUFFER_BIT);
a_points.forEach(({ x, y, size, color: { r, g, b, a } }) => {
gl.vertexAttrib2f(a_Position, x, y);
gl.vertexAttrib1f(a_PointSize, size);
const arr = new Float32Array([r, g, b, a]);
gl.uniform4fv(u_FragColor, arr);
gl.drawArrays(gl.POINTS, 0, 1);
});
}
</script>
</body>
</html>
|
上面的生成随机颜色点代码中,我用到了uniform4fv
我们在改变 uniform 变量的时候,既可以用 uniform4f() 方法一个个的写参数,也可以用 uniform4fv() 方法传递类型数组。
uniform4f 中,4 是有 4 个数据,f 是 float 浮点类型,在我们上面的例子里就是 r、g、b、a 这四个颜色数据。
uniform4fv 中,4f 的意思和上面一样,v 是 vector 矢量的意思,这在数学里就是向量的意思。由之前的 4f 可知,这个向量由 4 个浮点类型的分量构成。
在上面呢的案例中,我们可以知道,在修改 uniform 变量的时候,这两种写法是一样的:
1
2
3
4
| gl.uniform4f(u_FragColor, 1.0, 1.0, 0.0, 1.0);
const color = new Float32Array([1.0, 1.0, 0.0, 1.0]);
gl.uniform4fv(u_FragColor, color);
|
uniform4f() 和 uniform4fv() 也有着自己的同族方法,其中的 4 可以变成 1|2|3。
uniform4fv() 方法的第二个参数必须是 Float32Array 数组,不要使用普通的 Array 对象。
Float32Array 是一种 32 位的浮点型数组,它在浏览器中的运行效率要比普通的 Array 高很多
绘制圆点
- distance(p1,p2) 计算两个点位的距离
- gl_PointCoord 片元在一个点中的位置,此位置是被归一化的
- discard 丢弃,即不会一个片元进行渲染
1
2
3
4
5
6
7
8
9
10
11
12
| <script id="fragmentShader" type="x-shader/x-fragment">
precision mediump float;
uniform vec4 u_FragColor;
void main() {
float dist = distance(gl_PointCoord, vec2(0.5, 0.5));
if(dist < 0.5) {
gl_FragColor = u_FragColor;
} else {
discard;
}
}
</script>
|
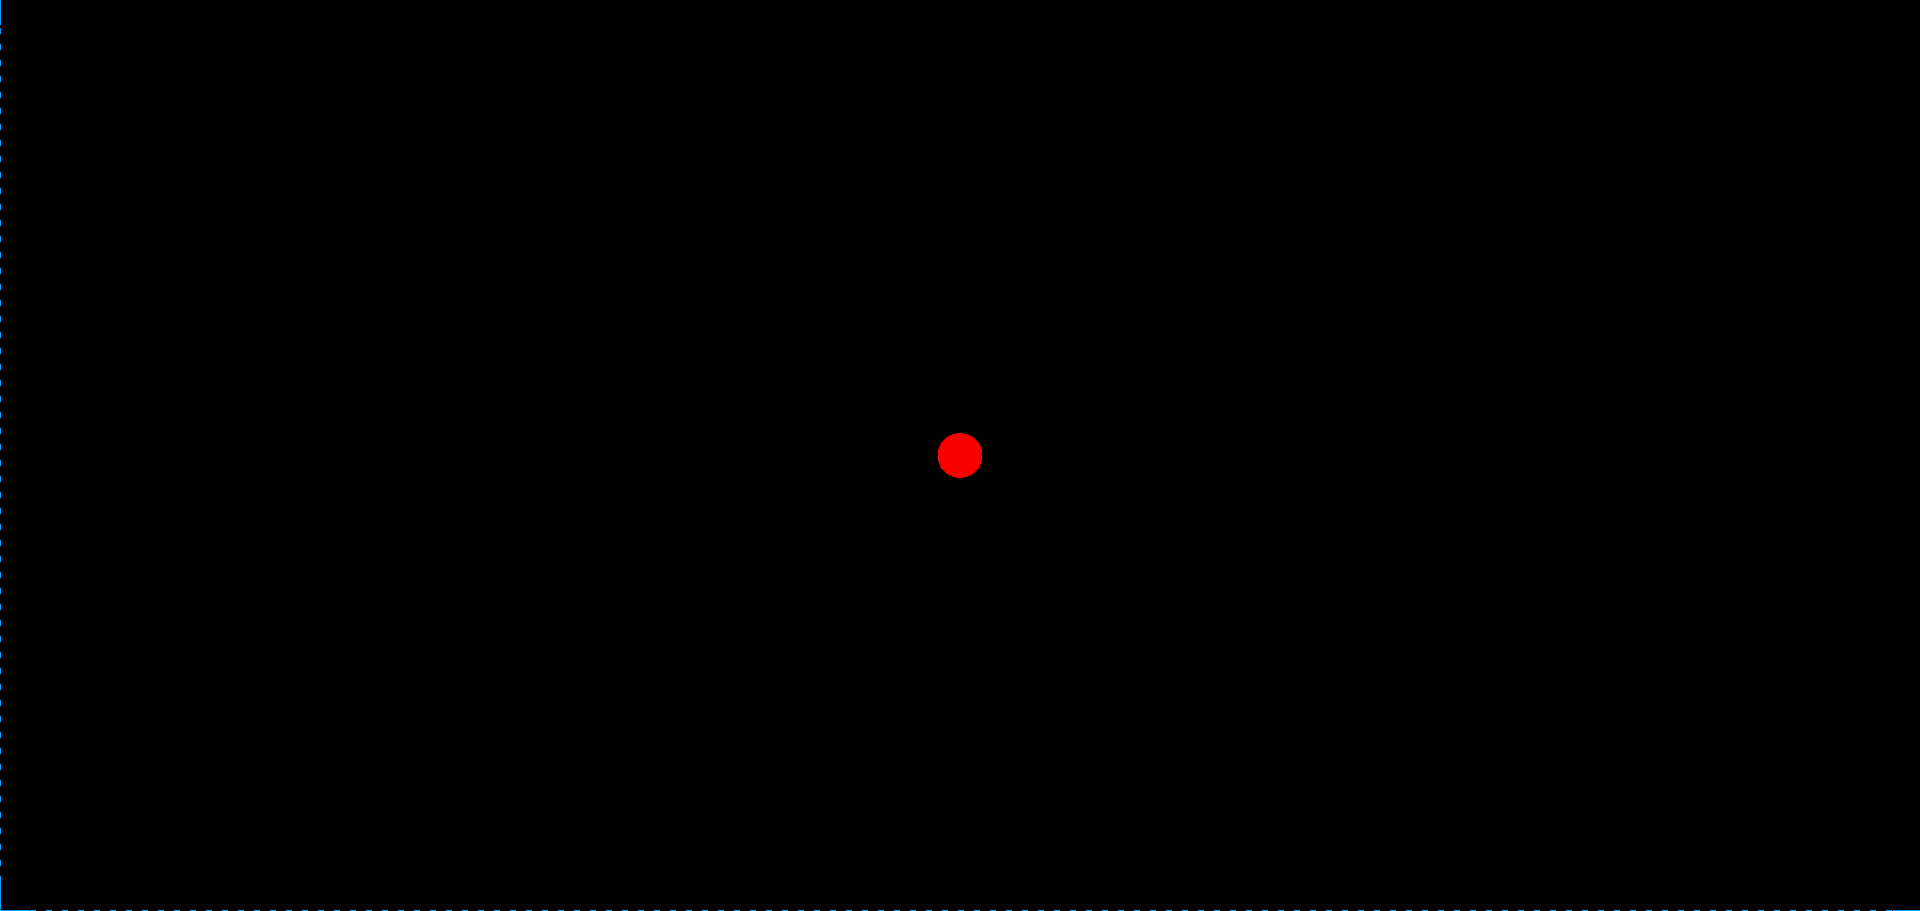
差不多效果就是这样,小于 0.5 的距离的部分组成起来就是一个圆形
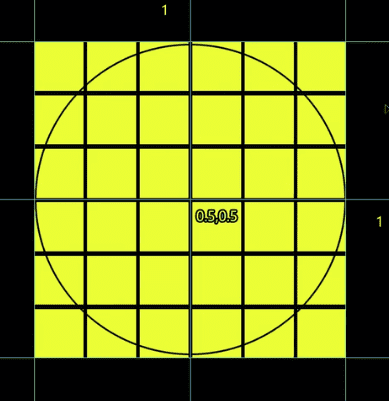
着色器语法地址:https://registry.khronos.org/OpenGL-Refpages/gl4/
这样,我们就可以在 webgl 中得到圆点了
实现 demo-星星向你眨眼睛
实现星空
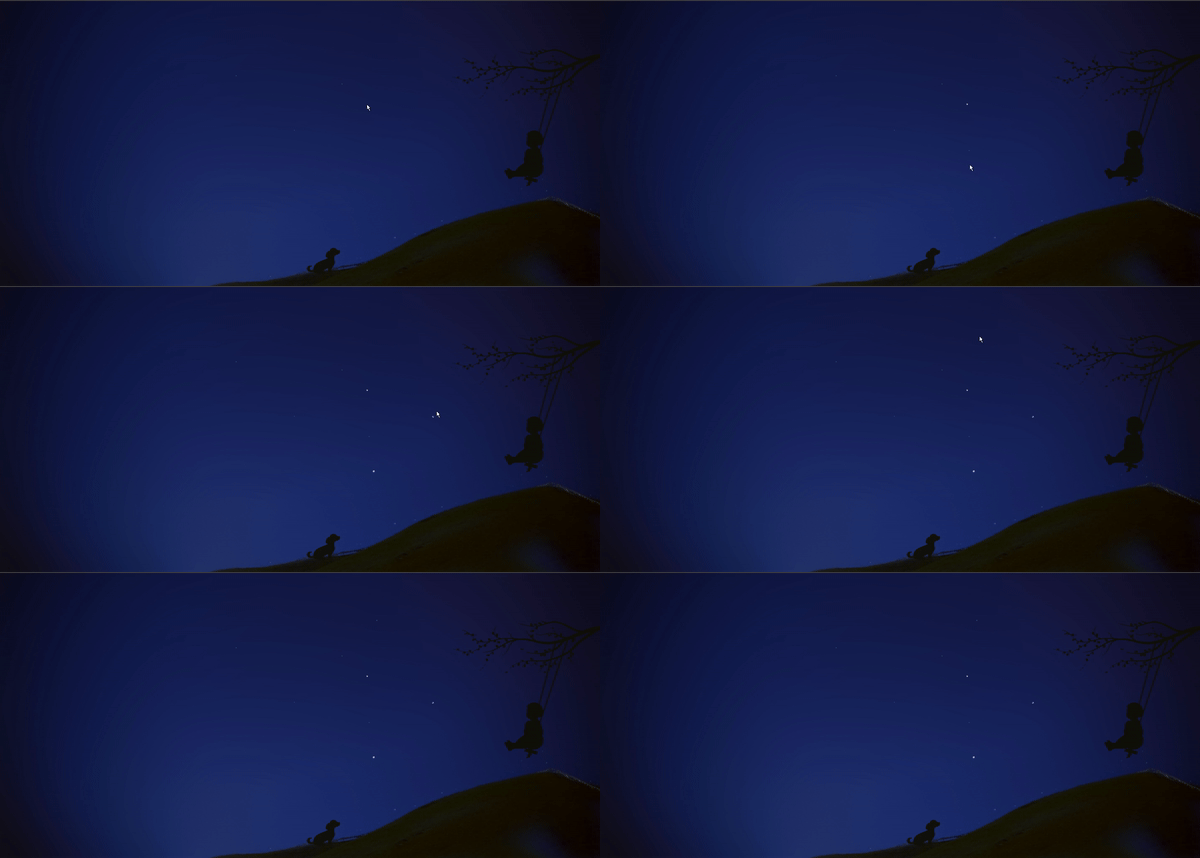
首先我们先把背景图结合圆点,点击生成随机顶点的内容组合起来给放上去,这里还有几个重要的点
刷底色的时候给一个透明的底色,这样才能看见 canvas 的 css 背景
1
| gl.clearColor(0, 0, 0, 0);
|
接下来图形的透明度作为变量:
1
2
| const arr = new Float32Array([0.87, 0.91, 1, a]);
gl.uniform4fv(u_FragColor, arr);
|
开启片元的颜色合成功能
设置片元的合成方式
1
| gl.blendFunc(gl.SRC_ALPHA, gl.ONE_MINUS_SRC_ALPHA);
|
完整代码
1
2
3
4
5
6
7
8
9
10
11
12
13
14
15
16
17
18
19
20
21
22
23
24
25
26
27
28
29
30
31
32
33
34
35
36
37
38
39
40
41
42
43
44
45
46
47
48
49
50
51
52
53
54
55
56
57
58
59
60
61
62
63
64
65
66
67
68
69
70
71
72
73
74
75
76
77
78
79
80
81
82
83
84
85
86
87
88
89
90
91
92
93
94
95
96
97
98
99
100
101
102
103
| <!DOCTYPE html>
<html lang="en">
<head>
<meta charset="UTF-8" />
<title>绘制星空</title>
<style>
body {
margin: 0;
overflow: hidden;
}
#canvas {
background: url("./images/sky.jpg");
background-size: cover;
background-position: right bottom;
}
</style>
</head>
<body>
<canvas id="canvas"></canvas>
<script id="vertexShader" type="x-shader/x-vertex">
attribute vec4 a_Position;
attribute float a_PointSize;
void main(){
gl_Position=a_Position;
gl_PointSize=a_PointSize;
}
</script>
<script id="fragmentShader" type="x-shader/x-fragment">
precision mediump float;
uniform vec4 u_FragColor;
void main(){
float dist=distance(gl_PointCoord,vec2(0.5,0.5));
if(dist<0.5){
gl_FragColor=u_FragColor;
}else{
discard;
}
}
</script>
<script type="module">
import { initShaders, getMousePosInWebgl } from "../jsm/Utils.js";
const canvas = document.querySelector("#canvas");
canvas.width = window.innerWidth;
canvas.height = window.innerHeight;
const vsSource = document.querySelector("#vertexShader").innerText;
const fsSource = document.querySelector("#fragmentShader").innerText;
const gl = canvas.getContext("webgl");
gl.enable(gl.BLEND);
gl.blendFunc(gl.SRC_ALPHA, gl.ONE_MINUS_SRC_ALPHA);
initShaders(gl, vsSource, fsSource);
const a_Position = gl.getAttribLocation(gl.program, "a_Position");
const a_PointSize = gl.getAttribLocation(gl.program, "a_PointSize");
const u_FragColor = gl.getUniformLocation(gl.program, "u_FragColor");
const stars = [];
gl.clearColor(0, 0, 0, 0);
gl.clear(gl.COLOR_BUFFER_BIT);
render();
canvas.addEventListener("click", (event) => {
const { x, y } = getMousePosInWebgl(event, canvas);
const s = Math.random() * 5 + 2;
const a = Math.random();
stars.push({ x, y, s, a });
render();
});
function render() {
gl.clear(gl.COLOR_BUFFER_BIT);
stars.forEach(({ x, y, s, a }) => {
gl.vertexAttrib2f(a_Position, x, y);
gl.vertexAttrib1f(a_PointSize, s);
const arr = new Float32Array([0.87, 0.91, 1, a]);
gl.uniform4fv(u_FragColor, arr);
gl.drawArrays(gl.POINTS, 0, 1);
});
}
</script>
</body>
</html>
|
此时的效果如下
了解补间动画
这里比较复杂哈,我博客可能写不明白,如果看不懂的友友可以去小破站看一下老师的视频内容,他视频里面讲解的还是蛮清楚的。
这里提几个概念用词:
- 合成:多个时间轨的集合
- 时间轨:通过关键帧,对其中目标对象的状态进行插值计算
- 补间动画:通过两个关键帧,对一个对象在这两个关键帧之间的状态进行插值计算,从而实现这个对象在两个关键帧间的平滑过渡
简单来说就是几个时间节点(关键帧),每个关键帧都有自己的状态,然后这个状态之间的切换过程就是(补间动画),多个关键帧组成了一条时间轨,也就是一个完整的动画,合成其实就是多个动画存到了一起。
合成对象
这里就是多个动画的集合,合成对象
1
2
3
4
5
6
7
8
9
10
11
12
13
14
15
| export default class Compose {
constructor() {
this.parent = null;
this.children = [];
}
add(obj) {
obj.parent = this;
this.children.push(obj);
}
update(t) {
this.children.forEach((ele) => {
ele.update(t);
});
}
}
|
属性:
- parent 父对象,合成对象可以相互嵌套
- children 子对象集合,其集合元素可以是时间轨,也可以是合成对象
方法:
- add(obj) 添加子对象方法
- update(t) 基于当前时间更新子对象状态的方法
时间轨
1
2
3
4
5
6
7
8
9
10
11
12
13
14
15
16
17
18
19
20
21
22
23
24
25
26
27
| export default class Track {
constructor(target) {
this.target = target;
this.parent = null;
this.start = 0;
this.timeLen = 5;
this.loop = false;
this.keyMap = new Map();
}
update(t) {
const { keyMap, timeLen, target, loop } = this;
let time = t - this.start;
if (loop) {
time = time % timeLen;
}
for (const [key, fms] of keyMap.entries()) {
const last = fms.length - 1;
if (time < fms[0][0]) {
target[key] = fms[0][1];
} else if (time > fms[last][0]) {
target[key] = fms[last][1];
} else {
target[key] = getValBetweenFms(time, fms, last);
}
}
}
}
|
target 时间轨上的目标对象
parent 父对象,只能是合成对象
start 起始时间,即时间轨的建立时间
timeLen 时间轨总时长
loop 是否循环
keyMap 关键帧集合,结构如下:
1
2
3
4
5
6
7
8
9
10
11
12
13
14
15
16
| [
[
'对象属性1',
[
[时间1,属性值], //关键帧
[时间2,属性值], //关键帧
]
],
[
'对象属性2',
[
[时间1,属性值], //关键帧
[时间2,属性值], //关键帧
]
],
]
|
方法
update(t) 基于当前时间更新目标对象的状态。
先计算本地时间,即世界时间相对于时间轨起始时间的的时间。
若时间轨循环播放,则本地时间基于时间轨长度取余。
遍历关键帧集合:
若本地时间小于第一个关键帧的时间,目标对象的状态等于第一个关键帧的状态
若本地时间大于最后一个关键帧的时间,目标对象的状态等于最后一个关键帧的状态
否则,计算本地时间在左右两个关键帧之间对应的补间状态
获取两个关键帧之间补间状态的方法
1
2
3
4
5
6
7
8
9
10
11
12
13
14
15
| function getValBetweenFms(time, fms, last) {
for (let i = 0; i < last; i++) {
const fm1 = fms[i];
const fm2 = fms[i + 1];
if (time >= fm1[0] && time <= fm2[0]) {
const delta = {
x: fm2[0] - fm1[0],
y: fm2[1] - fm1[1],
};
const k = delta.y / delta.x;
const b = fm1[1] - fm1[0] * k;
return k * time + b;
}
}
}
|
getValBetweenFms(time,fms,last)
time 本地时间
fms 某个属性的关键帧集合
last 最后一个关键帧的索引位置
其实现思路如下:
遍历所有关键帧
判断当前时间在哪两个关键帧之间
基于这两个关键帧的时间和状态,求点斜式
基于点斜式求本地时间对应的状态
使用合成对象和轨道对象制作补间动画
建立动画相关的对象
1
2
3
4
5
6
7
8
9
10
11
12
13
14
15
16
17
18
19
20
21
22
23
24
25
| const compose = new Compose();
const stars = [];
canvas.addEventListener("click", function (event) {
const { x, y } = getMousePosInWebgl(event, canvas);
const a = 1;
const s = Math.random() * 5 + 2;
const obj = { x, y, s, a };
stars.push(obj);
const track = new Track(obj);
track.start = new Date();
track.keyMap = new Map([
[
"a",
[
[500, a],
[1000, 0],
[1500, a],
],
],
]);
track.timeLen = 2000;
track.loop = true;
compose.add(track);
});
|
用请求动画帧驱动动画,连续更新数据,渲染视图。
1
2
3
4
5
| !(function ani() {
compose.update(new Date());
render();
requestAnimationFrame(ani);
})();
|
渲染方法
1
2
3
4
5
6
7
8
9
| function render() {
gl.clear(gl.COLOR_BUFFER_BIT);
stars.forEach(({ x, y, s, a }) => {
gl.vertexAttrib2f(a_Position, x, y);
gl.vertexAttrib1f(a_PointSize, s);
gl.uniform4fv(u_FragColor, new Float32Array([0.87, 0.92, 1, a]));
gl.drawArrays(gl.POINTS, 0, 1);
});
}
|
配点音乐
1
2
3
4
5
6
7
8
9
10
11
12
13
14
| #audio{
position: absolute;
right: 20px;
bottom: 20px;
opacity: 10%;
transition: opacity 200ms;
z-index: 20;
}
#audio:hover{
opacity: 90%;
}
<audio id="audio" controls loop autoplay>
<source src="./audio/cef.mp3" type="audio/mpeg">
</audio>
|
完整代码
下面cv以下完整代码
1
2
3
4
5
6
7
8
9
10
11
12
13
14
15
16
17
18
19
20
21
22
23
24
25
26
27
28
29
30
31
32
33
34
35
36
37
38
39
40
41
42
43
44
45
46
47
48
49
50
51
52
53
54
55
56
57
58
59
60
61
62
63
64
65
66
67
68
69
70
71
72
73
74
75
76
77
78
79
80
81
82
83
84
85
86
87
88
89
90
91
92
93
94
95
96
97
98
99
100
101
102
103
104
105
106
107
108
109
110
111
112
113
114
115
116
117
118
119
120
121
122
123
124
125
126
127
128
129
130
131
132
133
134
135
136
137
138
139
140
141
142
143
144
145
146
147
148
149
150
151
152
| <!DOCTYPE html>
<html lang="en">
<head>
<meta charset="UTF-8" />
<title>星星向你眨眼睛</title>
<style>
body {
margin: 0;
overflow: hidden;
}
#canvas {
background: url("./images/sky.jpg");
background-size: cover;
background-position: right bottom;
}
#audio {
position: absolute;
right: 20px;
bottom: 20px;
opacity: 10%;
transition: opacity 200ms;
z-index: 20;
}
#audio:hover {
opacity: 90%;
}
</style>
</head>
<body>
<canvas id="canvas"></canvas>
<audio id="audio" controls loop autoplay>
<source src="./audio/cef.mp3" type="audio/mpeg" />
</audio>
<script id="vertexShader" type="x-shader/x-vertex">
attribute vec4 a_Position;
attribute float a_PointSize;
void main(){
gl_Position=a_Position;
gl_PointSize=a_PointSize;
}
</script>
<script id="fragmentShader" type="x-shader/x-fragment">
precision mediump float;
uniform vec4 u_FragColor;
void main(){
float dist=distance(gl_PointCoord,vec2(0.5,0.5));
if(dist<0.5){
gl_FragColor=u_FragColor;
}else{
discard;
}
}
</script>
<script type="module">
import { initShaders ,getMousePosInWebgl} from "../jsm/Utils.js";
import Compose from "../jsm/Compose.js";
import Track from "../jsm/Track.js";
const canvas = document.querySelector("#canvas");
canvas.width = window.innerWidth;
canvas.height = window.innerHeight;
const vsSource = document.querySelector("#vertexShader").innerText;
const fsSource = document.querySelector("#fragmentShader").innerText;
const gl = canvas.getContext("webgl");
gl.enable(gl.BLEND);
gl.blendFunc(gl.SRC_ALPHA, gl.ONE_MINUS_SRC_ALPHA);
initShaders(gl, vsSource, fsSource);
const a_Position = gl.getAttribLocation(gl.program, "a_Position");
const a_PointSize = gl.getAttribLocation(gl.program, "a_PointSize");
const u_FragColor = gl.getUniformLocation(gl.program, "u_FragColor");
const stars = [];
const compose = new Compose();
gl.clearColor(0, 0, 0, 0);
gl.clear(gl.COLOR_BUFFER_BIT);
render();
canvas.addEventListener("click", ({ clientX, clientY }) => {
const { x, y } = getMousePosInWebgl(event, canvas);
const s = Math.random() * 5 + 2;
const a = 1;
const obj = { x, y, s, a };
stars.push(obj);
const track = new Track(obj);
track.start = new Date();
track.timeLen = 2000;
track.loop = true;
track.keyMap = new Map([
[
"a",
[
[500, a],
[1000, 0],
[1500, a],
],
],
]);
compose.add(track);
});
!(function ani() {
  compose.update(new Date());
  render();
  requestAnimationFrame(ani);
})();
function render() {
gl.clear(gl.COLOR_BUFFER_BIT);
stars.forEach(({ x, y, s, a }) => {
gl.vertexAttrib2f(a_Position, x, y);
gl.vertexAttrib1f(a_PointSize, s);
const arr = new Float32Array([0.87, 0.91, 1, a]);
gl.uniform4fv(u_FragColor, arr);
gl.drawArrays(gl.POINTS, 0, 1);
});
}
</script>
</body>
</html>
|
最终效果
由于我这篇文章是在公司摸鱼写的博客哈,所以声音就不能给大家录进来了,大家体谅一下,看看最终效果
结语
本篇文章就到这里,更多内容敬请期待,债见~


