前言 本篇将继续学习 webgl 的知识。前面一篇文章我们已经了解了单独的平移,旋转和缩放,本篇文章将把这些步骤结合起来使用。
矩阵乘法 在了解复合变换之前,我们先来了解一下矩阵乘法
1
2
3
4
5
6
7
8
9
10
11
12
const a = new Matrix4 ().set ( 0 ,1 ,2 ,3 , 4 ,5 ,6 ,7 , 8 ,9 ,10 ,11 , 12 ,13 ,14 ,15 ); const b = new Matrix4 ().set ( 0 ,10 ,20 ,30 , 40 ,50 ,60 ,70 , 80 ,90 ,100 ,110 , 120 ,130 ,140 ,150 );
注:set()方法里输入的矩阵是行主序的,但 elements 输出的矩阵是列主序的。
1
2
3
4
5
6
7
8
9
const ca = a.elements ;console .log (ca);[ 0 , 4 , 8 , 12 , 1 , 5 , 9 , 13 , 2 , 6 , 10 , 14 , 3 , 7 , 11 , 15 ];
让矩阵 a 乘以矩阵 b0*0+1*40+2*80+3*120=560
1
2
3
4
5
6
7
560=0*0 +1*40+2*80 +3*120 620=0*10+1*50+2*90 +3*130 680=0*20+1*60+2*100+3*140 740=0*30+1*70+2*110+3*150 1520=4*0 +5*40+6*80 +7*120 1740=4*10+5*50+6*90 +7*130
1
2
3
4
5
6
7
8
9
const c = a.multiply (b);console .log (c.elements );[ 560 , 1520 , 2480 , 3440 , 620 , 1740 , 2860 , 3980 , 680 , 1960 , 3240 , 4520 , 740 , 2180 , 3620 , 5060 , ];
位移 + 位移 已知条件 已知:
接下来我们来推导一下 F 的位置
先位移一次,再位移一次 设初次变换矩阵为 bm(行主序):
1
2
3
4
5
6
[ 1.0,0.0,0.0,bx, 0.0,1.0,0.0,by, 0.0,0.0,1.0,0.0, 0.0,0.0,0.0,1.0, ]
则初次变换后的点 F 为:
1
2
3
4
5
F=bm*A fx=(1.0,0.0,0.0,bx)*(ax,ay,az,1.0)=ax+bx fy=(0.0,1.0,0.0,by)*(ax,ay,az,1.0)=ay+by fz=(0.0,0.0,1.0,0.0)*(ax,ay,az,1.0)=az fw=(0.0,0.0,0.0,1.0)*(ax,ay,az,1.0)=1.0
设第二次变换矩阵为 cm(行主序):
1
2
3
4
5
6
[ 1.0,0.0,0.0,cx, 0.0,1.0,0.0,cy, 0.0,0.0,1.0,0.0, 0.0,0.0,0.0,1.0, ]
则第二次变换后的点 F 为第二次变换矩阵乘以上一次变换后的点 F:
1
2
3
4
5
F=cm*F fx=(1.0,0.0,0.0,cx)*(fx,fy,fz,1.0)=fx+cx fy=(0.0,1.0,0.0,cy)*(fx,fy,fz,1.0)=fy+cy fz=(0.0,0.0,1.0,0.0)*(fx,fy,fz,1.0)=fz fw=(0.0,0.0,0.0,1.0)*(fx,fy,fz,1.0)=1.0
通过第一次的变换,我们也可以这么理解最终的点 F:
1
2
3
4
fx=ax+bx+cx fy=ay+by+cy fz=az fw=1.0
一次性处理好位移距离,直接位移一次 同样的,我们可以使用先把矩阵给相乘了,之后再之间用初始点位 A 去和这两个矩阵相乘处理完了之后的矩阵相乘就行
矩阵相乘
1
2
3
4
5
6
7
8
9
10
11
[ 1.0,0.0,0.0,bx, 0.0,1.0,0.0,by, 0.0,0.0,1.0,0.0, 0.0,0.0,0.0,1.0, ] * [ 1.0,0.0,0.0,cx, 0.0,1.0,0.0,cy, 0.0,0.0,1.0,0.0, 0.0,0.0,0.0,1.0, ]
结果就是(行矩阵)
1
2
3
4
5
6
[ 1.0, 0.0, 0.0,bx+cx 0.0, 1.0, 0.0,cy+by 0.0, 0.0, 1.0,0.0 0.0, 0.0, 0.0,1.0 ]
此时我们拿
去位移,这时候是不是就很熟悉了,和我们上一节中的单独位移就一模一样了
1 2 3 4 Fx=ax+bx+cx Fy=ay+by+cy Fz=az Fw=1.0
代码 理解了这个,我们就可以在代码中实现了,我们在顶点着色器中暴露一个矩阵
顶点着色器暴露矩阵 1 2 3 4 5 6 7 8 <script id="vertexShader" type="x-shader/x-vertex" > attribute vec4 a_Position; uniform mat4 u_Matrix; void main ( gl_Position = u_Matrix*a_Position; } </script>
js 中获取参数并赋值处理 这里的multiply是bmcm,而不是cm bm,谁在后面就是谁的矩阵在前面
1 2 3 4 5 6 7 const u_Matrix = gl.getUniformLocation (gl.program , "u_Matrix" );const [bx, by] = [0.2 , 0.3 ];const [cx, cy] = [0.1 , 0.1 ];const bm = new Matrix4 ().set (1 , 0 , 0 , bx, 0 , 1 , 0 , by, 0 , 0 , 1 , 0 , 0 , 0 , 0 , 1 );const cm = new Matrix4 ().set (1 , 0 , 0 , cx, 0 , 1 , 0 , cy, 0 , 0 , 1 , 0 , 0 , 0 , 0 , 1 );const dm = cm.multiply (bm);gl.uniformMatrix4fv (u_Matrix, false , dm.elements );
完整代码 1 2 3 4 5 6 7 8 9 10 11 12 13 14 15 16 17 18 19 20 21 22 23 24 25 26 27 28 29 30 31 32 33 34 35 36 37 38 39 40 41 42 43 44 45 46 47 48 49 50 51 52 53 54 55 56 57 58 59 60 61 62 63 64 65 66 67 68 69 70 71 72 73 74 75 <!DOCTYPE html > <html lang ="en" > <head > <meta charset ="UTF-8" /> <title > 位移加位移</title > <style > body { margin : 0 ; overflow : hidden; } </style > </head > <body > <canvas id ="canvas" > </canvas > <script id ="vertexShader" type ="x-shader/x-vertex" > attribute vec4 a_Position; uniform mat4 u_Matrix; void main ( gl_Position = u_Matrix*a_Position; } </script > <script id ="fragmentShader" type ="x-shader/x-fragment" > void main ( gl_FragColor=vec4 (1.0 ,1.0 ,0.0 ,1.0 ); } </script > <script type ="module" > import { initShaders } from "../jsm/Utils.js" ; import { Matrix4 } from "https://unpkg.com/three/build/three.module.js" ; const canvas = document .getElementById ("canvas" ); canvas.width = window .innerWidth ; canvas.height = window .innerHeight ; const gl = canvas.getContext ("webgl" ); const vsSource = document .getElementById ("vertexShader" ).innerText ; const fsSource = document .getElementById ("fragmentShader" ).innerText ; initShaders (gl, vsSource, fsSource); const vertices = new Float32Array ([0.0 , 0.1 , -0.1 , -0.1 , 0.1 , -0.1 ]); const vertexBuffer = gl.createBuffer (); gl.bindBuffer (gl.ARRAY_BUFFER , vertexBuffer); gl.bufferData (gl.ARRAY_BUFFER , vertices, gl.STATIC_DRAW ); const a_Position = gl.getAttribLocation (gl.program , "a_Position" ); gl.vertexAttribPointer (a_Position, 2 , gl.FLOAT , false , 0 , 0 ); gl.enableVertexAttribArray (a_Position); const u_Matrix = gl.getUniformLocation (gl.program , "u_Matrix" ); const [bx, by] = [0.2 , 0.3 ]; const [cx, cy] = [0.1 , 0.1 ]; const bm = new Matrix4 ().set ( 1 ,0 ,0 ,bx, 0 ,1 ,0 ,by, 0 ,0 ,1 ,0 , 0 ,0 ,0 ,1 ); const cm = new Matrix4 ().set ( 1 ,0 ,0 ,cx, 0 ,1 ,0 ,cy, 0 ,0 ,1 ,0 , 0 ,0 ,0 ,1 ); const dm = cm.multiply (bm); gl.uniformMatrix4fv (u_Matrix, false , dm.elements ); gl.clearColor (0.0 , 0.0 , 0.0 , 1.0 ); gl.clear (gl.COLOR_BUFFER_BIT ); gl.drawArrays (gl.TRIANGLES , 0 , 3 ); </script > </body > </html >
位移 + 旋转 由上面可知,我们只需要先把矩阵进行处理,最后将点位进行处理的情况来说,可以得到下面的公式
1 2 3 4 5 6 7 8 9 const mr=new Matrix4 ()mr.makeRotationZ (Math .PI /4 ) const mt=new Matrix4 ()mt.makeTranslation (0.3 ,0 ,0 ) const matrix=mr.multiply (mt)const u_Matrix=gl.getUniformLocation (gl.program ,'u_Matrix' )gl.uniformMatrix4fv (u_Matrix,false ,matrix.elements )
mr 是旋转矩阵
旋转 + 移动 同理,那么先旋转+移动就只需要
1 2 3 4 5 6 7 8 9 const mr=new Matrix4 ()mr.makeRotationZ (Math .PI /4 ) const mt=new Matrix4 ()mt.makeTranslation (0.3 ,0 ,0 ) const matrix=mt.multiply (mr)const u_Matrix=gl.getUniformLocation (gl.program ,'u_Matrix' )gl.uniformMatrix4fv (u_Matrix,false ,matrix.elements )
缩放+ 旋转 1 2 3 4 5 6 7 8 9 10 const u_Matrix = gl.getUniformLocation (gl.program , 'u_Matrix' )const mr = new Matrix4 ();mr.makeRotationZ (Math .PI / 4 ) const ms = new Matrix4 ();ms.makeScale (2 , 2 , 2 ) const matrix = mr.multiply (ms)gl.uniformMatrix4fv (u_Matrix, false , matrix.elements )
后面其他的我也就不多介绍了,如果是平移+旋转+缩放的组合也是一样的,就是谁先操作,谁在后面
利用compose合成实现综合变换 Matrix4还有一个compose综合变换方法,它可以将所有变换信息都写进去,其变换顺序就是先缩放,再旋转,最后位移。
1 2 3 4 5 6 7 8 const matrix=new Matrix4 ()const pos=new Vector3 (0.3 ,0 ,0 )const rot=new Quaternion ()rot.setFromAxisAngle ( new Vector3 ( 0 , 0 , 1 ), Math .PI / 4 ) const scale=new Vector3 (2 ,0.5 ,1 )matrix.compose (pos,rot,scale) const u_Matrix=gl.getUniformLocation (gl.program ,'u_Matrix' )gl.uniformMatrix4fv (u_Matrix,false ,matrix.elements )
compose ( position : Vector3, quaternion : Quaternion, scale : Vector3 )
position 位置
compose() 方法分解开来,就是这样的:
1 2 3 4 5 6 7 8 9 10 11 12 const mt=new Matrix4 ()mt.makeTranslation (0.3 ,0 ,0 ) const mr=new Matrix4 ()mr.makeRotationZ (Math .PI /4 ) const ms=new Matrix4 ()ms.makeScale (2 ,0.5 ,1 ) const matrix=mt.multiply (mr).multiply (ms)const u_Matrix=gl.getUniformLocation (gl.program ,'u_Matrix' )gl.uniformMatrix4fv (u_Matrix,false ,matrix.elements )
视图矩阵 视图矩阵是用于确定相机角度和位置的矩阵。
相机的定义
视点:相机的位置
视线方向:相机所看的方向
上方向:相机绕视线转动的方向
相对运动 当相机与它所拍摄的物体同时运动的时候,相机所拍摄的画面不会有任何改变。
因此,我们可以默认相机的视点就在零点,相机看向-z方向,其上方向就是y轴。
当我我们改变的相机的视点、视线和上方向的时候,只要相对的去改变场景中的物体即可。
而这个相对的去改变场景中的物体的矩阵,就是视图矩阵。
通过上面原理,我们可以知道,想要计算视图矩阵,只要让其满足以下条件即可:
把视点e(ex,ey,ez)对齐到 O点上
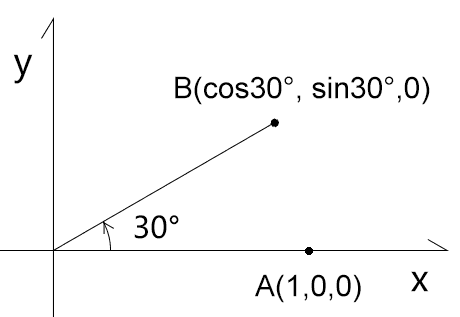
正交矩阵的旋转 题目1 比如如下图示
1 2 3 4 5 6 7 8 9 m1=[ cos30°,-sin30°,0 ,0 , sin30°,cos30°, 0 ,0 , 0 , 0 , 1 ,0 , 0 , 0 , 0 ,1 , ] B=m1*A B.x =(cos30°,-sin30°,0 ,0 )·(1 ,0 ,0 ,1 )=cos30° B.y =(sin30°,cos30°, 0 ,0 )·(1 ,0 ,0 ,1 )=sin30°
题目2 继上面题目的已知条件
1 2 3 4 5 6 7 8 9 10 11 12 13 m2=[ cos-30 °,-sin-30 °,0 ,0 , sin-30 °,cos-30 °, 0 ,0 , 0 , 0 , 1 ,0 , 0 , 0 , 0 ,1 , ] m2=[ cos30°, sin30°, 0 ,0 , -sin30°,cos30°, 0 ,0 , 0 , 0 , 1 ,0 , 0 , 0 , 0 ,1 , ]
观察题1、题2,我们可以发现两个规律:
m2 是m1 的逆矩阵
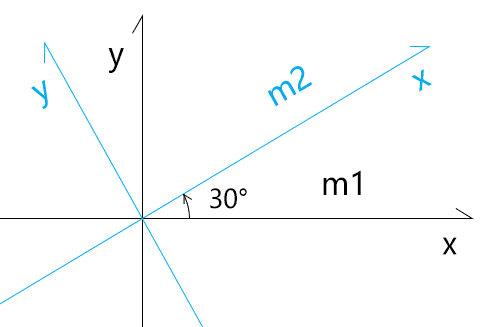
题目3 如下图所示
x(1,0,0)
x(cos30°, sin30°,0)
解:
将m2的基向量x,y,z 中的x 分量写入m3第1行;
将m2的基向量x,y,z 中的y 分量写入m3第2行;
将m2的基向量x,y,z 中的z 分量写入m3第3行。
1 2 3 4 5 6 m3=[ cos30°,-sin30°,0,0, sin30°,cos30°, 0,0, 0, 0, 1,0, 0, 0, 0,1, ]
题目4 继题3的已知条件
求:将m2中的基向量对齐到m1的行主序矩阵m4
解:
由题3已知:将m1中的基向量对齐到m2的行主序矩阵是m3
由题4的问题可知:m4就是m3的逆矩阵
因为:正交旋转矩阵的逆矩阵就是其转置矩阵
所以:m4就是m3的转置矩阵
1 2 3 4 5 6 7 8 9 10 11 12 m3=[ cos30°,-sin30°,0 ,0 , sin30°,cos30°, 0 ,0 , 0 , 0 , 1 ,0 , 0 , 0 , 0 ,1 , ] m4=[ cos30°,sin30°,0 ,0 , -sin30°,cos30°,0 ,0 , 0 ,0 ,1 ,0 , 0 ,0 ,0 ,1 ]
计算视图矩阵
先位移:写出把视点e(ex,ey,ez) 对齐到 O点上的行主序位移矩阵mt 1 2 3 4 5 6 mt=[ 1 ,0 ,0 ,-ex, 0 ,1 ,0 ,-ey, 0 ,0 ,1 ,-ez, 0 ,0 ,0 ,1 , ]
写出把{o;x,y,-z} 对齐到{e;a,b,c} 的行主序旋转矩阵mr1 把a,b,-c的x 分量写入mr1的第1行;
把a,b,-c的y 分量写入mr1的第2行;
把a,b,-c的z 分量写入mr1的第3行;
1 2 3 4 5 6 mr1=[ ax, bx, -cx, 0 , ay, by, -cy, 0 , az, bz, -cz, 0 , 0 , 0 , 0 , 1 ]
计算mr1的逆矩阵mr2 因为正交旋转矩阵的逆矩阵就是其转置矩阵,所以mr2就是mr1的转置矩阵。
1 2 3 4 5 6 mr2=[ ax, ay, az, 0 , bx, by, bz, 0 , -cx,-cy,-cz, 0 , 0 , 0 , 0 , 1 ]
视图矩阵 此时的视图矩阵为 视图矩阵=mr2*mt (旋转矩阵乘以平移矩阵,先平移后旋转)
视图矩阵的代码实现
1 2 3 4 5 6 7 8 9 10 11 12 13 14 15 16 17 18 19 20 21 22 23 function getViewMatrix (e, t, u ) { const c = new Vector3 ().subVectors (e, t).normalize () const a = new Vector3 ().crossVectors (u, c).normalize () const b = new Vector3 ().crossVectors (c, a).normalize () const mr = new Matrix4 ().set ( ...a, 0 , ...b, 0 , -c.x , -c.y , -c.z , 0 , 0 , 0 , 0 , 1 ) const mt = new Matrix4 ().set ( 1 , 0 , 0 , -e.x , 0 , 1 , 0 , -e.y , 0 , 0 , 1 , -e.z , 0 , 0 , 0 , 1 ) return mr.multiply (mt).elements }
lookAt 方法就是从一个新的角度去看某一个东西的意思
e 视点
subVectors(e, t) 向量e减向量t
相当于这样的一段代码
1 2 3 4 5 6 7 8 crossVectors ( a, b ) { const ax = a.x , ay = a.y , az = a.z ; const bx = b.x , by = b.y , bz = b.z ; this .x = ay * bz - az * by; this .y = az * bx - ax * bz; this .z = ax * by - ay * bx; return this ; }
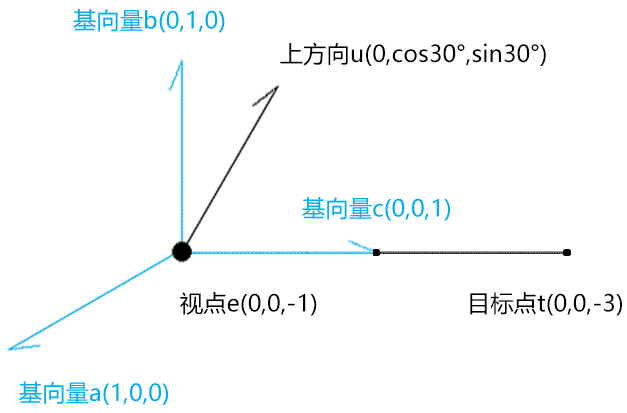
解释一下上面基向量a,b,c 的运算原理,以下图为例:
视线c 之所以是视点e减目标点t,是为了取一个正向的基向量。
1 2 3 c=(e-t)/|e-t| c=(0 ,0 ,2 )/2 c=(0 ,0 ,1 )
基向量a是上方向u和向量c的叉乘
1 2 3 a=u^c/|u^c| a=(cos30°,0 ,0 )/cos30° a=(1 ,0 ,0 )
基向量b是向量c和向量a的叉乘,可以理解为把上方向摆正。
1 2 3 b=c^a/|c^a| b=(0 ,1 ,0 )/1 b=(0 ,1 ,0 )
利用视图矩阵 接下来我们用视图矩阵完成一个小案例
顶点着色器 1 2 3 4 5 6 7 8 <script id="vertexShader" type="x-shader/x-vertex" > attribute vec4 a_Position; uniform mat4 u_ViewMatrix; void main ( gl_Position = u_ViewMatrix*a_Position; } </script>
建立视图矩阵,并传递给顶点着色器 1 2 3 4 5 6 7 const u_ViewMatrix = gl.getUniformLocation (gl.program , 'u_ViewMatrix' )const viewMatrix = getViewMatrix ( new Vector3 (0.3 , 0.2 , 0.5 ), new Vector3 (0.0 , 0.1 , 0 ), new Vector3 (0 , 1 , 0 ) ) gl.uniformMatrix4fv (u_ViewMatrix, false , viewMatrix)
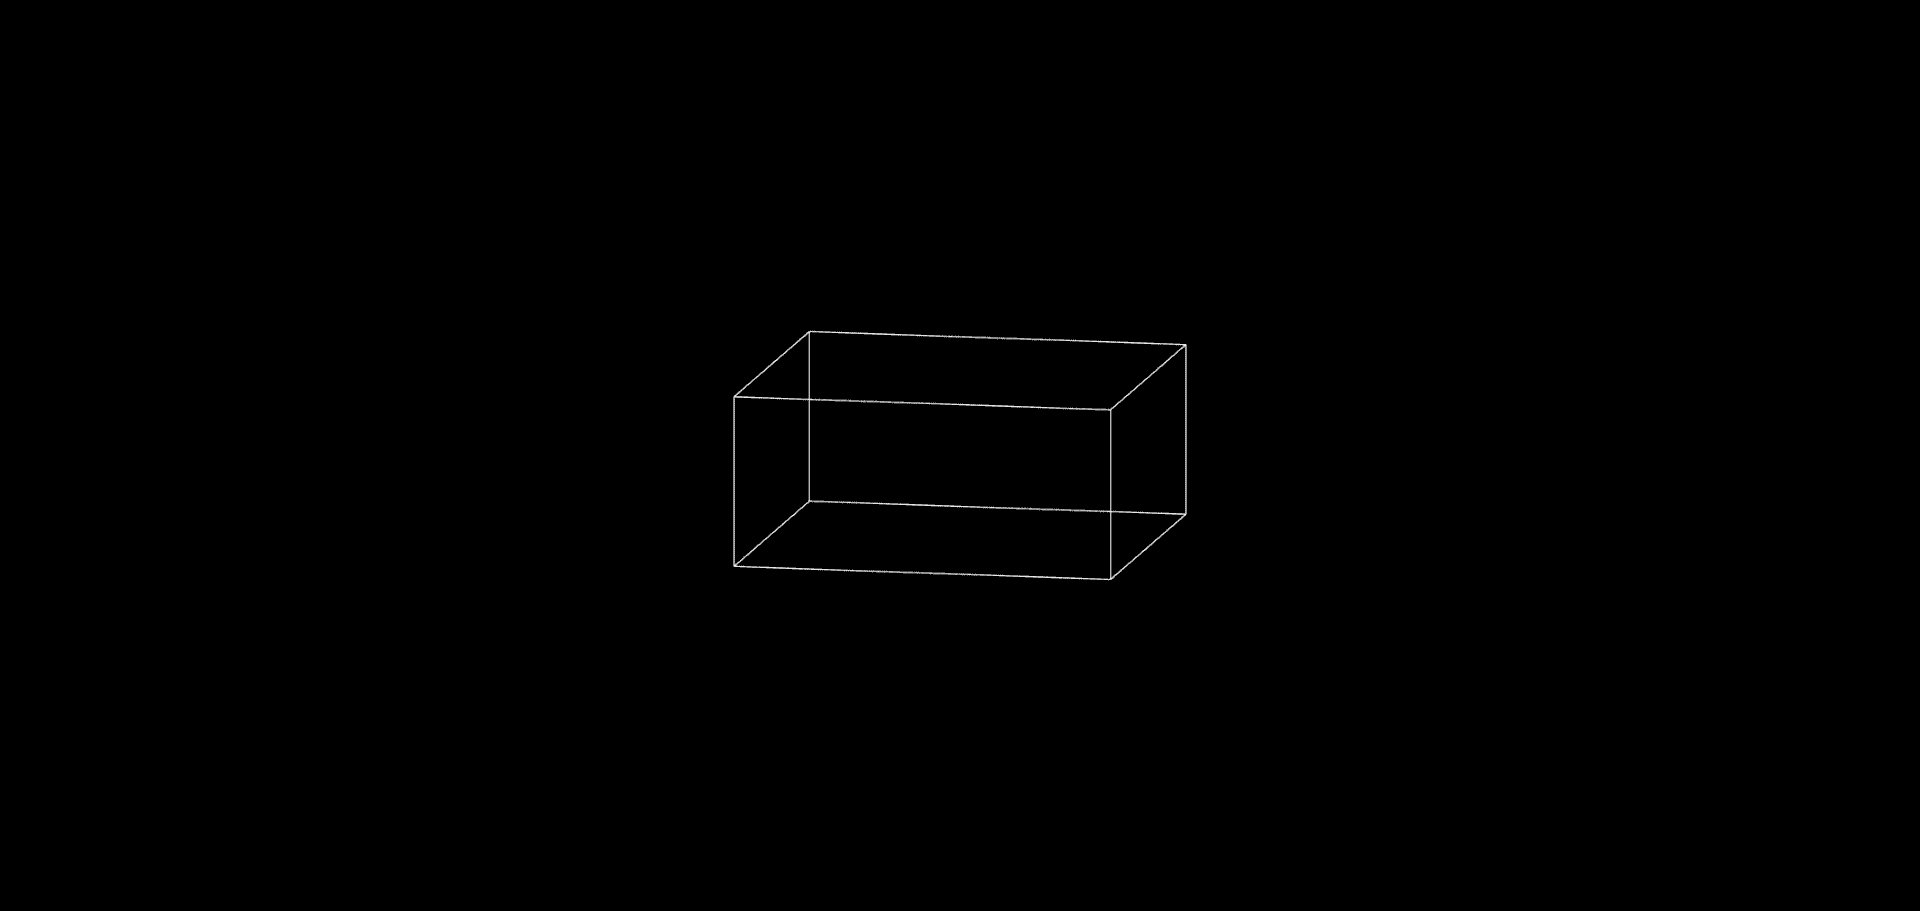
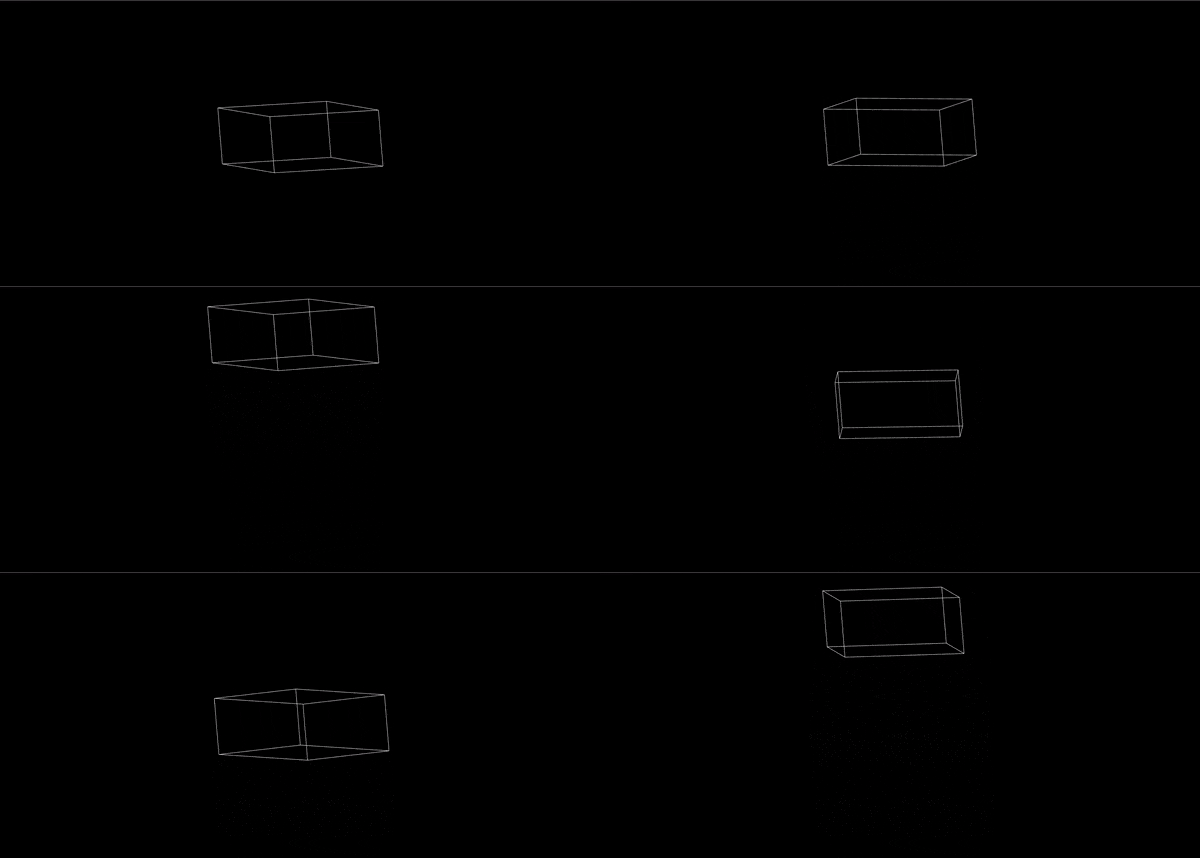
完整代码 这里绘制矩形用了点位,和对应点位的索引(将需要直线连接的索引列举出来),然后绘制了一个矩形,然后通过视图矩阵切换了我们的视野,此时我们可以有一种3D的效果了
1 2 3 4 5 6 7 8 9 10 11 12 13 14 15 16 17 18 19 20 21 22 23 24 25 26 27 28 29 30 31 32 33 34 35 36 37 38 39 40 41 42 43 44 45 46 47 48 49 50 51 52 53 54 55 56 57 58 59 60 61 62 63 64 65 66 67 68 69 70 71 72 73 74 75 76 77 78 79 80 81 82 83 84 85 86 87 88 89 90 91 92 93 94 95 96 97 98 99 100 101 102 103 104 105 106 107 108 109 110 111 112 113 114 115 116 117 118 119 120 121 122 123 124 125 126 127 128 129 130 131 132 <!DOCTYPE html > <html lang ="en" > <head > <meta charset ="UTF-8" > <title > 视图矩阵</title > <style > body { margin : 0 ; overflow : hidden } </style > </head > <body > <canvas id ="canvas" > </canvas > <script id ="vertexShader" type ="x-shader/x-vertex" > attribute vec4 a_Position; uniform mat4 u_ViewMatrix; void main ( gl_Position = u_ViewMatrix*a_Position; } </script > <script id ="fragmentShader" type ="x-shader/x-fragment" > void main ( gl_FragColor=vec4 (1.0 ,1.0 ,1.0 ,1.0 ); } </script > <script type ="module" > import { initShaders } from '../jsm/Utils.js' ; import { Matrix4 , Vector3 , Quaternion } from 'https://unpkg.com/three/build/three.module.js' ; const canvas = document .getElementById ('canvas' ); canvas.width = window .innerWidth ; canvas.height = window .innerHeight ; const gl = canvas.getContext ('webgl' ); const vsSource = document .getElementById ('vertexShader' ).innerText ; const fsSource = document .getElementById ('fragmentShader' ).innerText ; initShaders (gl, vsSource, fsSource); const verticeLib = [ 1.0 , 1.0 , 1.0 , -1.0 , 1.0 , 1.0 , -1.0 , -1.0 , 1.0 , 1.0 , -1.0 , 1.0 , 1.0 , -1.0 , -1.0 , 1.0 , 1.0 , -1.0 , -1.0 , 1.0 , -1.0 , -1.0 , -1.0 , -1.0 , ]; const indices = [ 0 , 1 , 1 , 2 , 2 , 3 , 3 , 0 , 0 , 5 , 1 , 6 , 2 , 7 , 3 , 4 , 4 , 5 , 5 , 6 , 6 , 7 , 7 , 4 ]; const arr = []; indices.forEach (n => const i = n * 3 arr.push ( verticeLib[i] / 5 , verticeLib[i + 1 ] / 5 , verticeLib[i + 2 ] / 5 , ) }) const vertices = new Float32Array (arr) const vertexBuffer = gl.createBuffer (); gl.bindBuffer (gl.ARRAY_BUFFER , vertexBuffer); gl.bufferData (gl.ARRAY_BUFFER , vertices, gl.STATIC_DRAW ); const a_Position = gl.getAttribLocation (gl.program , 'a_Position' ); gl.vertexAttribPointer (a_Position, 3 , gl.FLOAT , false , 0 , 0 ); gl.enableVertexAttribArray (a_Position); const u_ViewMatrix = gl.getUniformLocation (gl.program , 'u_ViewMatrix' ) const viewMatrix = getViewMatrix ( new Vector3 (0.1 , 0.2 , 0.5 ), new Vector3 (0 , 0 , 0 ), new Vector3 (0 , 1 , 0 ) ) gl.uniformMatrix4fv (u_ViewMatrix, false , viewMatrix) gl.clearColor (0.0 , 0.0 , 0.0 , 1.0 ); gl.clear (gl.COLOR_BUFFER_BIT ); gl.drawArrays (gl.LINES , 0 , indices.length ); function getViewMatrix (e, t, u ) { const c = new Vector3 ().subVectors (e, t).normalize () const a = new Vector3 ().crossVectors (u, c).normalize () const b = new Vector3 ().crossVectors (c, a).normalize () const mr = new Matrix4 ().set ( ...a, 0 , ...b, 0 , -c.x , -c.y , -c.z , 0 , 0 , 0 , 0 , 1 ) const mt = new Matrix4 ().set ( 1 , 0 , 0 , -e.x , 0 , 1 , 0 , -e.y , 0 , 0 , 1 , -e.z , 0 , 0 , 0 , 1 ) return mr.multiply (mt).elements } </script > </body > </html >
1 2 3 4 5 6 7 const u_ViewMatrix = gl.getUniformLocation (gl.program , 'u_ViewMatrix' )const viewMatrix = new Matrix4 ().lookAt ( new Vector3 (0.5 , 0.5 , 1 ), new Vector3 (0 , 0 , 0 ), new Vector3 (0 , 1 , 0 ), ) gl.uniformMatrix4fv (u_ViewMatrix, false , viewMatrix.elements )
不过three.js 里的相机的视图矩阵并没有翻转相机视线,其视线的翻转是放到投影矩阵里做的
模型矩阵 在我们给了物体一个视图矩阵后,我们还可以再给它一个模型矩阵。
模型矩阵可以对物体进行位移、旋转、缩放变换。
比如我们想让物体沿z 旋转。
模型矩阵案例 在顶点着色器中添加一个模型矩阵 1 2 3 4 5 6 7 8 9 10 <script id="vertexShader" type="x-shader/x-vertex" > attribute vec4 a_Position; uniform mat4 u_ModelMatrix; uniform mat4 u_ViewMatrix; void main ( gl_Position = u_ViewMatrix*u_ModelMatrix*a_Position; } </script>
在js中建立模型矩阵,并传递给顶点着色器 1 2 3 4 5 6 7 8 9 10 11 12 const u_ModelMatrix = gl.getUniformLocation (gl.program , 'u_ModelMatrix' )const u_ViewMatrix = gl.getUniformLocation (gl.program , 'u_ViewMatrix' )const modelMatrix = new Matrix4 ()const viewMatrix = new Matrix4 ().lookAt ( new Vector3 (0 , 0.25 , 1 ), new Vector3 (0 , 0 , 0 ), new Vector3 (0 , 1 , 0 ), ) gl.uniformMatrix4fv (u_ModelMatrix, false , modelMatrix.elements ) gl.uniformMatrix4fv (u_ViewMatrix, false , viewMatrix.elements )
添加一个旋转动画 1 2 3 4 5 6 7 8 9 10 let angle = 0 ;!(function ani ( angle += 0.02 modelMatrix.makeRotationY (angle) gl.uniformMatrix4fv (u_ModelMatrix, false , modelMatrix.elements ) gl.clear (gl.COLOR_BUFFER_BIT ); gl.drawArrays (gl.LINES , 0 , indices.length ); requestAnimationFrame (ani) })()
弹性动画 这里简单讲解一下,modelMatrix.elements[13]其实就是控制我们y方向的位移的(列矩阵),如何是行矩阵就是第四个参数
1 2 3 4 5 6 7 8 9 10 11 12 13 14 15 16 17 18 19 20 21 22 23 24 25 let angle = 0 ;const minY = -0.70 const maxY = 0.7 let y = maxYlet vy = 0 ;const ay = -0.001 const bounce = 1 ;!(function ani ( angle += 0.01 vy += ay; y += vy modelMatrix.makeRotationY (angle) modelMatrix.setPosition (0 , y, 0 ) if (modelMatrix.elements [13 ] < minY) { y = minY vy *= -bounce } gl.uniformMatrix4fv (u_ModelMatrix, false , modelMatrix.elements ) gl.clear (gl.COLOR_BUFFER_BIT ); gl.drawArrays (gl.LINES , 0 , indices.length ); requestAnimationFrame (ani) })()
完整代码 1 2 3 4 5 6 7 8 9 10 11 12 13 14 15 16 17 18 19 20 21 22 23 24 25 26 27 28 29 30 31 32 33 34 35 36 37 38 39 40 41 42 43 44 45 46 47 48 49 50 51 52 53 54 55 56 57 58 59 60 61 62 63 64 65 66 67 68 69 70 71 72 73 74 75 76 77 78 79 80 81 82 83 84 85 86 87 88 89 90 91 92 93 94 95 96 97 98 99 100 101 102 103 104 105 106 107 108 109 110 111 112 113 114 115 116 117 118 119 120 121 122 123 124 125 126 127 128 129 130 131 132 133 134 135 136 137 138 139 140 141 142 <!DOCTYPE html > <html lang ="en" > <head > <meta charset ="UTF-8" > <title > 模型矩阵</title > <style > body { margin : 0 ; overflow : hidden } </style > </head > <body > <canvas id ="canvas" > </canvas > <script id ="vertexShader" type ="x-shader/x-vertex" > attribute vec4 a_Position; uniform mat4 u_ViewMatrix; uniform mat4 u_ModelMatrix; void main ( gl_Position = u_ViewMatrix*u_ModelMatrix*a_Position; } </script > <script id ="fragmentShader" type ="x-shader/x-fragment" > void main ( gl_FragColor=vec4 (1.0 ,1.0 ,1.0 ,1.0 ); } </script > <script type ="module" > import { initShaders } from '../jsm/Utils.js' ; import { Matrix4 , Vector3 , Quaternion } from 'https://unpkg.com/three/build/three.module.js' ; const canvas = document .getElementById ('canvas' ); canvas.width = window .innerWidth ; canvas.height = window .innerHeight ; const gl = canvas.getContext ('webgl' ); const vsSource = document .getElementById ('vertexShader' ).innerText ; const fsSource = document .getElementById ('fragmentShader' ).innerText ; initShaders (gl, vsSource, fsSource); const verticeLib = [ 1.0 , 1.0 , 1.0 , -1.0 , 1.0 , 1.0 , -1.0 , -1.0 , 1.0 , 1.0 , -1.0 , 1.0 , 1.0 , -1.0 , -1.0 , 1.0 , 1.0 , -1.0 , -1.0 , 1.0 , -1.0 , -1.0 , -1.0 , -1.0 , ]; const indices = [ 0 , 1 , 1 , 2 , 2 , 3 , 3 , 0 , 0 , 5 , 1 , 6 , 2 , 7 , 3 , 4 , 4 , 5 , 5 , 6 , 6 , 7 , 7 , 4 ]; const arr = []; indices.forEach (n => const i = n * 3 arr.push ( verticeLib[i] / 5 , verticeLib[i + 1 ] / 5 , verticeLib[i + 2 ] / 5 , ) }) const vertices = new Float32Array (arr) const vertexBuffer = gl.createBuffer (); gl.bindBuffer (gl.ARRAY_BUFFER , vertexBuffer); gl.bufferData (gl.ARRAY_BUFFER , vertices, gl.STATIC_DRAW ); const a_Position = gl.getAttribLocation (gl.program , 'a_Position' ); gl.vertexAttribPointer (a_Position, 3 , gl.FLOAT , false , 0 , 0 ); gl.enableVertexAttribArray (a_Position); const u_ViewMatrix = gl.getUniformLocation (gl.program , 'u_ViewMatrix' ) const u_ModelMatrix = gl.getUniformLocation (gl.program , 'u_ModelMatrix' ) const viewMatrix = new Matrix4 ().lookAt ( new Vector3 (0.2 , 0.2 , 1 ), new Vector3 (0 , 0 , 0 ), new Vector3 (0 , 1 , 0 ) ) const modelMatrix = new Matrix4 () gl.uniformMatrix4fv (u_ViewMatrix, false , viewMatrix.elements ) gl.uniformMatrix4fv (u_ModelMatrix, false , modelMatrix.elements ) gl.clearColor (0.0 , 0.0 , 0.0 , 1.0 ); gl.clear (gl.COLOR_BUFFER_BIT ); gl.drawArrays (gl.LINES , 0 , indices.length ); let angle = 0 ; const minY = -0.7 const maxY = 0.7 let y = maxY let vy = 0 const ay = -0.001 const bounce = 1 !(function ani ( angle += 0.02 vy += ay y += vy modelMatrix.makeRotationY (angle) modelMatrix.setPosition (0 , y, 0 ) if (modelMatrix.elements [13 ] < minY) { y = minY vy *= -bounce } gl.uniformMatrix4fv (u_ModelMatrix, false , modelMatrix.elements ) gl.clear (gl.COLOR_BUFFER_BIT ); gl.drawArrays (gl.LINES , 0 , indices.length ); requestAnimationFrame (ani) })() </script > </body > </html >
效果
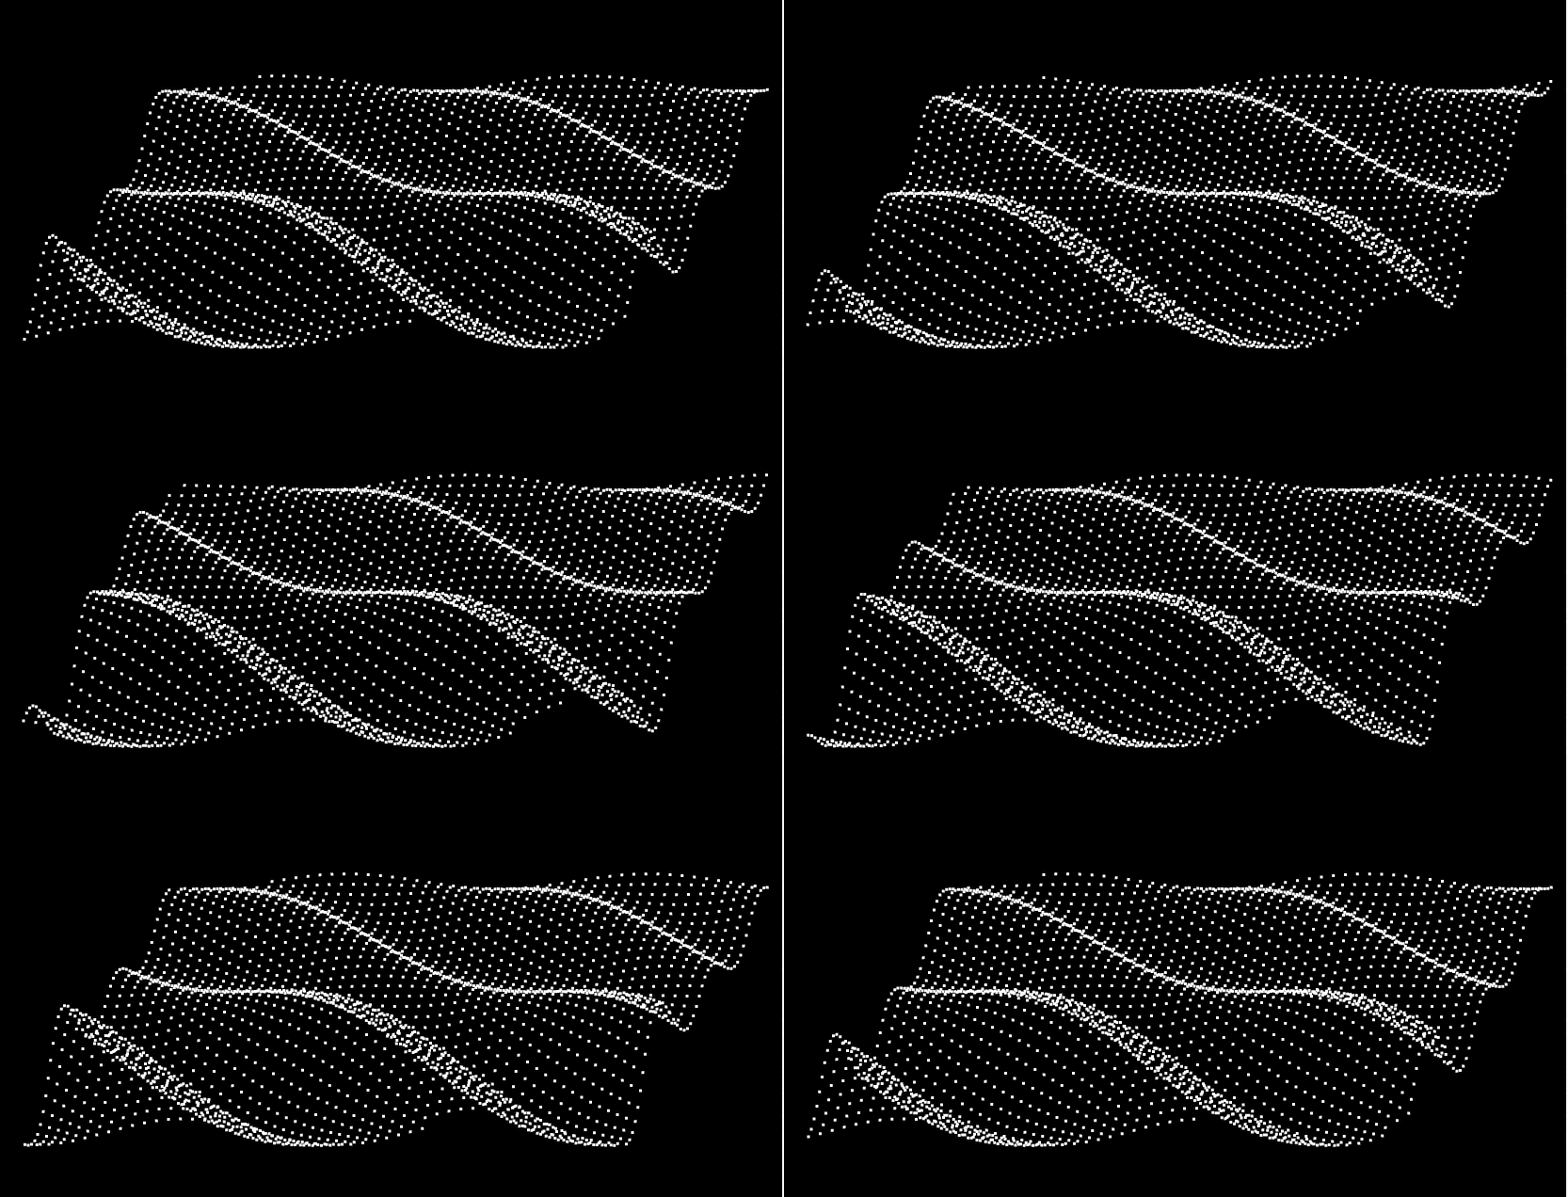
实现一池春水案例 接下来要带大家实现一下下面的这个效果
正弦函数 1.正弦型函数公式
y=Asin(ωx+φ)
2.正弦型函数概念分析
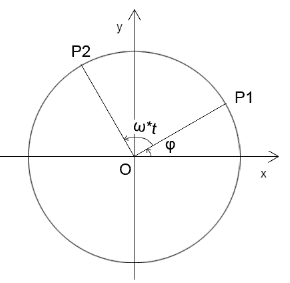
已知:
点P1旋转的量就是ω*t
点P2基于x 正半轴的弧度就是∠xOP2=ω*t+φ
点P1 的转动周期T=周长/速度=2π/ω
点P1转动的频率f=1/T=ω/2π
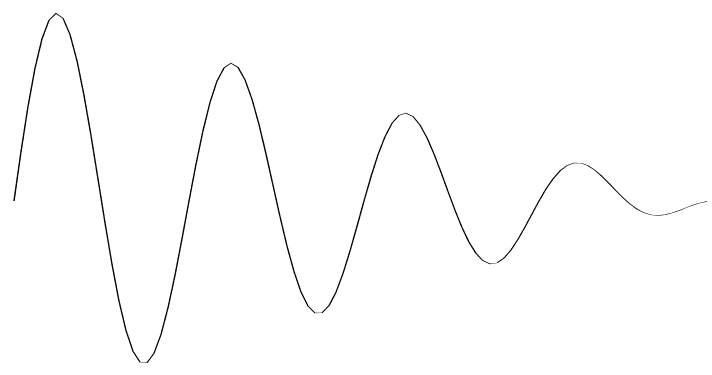
3.正弦型函数的图像性质 y=Asin(ωx+φ)
代码实现 布置点位 1.准备好顶点着色器
1 2 3 4 5 6 7 8 <script id="vertexShader" type="x-shader/x-vertex" > attribute vec4 a_Position; uniform mat4 u_ViewMatrix; void main ( gl_Position = u_ViewMatrix*a_Position; gl_PointSize=3.0 ; } </script>
2.着色器初始化,定义清理画布的底色
1
2
3
4
5
6
7
8
9
const canvas = document .getElementById ('canvas' );canvas.width = window .innerWidth ; canvas.height = window .innerHeight ; const gl = canvas.getContext ('webgl' );const vsSource = document .getElementById ('vertexShader' ).innerText ;const fsSource = document .getElementById ('fragmentShader' ).innerText ;initShaders (gl, vsSource, fsSource);gl.clearColor (0.0 , 0.0 , 0.0 , 1.0 );
3.建立视图矩阵
1 2 3 4 5 6 const viewMatrix = new Matrix4 ().lookAt ( new Vector3 (0.2 , 0.3 , 1 ), new Vector3 (), new Vector3 (0 , 1 , 0 ) )
4.建立波浪对象
1
2
3
4
5
6
7
8
9
10
const wave = new Poly ({ gl, vertices : crtVertices (), uniforms : { u_ViewMatrix : { type : 'uniformMatrix4fv' , value : viewMatrix.elements }, } })
Poly 对象,我在之前”绘制三角形” 里说过,我这里又对其做了下调整,为其添加了uniforms 属性,用于获取和修改uniform 变量。
1 2 3 4 5 6 7 8 9 10 11 12 updateUniform ( const {gl,uniforms}=this for (let [key, val] of Object .entries (uniforms)) { const { type, value } = val const u = gl.getUniformLocation (gl.program , key) if (type.includes ('Matrix' )) { gl[type](u,false ,value) } else { gl[type](u,value) } } }
crtVertices() 建立顶点集合
1 2 3 4 5 6 7 8 9 10 function crtVertices (offset = 0 ) { const vertices = [] for (let z = minPosZ; z < maxPosZ; z += 0.04 ) { for (let x = minPosX; x < maxPosX; x += 0.03 ) { vertices.push (x, 0 , z) } } return vertices }
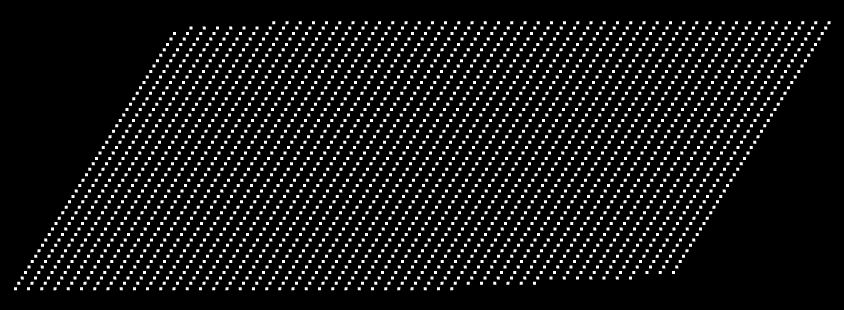
渲染
1 2 gl.clear (gl.COLOR_BUFFER_BIT ) wave.draw ()
效果
塑形 1.建立比例尺,将空间坐标和弧度相映射
1 2 3 4 5 6 7 8 9 10 11 12 13 14 15 const [minPosX, maxPosX, minPosZ, maxPosZ] = [ -0.7 , 0.8 , -1 , 1 ] const [minAngX, maxAngX, minAngZ, maxAngZ] = [ 0 , Math .PI * 4 , 0 , Math .PI * 2 ] const scalerX = ScaleLinear ( minPosX, minAngX, maxPosX, maxAngX ) const scalerZ = ScaleLinear (minPosZ, minAngZ, maxPosZ, maxAngZ)
2.建立正弦型函数
1 2 3 4 5 function SinFn (a, Omega, phi ) { return function (x ) { return a * Math .sin (Omega * x + phi); } }
SinFn中的参数与正弦型函数公式相对应:
y=Asin(ωx+φ)
y-顶点高度y
3.更新顶点高度
将z方向的弧度作为正弦函数的参数
a, Omega, phi 先写死
1 2 3 4 5 6 7 8 9 10 11 function updateVertices (offset = 0 ) { const { vertices } = wave for (let i = 0 ; i < vertices.length ; i += 3 ) { const [posX, posZ] = [vertices[i], vertices[i + 2 ]] const angZ = scalerZ (posZ) const Omega = 2 const a = 0.05 const phi = 0 vertices[i + 1 ] = SinFn (a, Omega , phi)(angZ) } }
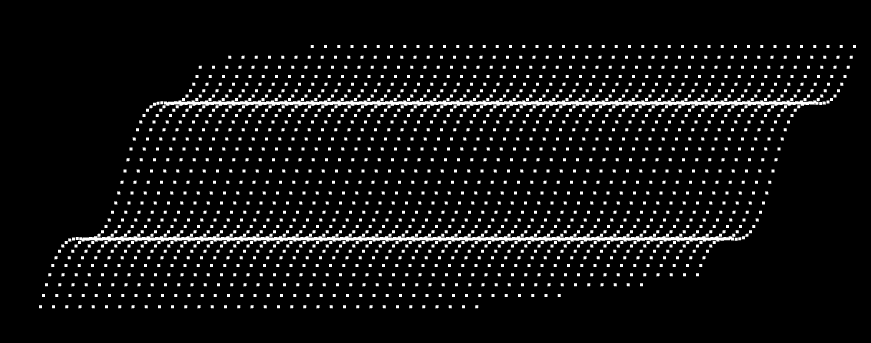
效果如下:
4.修改updateVertices()方法中的 phi 值,使其随顶点的x位置变化
1 const phi = scalerX (posX)
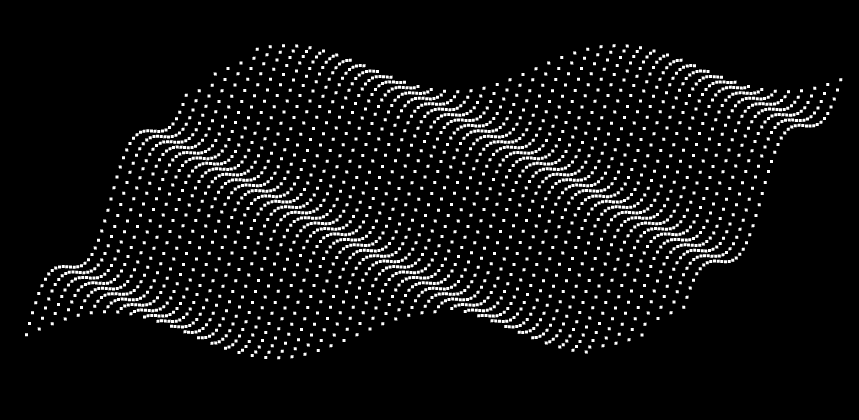
效果如下:
5.修改修改updateVertices()方法中的 a值,使其随顶点的z向弧度变化
1 const a = Math .sin (angZ) * 0.1 + 0.03
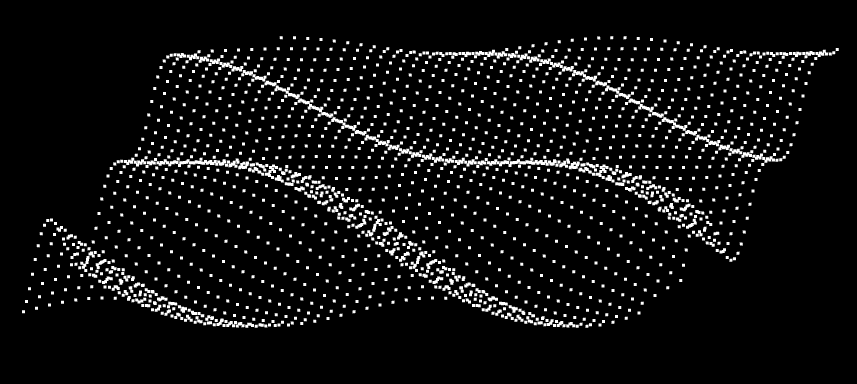
效果如下:
动画 接下来我们可以基于正弦型函数的φ值,来一场动画,让它吹皱一池春水。
1 2 3 4 5 6 7 8 9 10 11 function updateVertices (offset = 0 ) { const { vertices } = wave for (let i = 0 ; i < vertices.length ; i += 3 ) { const [posX, posZ] = [vertices[i], vertices[i + 2 ]] const angZ = scalerZ (posZ) const Omega = 2 const a = Math .sin (angZ) * 0.1 + 0.03 const phi = scalerX (posX) + offset vertices[i + 1 ] = SinFn (a, Omega , phi)(angZ) } }
2.动画
1 2 3 4 5 6 7 8 9 let offset = 0 !(function ani ( offset += 0.08 updateVertices (offset) wave.updateBuffer () gl.clear (gl.COLOR_BUFFER_BIT ) wave.draw () requestAnimationFrame (ani) })()
完整代码 1 2 3 4 5 6 7 8 9 10 11 12 13 14 15 16 17 18 19 20 21 22 23 24 25 26 27 28 29 30 31 32 33 34 35 36 37 38 39 40 41 42 43 44 45 46 47 48 49 50 51 52 53 54 55 56 57 58 59 60 61 62 63 64 65 66 67 68 69 70 71 72 73 74 75 76 77 78 79 80 81 82 83 84 85 86 87 88 89 90 91 92 93 94 95 96 97 98 99 100 101 102 103 104 105 106 107 108 109 110 111 112 113 114 115 116 117 118 119 120 121 122 123 124 <!DOCTYPE html > <html lang ="en" > <head > <meta charset ="UTF-8" > <title > 正弦曲线</title > <style > body { margin : 0 ; overflow : hidden } </style > </head > <body > <canvas id ="canvas" > </canvas > <script id ="vertexShader" type ="x-shader/x-vertex" > attribute vec4 a_Position; uniform mat4 u_ViewMatrix; void main ( gl_Position = u_ViewMatrix*a_Position; gl_PointSize=3.0 ; } </script > <script id ="fragmentShader" type ="x-shader/x-fragment" > void main ( gl_FragColor=vec4 (1.0 ,1.0 ,1.0 ,1.0 ); } </script > <script type ="module" > import { initShaders, getMousePosInWebgl, ScaleLinear } from '../jsm/Utils.js' ; import { Matrix4 , Vector3 , Quaternion , Plane , Ray } from 'https://unpkg.com/three/build/three.module.js' ; import Poly from './jsm/Poly.js' ; const canvas = document .getElementById ('canvas' ); canvas.width = window .innerWidth ; canvas.height = window .innerHeight ; const gl = canvas.getContext ('webgl' ); const vsSource = document .getElementById ('vertexShader' ).innerText ; const fsSource = document .getElementById ('fragmentShader' ).innerText ; initShaders (gl, vsSource, fsSource); gl.clearColor (0.0 , 0.0 , 0.0 , 1.0 ); const viewMatrix = new Matrix4 ().lookAt ( new Vector3 (0.2 , 0.3 , 1 ), new Vector3 (), new Vector3 (0 , 1 , 0 ) ) const [minPosX, maxPosX, minPosZ, maxPosZ] = [ -0.7 , 0.8 , -1 , 1 ] const [minAngX, maxAngX, minAngZ, maxAngZ] = [ 0 , Math .PI * 4 , 0 , Math .PI * 2 ] const scalerX = ScaleLinear (minPosX, minAngX, maxPosX, maxAngX) const scalerZ = ScaleLinear (minPosZ, minAngZ, maxPosZ, maxAngZ) const wave = new Poly ({ gl, vertices : crtVertices (), uniforms : { u_ViewMatrix : { type : 'uniformMatrix4fv' , value : viewMatrix.elements }, } }) let offset = 0 !(function ani ( offset += 0.08 updateVertices (offset) wave.updateBuffer () gl.clear (gl.COLOR_BUFFER_BIT ) wave.draw () requestAnimationFrame (ani) })() function crtVertices (offset = 0 ) { const vertices = [] for (let z = minPosZ; z < maxPosZ; z += 0.04 ) { for (let x = minPosX; x < maxPosX; x += 0.03 ) { vertices.push (x, 0 , z) } } return vertices } function updateVertices (offset = 0 ) { const { vertices } = wave for (let i = 0 ; i < vertices.length ; i += 3 ) { const [posX, posZ] = [vertices[i], vertices[i + 2 ]] const angZ = scalerZ (posZ) const Omega = 2 const a = Math .sin (angZ) * 0.1 + 0.03 const phi = scalerX (posX) + offset vertices[i + 1 ] = SinFn (a, Omega , phi)(angZ) } } function SinFn (a, Omega, phi ) { return function (x ) { return a * Math .sin (Omega * x + phi); } } </script > </body > </html >
这样,就可以实现我们最终的效果了
结语 本篇文章就到这里结束了,更多内容敬请期待,债见~


