【可视化学习】74-简易员工风采展示
发表于:2024-07-04 |

前言

最近老板提了一嘴要搞个员工风采展示的功能,我刚好最近活比较少,比较无聊,就想着搞一下这个也挺好的,搞好了我给主管看,主管说太花里胡哨了,老实说自己搞出来的东西被人家否定,还是有点难受的,后来想想我赚着老板的钱,没给他做东西,做了自己喜欢的事情,这不就是赢麻了吗?本篇文章分享一下我实现这个小 demo 的流程。

提示

这里很多数值都是我根据自己的情况进行过多次慢慢调整的,比较符合我自己的审美,你完全可以根据你的情况自己调整

创建项目

这里我用 vite+vue3+js 进行了项目,这块我就不多阐述了,大家可以考古我之前的文章。

安装依赖

我这里我需要用到 three,gsap,d3,vue-router 的依赖

简单路由使用

我这里简单封装了一个 router

1
2
3
4
5
6
7
8
9
10
11
12
13
14
15
16
17
18
19
20
21
22
23
24
25
26
27
28
29
30
31
32
33
34
import {
createRouter, // 创建路由
createWebHistory, // history模式
} from "vue-router";

const routes = [
{
path: "/",
children: [
{
path: "",
redirect: "/index",
},
{
name: "Home",
path: "/index",
// vite下,组件路径必须完整,带上vue后缀
component: () => import("@/views/home.vue"),
},
{
name: "Show",
path: "/show",
component: () => import("@/views/show.vue"),
},
],
},
];

const router = createRouter({
history: createWebHistory(),
routes,
});

export default router;

然后在 main.js 中使用即可

1
2
3
4
5
6
import { createApp } from "vue";
import "./style.css";
import App from "./App.vue";
import router from "./router";

createApp(App).use(router).mount("#app");

初始化样式

随便初始化一下样式

1
2
3
4
5
6
7
8
9
10
11
12
13
14
15
* {
margin: 0;
padding: 0;
}
html {
font-size: calc(100vw / 19.2);
}
body {
font-size: 16px;
}

ul,
li {
list-style: none;
}

找一个环境贴图

给大家推荐一个网站,爱给网:https://www.aigei.com/
我就是在这里面找的全景环境贴图,因为这里面的图片是.jpg 类型,不是 hdr 的格式,所以我们 rgbeloader 没法直接去加载,我们需要将这个贴图切割成为 6 张前后左右上下的图片

切割图片

然后我们去这个网站 https://matheowis.github.io/HDRI-to-CubeMap/
将我们的图片上传,按照分割的格式导出即可。
分割图片

初始化 three 项目

这个之前讲过很多次了,我这里用了我之前 vue 智慧城市的代码来初始化,我就直接贴代码了

home.vue

1
2
3
4
5
6
7
8
<script setup>
import Scene from "../components/Scene.vue";
</script>
<template>
<div id="app">
<Scene />
</div>
</template>

Scene.vue

1
2
3
4
5
6
7
8
9
10
11
12
13
14
15
16
17
18
19
20
21
22
23
24
25
26
27
28
29
30
31
32
33
34
35
36
37
38
39
40
41
42
43
44
45
46
47
48
<template>
<div class="scene" ref="sceneDiv"></div>
</template>

<script setup>
import { onMounted, ref } from "vue";
import * as THREE from "three";
// 导入场景
import scene from "@/three/scene";
// 导入相机
import camera from "@/three/camera";
// 导入gui对象
import gui from "@/three/gui";
// 导入renderer对象
import renderer from "@/three/renderer";
// 导入辅助坐标轴
import axesHelper from "@/three/axesHelper";
// 导入控制器
import controls from "@/three/controls";
// 导入每一帧的执行函数
import animate from "@/three/animate";
// 初始化调整屏幕
import "@/three/init";

// 场景元素div
let sceneDiv = ref(null);

// 添加相机
scene.add(camera);
// 添加辅助坐标轴
scene.add(axesHelper);
onMounted(() => {
// 将webgl渲染的canvas内容添加到body上
sceneDiv.value.appendChild(renderer.domElement);
animate();
});
</script>

<style>
.scene {
width: 100vw;
height: 100vh;
position: fixed;
z-index: 100;
left: 0;
top: 0;
}
</style>

JS

animate.js
1
2
3
4
5
6
7
8
9
10
11
12
13
import camera from "./camera";
import renderer from "./renderer";
import controls from "./controls";
import scene from "./scene";

function animate() {
controls.update();
requestAnimationFrame(animate);
// 使用渲染器渲染相机看这个场景的内容渲染出来
renderer.render(scene, camera);
}

export default animate;
axesHelper.js
1
2
3
4
5
import * as THREE from "three";
// 加入辅助轴,帮助我们查看3维坐标轴
const axesHelper = new THREE.AxesHelper(5);

export default axesHelper;
camera.js
1
2
3
4
5
6
7
8
9
10
11
12
13
14
import * as THREE from "three";

// 2.创建相机
const camera = new THREE.PerspectiveCamera(
90,
window.innerWidth / window.innerHeight,
0.1,
100000
);

// 设置相机位置
camera.position.set(0, -50, 120);

export default camera;
controls.js
1
2
3
4
5
6
7
8
9
10
11
12
import { OrbitControls } from "three/examples/jsm/controls/OrbitControls";
import camera from "./camera";
import renderer from "./renderer";

// 初始化控制器
const controls = new OrbitControls(camera, renderer.domElement);
// 设置控制器阻尼
controls.enableDamping = true;
// 设置自动旋转
// controls.autoRotate = true;

export default controls;
gui.js
1
2
3
4
5
6
7
// 导入lil.gui
import { GUI } from "three/examples/jsm/libs/lil-gui.module.min.js";

// 创建GUI
const gui = new GUI();

export default gui;
init.js
1
2
3
4
5
6
7
8
9
10
11
12
13
14
15
16
17
18
19
20
21
import camera from "./camera";
import renderer from "./renderer";

// 更新摄像头
camera.aspect = window.innerWidth / window.innerHeight;
// 更新摄像机的投影矩阵
camera.updateProjectionMatrix();

// 监听屏幕大小改变的变化,设置渲染的尺寸
window.addEventListener("resize", () => {
// console.log("resize");
// 更新摄像头
camera.aspect = window.innerWidth / window.innerHeight;
// 更新摄像机的投影矩阵
camera.updateProjectionMatrix();

// 更新渲染器
renderer.setSize(window.innerWidth, window.innerHeight);
// 设置渲染器的像素比例
renderer.setPixelRatio(window.devicePixelRatio);
});
renderer.js
1
2
3
4
5
6
7
8
9
10
11
import * as THREE from "three";
// 初始化渲染器
const renderer = new THREE.WebGLRenderer();

//设置渲染的尺寸大小
renderer.setSize(window.innerWidth, window.innerHeight);

// 开启阴影
renderer.shadowMap.enabled = true;

export default renderer;
scene.js

这里稍微说一下,我把刚才导出的 6 张图片放在了 public/textures 目录下面,然后利用天空盒子,把环境贴图贴上去就行

1
2
3
4
5
6
7
8
9
10
11
12
13
14
15
16
17
18
19
import * as THREE from "three";
// 1.创建场景
const scene = new THREE.Scene();

// 场景天空盒
const textureCubeLoader = new THREE.CubeTextureLoader().setPath("./textures/");
const textureCube = textureCubeLoader.load([
"px.png",
"nx.png",
"py.png",
"ny.png",
"pz.png",
"nz.png",
]);

scene.background = textureCube;
scene.environment = textureCube;

export default scene;

效果图

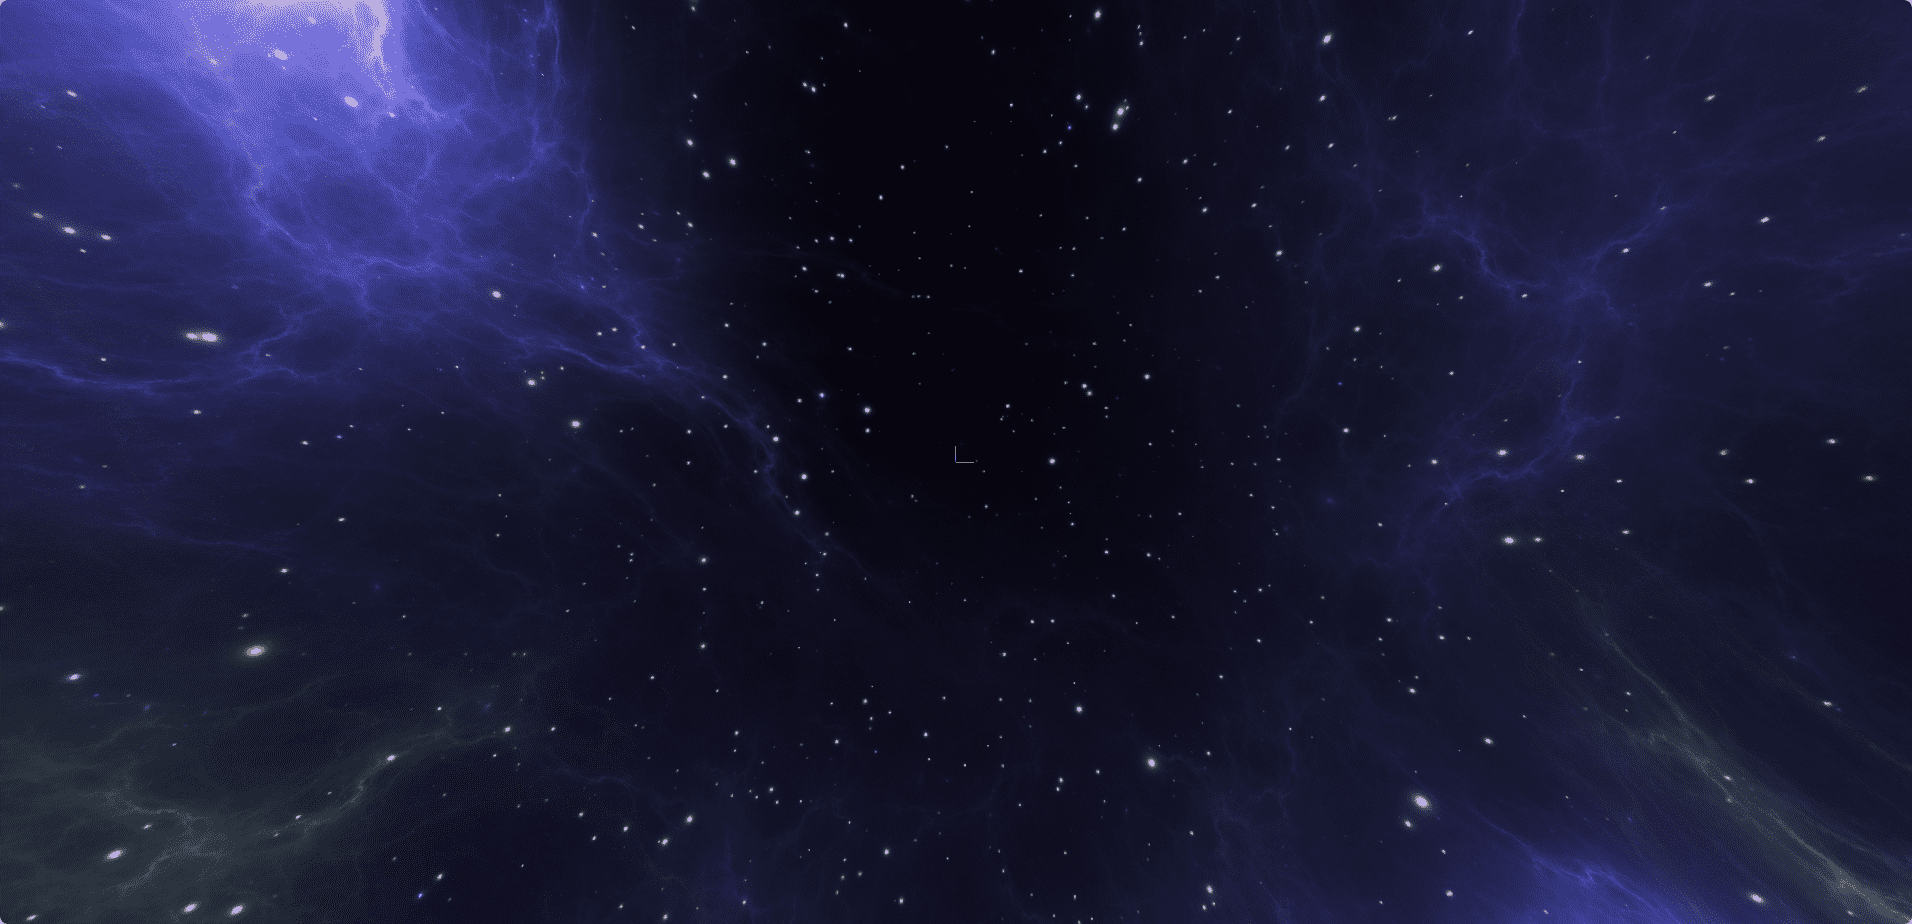
这样,我们的 three 项目基础就创建好了

引入 geojson

得到 json

去这个网址把 geojson 数据复制下来 https://datav.aliyun.com/portal/school/atlas/area_selector

放置 json

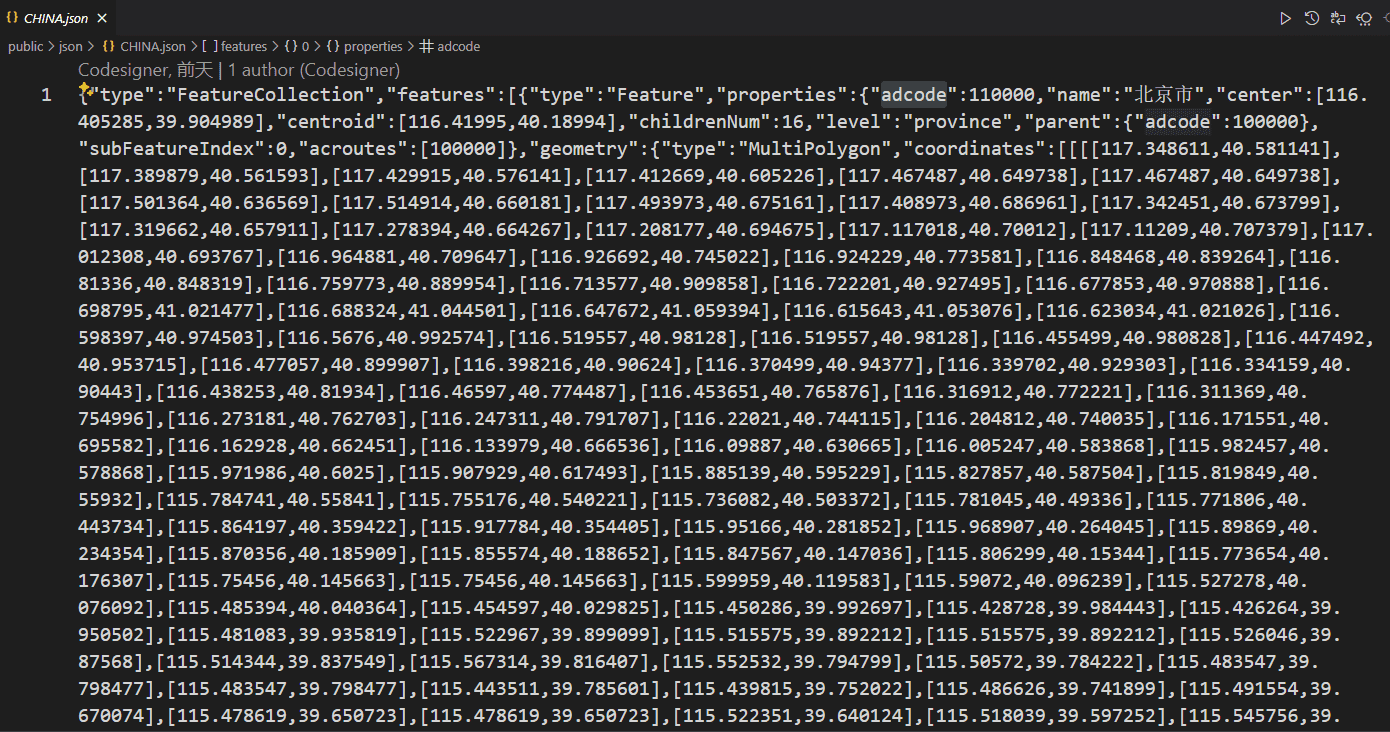
把这个 json 放在 public 目录下面,json 格式大概如下
效果图

根据 geojson 进行画图

这里大家记下来就行了,基本上代码就已经固定了
我这里新建了一个 jsonLoader 的 js

引入模块
1
2
3
import * as THREE from "three";
import * as d3 from "d3";
import scene from "./scene";
用 d3 将经纬度转化成 x,y,然后使用 FileLoader 读取 geojson 数据
1
2
3
4
5
6
7
8
9
10
11
12
// 加载纹理
const map = new THREE.Object3D();
// 以经纬度116,39为中心,进行投影的函数转换函数
const projection1 = d3.geoMercator().center([116, 39]).translate([0, 0, 0]);

export function jsonLoader() {
const loader = new THREE.FileLoader();
loader.load("./json/CHINA.json", (data) => {
const jsonData = JSON.parse(data);
operationData(jsonData);
});
}
循环各个省份的信息,然后进行绘制
1
2
3
4
5
6
7
8
9
10
11
12
13
14
15
16
17
18
19
20
21
22
23
24
25
26
27
28
29
30
31
32
33
34
35
36
37
38
39
40
41
42
function operationData(jsondata) {
// 全国信息
const features = jsondata.features;

features.forEach((feature) => {
// 单个省份 对象
const province = new THREE.Object3D();
// 地址
province.properties = feature.properties.name;
const coordinates = feature.geometry.coordinates;
let color = "#1e80ff";
if (feature.geometry.type === "MultiPolygon") {
// 多个,多边形
coordinates.forEach((coordinate) => {
// coordinate 多边形数据
coordinate.forEach((rows) => {
const mesh = drawExtrudeMesh(rows, color, projection1);
const line = lineDraw(rows, color, projection1);
// 唯一标识
mesh.properties = feature.properties.name;

province.add(line);
province.add(mesh);
});
});
}

if (feature.geometry.type === "Polygon") {
// 多边形
coordinates.forEach((coordinate) => {
const mesh = drawExtrudeMesh(coordinate, color, projection1);
const line = lineDraw(coordinate, color, projection1);
// 唯一标识
mesh.properties = feature.properties.name;

province.add(line);
province.add(mesh);
});
}
map.add(province);
});
}
绘制线和多边形代码

这里是绘制线和多边形的代码

1
2
3
4
5
6
7
8
9
10
11
12
13
14
15
16
17
18
19
20
21
22
23
24
25
26
27
28
29
30
31
32
33
34
35
36
37
38
39
40
function lineDraw(polygon, color, projection) {
const lineGeometry = new THREE.BufferGeometry();
const pointsArray = new Array();
polygon.forEach((row) => {
const [x, y] = projection(row);
// 创建三维点
pointsArray.push(new THREE.Vector3(x, -y, 9));
});
// 放入多个点
lineGeometry.setFromPoints(pointsArray);

const lineMaterial = new THREE.LineBasicMaterial({
color: color,
});
return new THREE.Line(lineGeometry, lineMaterial);
}

// 根据经纬度坐标生成物体
function drawExtrudeMesh(polygon, color, projection) {
const shape = new THREE.Shape();
polygon.forEach((row, i) => {
const [x, y] = projection(row);
if (i === 0) {
shape.moveTo(x, -y);
}
shape.lineTo(x, -y);
});

// 拉伸
const geometry = new THREE.ExtrudeGeometry(shape, {
depth: 10,
bevelEnabled: false,
});
const material = new THREE.MeshBasicMaterial({
color: color,
transparent: true,
opacity: 0.5,
});
return new THREE.Mesh(geometry, material);
}
home.vue 导入方法并执行
1
2
3
4
5
6
7
8
9
10
11
// 导入引入JSON的数据
import { jsonLoader } from "@/three/jsonLoader";
// 场景元素div
let sceneDiv = ref(null);

onMounted(() => {
// 将webgl渲染的canvas内容添加到body上
sceneDiv.value.appendChild(renderer.domElement);
jsonLoader();
animate();
});

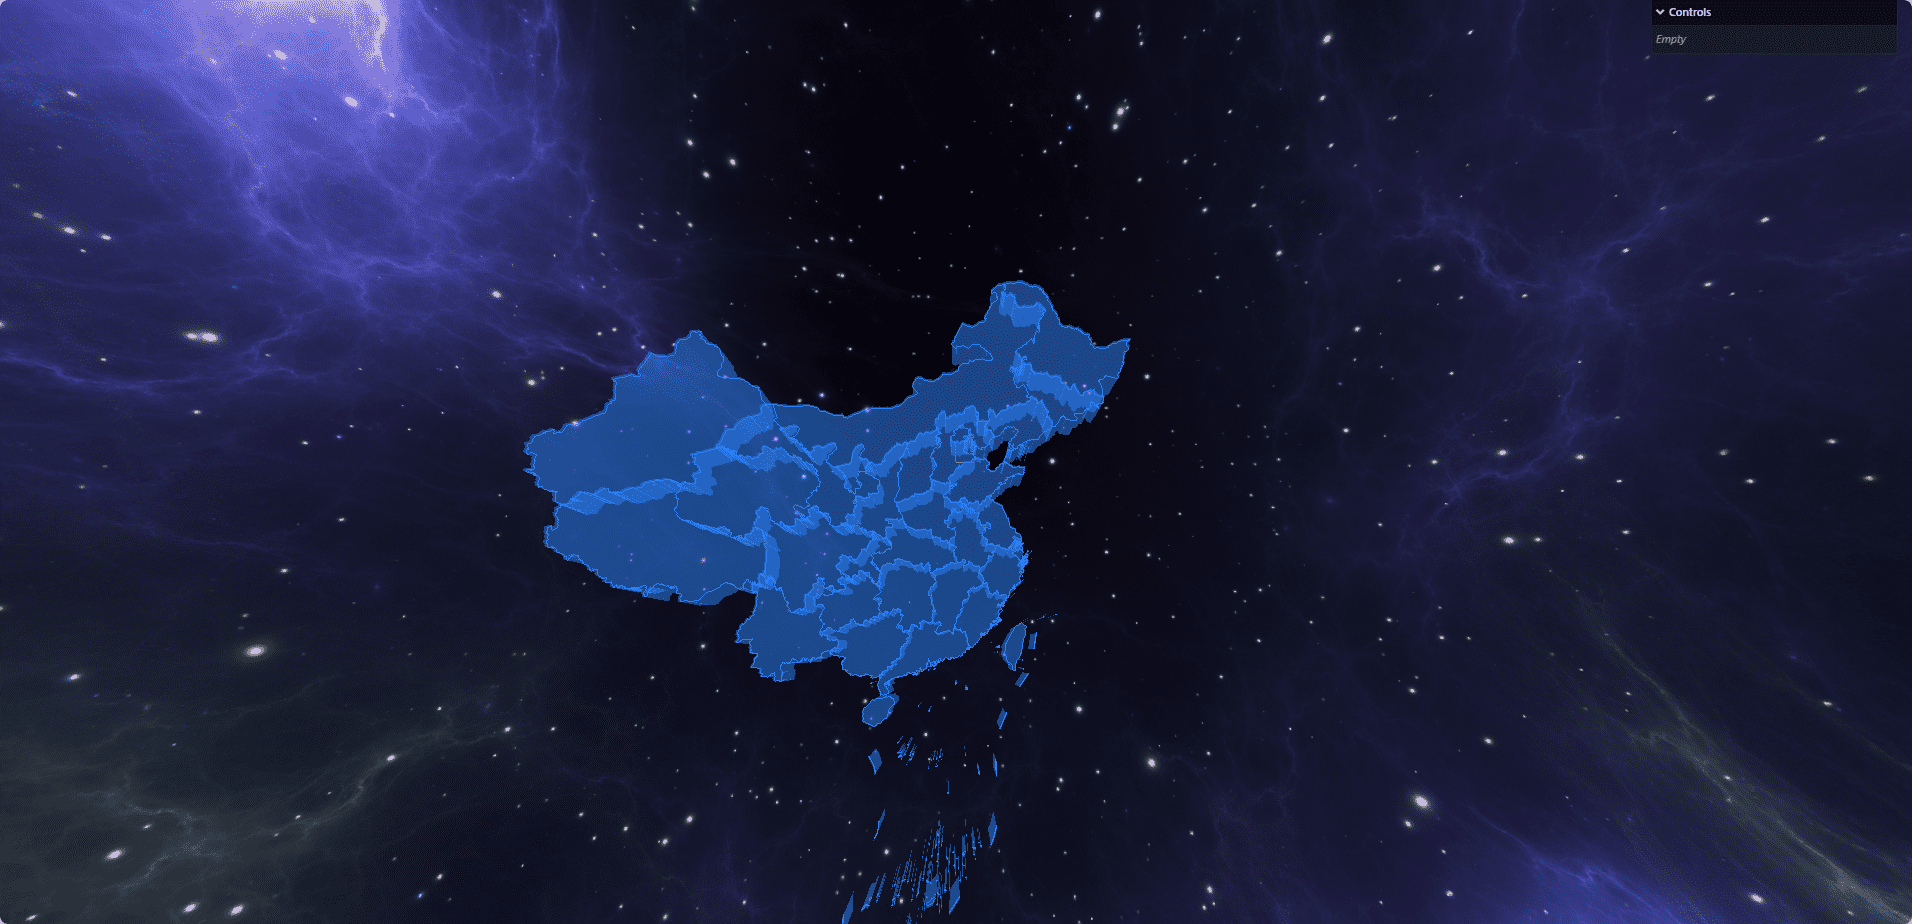
效果图

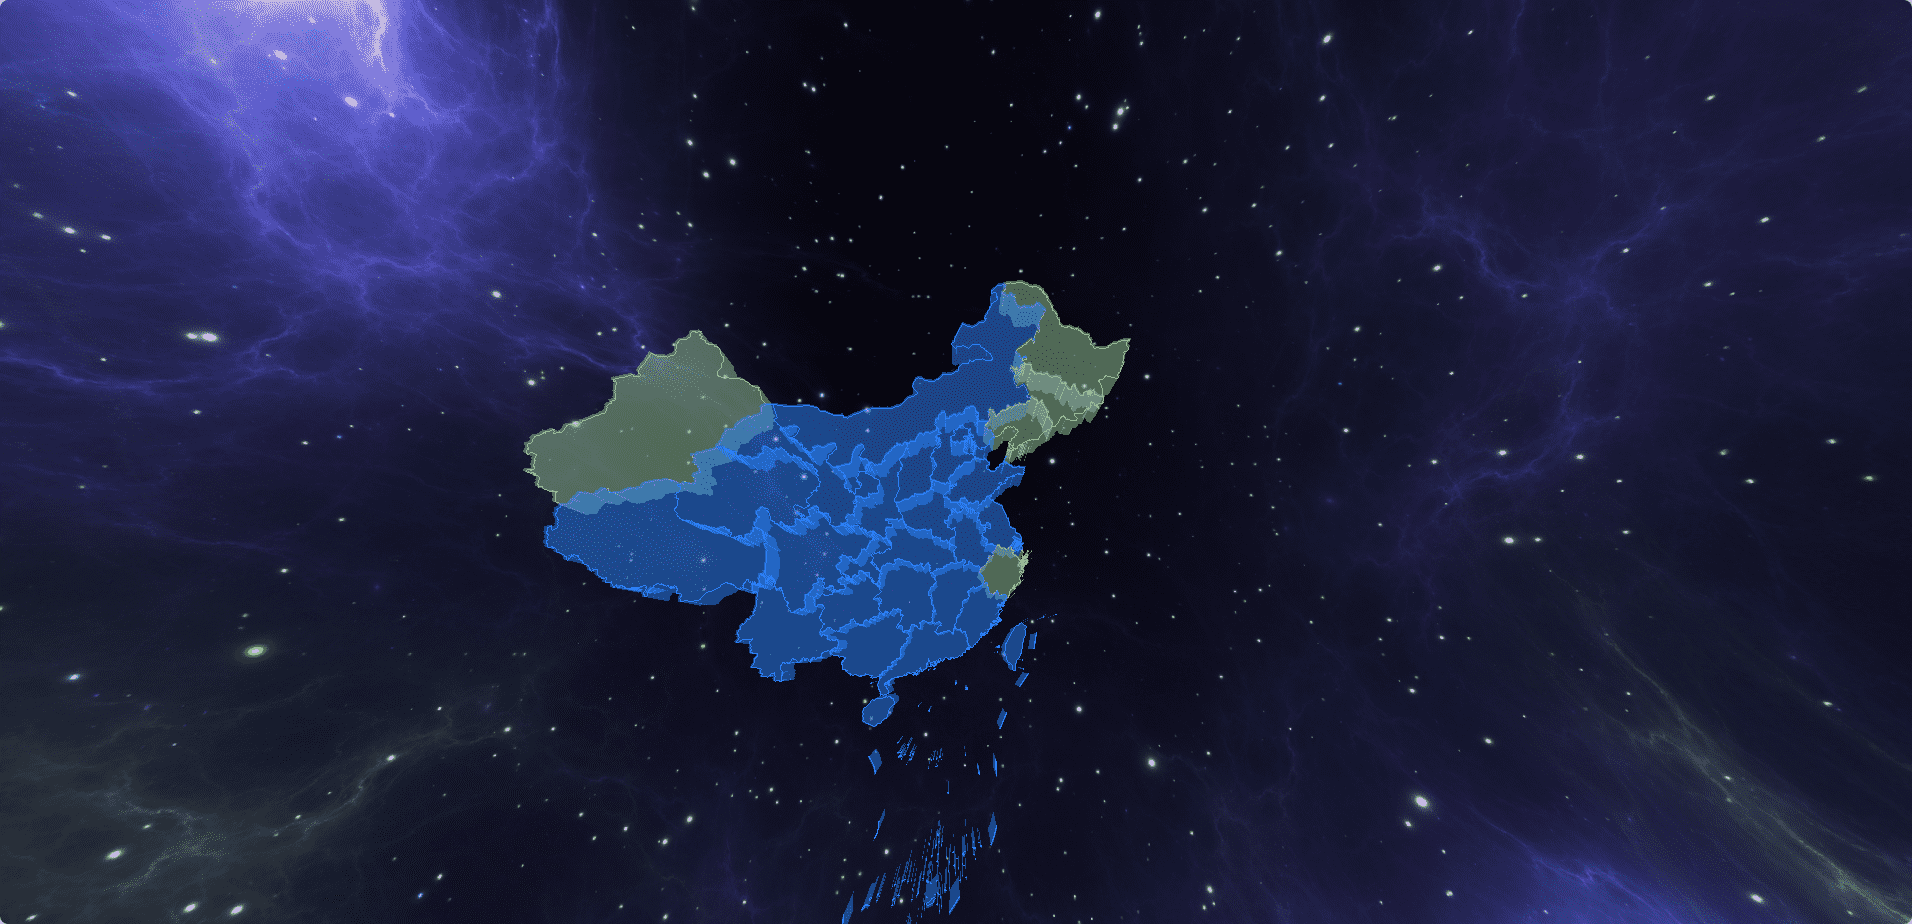
分部省份变色

我们公司有多个分部,我需要将这些个有分部的省份给进行变色,这里的 code,大家需要自己去一一对应

1
2
3
4
5
6
7
8
9
// 地点的code
province.adcode = feature.properties.adcode;
const coordinates = feature.geometry.coordinates;
let color = "#1e80ff";
if (
[230000, 220000, 650000, 330000, 210000].includes(Number(province.adcode))
) {
color = "#90c890";
}

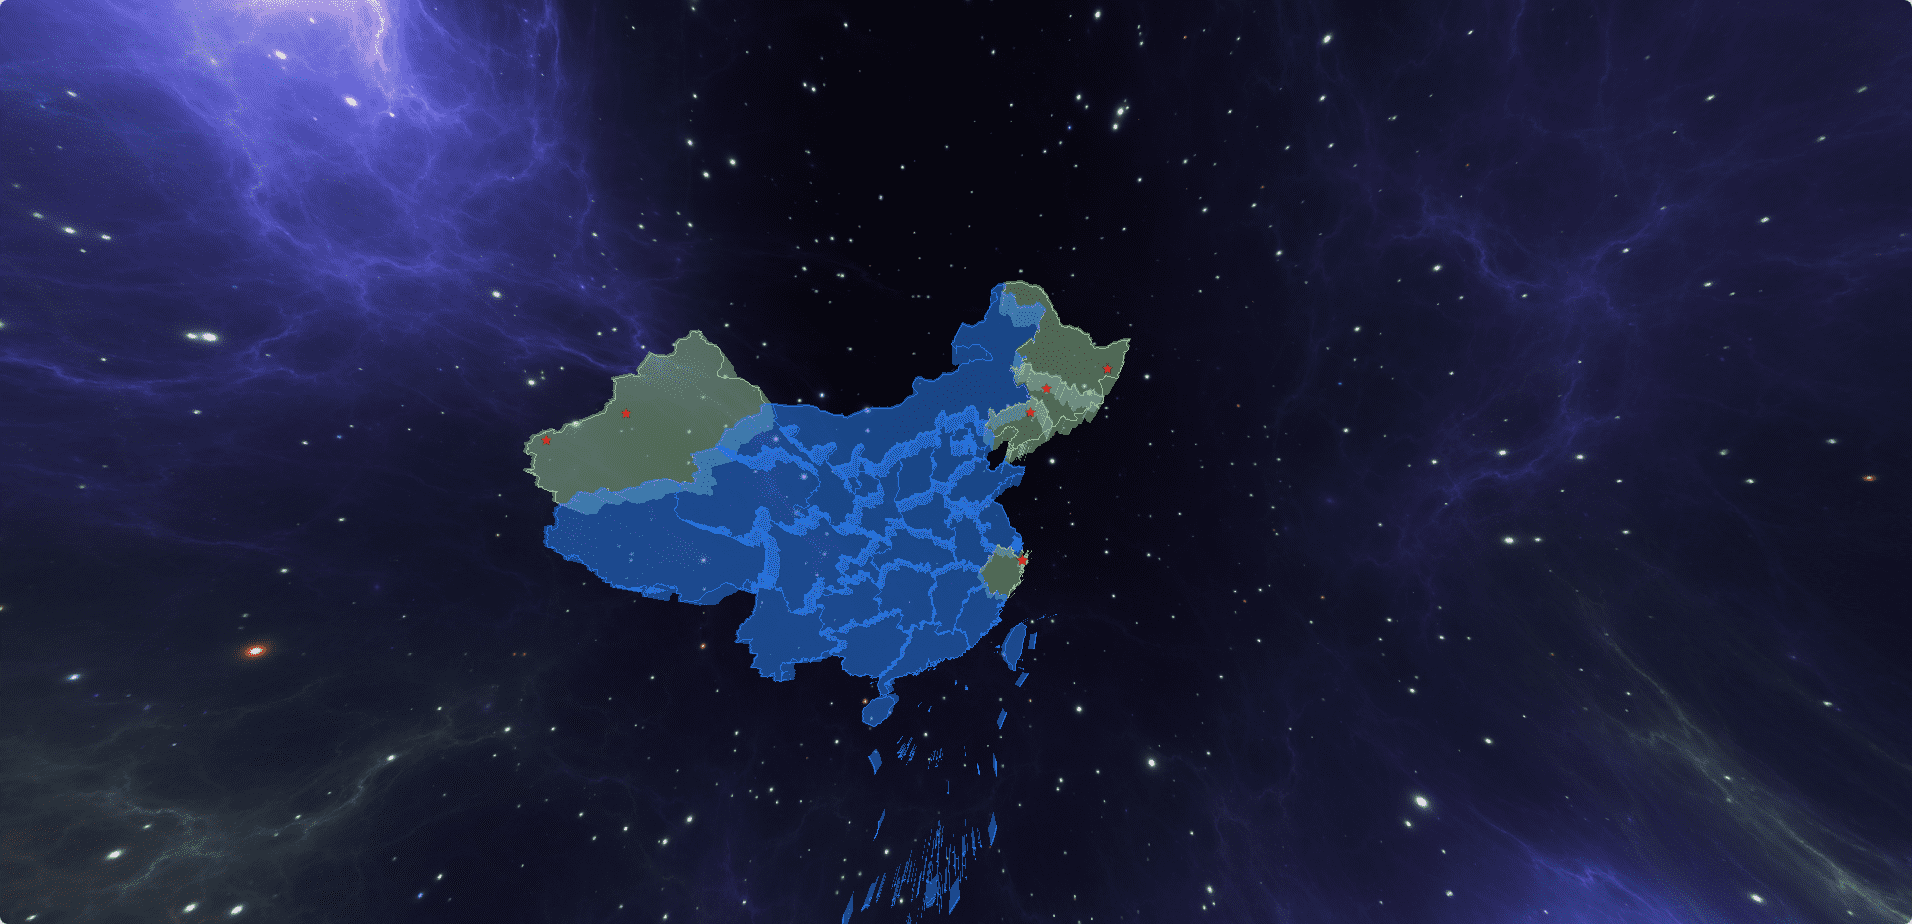
效果图

地点绘制五角星

得到地点经纬度

首先我们要得到我们需要地址的经纬度,我是使用了这个网站 https://map.jiqrxx.com/jingweidu/

根据经纬度绘制

1
2
3
4
5
6
7
8
9
10
11
12
13
const pointColor = "#f64242";
const positionPointList = {
宁波: [121.84431, 29.89889],
沈阳: [123.46987, 41.80515],
长春: [125.28845, 43.83327],
密山: [131.84631, 45.52975],
喀什: [75.98976, 39.47042],
库车: [82.96212, 41.71741],
};
Object.values(positionPointList).forEach((row) => {
const point = pointDraw(row, pointColor, projection1);
map.add(point);
});

绘制方法

这里的texture是我自己找的五角星的图片

1
2
3
4
5
6
7
8
9
10
11
12
13
14
15
16
17
18
19
// 导入纹理
const textureLoader = new THREE.TextureLoader();
const texture = textureLoader.load("textures/star.png");
// 根据经纬度坐标生成star
function pointDraw(point, color, projection) {
// 创建一个几何体
const [x, y] = projection(point);
const group = new THREE.Object3D();
let spriteMaterial = new THREE.SpriteMaterial({
map: texture,
color: new THREE.Color(color),
});
// 添加标点
const sprite1 = new THREE.Sprite(spriteMaterial);
sprite1.position.set(x, -y, 11);
sprite1.scale.set(3, 3, 2);
group.add(sprite1);
return group;
}

效果图

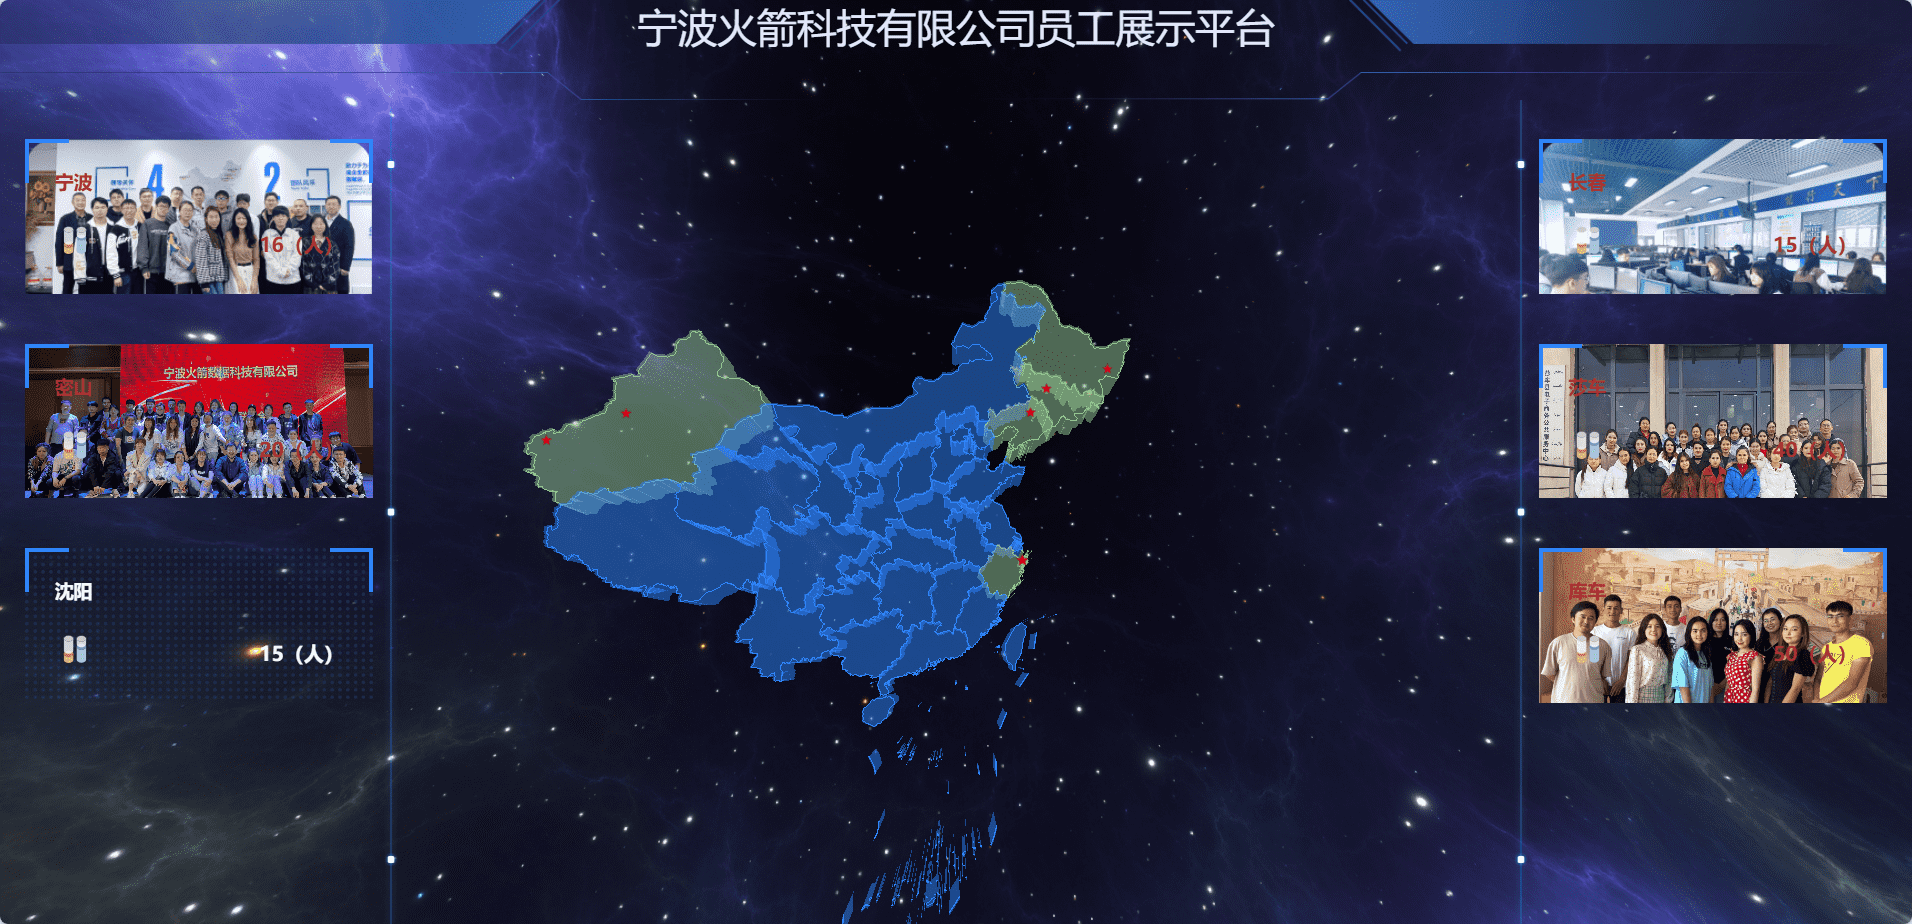
大屏内容信息绘制

这里我还是用到了之前vue-智慧城市的东西,cv过来了而已

BigScreen.vue

1
2
3
4
5
6
7
8
9
10
11
12
13
14
15
16
17
18
19
20
21
22
23
24
25
26
27
28
29
30
31
32
33
34
35
36
37
38
39
40
41
42
43
44
45
46
47
48
49
50
51
52
53
54
55
56
57
58
59
60
61
62
63
64
65
66
67
68
69
70
71
72
73
74
75
76
77
78
79
80
81
82
83
84
85
86
87
88
89
90
91
92
93
94
95
96
97
98
99
100
101
102
103
104
105
106
107
108
109
110
111
112
113
114
115
116
117
118
119
120
121
122
123
124
125
126
127
128
129
130
131
132
133
134
135
136
137
138
139
140
141
142
143
144
145
146
147
148
149
150
151
152
153
154
155
156
157
158
159
160
161
162
163
164
165
166
167
168
169
170
171
172
173
174
175
176
177
178
179
180
181
182
183
184
185
186
187
188
189
190
191
192
193
194
195
196
197
198
199
200
201
202
203
204
205
206
207
208
209
210
211
212
213
214
215
216
217
218
219
220
221
222
223
224
225
226
227
228
229
230
231
232
233
234
235
236
237
238
239
240
241
242
243
244
245
246
247
248
249
250
251
252
253
254
255
256
257
258
259
260
261
262
263
264
265
266
267
268
269
270
271
272
273
274
275
276
277
278
279
280
281
282
283
284
285
286
287
288
289
290
291
292
293
294
295
296
297
298
299
300
301
302
303
304
305
306
307
308
309
310
311
312
313
314
315
<template>
<div id="bigScreen">
<div class="header">宁波火箭科技有限公司员工展示平台</div>
<div class="main">
<div class="left">
<div v-for="(item, key) in dataList.slice(0, 3)">
<div
class="cityEvent"
:style="{
backgroundImage: item.img
? `url(${item.img})`
: `url(${normalBg})`,
backgroundRepeat: item.img ? 'no-repeat' : 'repeat',
}"
@click="handleRouterChange(item.code)"
>
<h3
:style="{
color: item.img ? '#ad352f' : '#fff',
}"
>
<span>{{ item.name }}</span>
</h3>
<h1
:style="{
color: item.img ? '#ad352f' : '#fff',
}"
>
<img src="../assets/bg/bar.svg" class="icon" />
<span>{{ toFixInt(item.number) }}(人)</span>
</h1>
<div class="footerBoder"></div>
</div>
</div>
</div>
<div class="right">
<div v-for="(item, key) in dataList.slice(3)">
<div
class="cityEvent"
:style="{
backgroundImage: item.img
? `url(${item.img})`
: `url(${normalBg})`,
backgroundRepeat: item.img ? 'no-repeat' : 'repeat',
}"
@click="handleRouterChange(item.code)"
>
<h3
:style="{
color: item.img ? '#ad352f' : '#fff',
}"
>
<span>{{ item.name }}</span>
</h3>
<h1
:style="{
color: item.img ? '#ad352f' : '#fff',
}"
>
<img src="../assets/bg/bar.svg" class="icon" />
<span>{{ toFixInt(item.number) }}(人)</span>
</h1>
<div class="footerBoder"></div>
</div>
</div>
</div>
</div>
</div>
</template>

<script setup>
import eventHub from "@/utils/eventHub";
import { ref } from "vue";
import { useRouter } from "vue-router";
const props = defineProps(["eventList"]);

const normalBg = new URL("@/assets/bg/bg_img03.png", import.meta.url).href;

const dataList = [
{
name: "宁波",
number: 16,
img: new URL("@/assets/bg/ningbo.png", import.meta.url).href,
code: "NB",
},
{
name: "密山",
number: 20,
img: new URL("@/assets/bg/heilongjiang.png", import.meta.url).href,
code: "MS",
},
{ name: "沈阳", number: 15, code: "SY" },
{
name: "长春",
number: 15,
img: new URL("@/assets/bg/changchun.png", import.meta.url).href,
code: "CC",
},
{
name: "莎车",
number: 40,
img: new URL("@/assets/bg/shache.png", import.meta.url).href,
code: "SC",
},
{
name: "库车",
number: 50,
img: new URL("@/assets/bg/kuche.png", import.meta.url).href,
code: "KC",
},
];
const router = useRouter();
const handleRouterChange = (code) => {
router.push(`/show?code=${code}`);
};

const toFixInt = (num) => {
return num.toFixed(0);
};

const currentActive = ref(null);
eventHub.on("spriteClick", (data) => {
// console.log(data);
currentActive.value = data.i;
});

const toggleEvent = (i) => {
currentActive.value = i;
eventHub.emit("eventToggle", i);
};
</script>

<style scoped>
#bigScreen {
width: 100vw;
height: 100vh;
position: fixed;
z-index: 100;

left: 0;
top: 0;
pointer-events: none;
display: flex;
flex-direction: column;
}

.header {
/* width: 1920px;
height: 100px; */

width: 19.2rem;
height: 1rem;
background-image: url(@/assets/bg/title.png);
background-size: cover;
background-position: center;
background-repeat: no-repeat;
text-align: center;
color: rgb(226, 226, 255);
font-size: 0.4rem;
}

.main {
flex: 1;
width: 19.2rem;
display: flex;
justify-content: space-between;
}

.left {
width: 4rem;
/* background-color: rgb(255,255,255,0.5); */
background-image: url(@/assets/bg/line_img.png);
background-repeat: no-repeat;
background-size: contain;
background-position: right center;
display: flex;
flex-direction: column;
align-items: center;
padding: 0.4rem 0;
}

.right {
width: 4rem;
/* background-color: rgb(255,255,255,0.5); */
background-image: url(@/assets/bg/line_img.png);
background-repeat: no-repeat;
background-size: contain;
background-position: left center;
display: flex;
flex-direction: column;
align-items: center;
padding: 0.4rem 0;
}

.cityEvent {
position: relative;
width: 3.5rem;
/* height: 3rem; */
margin-bottom: 0.5rem;
background-image: url(@/assets/bg/bg_img03.png);
background-repeat: repeat;
background-size: 3.5rem;
cursor: pointer;
pointer-events: auto;
}

.cityEvent::before {
width: 0.4rem;
height: 0.4rem;
position: absolute;
left: 0;
top: 0;
border-top: 4px solid rgb(34, 133, 247);
border-left: 4px solid rgb(34, 133, 247);
content: "";
display: block;
}

.cityEvent::after {
width: 0.4rem;
height: 0.4rem;
position: absolute;
right: 0;
top: 0;
border-top: 4px solid rgb(34, 133, 247);
border-right: 4px solid rgb(34, 133, 247);
content: "";
display: block;
}
.footerBorder {
position: absolute;
bottom: 0;
bottom: 0;
width: 3.5rem;
height: 0.4rem;
}
.footerBorder::before {
width: 0.4rem;
height: 0.4rem;
position: absolute;
left: 0;
top: 0;
border-bottom: 4px solid rgb(34, 133, 247);
border-left: 4px solid rgb(34, 133, 247);
content: "";
display: block;
}

.footerBorder::after {
width: 0.4rem;
height: 0.4rem;
position: absolute;
right: 0;
top: 0;
border-bottom: 4px solid rgb(34, 133, 247);
border-right: 4px solid rgb(34, 133, 247);
content: "";
display: block;
}

.icon {
width: 40px;
height: 40px;
}

h1 {
color: #fff;
display: flex;
align-items: center;
padding: 0 0.3rem 0.3rem;
justify-content: space-between;
font-size: 0.2rem;
}
h3 {
color: #fff;
display: flex;
align-items: center;
padding: 0.3rem 0.3rem;
}

h1 > div {
display: flex;
align-items: center;
}
h1 span.time {
font-size: 0.2rem;
font-weight: normal;
}

.cityEvent li > p {
color: #eee;
padding: 0rem 0.3rem 0.3rem;
}

.list h1 {
padding: 0.1rem 0.3rem;
}
.cityEvent.list ul {
pointer-events: auto;
cursor: pointer;
}

.cityEvent li.active h1 {
color: red;
}
.cityEvent li.active p {
color: red;
}

ul,
li {
list-style: none;
}
</style>

home.vue引用

1
2
3
4
5
6
7
8
9
10
<script setup>
import Scene from "../components/Scene.vue";
import BigScreen from "../components/BigScreen.vue";
</script>
<template>
<div id="app">
<Scene />
<BigScreen />
</div>
</template>

效果图

飞线使用

这里我还是使用了之前vue-智慧城市的飞线代码,cv过来了而已,因为我们公司宁波是总部,所以我想得到的是从宁波发送飞线到各个分布,所以以宁波为base,将其他地方的经纬度适当微调(为了显示准确)

根据经纬度创建飞线

1
2
3
4
5
6
7
8
9
10
11
12
13
14
15
16
17
18
19
20
21
22
23
24
25
26
27
28
29
30
31
32
33
34
35
36
// 创建飞线
export function drawFlyLine(projection) {
const [baseX,baseY]= projection([121.84431, 29.89889]);
const basePosition= {
x:baseX,
y:-baseY
}
// 将数据进行微调
const positionPointList = {
// 宁波: [121.84431, 29.89889],
沈阳: [124.5, 41.80515],
长春: [127, 44],
密山: [134, 46],
喀什: [70.5, 39.47042],
库车: [78.5, 41.71741],
};
Object.values(positionPointList).forEach((row) => {
// 生成随机颜色
const color = new THREE.Color(
Math.random(),
Math.random(),
Math.random()
).getHex();
// 这里是地图上的x,y,我需要得到在场景中的x,y
const [x, y] = projection(row);
const position= {
x:x,
y:-y,
z: 80
}
// 添加着色器飞线
const flyLineShader = new FlyLineShader(basePosition,position, color);
scene.add(flyLineShader.mesh);
})

}

FlyLineShader代码

1
2
3
4
5
6
7
8
9
10
11
12
13
14
15
16
17
18
19
20
21
22
23
24
25
26
27
28
29
30
31
32
33
34
35
36
37
38
39
40
41
42
43
44
45
46
47
48
49
50
51
52
53
54
55
56
57
58
59
60
61
62
63
64
65
66
67
68
import * as THREE from "three";
import gsap from "gsap";
import vertex from "@/shader/flyLine/vertex.glsl?raw";
import fragment from "@/shader/flyLine/fragment.glsl?raw";

export default class FlyLineShader {
constructor(basePosition={x:0,z:0},position = { x: 0, z: 0 }, color = 0x00ffff) {
// 1/根据点生成曲线
let linePoints = [
// new THREE.Vector3(0, 0, 11),
new THREE.Vector3(basePosition.x, basePosition.y, 11),
new THREE.Vector3(position.x / 2, position.y/2, position.z / 2),
new THREE.Vector3(position.x, position.y, 0),
];
// 创建曲线
this.lineCurve = new THREE.CatmullRomCurve3(linePoints);
const points = this.lineCurve.getPoints(1000);
// 2/创建几何顶点
this.geometry = new THREE.BufferGeometry().setFromPoints(points);

// 给每一个顶点设置属性
const aSizeArray = new Float32Array(points.length);
for (let i = 0; i < aSizeArray.length; i++) {
aSizeArray[i] = i;
}
// 设置几何体顶点属性
this.geometry.setAttribute(
"aSize",
new THREE.BufferAttribute(aSizeArray, 1)
);
// 3/设置着色器材质
this.shaderMaterial = new THREE.ShaderMaterial({
uniforms: {
uTime: {
value: 0,
},
uColor: {
value: new THREE.Color(color),
},
uLength: {
value: points.length,
},
},
vertexShader: vertex,
fragmentShader: fragment,
transparent: true,
depthWrite: false,
blending: THREE.AdditiveBlending,
});

this.mesh = new THREE.Points(this.geometry, this.shaderMaterial);

// 改变uTime来控制动画
gsap.to(this.shaderMaterial.uniforms.uTime, {
value: 1000,
duration: 2,
repeat: -1,
ease: "none",
});
}
remove() {
this.mesh.remove();
this.mesh.removeFromParent();
this.mesh.geometry.dispose();
this.mesh.material.dispose();
}
}

片元着色器

1
2
3
4
5
6
7
8
9
10
11
12
13
varying float vSize;
uniform vec3 uColor;
void main(){
float distanceToCenter = distance(gl_PointCoord,vec2(0.5,0.5));
float strength = 1.0 - (distanceToCenter*2.0);

if(vSize<=0.0){
gl_FragColor = vec4(1,0,0,0);
}else{
gl_FragColor = vec4(uColor,strength);
}

}

顶点着色器

1
2
3
4
5
6
7
8
9
10
11
12
13
14
15
16
17
18

uniform float uTime;
uniform vec3 uColor;
uniform float uLength;
attribute float aSize;
varying float vSize;

void main(){
vec4 viewPosition = viewMatrix * modelMatrix *vec4(position,1);
gl_Position = projectionMatrix * viewPosition;
vSize = (aSize-uTime);
if(vSize<0.0){
vSize = vSize + uLength;
}
vSize = (vSize-400.0)*0.9;

gl_PointSize = -vSize/viewPosition.z;
}

这里的着色器也欢迎大家去考古我之前的vue-智慧城市文章,那里有比较详细的解释。

这样如同banner图的效果就实现了
效果图

tween效果展示员工信息

然后我根据threejs官网的tween效果实现了自己的效果展示
官网效果 https://threejs.org/examples/?q=CSS3D#css3d_periodictable

实现不同图片进行官网动画的分布

我们先拉threejs代码,这个在第一篇可视化学习的内容中就说过了,如何找到我们想要案例的代码,这里就不过多介绍了。
然后我去了网站上随便找了一些明星的图片,因为我的方案被主管pass掉了,所以我并没有我们企业员工个人的照片。

基本框架代码

1
2
3
4
5
6
7
8
9
10
11
12
13
14
15
16
17
18
19
20
21
22
23
24
25
26
27
28
29
30
31
32
33
34
35
36
37
38
39
40
41
42
43
44
45
46
47
48
49
50
51
52
53
54
55
56
57
58
59
60
61
62
63
64
65
66
67
68
69
70
71
72
73
74
75
76
77
78
79
80
81
82
83
84
85
86
87
88
89
90
91
92
93
94
95
96
97
98
99
100
101
102
103
104
105
106
107
108
109
110
111
112
113
114
115
116
117
118
119
120
121
122
123
124
125
126
127
128
129
130
131
132
133
134
135
136
137
138
<template>
<div class="show-scene" ref="showSceneDiv"></div>

<div id="bigScreen">
<div id="menu">
<button id="table" @click="transform(targets.table, 2000)">
表格展示
</button>
<button id="sphere" @click="transform(targets.sphere, 2000)">
球体展示
</button>
<button id="helix" @click="transform(targets.helix, 2000)">
螺旋展示
</button>
<button id="grid" @click="transform(targets.grid, 2000)">纵列展示</button>
</div>
</div>
</template>
<script setup>
import * as THREE from "three";
import { onMounted, reactive, ref } from "vue";
import { OrbitControls } from "three/examples/jsm/controls/OrbitControls";
import TWEEN from "three/addons/libs/tween.module.js";

const showSceneDiv = ref(null);
const targets = reactive({ table: [], sphere: [], helix: [], grid: [] });
const objects = [];

let camera, scene, renderer, controls;

onMounted(() => {
init();
animate();
});

</script>
<style>
#bigScreen {
width: 100vw;
height: 100vh;
position: fixed;
z-index: 100;

left: 0;
top: 0;
pointer-events: none;
display: flex;
flex-direction: column;
}
.show-scene {
width: 100vw;
height: 100vh;
position: fixed;
z-index: 100;
left: 0;
top: 0;
}
a {
color: #8ff;
}

#menu {
position: fixed;
bottom: 20px;
width: 100%;
text-align: center;
pointer-events: none;
}

button {
color: rgba(127, 255, 255, 0.75);
background: transparent;
outline: 1px solid rgba(127, 255, 255, 0.75);
border: 0px;
padding: 5px 10px;
cursor: pointer;
pointer-events: auto;
}

button:hover {
background-color: rgba(0, 255, 255, 0.5);
}

button:active {
color: #000000;
background-color: rgba(0, 255, 255, 0.75);
}

.member-info{
height: 100vh;
}

.cityEvent {
position: relative;
width: 4rem;
/* height: 3rem; */
background-image: url(@/assets/bg/bg_img03.png);
background-repeat: no-repeat;
background-size: 4rem;
cursor: pointer;
pointer-events: auto;
height:100vh;
}

.cityEvent::before {
width: 0.4rem;
height: 0.4rem;
position: absolute;
left: 0;
top: 0;
border-top: 4px solid rgb(34, 133, 247);
border-left: 4px solid rgb(34, 133, 247);
content: "";
display: block;
}

.cityEvent::after {
width: 0.4rem;
height: 0.4rem;
position: absolute;
right: 0;
top: 0;
border-top: 4px solid rgb(34, 133, 247);
border-right: 4px solid rgb(34, 133, 247);
content: "";
display: block;
}

h1 {
color: red;
display: flex;
font-weight:800;
align-items: center;
padding: 0 0.3rem 0.3rem;
justify-content: flex-start;
font-size: 0.3rem;
}
</style>

初始化函数

这里我还是使用了之前的贴图,我本来是想根据code,就是我前面路由传过来的值进行不同地点人员判断的,现在就这样烂尾好了,我练手的需求已经完成了,后续这种完善看心情吧,比如代码冗余也是如此,不是我不知道有些代码写得很没用,只是我懒得搞,我对于自己玩的代码真没啥代码洁癖,如果是干的活那就不太一样了。

1
2
3
4
5
6
7
8
9
10
11
12
13
14
15
16
17
18
19
20
21
22
23
24
25
26
27
28
29
30
31
32
33
34
35
36
37
38
39
40
41
42
43
44
45
46
47
48
49
50
51
52
53
54
55
56
57
58
59
60
61
function init() {
camera = new THREE.PerspectiveCamera(
40,
window.innerWidth / window.innerHeight,
1,
100000
);
camera.position.z = 3000;

scene = new THREE.Scene();
// 场景天空盒
const textureCubeLoader = new THREE.CubeTextureLoader().setPath(
"./textures/"
);
const textureCube = textureCubeLoader.load([
"px.png",
"nx.png",
"py.png",
"ny.png",
"pz.png",
"nz.png",
]);

scene.background = textureCube;
scene.environment = textureCube;

// 生成补间动画
gennerateTween();

// 渲染器
renderer = new THREE.WebGLRenderer();
renderer.setPixelRatio(window.devicePixelRatio);
renderer.setSize(window.innerWidth, window.innerHeight);
showSceneDiv.value.appendChild(renderer.domElement);

// 控制器
controls = new OrbitControls(camera, renderer.domElement);
controls.minDistance = 50;
controls.maxDistance = 60000;
// controls.minDistance = 5;
// controls.maxDistance = 100;
window.addEventListener("resize", onWindowResize);
}
// 监听窗口变化
function onWindowResize() {
camera.aspect = window.innerWidth / window.innerHeight;
camera.updateProjectionMatrix();
renderer.setSize(window.innerWidth, window.innerHeight);
}

// 动画帧
function animate() {
requestAnimationFrame(animate);
TWEEN.update();
controls.update();
render();
}
// 渲染器渲染
function render() {
renderer.render(scene, camera);
}

补间动画

基本逻辑还是和官网的效果是一样的

执行补间动画
1
2
3
4
5
6
7
8
9
10
11
12
13
14
15
16
17
18
19
20
21
22
23
24
25
26
27
28
29
30
// 执行补间动画变化
function transform(targets, duration) {
TWEEN.removeAll();

for (let i = 0; i < objects.length; i++) {
const object = objects[i];
const target = targets[i];

new TWEEN.Tween(object.position)
.to(
{ x: target.position.x, y: target.position.y, z: target.position.z },
Math.random() * duration + duration
)
.easing(TWEEN.Easing.Exponential.InOut)
.start();

new TWEEN.Tween(object.rotation)
.to(
{ x: target.rotation.x, y: target.rotation.y, z: target.rotation.z },
Math.random() * duration + duration
)
.easing(TWEEN.Easing.Exponential.InOut)
.start();
}

new TWEEN.Tween(this)
.to({}, duration * 2)
.onUpdate(render)
.start();
}
生成补间动画

我这里有一些图片,等所有图片加载完毕之后,我用了循环100次随机生成员工的图片展示。

1
2
3
4
5
6
7
8
9
10
11
12
13
14
15
16
17
18
19
20
21
22
23
24
25
26
27
28
29
30
31
32
33
34
35
36
37
38
39
40
41
42
43
44
45
46
47
48
49
50
51
52
53
54
55
56
57
58
59
60
61
62
63
64
65
66
67
const gennerateTween = () => {
const group = new THREE.Group();
const textureLoader = new THREE.TextureLoader().setPath("./textures/staff/");
const imgUrls = [];
for (let i = 1; i <= 18; i++) {
imgUrls.push(`${i}.jpg`);
}
const materials = [];
imgUrls.forEach((url) => {
const texture = textureLoader.load(url);
materials.push(
new THREE.SpriteMaterial({ map: texture, transparent: false })
);
if (imgUrls.length === materials.length) {
// 生成成员的个数
const l = 100;
// 生成随机贴图位置的点
for (let i = 0; i < l; i++) {
const random=getRandomInteger(0, materials.length - 1)
const material = materials[random];
const sprite = new THREE.Sprite(material);
sprite.position.x = Math.random() * 4000 - 2000;
sprite.position.y = Math.random() * 4000 - 2000;
sprite.position.z = Math.random() * 4000 - 2000;
sprite.scale.x = 200;
sprite.scale.y = 250;
group.add(sprite);
// table的位置
const sprite1 = new THREE.Sprite(material);
// 每10个一行
const length = Math.floor(i / 10) + 1;
const length2 = (i % 10) + 1;
sprite1.position.x = [length2] * 250 - 1530;
sprite1.position.y = -[length] * 250 + 1300;
sprite1.position.z = -1500;
targets.table.push(sprite1);
// 球
const vector = new THREE.Vector3();
const phi = Math.acos(-1 + (2 * i) / l);
const theta = Math.sqrt(l * Math.PI) * phi;
const object = new THREE.Object3D();
object.position.setFromSphericalCoords(1500, phi, theta);
vector.copy(object.position).multiplyScalar(2);
object.lookAt(vector);
targets.sphere.push(object);
// 复制table的x,y的值,纵向观察
const object1 = new THREE.Object3D();
object1.position.x = sprite1.position.x;
object1.position.y = sprite1.position.y;
object1.position.z = Math.floor(i / 10) * 400 - 5500;
targets.grid.push(object1);
object1.lookAt(vector);
// helix
const theta1 = i * 0.175 + Math.PI;
const y = -(i * 8) + 450;
const object2 = new THREE.Object3D();
object2.position.setFromCylindricalCoords(900, theta1, y);
vector.x = object.position.x * 2;
vector.y = object.position.y;
vector.z = object.position.z * 2 - 500;
object2.lookAt(vector);
targets.helix.push(object2);
}
scene.add(group);
}
});
};

这样补间动画就完成了

添加点击图片展示员工信息

最后给加上点击事件即可,这里样式丑了点,大家明白我就是意思一下就行
我这里定义了一个curMemberInfo的对象,在生成员工图片的时候,我顺便生成了随机的其他信息,并且添加到了这个参数里面,然后通过点击事件的检测,来进行判断

1
2
3
4
5
6
7
8
9
10
11
12
13
14
15
16
17
18
19
20
21
22
23
24
25
26
27
28
29
30
31
32
33
34
35
36
37
38
39
40
41
42
43
44
45
46
47
48
49
50
51
52
53
54
55
56
57
58
59
60
61
62
63
64
65
66
67
68
69
70
71
72
73
74
75
76
77
78
79
80
81
82
83
84
85
86
87
88
89
90
91
92
93
94
95
96
97
98
99
100
101
102
103
104
105
106
107
108
109
110
111
112
113
114
115
116
117
118
119
120
121
122
123
124
125
126
127
128
129
130
131
132
133
134
135
136
137
138
139
140
141
142
143
144
145
146
147
148
149
150
151
152
153
154
155
156
157
158
159
160
161
162
163
164
165
166
167
168
169
170
171
172
173
174
175
176
177
178
179
180
181
182
183
184
185
186
187
188
189
190
191
192
193
194
195
196
197
198
199
200
201
202
203
204
205
206
207
208
209
210
211
212
213
214
215
216
217
218
219
220
221
222
223
224
225
226
227
228
229
230
231
232
233
234
235
236
237
238
239
240
241
242
243
244
245
246
247
248
249
250
251
252
253
254
255
256
257
258
259
260
261
262
263
264
265
266
267
268
269
270
271
272
273
274
275
276
277
278
279
280
281
282
283
284
285
286
287
288
289
290
291
292
293
294
295
296
297
298
299
300
301
302
303
304
305
306
307
308
309
310
311
312
313
314
315
316
317
318
319
320
321
322
323
324
325
326
327
328
329
330
331
332
333
334
335
336
337
338
339
340
341
342
343
344
345
346
347
348
349
350
351
352
353
354
355
356
357
358
359
360
361
362
<template>
<div class="show-scene" ref="showSceneDiv"></div>

<div id="bigScreen">
<div class="member-info" v-if="curMemberInfo.name">
<div class="cityEvent" :style="{
backgroundImage: `url(${curMemberInfo.img})`
}">

<h1 style='padding-top:0.5rem'>姓名:<span>{{ curMemberInfo.name }}</span></h1>
<h1>年龄:<span>{{curMemberInfo.age}}(岁)</span></h1>
<h1>岗位:<span>{{curMemberInfo.work}}</span></h1>
</div>
</div>
<div id="menu">
<button id="table" @click="transform(targets.table, 2000)">
表格展示
</button>
<button id="sphere" @click="transform(targets.sphere, 2000)">
球体展示
</button>
<button id="helix" @click="transform(targets.helix, 2000)">
螺旋展示
</button>
<button id="grid" @click="transform(targets.grid, 2000)">纵列展示</button>
</div>
</div>
</template>

<script setup>
import * as THREE from "three";
import { onMounted, reactive, ref } from "vue";
import { OrbitControls } from "three/examples/jsm/controls/OrbitControls";
import TWEEN from "three/addons/libs/tween.module.js";

const showSceneDiv = ref(null);
const targets = reactive({ table: [], sphere: [], helix: [], grid: [] });
const objects = [];

let camera, scene, renderer, controls;

onMounted(() => {
init();
animate();
});

const curMemberInfo = ref({
name: "",
age: 0,
work: "",
img: "",
});

function init() {
camera = new THREE.PerspectiveCamera(
40,
window.innerWidth / window.innerHeight,
1,
100000
);
camera.position.z = 3000;

scene = new THREE.Scene();
// 场景天空盒
const textureCubeLoader = new THREE.CubeTextureLoader().setPath(
"./textures/"
);
const textureCube = textureCubeLoader.load([
"px.png",
"nx.png",
"py.png",
"ny.png",
"pz.png",
"nz.png",
]);

scene.background = textureCube;
scene.environment = textureCube;

// 生成补间动画
gennerateTween();

// 渲染器
renderer = new THREE.WebGLRenderer();
renderer.setPixelRatio(window.devicePixelRatio);
renderer.setSize(window.innerWidth, window.innerHeight);
showSceneDiv.value.appendChild(renderer.domElement);

// 控制器
controls = new OrbitControls(camera, renderer.domElement);
controls.minDistance = 50;
controls.maxDistance = 60000;
// controls.minDistance = 5;
// controls.maxDistance = 100;
window.addEventListener("resize", onWindowResize);
// 触发第一个table动画
// transform(targets.table, 2000);
}

function getRandomInteger(min, max) {
return Math.floor(Math.random() * (max - min + 1)) + min;
}

const gennerateTween = () => {
const group = new THREE.Group();
const textureLoader = new THREE.TextureLoader().setPath("./textures/staff/");
const imgUrls = [];
for (let i = 1; i <= 18; i++) {
imgUrls.push(`${i}.jpg`);
}
const materials = [];
imgUrls.forEach((url) => {
const texture = textureLoader.load(url);
materials.push(
new THREE.SpriteMaterial({ map: texture, transparent: false })
);
if (imgUrls.length === materials.length) {
// 生成成员的个数
const l = 100;
// 生成随机贴图位置的点
for (let i = 0; i < l; i++) {
const random=getRandomInteger(0, materials.length - 1)
const material = materials[random];
const sprite = new THREE.Sprite(material);
sprite.position.x = Math.random() * 4000 - 2000;
sprite.position.y = Math.random() * 4000 - 2000;
sprite.position.z = Math.random() * 4000 - 2000;
sprite.scale.x = 200;
sprite.scale.y = 250;
const randomWork = [
"前端",
"后端",
"输单(只打一遍)",
"输单(打两遍第一遍)",
"审单",
];
sprite.freeObject = {
name: `${i}号员工`,
age: getRandomInteger(20,30),
work: randomWork[Math.floor(Math.random() * 5)],
img: `./textures/staff/${imgUrls[random]}`,
};
objects.push(sprite);
// 创建射线
const raycaster = new THREE.Raycaster();
const mouse = new THREE.Vector2();
// 事件的监听
window.addEventListener("click", (event) => {
mouse.x = (event.clientX / window.innerWidth) * 2 - 1;
mouse.y = -((event.clientY / window.innerHeight) * 2 - 1);

raycaster.setFromCamera(mouse, camera);

event.mesh = sprite;

const intersects = raycaster.intersectObject(sprite);
if (intersects.length > 0) {
curMemberInfo.value = intersects[0].object.freeObject;
// console.log("点击了",intersects[0]);
}
});
group.add(sprite);
// table的位置
const sprite1 = new THREE.Sprite(material);
// 每10个一行
const length = Math.floor(i / 10) + 1;
const length2 = (i % 10) + 1;
sprite1.position.x = [length2] * 250 - 1530;
sprite1.position.y = -[length] * 250 + 1300;
sprite1.position.z = -1500;
targets.table.push(sprite1);
// 球
const vector = new THREE.Vector3();
const phi = Math.acos(-1 + (2 * i) / l);
const theta = Math.sqrt(l * Math.PI) * phi;
const object = new THREE.Object3D();
object.position.setFromSphericalCoords(1500, phi, theta);
vector.copy(object.position).multiplyScalar(2);
object.lookAt(vector);
targets.sphere.push(object);
// 复制table的x,y的值,纵向观察
const object1 = new THREE.Object3D();
object1.position.x = sprite1.position.x;
object1.position.y = sprite1.position.y;
object1.position.z = Math.floor(i / 10) * 400 - 5500;
targets.grid.push(object1);
object1.lookAt(vector);
// helix
const theta1 = i * 0.175 + Math.PI;
const y = -(i * 8) + 450;
const object2 = new THREE.Object3D();
object2.position.setFromCylindricalCoords(900, theta1, y);
vector.x = object.position.x * 2;
vector.y = object.position.y;
vector.z = object.position.z * 2 - 500;
object2.lookAt(vector);
targets.helix.push(object2);
}
scene.add(group);
}
});
};
// 执行补间动画变化
function transform(targets, duration) {
curMemberInfo.value = {
name: "",
age: 0,
work: "",
img: "",
};
TWEEN.removeAll();

for (let i = 0; i < objects.length; i++) {
const object = objects[i];
const target = targets[i];

new TWEEN.Tween(object.position)
.to(
{ x: target.position.x, y: target.position.y, z: target.position.z },
Math.random() * duration + duration
)
.easing(TWEEN.Easing.Exponential.InOut)
.start();

new TWEEN.Tween(object.rotation)
.to(
{ x: target.rotation.x, y: target.rotation.y, z: target.rotation.z },
Math.random() * duration + duration
)
.easing(TWEEN.Easing.Exponential.InOut)
.start();
}

new TWEEN.Tween(this)
.to({}, duration * 2)
.onUpdate(render)
.start();
}

// 监听窗口变化
function onWindowResize() {
camera.aspect = window.innerWidth / window.innerHeight;
camera.updateProjectionMatrix();
renderer.setSize(window.innerWidth, window.innerHeight);
}

// 动画帧
function animate() {
requestAnimationFrame(animate);
TWEEN.update();
controls.update();
render();
}
// 渲染器渲染
function render() {
renderer.render(scene, camera);
}
</script>

<style>
#bigScreen {
width: 100vw;
height: 100vh;
position: fixed;
z-index: 100;

left: 0;
top: 0;
pointer-events: none;
display: flex;
flex-direction: column;
}
.show-scene {
width: 100vw;
height: 100vh;
position: fixed;
z-index: 100;
left: 0;
top: 0;
}
a {
color: #8ff;
}

#menu {
position: fixed;
bottom: 20px;
width: 100%;
text-align: center;
pointer-events: none;
}

button {
color: rgba(127, 255, 255, 0.75);
background: transparent;
outline: 1px solid rgba(127, 255, 255, 0.75);
border: 0px;
padding: 5px 10px;
cursor: pointer;
pointer-events: auto;
}

button:hover {
background-color: rgba(0, 255, 255, 0.5);
}

button:active {
color: #000000;
background-color: rgba(0, 255, 255, 0.75);
}

.member-info{
height: 100vh;
}

.cityEvent {
position: relative;
width: 4rem;
/* height: 3rem; */
background-image: url(@/assets/bg/bg_img03.png);
background-repeat: no-repeat;
background-size: 4rem;
cursor: pointer;
pointer-events: auto;
height:100vh;
}

.cityEvent::before {
width: 0.4rem;
height: 0.4rem;
position: absolute;
left: 0;
top: 0;
border-top: 4px solid rgb(34, 133, 247);
border-left: 4px solid rgb(34, 133, 247);
content: "";
display: block;
}

.cityEvent::after {
width: 0.4rem;
height: 0.4rem;
position: absolute;
right: 0;
top: 0;
border-top: 4px solid rgb(34, 133, 247);
border-right: 4px solid rgb(34, 133, 247);
content: "";
display: block;
}

h1 {
color: red;
display: flex;
font-weight:800;
align-items: center;
padding: 0 0.3rem 0.3rem;
justify-content: flex-start;
font-size: 0.3rem;
}
</style>

最终效果如下

结语

本篇文章就到这里了,我将我的这份源代码放在了我的gitee上面,大家如果有需要,可以自己去找一下。债见~

上一篇:
【可视化学习】75-从入门到放弃WebGL(十一)
下一篇:
观前提示