【可视化学习】77-三维机房
发表于:2024-07-24 |

前言

本篇给大家带来一个简单的三维机房案例,没啥新的内容,就是和大家分享一下而已。

创建项目

这里我使用vue3来进行这个项目的操作,使用vite创建项目,步骤我就省略了,相信大家已经轻车熟路了。

初始化加载模型

我将导出的gltf文件的内容都放在了public的models文件下面
目录结构如下:
效果图

初始化代码

初始化CSS

css代码简单写一下就行,直接把canvas设置成100vw和100vh

1
2
3
4
5
6
7
8
9
10
11
*{
margin: 0;
padding: 0;
}

canvas{
display: block;
position: fixed;
width: 100vw;
height: 100vh;
}

初始化模型

1
2
3
4
5
6
7
8
9
10
11
12
13
14
15
16
17
18
19
20
21
22
23
24
25
26
27
28
29
30
31
32
33
34
35
36
37
38
39
40
41
42
43
44
45
46
47
48
49
50
51
52
53
54
55
56
57
58
59
60
61
62
63
64
65
66
67
68
69
70
71
72
73
74
75
76
77
78
79
80
81
82
83
<template>
<canvas ref="canvasRef"></canvas>
</template>
<script setup>
import * as THREE from "three";
import { onMounted, ref } from "vue";
import { OrbitControls } from "three/examples/jsm/controls/OrbitControls";
import { GLTFLoader } from "three/examples/jsm/loaders/GLTFLoader";

const canvasRef = ref(null);

onMounted(() => {
// 1.创建场景
const scene = new THREE.Scene({
antialias: true,
});

// 2.创建相机
const camera = new THREE.PerspectiveCamera(
45,
window.innerWidth / window.innerHeight,
0.1,
1000
);

// 设置相机位置
camera.position.set(0, 10, 15);
// 相机看向
camera.lookAt(0, 0, 0);

// 添加相机
scene.add(camera);

// 3.初始化渲染器
const renderer = new THREE.WebGLRenderer({
canvas: canvasRef.value,
});

//设置渲染的尺寸大小
renderer.setSize(window.innerWidth, window.innerHeight);

// 4.将webgl渲染的canvas内容添加到body上
document.body.appendChild(renderer.domElement);

// 5.创建轨道控制器
const controls = new OrbitControls(camera, renderer.domElement);
controls.enableDamping = true;

// 6.持续渲染,让相机场景动起来
function render() {
controls.update()
// 使用渲染器通过相机将场景渲染进来
renderer.render(scene, camera);
// 渲染下一帧的时候就会调用render函数
requestAnimationFrame(render);
}

render();

// 7.监听画面的变化,更新渲染的画面
window.addEventListener("resize", () => {
// 更新摄像头
camera.aspect = window.innerWidth / window.innerHeight;
// 更新摄像机的投影矩阵
camera.updateProjectionMatrix();
// 更新渲染器
renderer.setSize(window.innerWidth, window.innerHeight);

// 设置渲染器的像素比
renderer.setPixelRatio(window.devicePixelRatio);
});

// 8.加载模型
const loader = new GLTFLoader();
loader.load(
"models/machineRoom.gltf",
(gltf) => {
scene.add(gltf.scene);
}
);
});
</script>

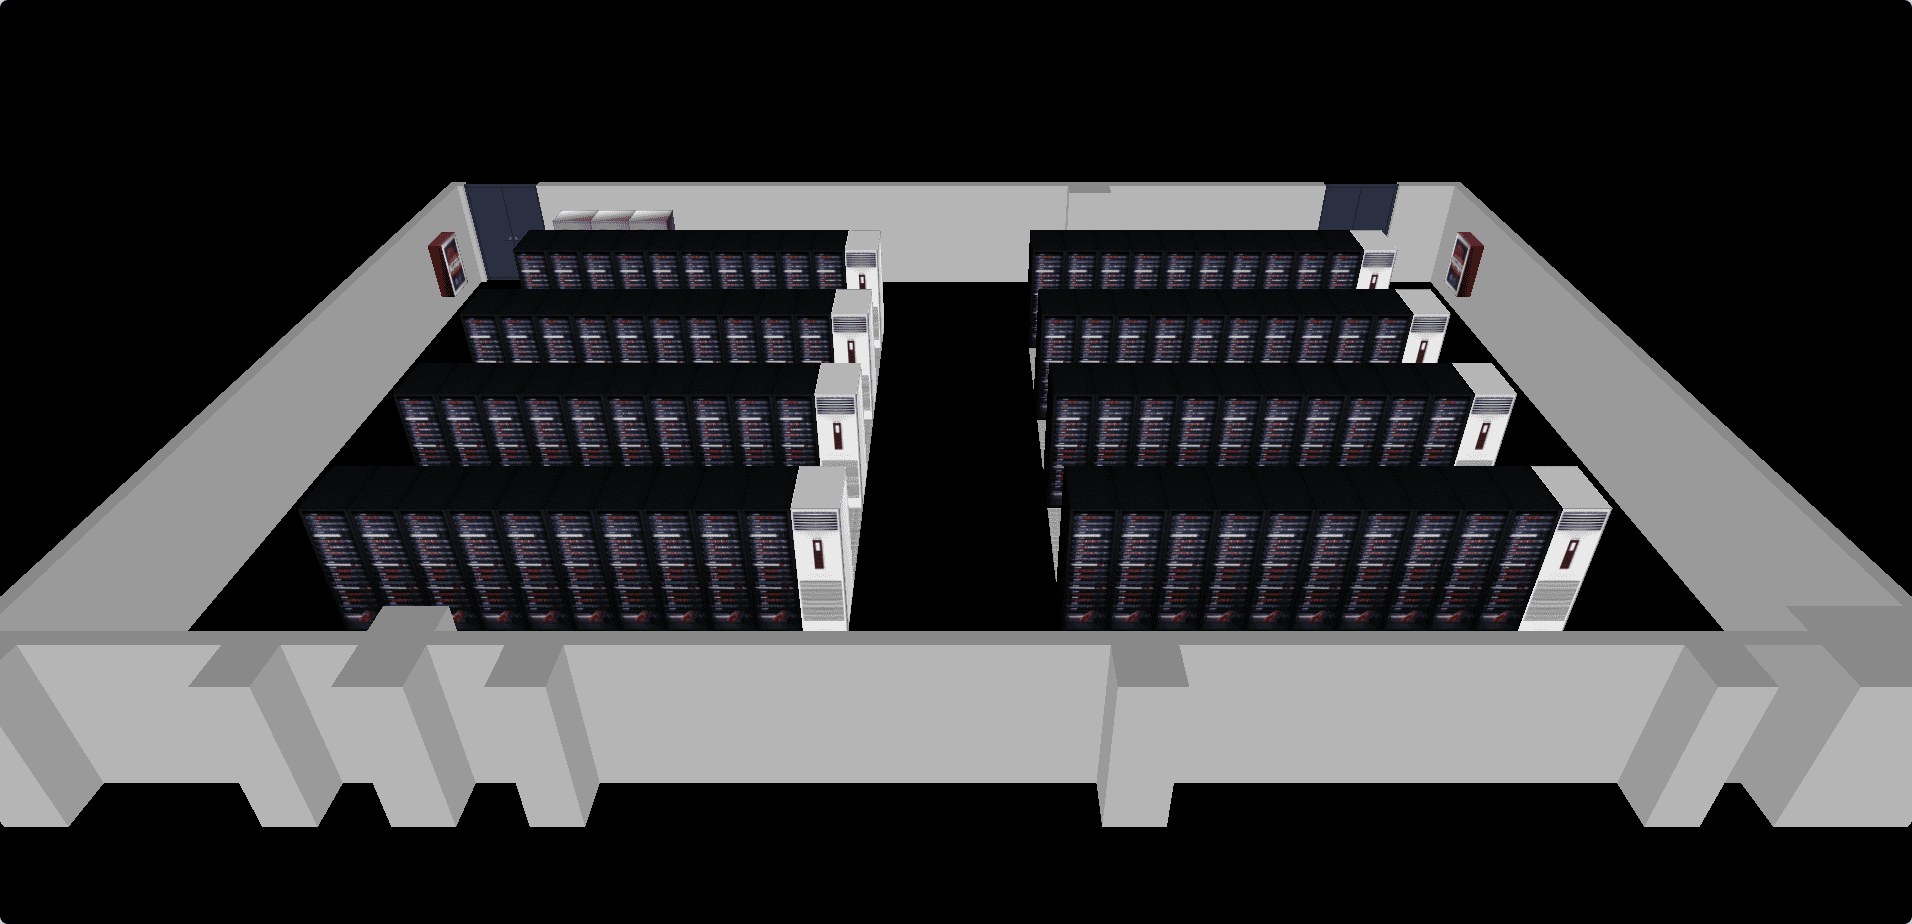
然后根据我们之前学过的代码,直接加载模型
效果图

模型颜色问题

我们可以看到,模型的颜色非常的暗:
分析一下children里的Mesh 对象,可以发现:所有Mesh对象的material材质都是MeshStandardMaterial 类型。

再分析一下material 中的map 贴图,可以发现其map贴图为 Texture 对象,其具备以下重要信息:

name 是贴图图片的名称。
flipY为false,即不对图像的y轴做翻转。
image图像源是ImageBitmap 类型。
wrapS 纹理横向重复,即THREE.RepeatWrapping。
wrapT 纹理纵向重复,即THREE.RepeatWrapping。
注:THREE.RepeatWrapping=1000

在此,我们要知道以下threejs 知识:

MeshStandardMaterial 材质会感光,这不是我们所需要的,我们不需要打光,需要将其材质换成MeshBasicMaterial。
ImageBitmap 的图像类型是渲染效果变黑的关键原因,因此需要将其换成Image() 对象。
接下来咱们就给模型换一个材质和图像源。

1
2
3
4
5
6
7
8
9
10
11
12
13
14
15
16
17
18
19
20
21
22
23
24
25
26
27
28
29
30
31
32
33
34
// 纹理集合
let maps = new Map();
// 修改材质和图像源
function crtTexture(imgName) {
let curTexture = maps.get(imgName);
if (!curTexture) {
curTexture = new THREE.TextureLoader().load("models/" + imgName);
curTexture.flipY = false;
curTexture.wrapS = 1000;
curTexture.wrapT = 1000;
maps.set(imgName, curTexture);
}
return curTexture;
}

function changeMat(obj, map, color) {
if (map) {
obj.material = new THREE.MeshBasicMaterial({
map: crtTexture(map.name),
});
} else {
obj.material = new THREE.MeshBasicMaterial({ color });
}
}

// 8.加载模型
const loader = new GLTFLoader();
loader.load("models/machineRoom.gltf", ({ scene: { children } }) => {
children.forEach((obj) => {
const { map, color } = obj.material;
changeMat(obj, map, color);
});
scene.add(...children);
});

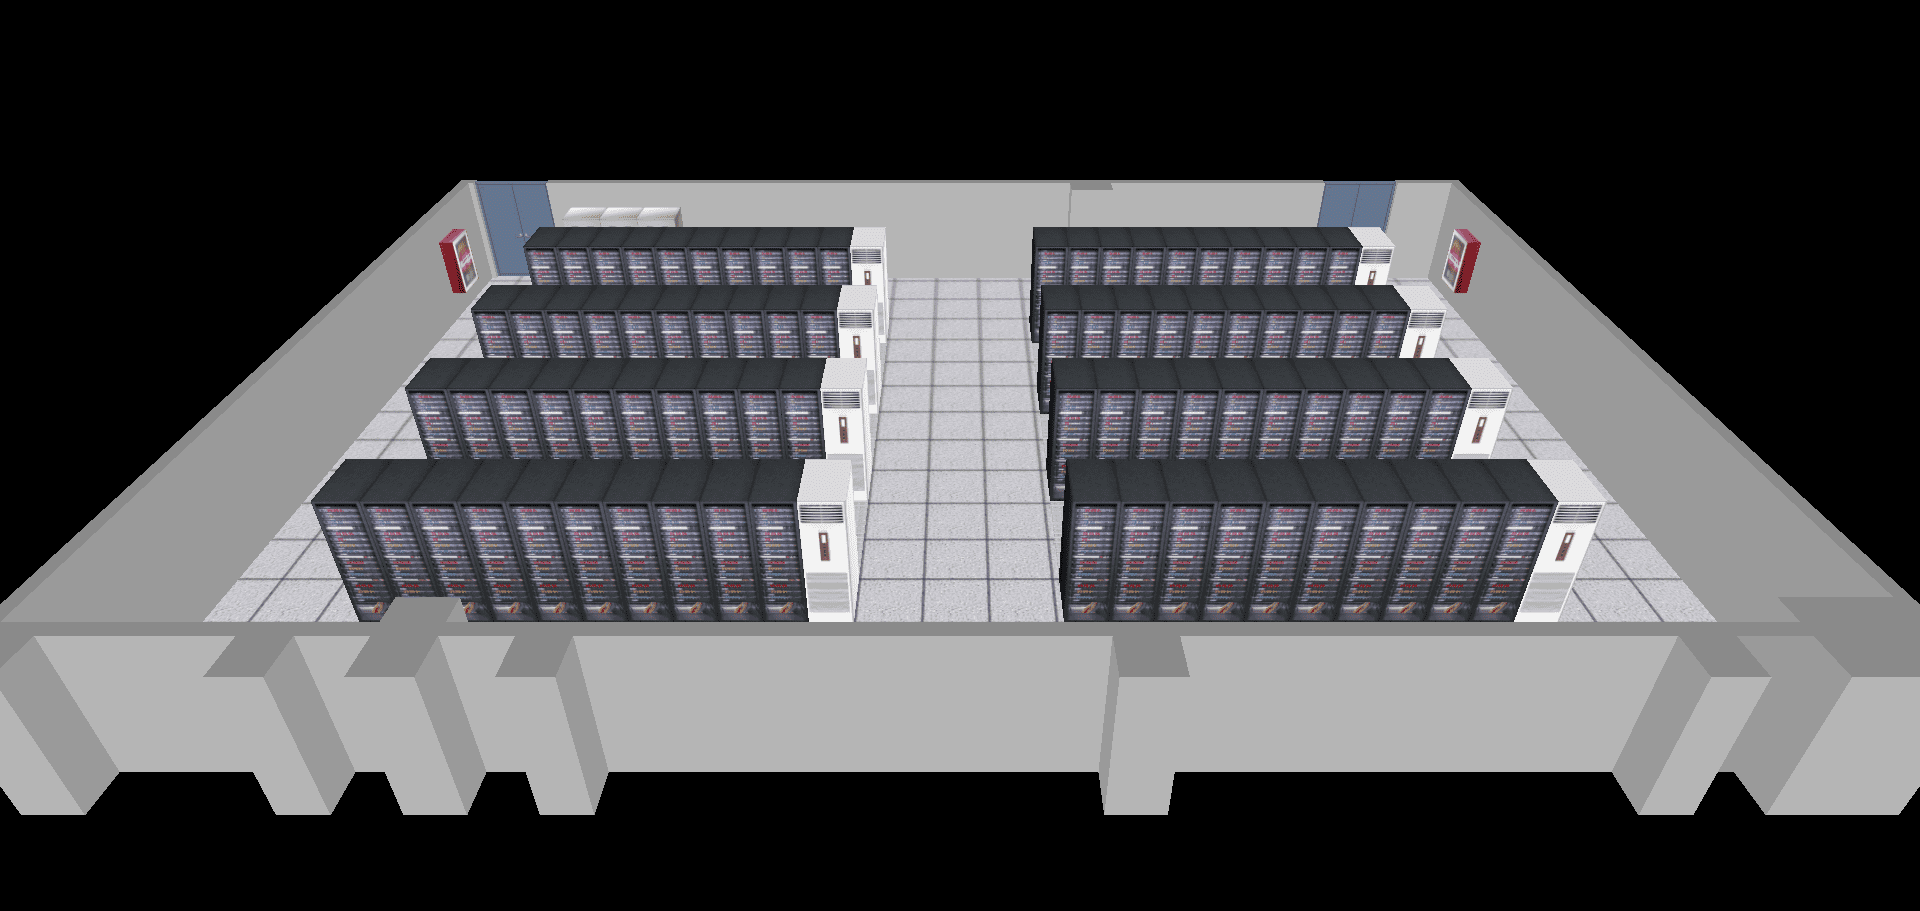
效果图

此时我们的加载的模型就会变得比较亮了,是原来模型的颜色。

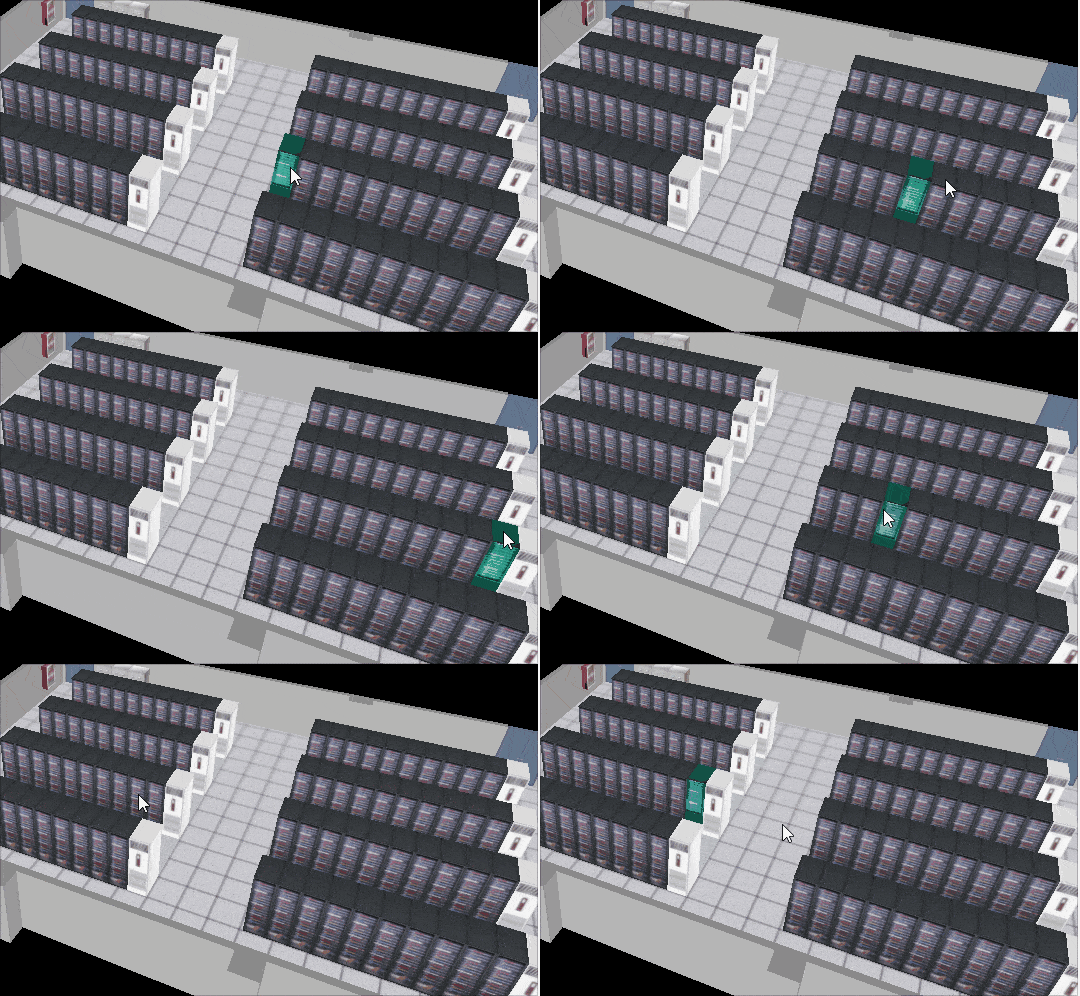
机柜选择贴图切换

接下来添加一个机柜被选中,贴图进行切换的效果

1
2
3
4
5
6
7
8
9
10
11
12
13
14
15
16
17
18
19
20
21
22
23
24
25
26
27
28
29
30
31
32
33
34
35
36
37
38
39
40
41
42
43
44
45
46
47
48
49
50
51
52
53
54
55
56
57
58
59
60
61
62
63
64
65
66
67
68
69
70
71
72
73
74
75
76
77
78
// 纹理集合
let maps = new Map();
// 机柜集合
let cabinets = [];
// 当前机柜
let curCabinet = null;

// 8.加载模型
const loader = new GLTFLoader();
loader.load("models/machineRoom.gltf", ({ scene: { children } }) => {
children.forEach((obj) => {
const { map, color } = obj.material;
changeMat(obj, map, color);
if (obj.name.includes("cabinet")) {
cabinets.push(obj);
}
});
// 添加贴图
crtTexture("cabinet-hover.jpg");
scene.add(...children);
// 监听mousemove效果
canvasRef.value.addEventListener("mousemove", (e) => {
selectCabinet(e.clientX, e.clientY);
});
});
//鼠标划入机柜事件,参数为机柜对象
function onMouseMoveCabinet() {}
//鼠标划入机柜事件,参数为机柜对象
function onMouseOverCabinet(cabinet) {}
//鼠标划出机柜的事件
function onMouseOutCabinet() {}
//射线投射器,可基于鼠标点和相机,在世界坐标系内建立一条射线,用于选中模型
const raycaster = new THREE.Raycaster();
//鼠标在裁剪空间中的点位
const pointer = new THREE.Vector2();
// 选择机柜
function selectCabinet(x: number, y: number) {
const { width, height } = renderer.domElement;
// 鼠标的canvas坐标转裁剪坐标
pointer.set((x / width) * 2 - 1, -(y / height) * 2 + 1);
// 基于鼠标点的裁剪坐标位和相机设置射线投射器
raycaster.setFromCamera(pointer, camera);
// 选择机柜
const intersect = raycaster.intersectObjects(cabinets)[0];
let intersectObj = intersect ? intersect.object : null;
// 若之前已有机柜被选择,且不等于当前所选择的机柜,取消之前选择的机柜的高亮
if (curCabinet && curCabinet !== intersectObj) {
const material = curCabinet.material;
material.setValues({
map: maps.get("cabinet.jpg"),
});
}
/*
若当前所选对象不为空:
触发鼠标在机柜上移动的事件。
若当前所选对象不等于上一次所选对象:
更新curCabinet。
将模型高亮。
触发鼠标划入机柜事件。
否则若上一次所选对象存在:
置空curCabinet。
触发鼠标划出机柜事件。
*/
if (intersectObj) {
onMouseMoveCabinet(x, y);
if (intersectObj !== curCabinet) {
curCabinet = intersectObj;
const material = intersectObj.material;
material.setValues({
map: maps.get("cabinet-hover.jpg"),
});
onMouseOverCabinet(intersectObj);
}
} else if (curCabinet) {
curCabinet = null;
onMouseOutCabinet();
}
}

效果图

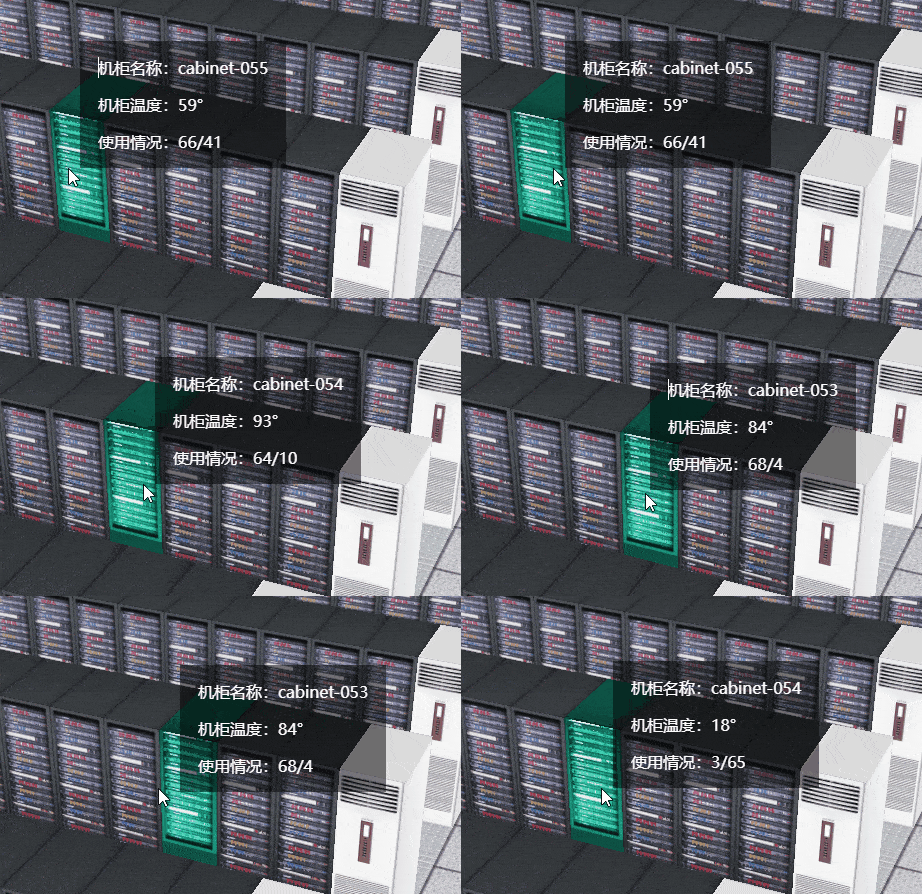
添加信息提示

修改HTML

1
2
3
4
5
6
7
8
<template>
<canvas ref="canvasRef"></canvas>
<div id="plane" :style="{display:planeDisplay,left:planePos.left,top:planePos.top}">
<p>机柜名称:{{ curShowCabinet.name }}</p>
<p>机柜温度:{{ curShowCabinet.temperature }}°</p>
<p>使用情况:{{ curShowCabinet.count }}/{{ curShowCabinet.capacity }}</p>
</div>
</template>

定义展示的参数

1
2
3
4
5
6
7
8
9
10
11
12
13
14
15
16
17
18
19
// 展示机柜信息
const curShowCabinet = reactive({
// 名称
name: "Loading……",
// 温度
temperature: 0,
// 容量
capacity: 0,
// 服务器数量
count: 0,
});

//信息面板的位置
const planePos = reactive({
left: 0,
top: 0,
});
// 信息面板的可见性
const planeDisplay = ref("none");

定义鼠标事件

getCabinetByName()方法是我定义的生成随机数据的方法

1
2
3
4
5
6
7
8
9
10
11
12
13
14
15
16
17
18
19
//鼠标划入机柜事件,参数为机柜对象
function onMouseMoveCabinet(left, top) {
planePos.left = left + "px";
planePos.top = top + "px";
planeDisplay.value = "block";
}
//鼠标划入机柜事件,参数为机柜对象
function onMouseOverCabinet(cabinet) {
getCabinetByName(cabinet.name).then((res) => {
curShowCabinet.name = res.name;
curShowCabinet.temperature = res.temperature;
curShowCabinet.capacity = res.capacity;
curShowCabinet.count = res.count;
});
}
//鼠标划出机柜的事件
function onMouseOutCabinet() {
planeDisplay.value = "none";
}

设置css样式

1
2
3
4
5
6
7
8
9
10
11
12
13
<style>
#plane {
position: absolute;
top: 200px;
left: 0;
background-color: rgba(0, 0, 0, 0.5);
color: #fff;
padding: 0 18px;
transform: translate(12px, -100%);
display: none;
z-index: 999;
}
</style>

完整代码

1
2
3
4
5
6
7
8
9
10
11
12
13
14
15
16
17
18
19
20
21
22
23
24
25
26
27
28
29
30
31
32
33
34
35
36
37
38
39
40
41
42
43
44
45
46
47
48
49
50
51
52
53
54
55
56
57
58
59
60
61
62
63
64
65
66
67
68
69
70
71
72
73
74
75
76
77
78
79
80
81
82
83
84
85
86
87
88
89
90
91
92
93
94
95
96
97
98
99
100
101
102
103
104
105
106
107
108
109
110
111
112
113
114
115
116
117
118
119
120
121
122
123
124
125
126
127
128
129
130
131
132
133
134
135
136
137
138
139
140
141
142
143
144
145
146
147
148
149
150
151
152
153
154
155
156
157
158
159
160
161
162
163
164
165
166
167
168
169
170
171
172
173
174
175
176
177
178
179
180
181
182
183
184
185
186
187
188
189
190
191
192
193
194
195
196
197
198
199
200
201
202
203
204
205
206
207
208
209
210
211
212
213
214
215
216
217
218
219
220
221
222
223
224
225
<template>
<canvas ref="canvasRef"></canvas>
<div id="plane" :style="{display:planeDisplay,left:planePos.left,top:planePos.top}">
<p>机柜名称:{{ curShowCabinet.name }}</p>
<p>机柜温度:{{ curShowCabinet.temperature }}°</p>
<p>使用情况:{{ curShowCabinet.count }}/{{ curShowCabinet.capacity }}</p>
</div>
</template>
<script setup lang="ts">
import * as THREE from "three";
import { onMounted, ref, reactive } from "vue";
import { OrbitControls } from "three/examples/jsm/controls/OrbitControls";
import { GLTFLoader } from "three/examples/jsm/loaders/GLTFLoader";
import {getCabinetByName} from "@/api/request"

const canvasRef = ref(null);

// 纹理集合
let maps = new Map();
// 机柜集合
let cabinets = [];
// 当前机柜
let curCabinet = null;
// 展示机柜信息
const curShowCabinet = reactive({
// 名称
name: "Loading……",
// 温度
temperature: 0,
// 容量
capacity: 0,
// 服务器数量
count: 0,
});

//信息面板的位置
const planePos = reactive({
left: 0,
top: 0,
});
// 信息面板的可见性
const planeDisplay = ref("none");

onMounted(() => {
// 1.创建场景
const scene = new THREE.Scene({
antialias: true,
});

// 2.创建相机
const camera = new THREE.PerspectiveCamera(
45,
window.innerWidth / window.innerHeight,
0.1,
1000
);

// 设置相机位置
camera.position.set(0, 10, 15);
// 相机看向
camera.lookAt(0, 0, 0);

// 添加相机
scene.add(camera);

// 3.初始化渲染器
const renderer = new THREE.WebGLRenderer({
canvas: canvasRef.value,
});

//设置渲染的尺寸大小
renderer.setSize(window.innerWidth, window.innerHeight);

// 4.将webgl渲染的canvas内容添加到app上
document.querySelector('#app').appendChild(renderer.domElement);

// 5.创建轨道控制器
const controls = new OrbitControls(camera, renderer.domElement);
controls.enableDamping = true;

// 6.持续渲染,让相机场景动起来
function render() {
controls.update();
// 使用渲染器通过相机将场景渲染进来
renderer.render(scene, camera);
// 渲染下一帧的时候就会调用render函数
requestAnimationFrame(render);
}

render();

// 7.监听画面的变化,更新渲染的画面
window.addEventListener("resize", () => {
// 更新摄像头
camera.aspect = window.innerWidth / window.innerHeight;
// 更新摄像机的投影矩阵
camera.updateProjectionMatrix();
// 更新渲染器
renderer.setSize(window.innerWidth, window.innerHeight);

// 设置渲染器的像素比
renderer.setPixelRatio(window.devicePixelRatio);
});

// 修改材质和图像源
function crtTexture(imgName) {
let curTexture = maps.get(imgName);
if (!curTexture) {
curTexture = new THREE.TextureLoader().load("models/" + imgName);
curTexture.flipY = false;
curTexture.wrapS = 1000;
curTexture.wrapT = 1000;
maps.set(imgName, curTexture);
}
return curTexture;
}

function changeMat(obj, map, color) {
if (map) {
obj.material = new THREE.MeshBasicMaterial({
map: crtTexture(map.name),
});
} else {
obj.material = new THREE.MeshBasicMaterial({ color });
}
}

// 8.加载模型
const loader = new GLTFLoader();
loader.load("models/machineRoom.gltf", ({ scene: { children } }) => {
children.forEach((obj) => {
const { map, color } = obj.material;
changeMat(obj, map, color);
if (obj.name.includes("cabinet")) {
cabinets.push(obj);
}
});
crtTexture("cabinet-hover.jpg");
scene.add(...children);
canvasRef.value.addEventListener("mousemove", (e) => {
selectCabinet(e.clientX, e.clientY);
});
});
//鼠标划入机柜事件,参数为机柜对象
function onMouseMoveCabinet(left, top) {
planePos.left = left + "px";
planePos.top = top + "px";
planeDisplay.value = "block";
}
//鼠标划入机柜事件,参数为机柜对象
function onMouseOverCabinet(cabinet) {
getCabinetByName(cabinet.name).then((res) => {
curShowCabinet.name = res.name;
curShowCabinet.temperature = res.temperature;
curShowCabinet.capacity = res.capacity;
curShowCabinet.count = res.count;
});
}
//鼠标划出机柜的事件
function onMouseOutCabinet() {
planeDisplay.value = "none";
}
//射线投射器,可基于鼠标点和相机,在世界坐标系内建立一条射线,用于选中模型
const raycaster = new THREE.Raycaster();
//鼠标在裁剪空间中的点位
const pointer = new THREE.Vector2();
// 选择机柜
function selectCabinet(x: number, y: number) {
const { width, height } = renderer.domElement;
// 鼠标的canvas坐标转裁剪坐标
pointer.set((x / width) * 2 - 1, -(y / height) * 2 + 1);
// 基于鼠标点的裁剪坐标位和相机设置射线投射器
raycaster.setFromCamera(pointer, camera);
// 选择机柜
const intersect = raycaster.intersectObjects(cabinets)[0];
let intersectObj = intersect ? intersect.object : null;
// 若之前已有机柜被选择,且不等于当前所选择的机柜,取消之前选择的机柜的高亮
if (curCabinet && curCabinet !== intersectObj) {
const material = curCabinet.material;
material.setValues({
map: maps.get("cabinet.jpg"),
});
}
/*
若当前所选对象不为空:
触发鼠标在机柜上移动的事件。
若当前所选对象不等于上一次所选对象:
更新curCabinet。
将模型高亮。
触发鼠标划入机柜事件。
否则若上一次所选对象存在:
置空curCabinet。
触发鼠标划出机柜事件。
*/
if (intersectObj) {
onMouseMoveCabinet(x, y);
if (intersectObj !== curCabinet) {
curCabinet = intersectObj;
const material = intersectObj.material;
material.setValues({
map: maps.get("cabinet-hover.jpg"),
});
onMouseOverCabinet(intersectObj);
}
} else if (curCabinet) {
curCabinet = null;
onMouseOutCabinet();
}
}
});
</script>
<style>
#plane {
position: absolute;
top: 200px;
left: 0;
background-color: rgba(0, 0, 0, 0.5);
color: #fff;
padding: 0 18px;
transform: translate(12px, -100%);
display: none;
z-index: 999;
}
</style>

效果图

封装整理代码

MachineRoom.ts

1
2
3
4
5
6
7
8
9
10
11
12
13
14
15
16
17
18
19
20
21
22
23
24
25
26
27
28
29
30
31
32
33
34
35
36
37
38
39
40
41
42
43
44
45
46
47
48
49
50
51
52
53
54
55
56
57
58
59
60
61
62
63
64
65
66
67
68
69
70
71
72
73
74
75
76
77
78
79
80
81
82
83
84
85
86
87
88
89
90
91
92
93
94
95
96
97
98
99
100
101
102
103
104
105
106
107
108
109
110
111
112
113
114
115
116
117
118
119
120
121
122
123
124
125
126
127
128
129
130
131
132
133
134
135
136
137
138
139
140
141
142
143
144
145
146
147
148
149
150
151
152
import { MeshBasicMaterial, MeshStandardMaterial, Mesh, PerspectiveCamera, Raycaster, Scene, Texture, TextureLoader, WebGLRenderer, Vector2, RepeatWrapping, Color } from "three";
import { OrbitControls } from "three/examples/jsm/controls/OrbitControls";
import { GLTFLoader } from "three/examples/jsm/loaders/GLTFLoader";

// GLTF 模型加载器
const gltfLoader = new GLTFLoader();
//射线投射器,可基于鼠标点和相机,在世界坐标系内建立一条射线,用于选中模型
const raycaster = new Raycaster();
//鼠标在裁剪空间中的点位
const pointer = new Vector2();

export default class MachineRoom {
// 渲染器
renderer: WebGLRenderer;
// 场景
scene: Scene;
// 相机
camera: PerspectiveCamera;
// 相机轨道控制器
controls: OrbitControls;
// 存放模型文件的目录
modelPath: string;
// 纹理集合
maps: Map<string, Texture> = new Map();
// 机柜集合
cabinets: Mesh[] = [];
// 鼠标划入的机柜
curCabinet: Mesh;
//鼠标划入机柜事件,参数为机柜对象
onMouseOverCabinet = (cabinet: Mesh) => {};
//鼠标在机柜上移动的事件,参数为鼠标在canvas画布上的坐标位
onMouseMoveCabinet = (x: number, y: number) => {};
//鼠标划出机柜的事件
onMouseOutCabinet = () => {};

// 初始化场景
constructor(canvas: HTMLCanvasElement, modelPath: string = "models/") {
this.renderer = new WebGLRenderer({ canvas });
this.scene = new Scene();
this.camera = new PerspectiveCamera(45, canvas.width / canvas.height, 0.1, 1000);
this.camera.position.set(0, 10, 15);
this.camera.lookAt(0, 0, 0);
this.controls = new OrbitControls(this.camera, this.renderer.domElement);
this.modelPath = modelPath;
this.crtTexture("cabinet-hover.jpg");
// 7.监听画面的变化,更新渲染的画面
window.addEventListener("resize", () => {
// 更新摄像头
this.camera.aspect = window.innerWidth / window.innerHeight;
// 更新摄像机的投影矩阵
this.camera.updateProjectionMatrix();
// 更新渲染器
this.renderer.setSize(window.innerWidth, window.innerHeight);
// 设置渲染器的像素比
this.renderer.setPixelRatio(window.devicePixelRatio);
});

}

// 加载GLTF模型
loadGLTF(modelName: string) {
gltfLoader.load(this.modelPath + modelName, ({ scene: { children } }) => {
children.forEach((obj: Mesh) => {
const { map, color } = obj.material as MeshStandardMaterial;
this.changeMat(obj, map, color);
if (obj.name.includes("cabinet")) {
this.cabinets.push(obj);
}
});
this.scene.add(...children);
});
}

// 修改材质
changeMat(obj: Mesh, map: Texture, color: Color) {
if (map) {
obj.material = new MeshBasicMaterial({
map: this.crtTexture(map.name),
});
} else {
obj.material = new MeshBasicMaterial({ color });
}
}

// 建立纹理对象
crtTexture(imgName: string) {
let curTexture = this.maps.get(imgName);
if (!curTexture) {
curTexture = new TextureLoader().load(this.modelPath + imgName);
curTexture.flipY = false;
curTexture.wrapS = 1000;
curTexture.wrapT = 1000;
this.maps.set(imgName, curTexture);
}
return curTexture;
}

// 选择机柜
selectCabinet(x: number, y: number) {
const { cabinets, renderer, camera, maps, curCabinet } = this;
const { width, height } = renderer.domElement;
// 鼠标的canvas坐标转裁剪坐标
pointer.set((x / width) * 2 - 1, -(y / height) * 2 + 1);
// 基于鼠标点的裁剪坐标位和相机设置射线投射器
raycaster.setFromCamera(pointer, camera);
// 选择机柜
const intersect = raycaster.intersectObjects(cabinets)[0];
let intersectObj = intersect ? (intersect.object as Mesh) : null;
// 若之前已有机柜被选择,且不等于当前所选择的机柜,取消之前选择的机柜的高亮
if (curCabinet && curCabinet !== intersectObj) {
const material = curCabinet.material as MeshBasicMaterial;
material.setValues({
map: maps.get("cabinet.jpg"),
});
}
/*
若当前所选对象不为空:
触发鼠标在机柜上移动的事件。
若当前所选对象不等于上一次所选对象:
更新curCabinet。
将模型高亮。
触发鼠标划入机柜事件。
否则若上一次所选对象存在:
置空curCabinet。
触发鼠标划出机柜事件。
*/
if (intersectObj) {
this.onMouseMoveCabinet(x, y);
if (intersectObj !== curCabinet) {
this.curCabinet = intersectObj;
const material = intersectObj.material as MeshBasicMaterial;
material.setValues({
map: maps.get("cabinet-hover.jpg"),
});
this.onMouseOverCabinet(intersectObj);
}
} else if (curCabinet) {
this.curCabinet = null;
this.onMouseOutCabinet();
}
}

// 连续渲染
animate() {
this.controls.update();
this.renderer.render(this.scene, this.camera);
requestAnimationFrame(() => {
this.animate();
});
}
}

App.vue

1
2
3
4
5
6
7
8
9
10
11
12
13
14
15
16
17
18
19
20
21
22
23
24
25
26
27
28
29
30
31
32
33
34
35
36
37
38
39
40
41
42
43
44
45
46
47
48
49
50
51
52
53
54
55
56
57
58
59
60
61
62
63
64
65
66
67
68
69
70
71
72
73
74
75
76
77
78
79
80
81
82
83
84
85
86
87
88
89
90
91
<template>
<canvas ref="canvasRef" @mousemove="mouseMove"></canvas>
<div id="plane" :style="{display:planeDisplay,left:planePos.left,top:planePos.top}">
<p>机柜名称:{{ curShowCabinet.name }}</p>
<p>机柜温度:{{ curShowCabinet.temperature }}°</p>
<p>使用情况:{{ curShowCabinet.count }}/{{ curShowCabinet.capacity }}</p>
</div>
</template>
<script setup lang="ts">
import * as THREE from "three";
import { onMounted, ref, reactive } from "vue";
import MachineRoom from "./MachineRoom";
import {getCabinetByName} from "@/api/request"

const canvasRef = ref<HTMLCanvasElement>(null);
let room: MachineRoom;

// 展示机柜信息
const curShowCabinet = reactive<{
name: string;
temperature: number;
capacity: number;
count: number;
}>({
// 名称
name: "Loading……",
// 温度
temperature: 0,
// 容量
capacity: 0,
// 服务器数量
count: 0,
});

//信息面板的位置
const planePos = reactive<{
left: number|string;
top: number|string;
}>({
left: 0,
top: 0,
});

// 信息面板的可见性
const planeDisplay = ref<"none"|"display">("none");

onMounted(() => {
if(!canvasRef.value) return;
canvasRef.value.width = window.innerWidth;
canvasRef.value.height = window.innerHeight;

room = new MachineRoom(canvasRef.value);
room.loadGLTF("machineRoom.gltf");
room.animate();
//当鼠标划入机柜,显示信息面板
room.onMouseOverCabinet = ({ name }) => {
//基于cabinet.name 获取机柜数据
getCabinetByName(name).then((obj) => {
Object.assign(curShowCabinet, {...obj,name});
});
};
//当鼠标在机柜上移动,让信息面板随鼠标移动
room.onMouseMoveCabinet = (left, top) => {
Object.assign(planePos, { left:left+'px', top:top+'px' });
planeDisplay.value = "block";
};
//当鼠标划出机柜,隐藏信息面板
room.onMouseOutCabinet = () => {
planeDisplay.value = "none";
};
})

// 鼠标移动事件
function mouseMove({ clientX, clientY }) {
room.selectCabinet(clientX, clientY);
}
</script>
<style>
#plane {
position: absolute;
top: 0;
left: 0;
background-color: rgba(0, 0, 0, 0.5);
color: #fff;
padding: 0 18px;
transform: translate(12px, -100%);
display: none;
z-index: 999;
}
</style>

结语

本篇文章就到这里了,更多内容敬请期待,债见。

上一篇:
【Redis学习】01-Redis安装与配置
下一篇:
【sql学习】04-sql进阶