前言
本篇文章继续跟着李伟老师学习WebGL,本篇主要来学习正交投影矩阵和视图矩阵。
正交投影矩阵
WebGL 是一个光栅引擎,其本身并不会实现三维效果,那我们要在其中实现三维效果的关键就在于算法:顶点在裁剪空间中的位置=投影矩阵*视图矩阵*模型矩阵*顶点的初始点位
正交投影矩阵是投影矩阵的一种,我们先从它说起。
在说正交投影矩阵之前,我们还需要对裁剪空间有一个清晰的认知。
裁剪空间
裁剪空间是用于显示webgl图形的空间,此空间是一个宽、高、深皆为2 的盒子。其坐标系的原点在canvas画布的中心,如下图: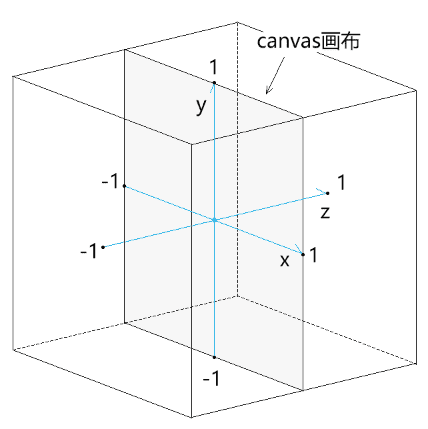
裁剪空间中:
- x轴上-1的位置对应canvas画布的左边界,1的位置对应canvas 画布的右边界
- y轴上-1的位置对应canvas画布的下边界,1的位置对应canvas 画布的上边界
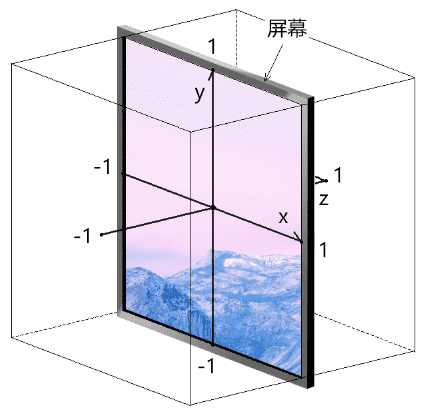
- z轴上-1的位置朝向屏幕外部,1的位置朝向屏幕内部,如下图:
正交投影矩阵的实现原理
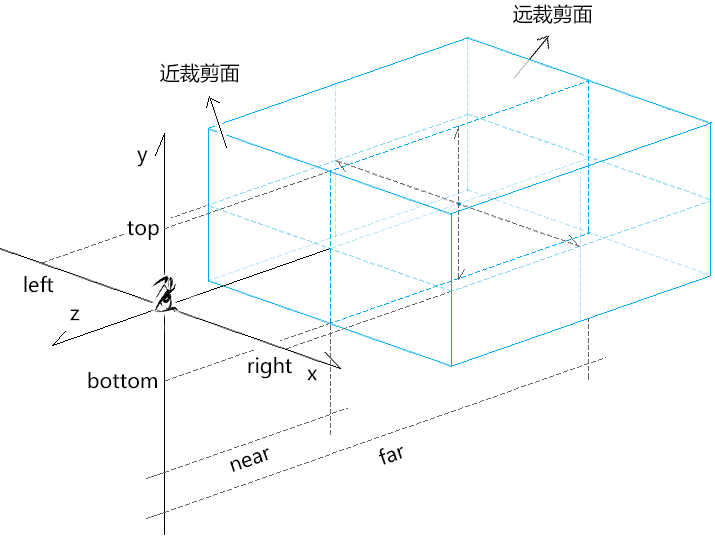
正交投影矩阵 orthographic projection:将世界坐标系中的一块矩形区域(正交相机的可视区域)投射到裁剪空间中,不同深度的物体不具备近大远小的透视规则。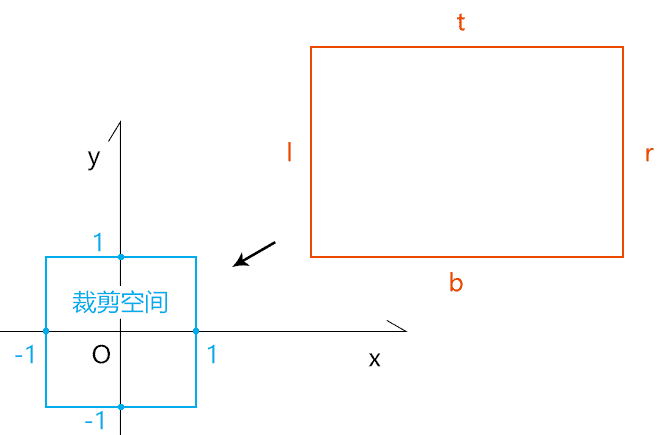
接下来我们试想一下,如何将这个立方体放入裁剪空间中,很明显就是分成俩步,先位移再缩放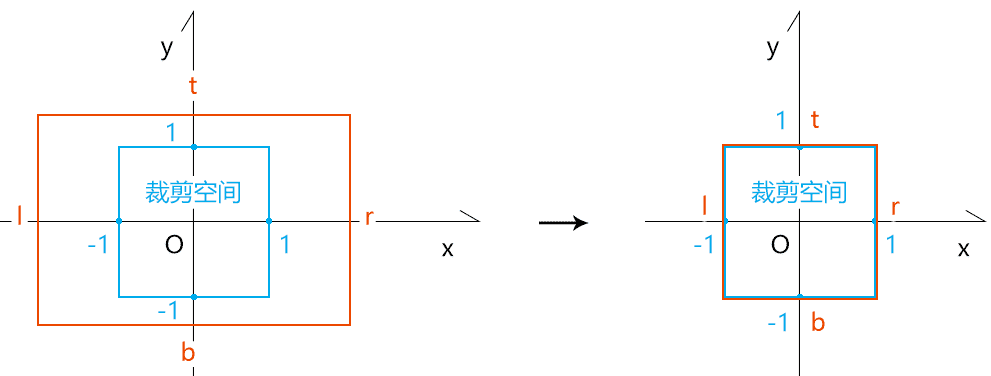
设:正交相机可视区域的上、下、左、右、前、后的边界分别是t、b、l、r、n、f
- 位移矩阵
1
2
3
4
5
6
[
1,0,0,-(r+l)/2,
0,1,0,-(t+b)/2,
0,0,1,-(f+n)/2,
0,0,0,1,
]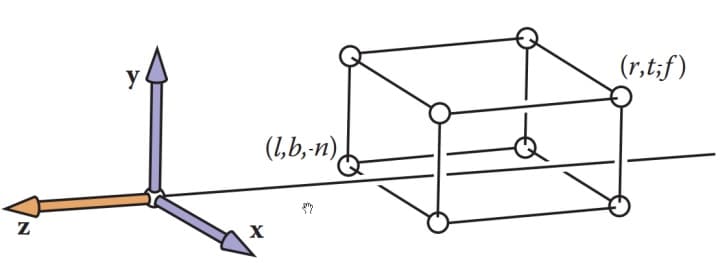
我们根据这个图,要将后面的长方体的中心点放置到坐标系的原点,就可以轻松得到这个位移矩阵,往x轴移动-(r+l)/2,y轴移动-(t+b)/2,z轴移动-(f+n)/2 - 缩放矩阵然后可以根据图得到缩放矩阵,最后的x,y,z的距离都是1 - (-1)=2,而之前长方体的距离分别为(r-l),(t-b),(f-n)
1
2
3
4
5
6
[
2/(r-l), 0, 0, 0,
0, 2/(t-b), 0, 0,
0, 0, 2/(f-n), 0,
0, 0, 0, 1,
]
这样就可以得到我们需要的正交投影矩阵 正交投影矩阵=缩放矩阵*位移矩阵n、f是一个距离量,而不是在z轴上的刻度值,正交投影矩阵在z轴上的缩放因子需要取反,这个也容易理解,因为我们z轴是朝着我们自己的,f是距离离我们比较远的点,所以就可以得到最终的正交投影矩阵为以下公式。1
2
3
4
5
6[
2/(r-l), 0, 0, -(r+l)/(r-l),
0, 2/(t-b), 0, -(t+b)/(t-b),
0, 0, 2/(f-n), -(f+n)/(f-n),
0, 0, 0, 1,
]1
2
3
4
5
6[
2/(r-l), 0, 0, -(r+l)/(r-l),
0, 2/(t-b), 0, -(t+b)/(t-b),
0, 0, -2/(f-n), -(f+n)/(f-n),
0, 0, 0, 1,
]
正交投影矩阵的代码实现
正交投影矩阵的代码实现很简单,我们可以直接从three.js 的Matrix4对象的makeOrthographic() 方法中找到,这个和我们上面推导出来的公式是一样的:
1 | makeOrthographic( left, right, top, bottom, near, far ) { |
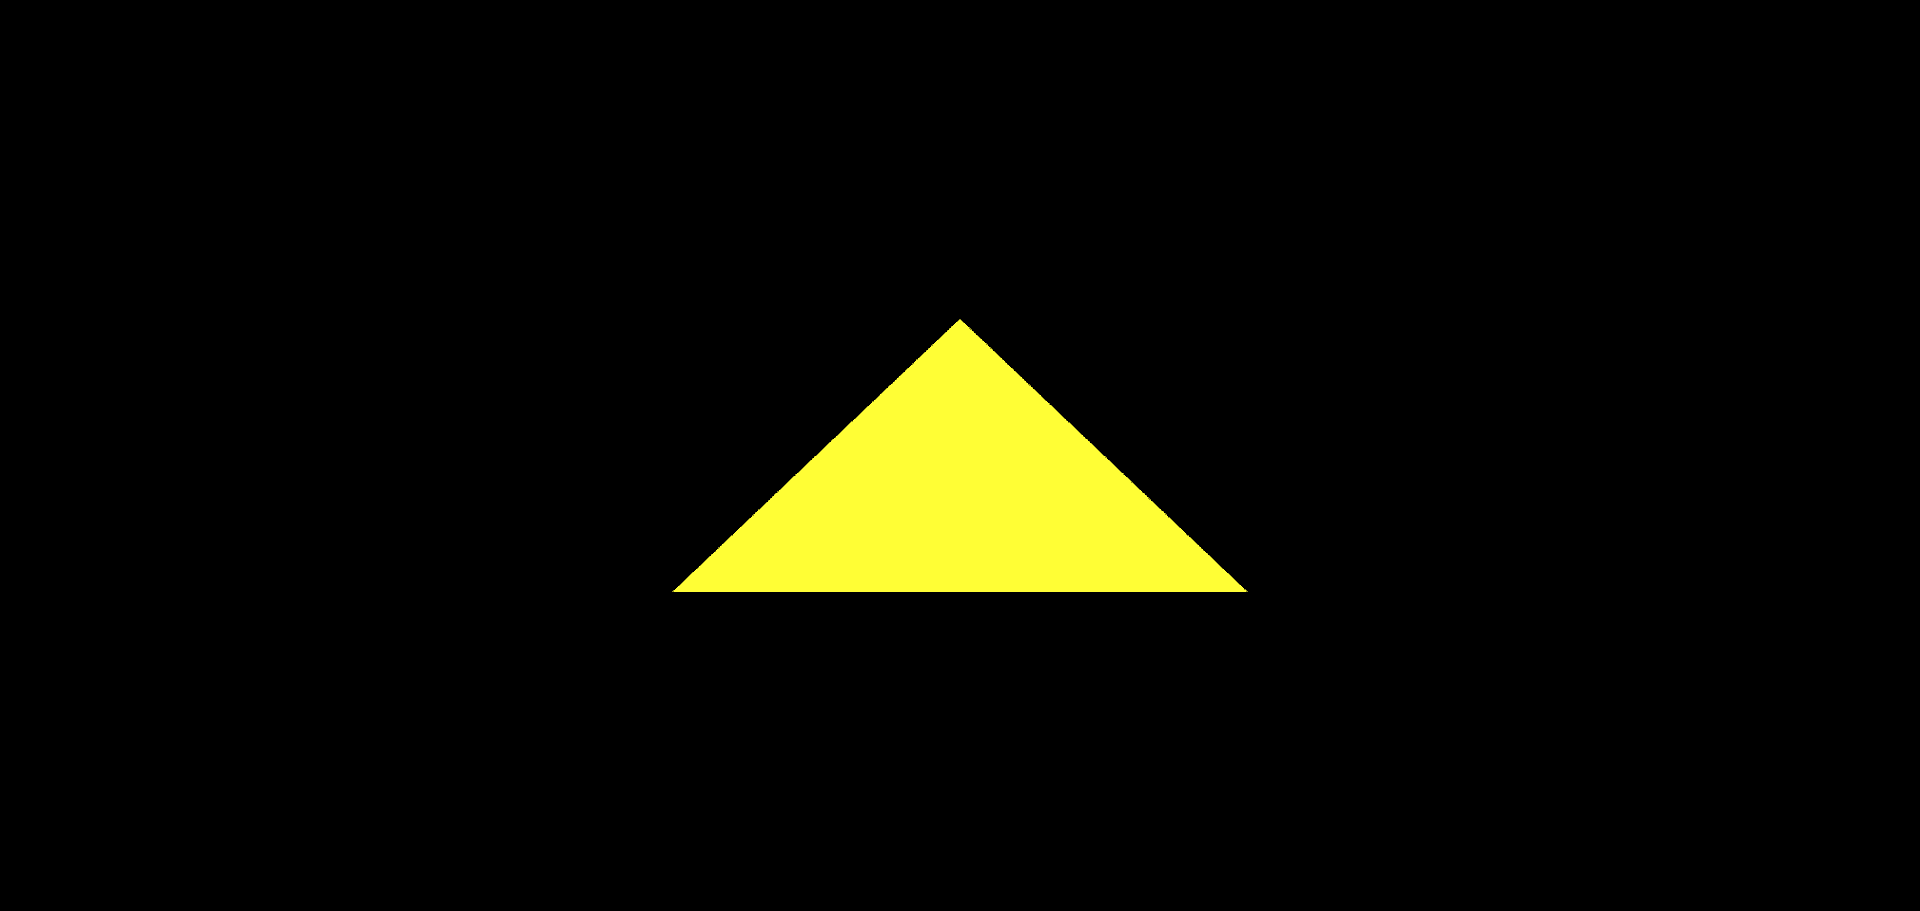
以前我们在绘制webgl 图形的时候,它们会随canvas 画布的大小发生拉伸,对于这个问题,我们便可以用投影矩阵来解决。
使用正交投影矩阵解决webgl图形拉伸问题
我们拿之前三角形绘制的代码
1 | <body> |
此时我们加上正交投影矩阵
1 | <body> |
这时候就得到了一个没有被拉伸的三角形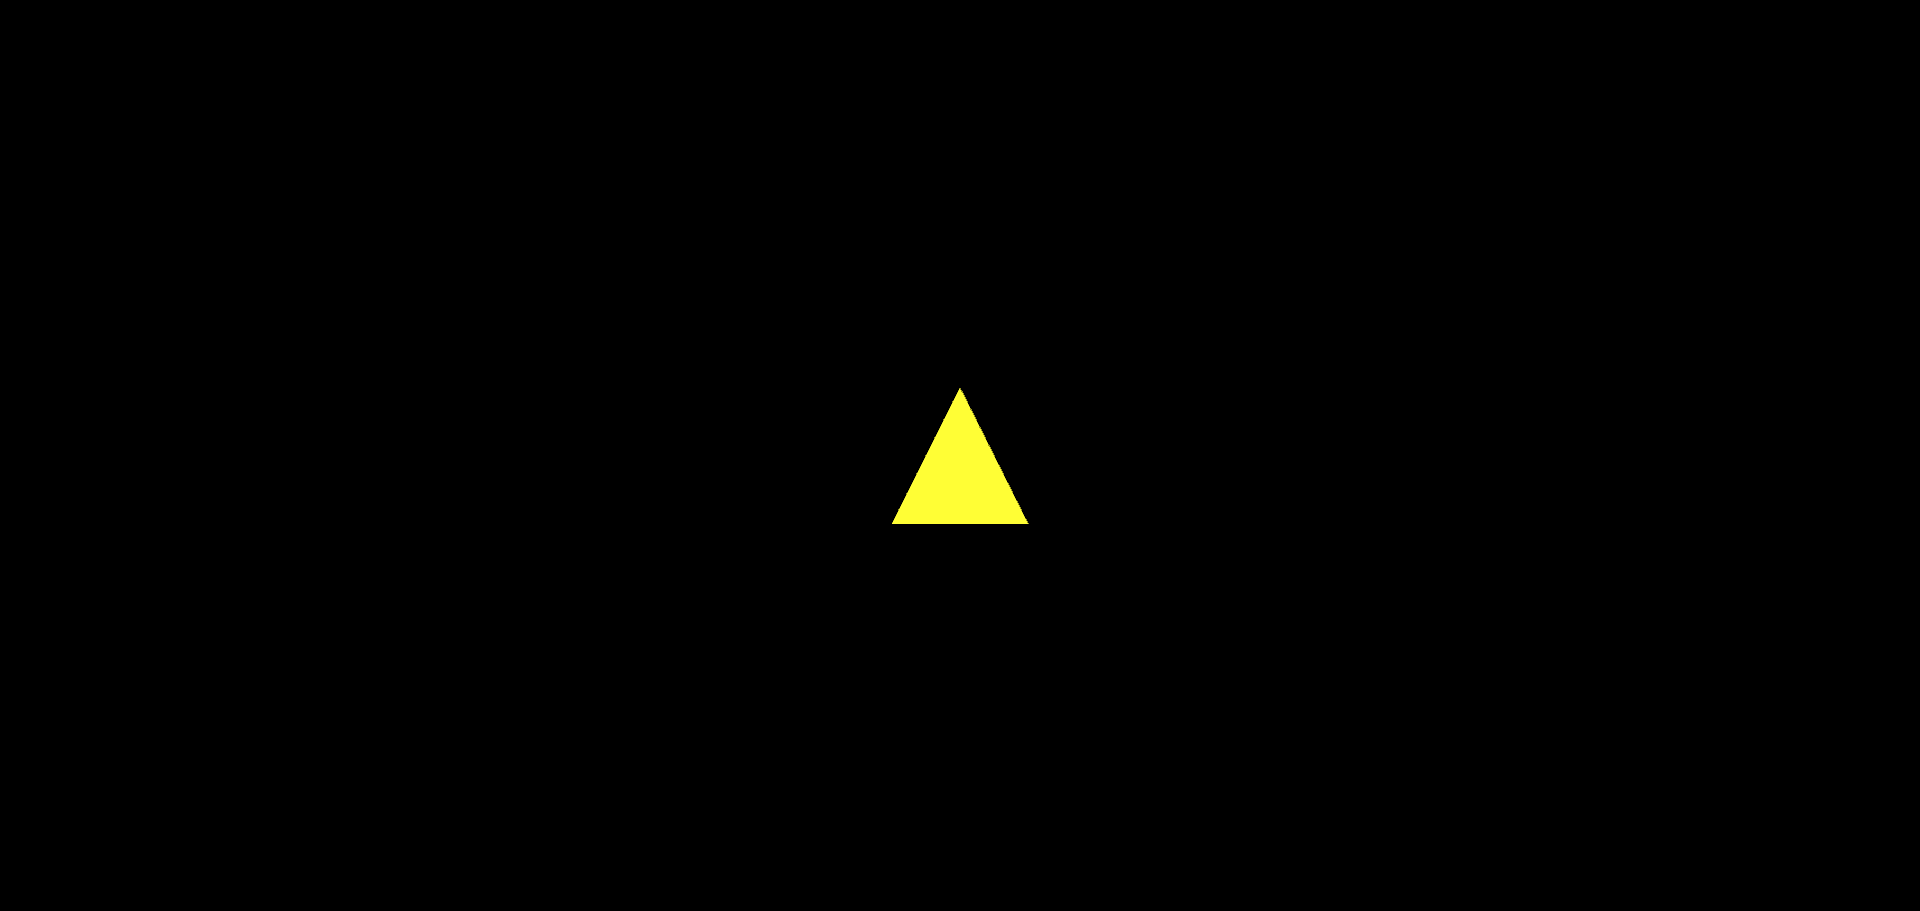
逆矩阵
逆矩阵在图形项目的应用很广,所以咱们接下来就系统说一下逆矩阵的概念。
逆矩阵的概念
逆矩阵就好比咱们学习除法的时候,一个实数的倒数。
如:
2的倒数是1/2。
那么,矩阵m的倒数就是1/m。
只不过,1/m不叫做矩阵m的倒数,而是叫做矩阵m的逆矩阵。
由上,我们可以推导出的一些特性。
已知:
矩阵m
矩阵n
可得:
1.矩阵与其逆矩阵的相乘结果为单位矩阵
因为:
2*1/2=1
所以:
m*1/m=单位矩阵
2.矩阵m除以矩阵n就等于矩阵m乘以矩阵n的逆矩阵
因为:
3/2=3*1/2
所以:
m/n=m*1/n
矩阵转逆矩阵
位移矩阵的逆矩阵是取位移因子的相反数
1 | const m=new Matrix4() |
缩放矩阵的逆矩阵是取缩放因子的倒数
1 | { |
3.旋转矩阵的逆矩阵是基于旋转弧度反向旋转
1 | { |
视图矩阵
创建视图矩阵
我们之前已经说过了简单说过视图矩阵,这里使用视图矩阵结合投影矩阵做一个正交投影视图矩阵
1 | function getViewMatrix(e, t, u) { |
因为我们z轴是朝向我们的,所以正交旋转矩阵的z轴方向改一下。
然后创建我们的视点,上方向和,目标点
1 | const eye = new Vector3(1, 0, 3); |
这样我们的视图矩阵就创建好了
1 | const viewMatrix=new Matrix4().fromArray(getViewMatrix(eye, target, up)) |
创建投影矩阵
然后我们根据上面学习的投影矩阵,创建正交投影矩阵
1 | const halfH = 2; |
结合投影和视图矩阵
接下来我们结合一下投影视图矩阵
1 | // 投影视图矩阵 |
利用投影视图矩阵绘图
然后我们利用这个绘制一下俩个三角形
1 | <body> |
Threejs验证
然后我们可以用threejs来验证一下我们的写的正交投影矩阵
1 | import { Matrix4, Vector3, OrthographicCamera } from 'https://unpkg.com/three/build/three.module.js'; |
这里我们导入了threejs的正交相机,然后将参数给正交相机得到正交投影视图矩阵,得到的效果图和我们之前的一样,这样我们也就顺便理解了lookAt的含义,也就是矩阵旋转。
1 | //正交相机 |
matrixWorldInverse是matrixWorld 的逆矩阵。也就是将本地坐标系转变成世界坐标系的逆矩阵,含义就是将世界坐标转化成物体坐标
分解lookAt步骤
- 由视点位置得出位移矩阵positionMatrix
1
const positionMatrix = new Matrix4().setPosition(eye)
- 由视点、目标点、上方向得出旋转矩阵rotationMatrix
1
const rotationMatrix = new Matrix4().lookAt(eye,target,up)
- 基于位移矩阵和旋转矩阵的
逆矩阵(invert())计算视图矩阵 viewMatrix1
2
3
4const viewMatrix = new Matrix4().multiplyMatrices(
positionMatrix,
rotationMatrix
).invert()
结语
本篇文章就到这里了,更多内容敬请期待,债见~