前言
本篇浅浅聊一下 SVG 动画,它可以让我们的页面效果更加流动。看本篇之前你需要一定的 SVG 知识,如果你没啥其他资料的话可以看看我之前的 SVG 文章。
直播中小动画
这个动画和 CSS 非常的像,比如我们想实现一个直播中的小动画,就可以这样实现
先写一个静态的样式
1
2
3
4
5
6
7
8
9
10
11
12
13
14
15
16
17
18
19
20
21
22
23
24
25
26
27
28
29
30
31
32
33
34
35
36
37
38
39
40
41
42
43
44
45
46
47
48
49
50
51
52
53
54
55
56
57
58
59
60
| <!DOCTYPE html>
<html lang="en">
<head>
<meta charset="UTF-8" />
<meta name="viewport" content="width=device-width, initial-scale=1.0" />
<title>Svg的Transform变化</title>
</head>
<body>
<svg height="0" width="0">
<symbol id="beats" viewBox="0 0 100 100">
<line
class="beat"
x1="15"
y1="40"
x2="15"
y2="100"
stroke="currentColor"
stroke-width="10"
stroke-linecap="round"
></line>
<line
class="beat"
x1="50"
y1="40"
x2="50"
y2="100"
stroke="currentColor"
stroke-width="10"
stroke-linecap="round"
></line>
<line
class="beat"
x1="85"
y1="40"
x2="85"
y2="100"
stroke="currentColor"
stroke-width="10"
stroke-linecap="round"
></line>
</symbol>
</svg>
<span
style="
color: #ff6699;
border: 1px solid #ff6699;
border-radius: 5px;
padding: 5px;
font-size: 24px;
"
>
<svg height="30" width="30">
<use href="#beats"></use>
</svg>
<span>直播中</span>
</span>
</body>
<style></style>
</html>
|
使用<line>标签绘制三条竖直的线条,(x1,y1)是线条起始点的坐标,(x2,y2)是线条终点的坐标。

然后我们给 svg 内容加上 css 动画样式
这里我们将变化起始点放到 svg 的底部,设置 y 方向的变化
1
2
3
4
5
6
7
8
9
10
11
12
13
14
15
16
| .beat {
transform-origin: bottom;
animation: beat-scale 1.4s linear infinite;
}
@keyframes beat-scale {
25% {
transform: scaleY(0.3);
}
50% {
transform: scaleY(1);
}
75% {
transform: scaleY(0.3);
}
}
|
此时三条线是一起运动的,我们加个延时
延时动画
1
2
3
4
5
6
| .beat:nth-child(1) {
animation-delay: 0.4s;
}
.beat:nth-child(2) {
animation-delay: 0.2s;
}
|
此时的效果就很不错了
描边动画
基本概念
描边动画的核心是 SVG 的两个显示属性,分别是 stroke-dasharray 和 stroke-dashoffset。
stroke:定义笔触的颜色。例如:stroke=”green”
stroke-dasharray:
定义 dash 和 gap 的长度。它主要是通过使用 , 来分隔 实线 和 间隔 的值。例如:stroke-dasharray=”5, 5” 表示,按照 实线为 5,间隔为 5 的排布重复下去。如下图:

stroke-dasharray 并不局限于只能设置两个值,要知道,它本身的含义是设置最小重复单元,即,dash,gap,dash,gap…。比如,我定义 stroke-dasharray=”15, 10, 5” 则相当于,[15,10,5] 为一段。则有:

stroke-dashoffset*:
用来设置 dasharray 定义其实 dash 线条开始的位置。值可以为 number || percentage。百分数是相对于 SVG 的 viewport。通常结合 dasharray 可以实现线条的运动。相对于绘制的起点偏移的量,正值(向右或者顺时针偏移),负值(向左或者逆时针)
偏移量计算公式:
1
2
| d = s - | 'stroke-dashoffset' | mod s
d:偏移量 s:线段总长度 'stroke-dashoffset':参数值
|
从公式我们可以看出偏移量是一个区间的值,无论参数值多大,偏移量不会大于线段总长度
stroke-linecap:
线条的端点样式。
stroke-linejoin:
线条连接的样式
stroke-miterlimit:
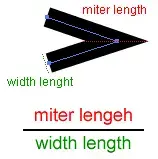
一个比较复杂的概念,如果我们只是画一些一般的线段,使用上面 linejoin 即可。如果涉及对边角要求比较高的,则可以使用该属性进行定义。它的值,其实就是角长度比上线宽:

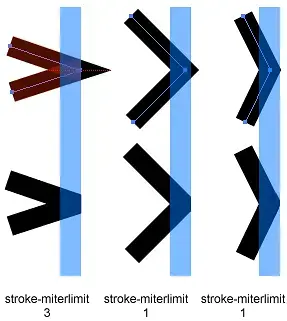
而实际理解的话,就是假设当 width 为 1。此时比例为 2。那么 miter = 2。那么超过 2 的 miter 部分则会被 cut 掉。可以参照:

他主要是配合 linejoin 一起使用。因为 linejoin 默认取值就是 miter。所以,默认情况下就可以使用该标签属性。它默认值为 4。其余的大家下去实践一下即可。
stroke-opacity:
线段的透明度
stroke-width:
线的粗细。
文字霓虹灯
基于上面的知识,我们来做一个简单的文字动画。复杂的动画需要 svg 生成器或者找 UI 去搞,毕竟咱也不是很专业。
初始描边
先初始化一下描边动画
HTML
1
2
3
| <svg width="100%" height="100">
<text text-anchor="middle" x="50%" y="50%" class="text">codesigner</text>
</svg>
|
CSS
1
2
3
4
5
6
7
8
9
10
11
12
13
14
15
16
17
| .text {
font-size: 64px;
font-weight: bold;
text-transform: uppercase;
fill: none;
stroke-width: 2px;
stroke-dasharray: 90 310;
animation: stroke 6s infinite linear;
stroke: #3498db;
text-shadow: 0 0 5px #3498db;
}
@keyframes stroke {
100% {
stroke-dashoffset: -400;
}
}
|
这里我定义了一段为 400–>90+310 90 是实线的,310 是间隔
多组动画完成霓虹灯
然后我们通过多个文字加上动画延迟得到文字霓虹灯的效果
HTML
1
2
3
4
5
6
7
8
9
10
11
12
13
14
| <svg width="100%" height="100">
<text text-anchor="middle" x="50%" y="50%" class="text text-1">
codesigner
</text>
<text text-anchor="middle" x="50%" y="50%" class="text text-2">
codesigner
</text>
<text text-anchor="middle" x="50%" y="50%" class="text text-3">
codesigner
</text>
<text text-anchor="middle" x="50%" y="50%" class="text text-4">
codesigner
</text>
</svg>
|
CSS
1
2
3
4
5
6
7
8
9
10
11
12
13
14
15
16
17
18
19
20
21
22
23
24
25
26
27
28
29
30
31
32
33
34
35
36
37
38
| .text {
font-size: 64px;
font-weight: bold;
text-transform: uppercase;
fill: none;
stroke-width: 2px;
stroke-dasharray: 90 310;
animation: stroke 6s infinite linear;
}
.text-1 {
stroke: #3498db;
text-shadow: 0 0 5px #3498db;
animation-delay: -1.5s;
}
.text-2 {
stroke: #f39c12;
text-shadow: 0 0 5px #f39c12;
animation-delay: -3s;
}
.text-3 {
stroke: #e74c3c;
text-shadow: 0 0 5px #e74c3c;
animation-delay: -4.5s;
}
.text-4 {
stroke: #9b59b6;
text-shadow: 0 0 5px #9b59b6;
animation-delay: -6s;
}
@keyframes stroke {
100% {
stroke-dashoffset: -400;
}
}
|
Icon 描边动画
我们随便去阿里巴巴 icon 找一个 icon 的 svg 复制下来,我复制了一个勾选的 svg
svg 内容
这里需要给 path 加上个 class
1
2
3
4
5
6
7
8
9
10
11
12
13
14
15
16
17
| <svg
t="1725257031579"
class="icon"
viewBox="0 0 1024 1024"
version="1.1"
xmlns="http://www.w3.org/2000/svg"
p-id="4268"
width="200"
height="200"
>
<path
class="icon-path"
d="M512 0C230.4 0 0 230.4 0 512s230.4 512 512 512c281.6 0 512-230.4 512-512S793.6 0 512 0zM838.4 371.2l-384 384C448 761.6 428.8 768 416 768c-12.8 0-25.6-6.4-38.4-12.8L147.2 524.8C128 505.6 128 467.2 147.2 448c19.2-19.2 57.6-19.2 76.8 0l192 192 345.6-345.6c19.2-19.2 57.6-19.2 76.8 0C864 313.6 864 345.6 838.4 371.2z"
p-id="4269"
fill="#1afa29"
></path>
</svg>
|
设置 stroke-dasharray 的大小
svg 元素上有一个方法 getTotalLength 方法去获取到当前 path 的长度,是给 stroke-dasharray 赋值
如果这时候有多个 path 元素,就去它们分别计算取最大值。
这里通过 getTotalLength 去取值,并且取最大值的原因是:
如果随便设置一个很大值,这时候如果业务场景需要不断地重复进行描边动画,这时候因为 stroke-dasharray 设置过大,会导致动画停留过久
而设置过小则因为 stroke-dasharray 方法是对图形切割的,会导致图形出现断层
1
2
3
4
5
6
7
| <script>
document.addEventListener("DOMContentLoaded", () => {
const logo = document.querySelector(".icon-path");
console.log(logo.getTotalLength());
});
</script>
|
设置动画
1
2
3
4
5
6
7
8
9
10
11
12
13
14
15
16
17
18
19
20
21
22
23
24
25
26
27
28
29
30
| .icon {
width: 300px;
height: 300px;
}
.icon-path {
fill: none;
animation: animation 5s linear forwards;
}
@keyframes animation {
0% {
fill: white;
stroke: #333;
stroke-dasharray: 5267.5693359375;
stroke-dashoffset: 5267.5693359375;
}
50% {
fill: white;
stroke: #333;
stroke-dasharray: 5267.5693359375;
stroke-dashoffset: 0;
}
75% {
fill: #e5e7e7;
stroke: white;
}
100% {
fill: #90c9c4;
stroke: white;
}
}
|
animation 是实现动画的关键,我们来介绍其中的几个比较容易忽略的属性
- linear 这代表动画效果,可以参考animation-timing-function
- forwards 代表最后一帧是保持住当前图形而不用回到初始的时候。可以参考animation-fill-mode
这里 animation 还可以设置数字或者 infinite 代表重复次数或者无穷次,不设置则不重复,可以参考animation-iteration-count
- 5267.5693359375 是我经过 getTotalLength 去计算出的最大值。
- 0% 到 50% 是实现图形从无到有的形成过程, stroke-dashoffset 设置为 0 代表展示图形
- 75%到 100%的过程代表为图形上色的过程,这里的 fill 代表填充的颜色,这一般在拿到 svg 元素的就已经写在 svg 标签里了
在理解了这个之后,那么我们平时使用的阿里巴巴 icon 的 svg 都可以进行动画加载
多个 path 的 Icon 描边动画
接下来我们进阶一下,进行多个 path 的描边动画。
找个图测试一下
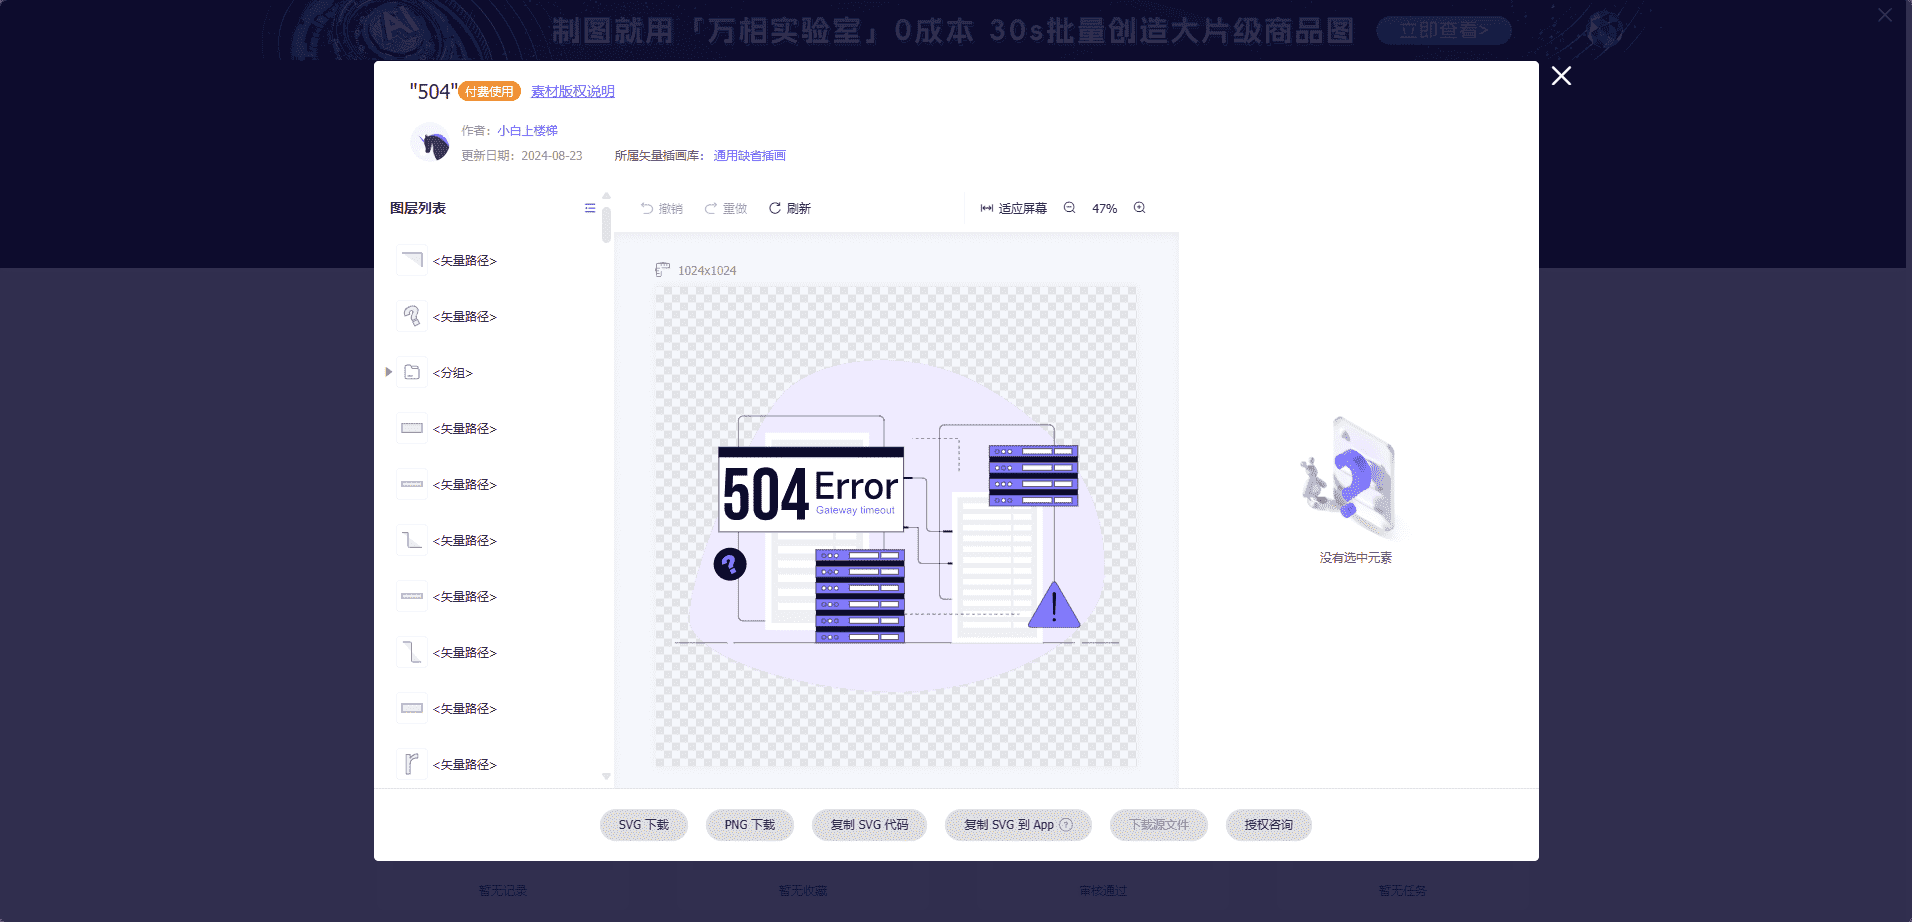
我们先去 iconfont 找一个插画矢量图,比如我找的就是这个

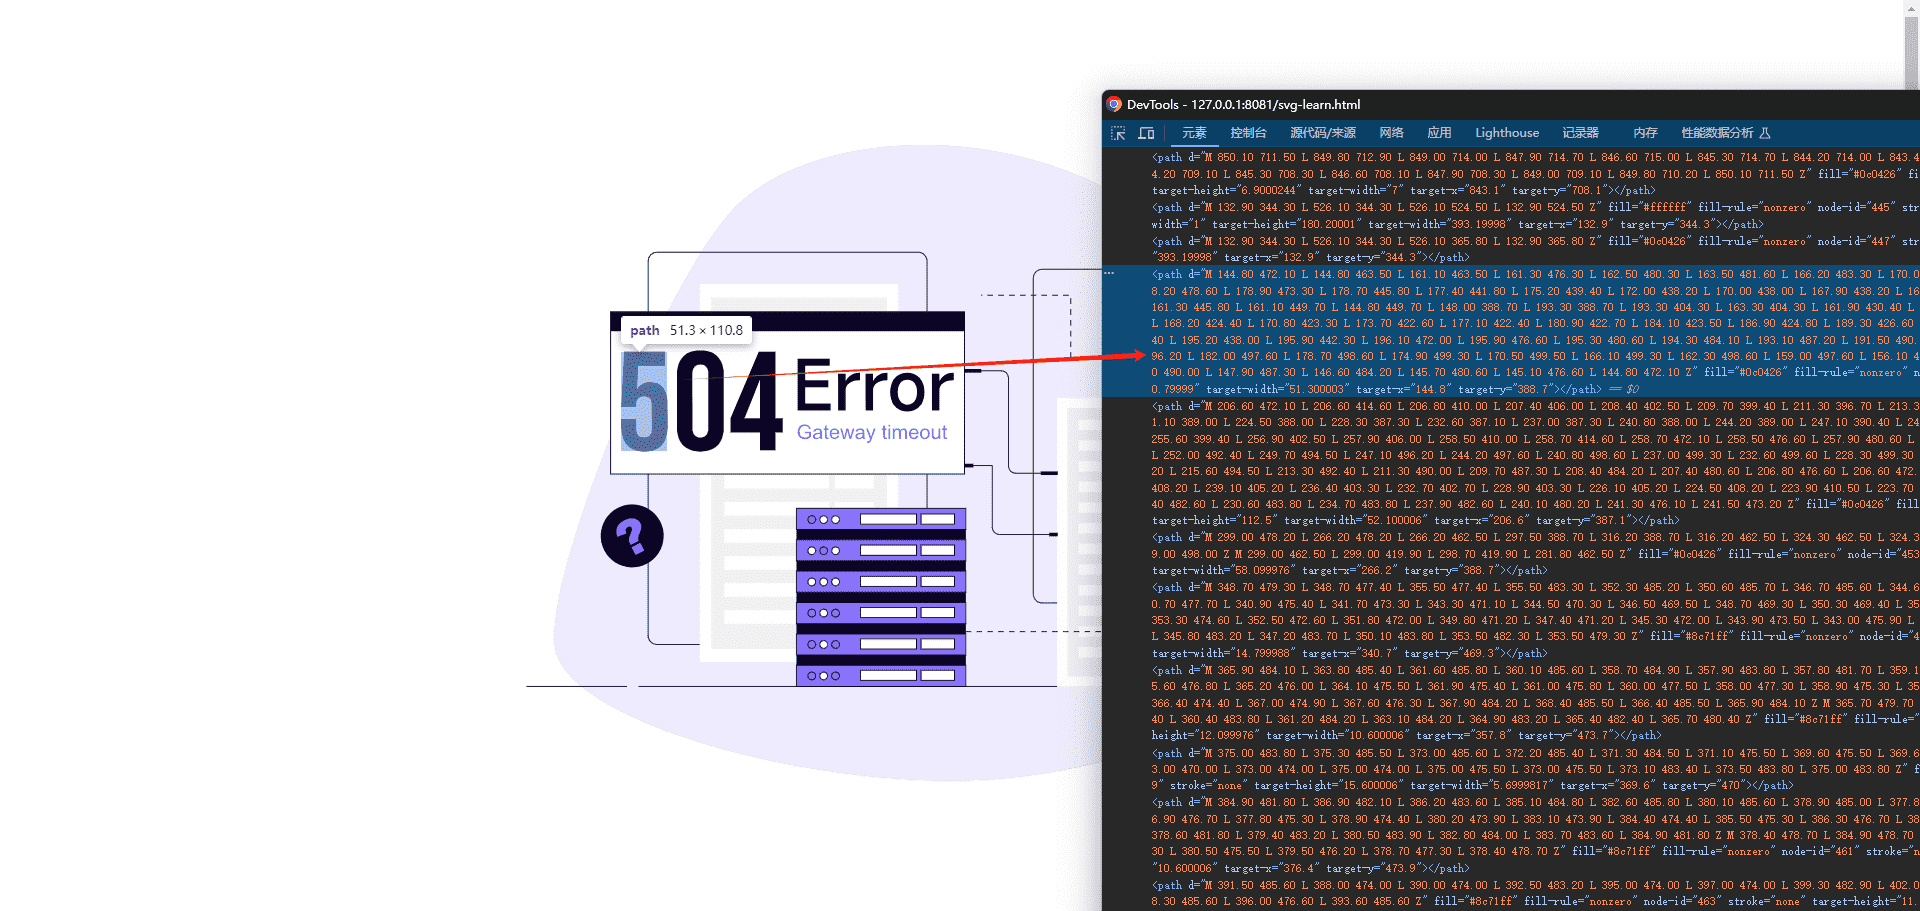
找到 svg 中关于文字的部分
打开浏览器页面调试器或者 UI 工具(这个我不多介绍了,太多了),我拿一个最简单的浏览器调试器来说,你就一一对应去找到你想做动画的部分

然后给那些 path 加上icon-path的 class,这个你喜欢加啥就加啥,你能对应起来就行
实现动画
这里先得到了maxPath,如果你确定文字大小路径差不多的话也可以不加这个循环。
1
2
3
4
5
6
7
8
9
10
11
12
13
14
15
16
17
18
19
20
21
22
23
24
25
26
27
28
29
30
31
32
33
34
35
36
37
38
39
40
41
42
43
44
| function setStyle(target, styles) {
for (const k in styles) {
target.style[k] = styles[k];
}
}
const pathElements = document.querySelectorAll(".icon-path");
document.addEventListener("DOMContentLoaded", () => {
let maxPath = 0;
for (let i = 0; i < pathElements.length; i++) {
const pathElement = pathElements[i];
maxPath = Math.max(maxPath, pathElement.getTotalLength());
}
for (let i = 0; i < pathElements.length; i++) {
const pathElement = pathElements[i];
const fill = pathElement.getAttribute("fill");
const path = {
fill: "none",
animation: `animation${i} 5s linear 1 forwards`,
};
setStyle(pathElement, path);
document.styleSheets[0].insertRule(
`
@keyframes animation${i} {
0% {
fill: white;
stroke: #0c0426;
stroke-dasharray: ${maxPath};
stroke-dashoffset: ${maxPath};
}
50% {
fill: white;
stroke: #0c0426;
stroke-dasharray: ${maxPath};
stroke-dashoffset: 0;
}
100% {
fill: ${fill};
stroke: ${fill};
}
}
`
);
}
});
|
其他动画
当然,svg内置了animate的标签,我们可以使用animate来做一些简单形变动画等,这里我不展开了,大家感兴趣的话可以自己去看一下文档
结语
本文主要就是给大家分享一下,我们的svg其实可以用来实现动画,阿里巴巴icon等iconfont库并不是我们简简单单当图片用就发挥了它的能力,我们完全可以利用svg来制作动画,让我们的页面更加流动,本篇文章就到这里了,更多内容敬请期待,债见。


