【可视化学习】94-粒子网站
发表于:2024-10-17 |

前言

本篇文章带着大家一起学习粒子网站的实现。

实现目标

  • 随机大小颜色位置粒子
  • 附着在模型附近的粒子
  • 模型粒子随着滚动爆炸与聚拢
  • 鼠标放上模型粒子出现扰流效果

实现页面滚动效果

我们要实现 3D 的页面滚动,其实就是添加多个 100vh 的页面

这里我们不用 Vue 和 React,就普通的 html 来进行效果实现,这里我使用 vite 的 Vanilla 进行快速创建

初始化以及调整目录和写基础样式

使用 vite 创建基础结构
1
npm init vite

然后按照我截图部分进行选择即可
效果图

依赖安装

然后就是简单的依赖安装,你多安装一个 three 即可

调整目录结构

接下来我把目录结构改成了这样
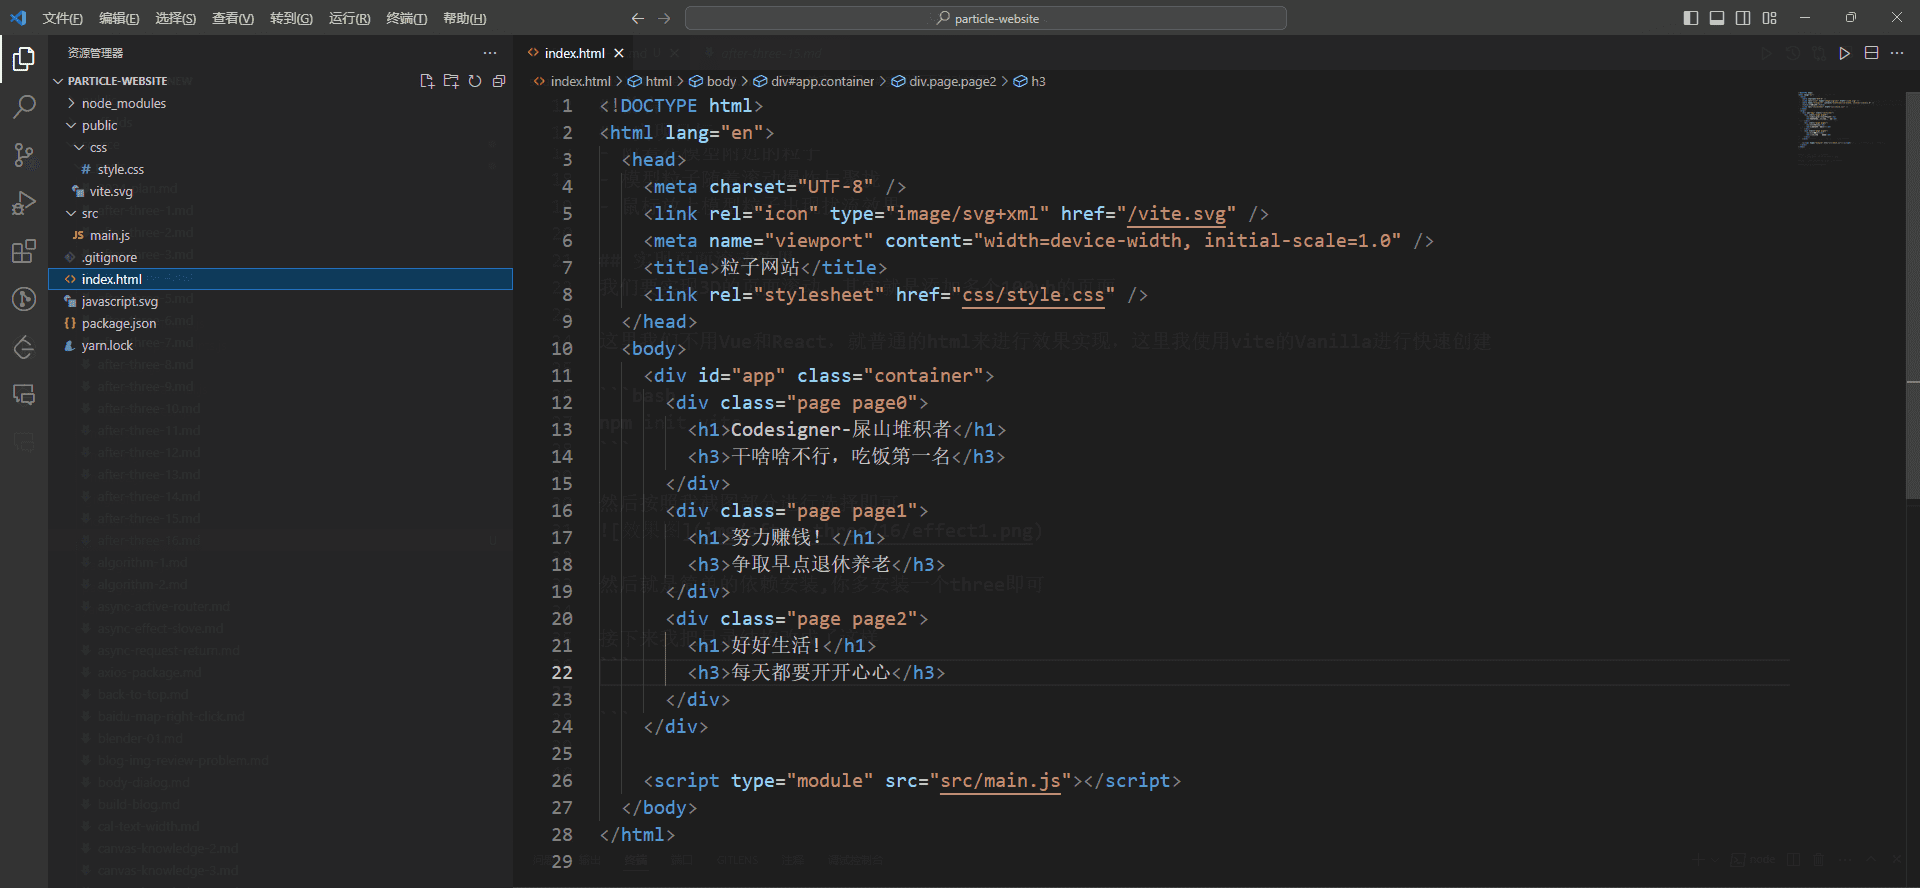
效果图

目录详情内容
  • main.js
    暂时是空的

  • index.html

1
2
3
4
5
6
7
8
9
10
11
12
13
14
15
16
17
18
19
20
21
22
23
24
25
26
27
28
<!DOCTYPE html>
<html lang="en">
<head>
<meta charset="UTF-8" />
<link rel="icon" type="image/svg+xml" href="/vite.svg" />
<meta name="viewport" content="width=device-width, initial-scale=1.0" />
<title>粒子网站</title>
<link rel="stylesheet" href="css/style.css" />
</head>
<body>
<div id="app" class="container">
<div class="page page0">
<h1>Codesigner-屎山堆积者</h1>
<h3>干啥啥不行,吃饭第一名</h3>
</div>
<div class="page page1">
<h1>努力赚钱!</h1>
<h3>争取早点退休养老</h3>
</div>
<div class="page page2">
<h1>好好生活!</h1>
<h3>每天都要开开心心</h3>
</div>
</div>

<script type="module" src="src/main.js"></script>
</body>
</html>
  • style.css
1
2
3
4
5
6
7
8
9
10
11
12
13
14
15
16
17
18
19
20
21
22
23
24
25
26
27
28
29
30
31
32
33
34
35
36
37
38
39
40
41
42
43
44
45
46
47
48
49
50
51
52
* {
margin: 0;
padding: 0;
}
body {
width: 100vw;
height: 100vh;
overflow: hidden;
}
canvas {
display: block;
position: fixed;
left: 0;
top: 0;
width: 100vw;
height: 100vh;
}
.container {
width: 100vw;
height: 100vh;
transition: transform 0.5s ease-in-out;
position: fixed;
left: 0;
top: 0;
z-index: 100;
}

.page {
display: flex;
flex-direction: column;
justify-content: center;
height: 100vh;
width: 100vw;
z-index: 100;
position: relative;
box-sizing: border-box;
color: #fff;
padding: 150px;
background: #16160e;
}

.page0 {
text-align: left;
}

.page1 {
text-align: right;
}

.page2 {
text-align: left;
}

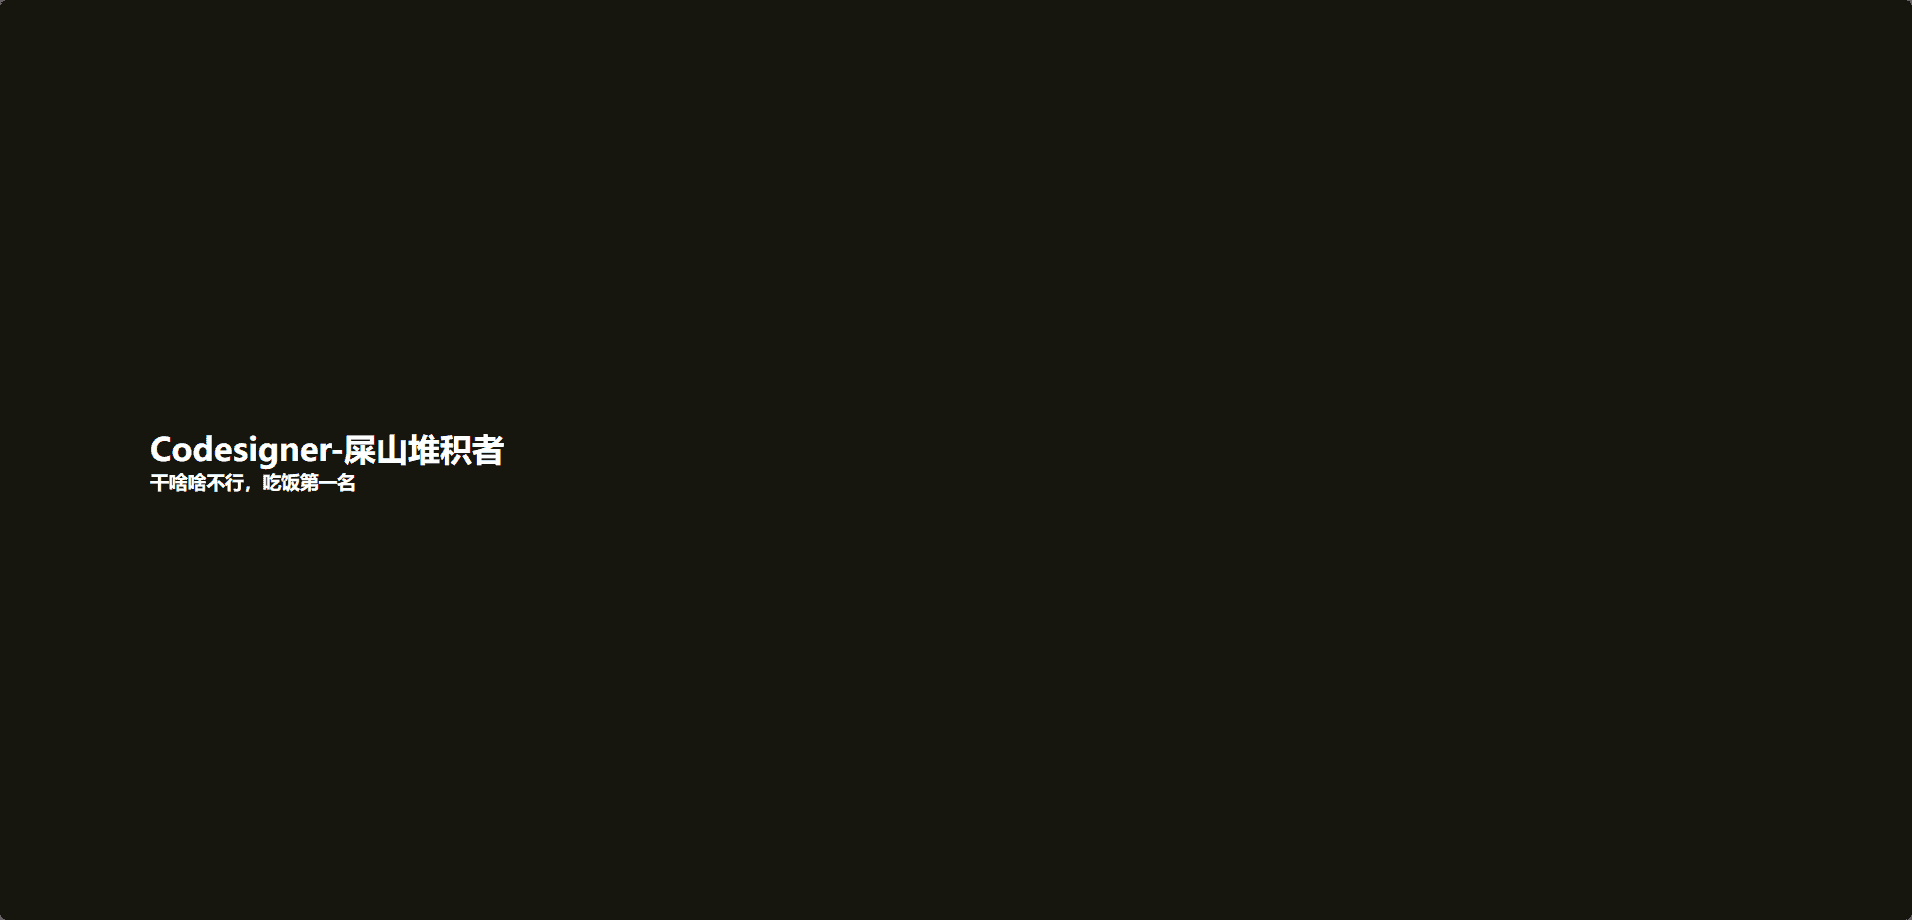
此时我们的页面效果如下,但是是没有滚动效果的,默认显示第一页。
效果图

自己实现滚动效果

这里只需要在 main.js 中写上这样一段代码

1
2
3
4
5
6
7
8
9
10
11
12
13
14
15
16
17
18
19
let currentPage = { value: 0 };
const totalPages = 20;
window.addEventListener("wheel", function (event) {
if (event.deltaY > 0) {
// 滚轮向下滚动
if (currentPage.value < totalPages) {
currentPage.value++;
}
} else {
// 滚轮向上滚动
if (currentPage.value > 0) {
currentPage.value--;
}
}
// 通过改变 translateY 的值来实现滚动效果
document.querySelector(".container").style.transform = `translateY(-${
currentPage.value * 10
}vh)`;
});
实现逻辑

上面的代码我根据滚轮的滚轮,修改了 dom 的transform属性,因为我设置了三屏,也就是可以滚动 200vh,然后我设置了 20 页的totalPages,所以每次滚动就修改currentPage.value * (200/20)的距离,又因为在 css 中加了transition的过渡动画,可以让我们的滚动,看起来更加的流畅,不然就会有一种突然滚了一段距离的体验,这样很不好。

效果:

生成随机粒子

在实现上面的效果之后,我们进行随机粒子的生成,这里我用 Threejs 的生成点来做。

初始化代码

我们现在 main.js 中初始化 Threejs 代码,这个很简单,我就复制一下

1
2
3
4
5
6
7
8
9
10
11
12
13
14
15
16
17
18
19
20
21
22
23
24
25
26
27
28
29
30
31
32
33
34
35
36
37
38
39
40
41
42
43
44
45
46
47
48
49
50
51
52
53
import * as THREE from "three";
// 1.创建场景
const scene = new THREE.Scene();

// 2.创建相机
const camera = new THREE.PerspectiveCamera(
75,
window.innerWidth / window.innerHeight,
0.1,
1000
);

// 设置相机位置
camera.position.z = 3;

// 添加相机
scene.add(camera);

// 初始化渲染器
const renderer = new THREE.WebGLRenderer({
antialias: true, // 开启抗锯齿
});

// 开启阴影效果
renderer.shadowMap.enabled = true;

//设置渲染的尺寸大小
renderer.setSize(window.innerWidth, window.innerHeight);

// 将webgl渲染的canvas内容添加到body上
document.body.appendChild(renderer.domElement);

// 持续渲染,让相机场景动起来
function render() {
// 使用渲染器通过相机将场景渲染进来
renderer.render(scene, camera);
// 渲染下一帧的时候就会调用render函数
requestAnimationFrame(render);
}

render();

// 监听画面的变化,更新渲染的画面
window.addEventListener("resize", () => {
// 更新摄像头
camera.aspect = window.innerWidth / window.innerHeight;
// 更新摄像机的投影矩阵
camera.updateProjectionMatrix();
// 更新渲染器
renderer.setSize(window.innerWidth, window.innerHeight);
// 设置渲染器的像素比
renderer.setPixelRatio(window.devicePixelRatio);
});

去除 css 背景色

因为我们这时候要显示 canvas 的内容了,所以需要将 css 中的背景色去除

1
2
3
4
5
6
7
8
9
10
11
12
.page {
display: flex;
flex-direction: column;
justify-content: center;
height: 100vh;
width: 100vw;
z-index: 100;
position: relative;
box-sizing: border-box;
color: #fff;
padding: 150px;
}

随机点

我们这里创建一个随机点的类RandomSpacePoints.js,这里也比较简单,就是利用了 Threejs 的点。我这里先创建了方向和速度是为了之后让点运动起来,这里暂时没用到,你也可以先不写。

1
2
3
4
5
6
7
8
9
10
11
12
13
14
15
16
17
18
19
20
21
22
23
24
25
26
27
28
29
30
31
32
33
34
35
36
37
38
39
40
41
42
43
44
45
46
47
48
49
50
51
52
53
54
55
56
57
58
59
60
61
62
63
64
65
66
67
68
69
70
71
72
73
74
75
76
77
78
// 导入threejs
import * as THREE from "three";

class RandomSpacePoints extends THREE.Points {
constructor(num = 100) {
super();
this.name = "RandomSpacePoints";
// 创建集合体对象
const geometry = new THREE.BufferGeometry();
// 创建顶点数据
const vertices = new Float32Array(num * 3); // 每个顶点有x、y、z三个坐标
// 创建颜色数据
const colors = new Float32Array(num * 3);
// 创建大小数据
const sizes = new Float32Array(num);
// 创建随机方向数据
const randomDirections = new Float32Array(num * 3);
// 创建随机速度数据
const randomSpeeds = new Float32Array(num);
// 创建范围
let radius = 5;
for (let i = 0; i < num; i++) {
// 随机生成x、y、z坐标,范围在0到5之间
vertices[i * 3] = radius * (Math.random() - 0.5); // x
vertices[i * 3 + 1] = 0.5 * radius * (Math.random() - 0.5); // y
vertices[i * 3 + 2] = 0.5 * radius * (Math.random() - 0.5); // z

// 随机生成颜色
colors[i * 3] = Math.random() * 0.5;
colors[i * 3 + 1] = Math.random() * 0.5;
colors[i * 3 + 2] = Math.random() * 0.5 + 0.5;

// 随机生成大小
sizes[i] = Math.random() * 0.5 + 0.5;

// 随机生成速度
randomSpeeds[i] = Math.random() * 0.5 + 0.1;
// 随机生成方向
let randomDirection = new THREE.Vector3(
Math.random() * 4 - 2, // X 方向 -1 到 1 之间的随机数
Math.random() * 4 - 2, // Y 方向 -1 到 1 之间的随机数
Math.random() * 4 - 2 // Z 方向 -1 到 1 之间的随机数
).normalize();
randomDirections[i * 3] = randomDirection.x; // 归一化以确保方向一致
randomDirections[i * 3 + 1] = randomDirection.y;
randomDirections[i * 3 + 2] = randomDirection.z;
}

// 设置顶点到几何体
geometry.setAttribute("position", new THREE.BufferAttribute(vertices, 3));
geometry.setAttribute("color", new THREE.BufferAttribute(colors, 3));
geometry.setAttribute("size", new THREE.BufferAttribute(sizes, 1));
geometry.setAttribute(
"randomDirection",
new THREE.BufferAttribute(randomDirections, 3)
);
geometry.setAttribute(
"randomSpeed",
new THREE.BufferAttribute(randomSpeeds, 1)
);

// 创建点的材质
const material = new THREE.PointsMaterial({
size: 0.05, // 点的大小
vertexColors: true, // 顶点颜色
transparent: true, // 开启透明度
opacity: 0.8, // 设置透明度
depthWrite: false, // 设置深度写入
blending: THREE.AdditiveBlending, // 设置混合模式(叠加)
sizeAttenuation: true, // 设置距离衰减
});

this.geometry = geometry;
this.material = material;
}
}

export default RandomSpacePoints;

导入并使用

在 main.js 中导入并使用

1
2
3
4
import RandomSpacePoints from "./mesh/RandomSpacePoints.js";
// 创建粒子
let points = new RandomSpacePoints(250);
scene.add(points);

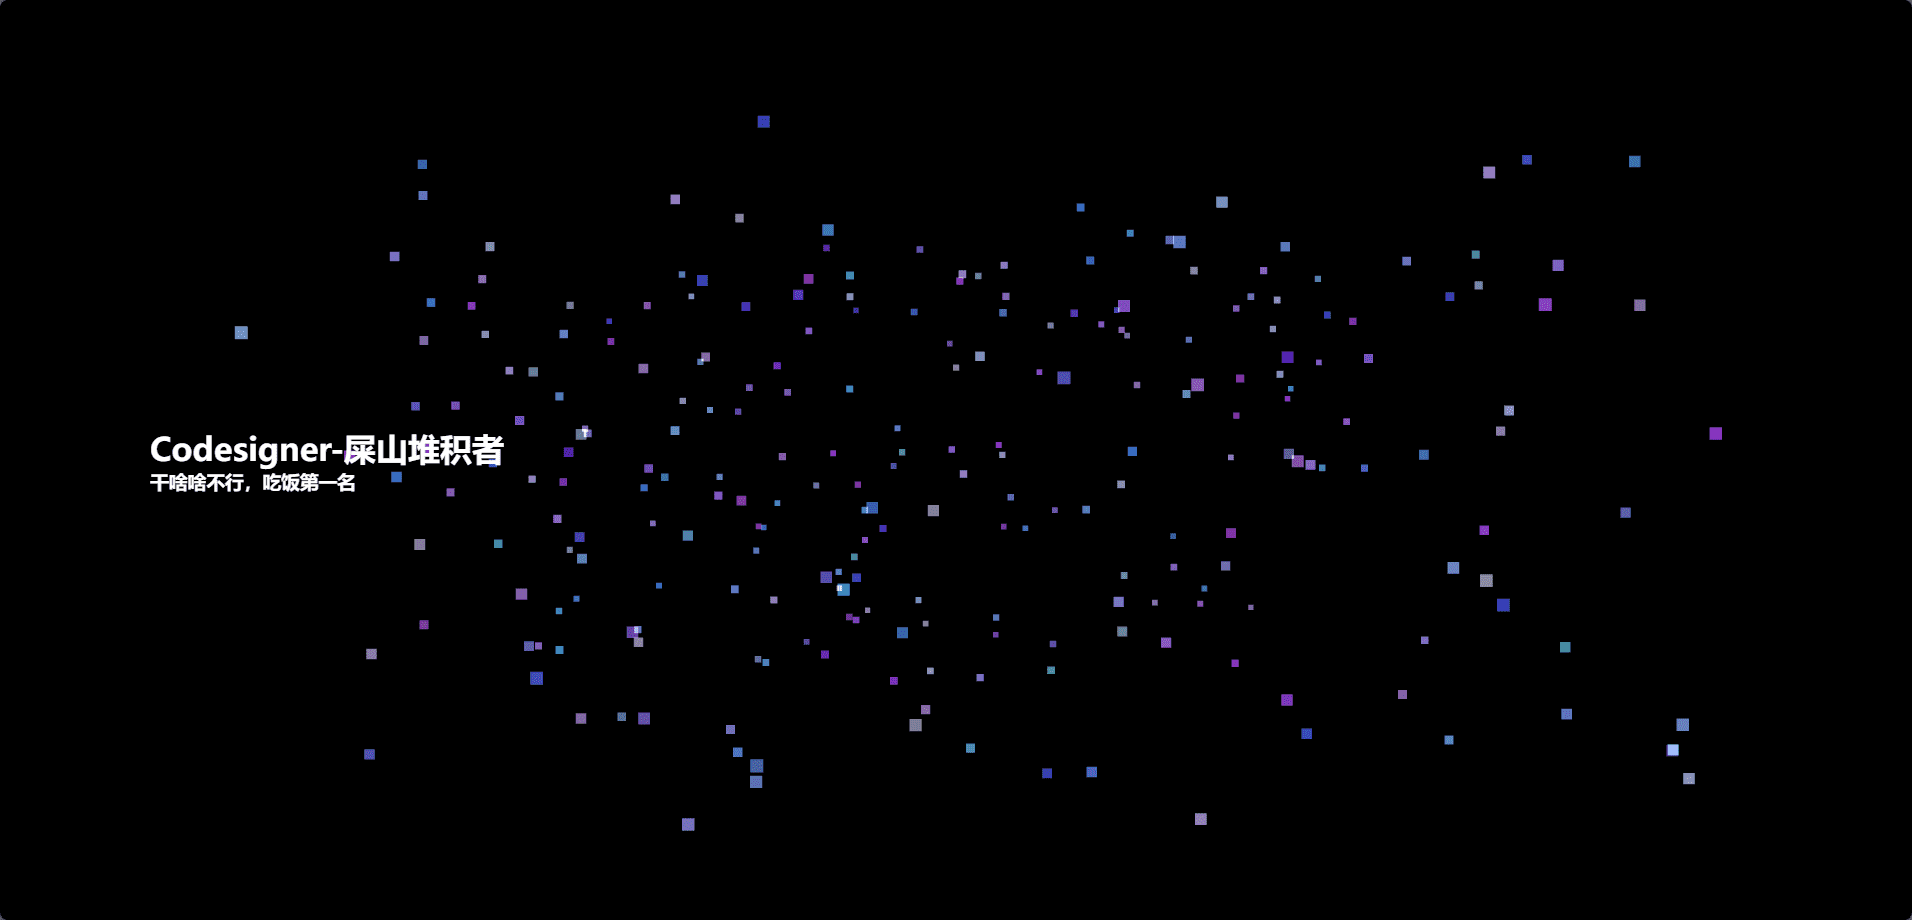
此时我们页面中就已经有了我们的随机粒子
效果图

给粒子添加材质

这里我们的粒子并不是很好看,可以给粒子添加贴图。这里我使用了这张图片
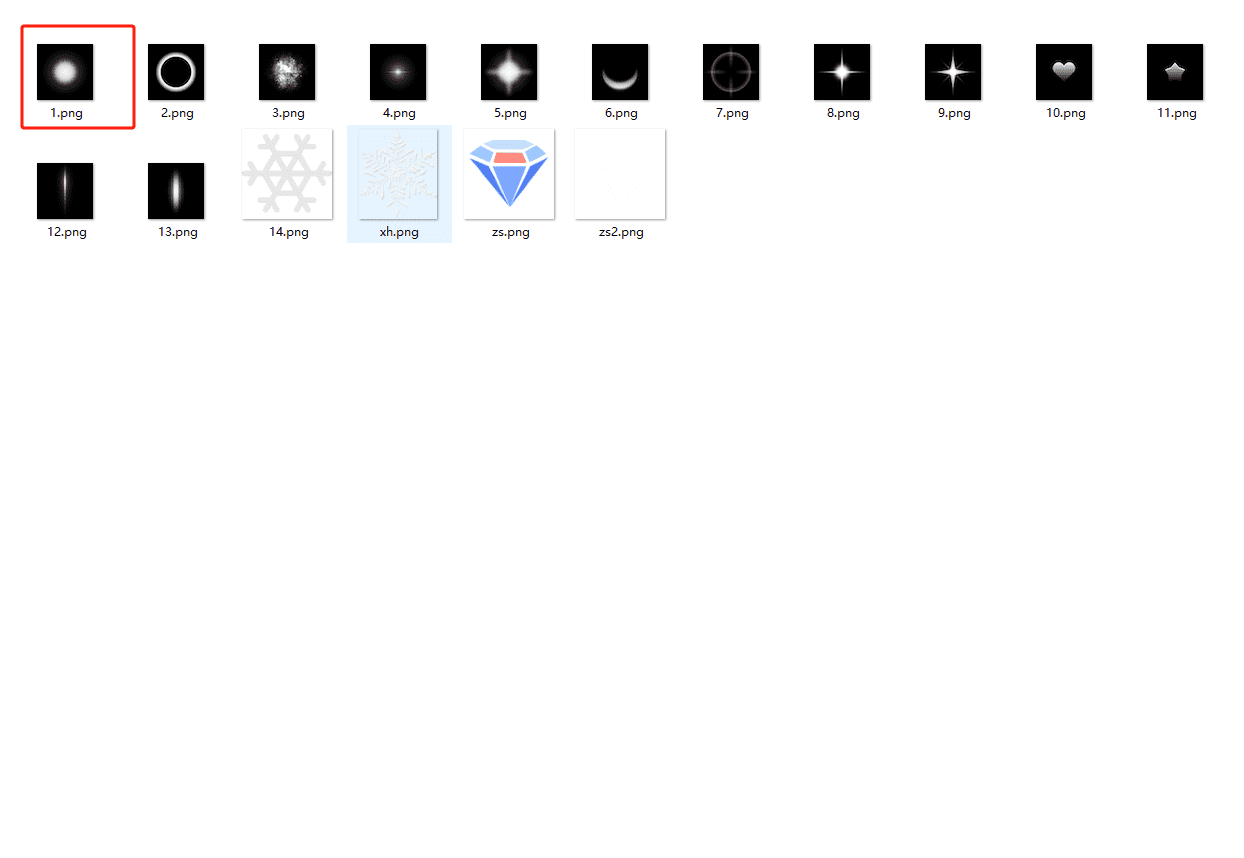
使用贴图

贴图使用

在创建粒子的使用把材质修改一下,因为我选的这张图片本来就是黑白的,所以当纹理贴图的时候也可以用作透明度贴图。

1
2
3
4
5
6
7
8
9
10
11
12
13
14
15
16
// 纹理贴图
const textureLoader = new THREE.TextureLoader();
const particlesTexture = textureLoader.load("./texture/particles/1.png");

// 创建点的材质
const material = new THREE.PointsMaterial({
size: 0.05, // 点的大小
vertexColors: true, // 顶点颜色
transparent: true, // 开启透明度
opacity: 0.8, // 设置透明度
depthWrite: false, // 设置深度写入
blending: THREE.AdditiveBlending, // 设置混合模式(叠加)
sizeAttenuation: true, // 设置距离衰减
map: particlesTexture, // 纹理贴图
alphaMap: particlesTexture, // 透明度贴图
});

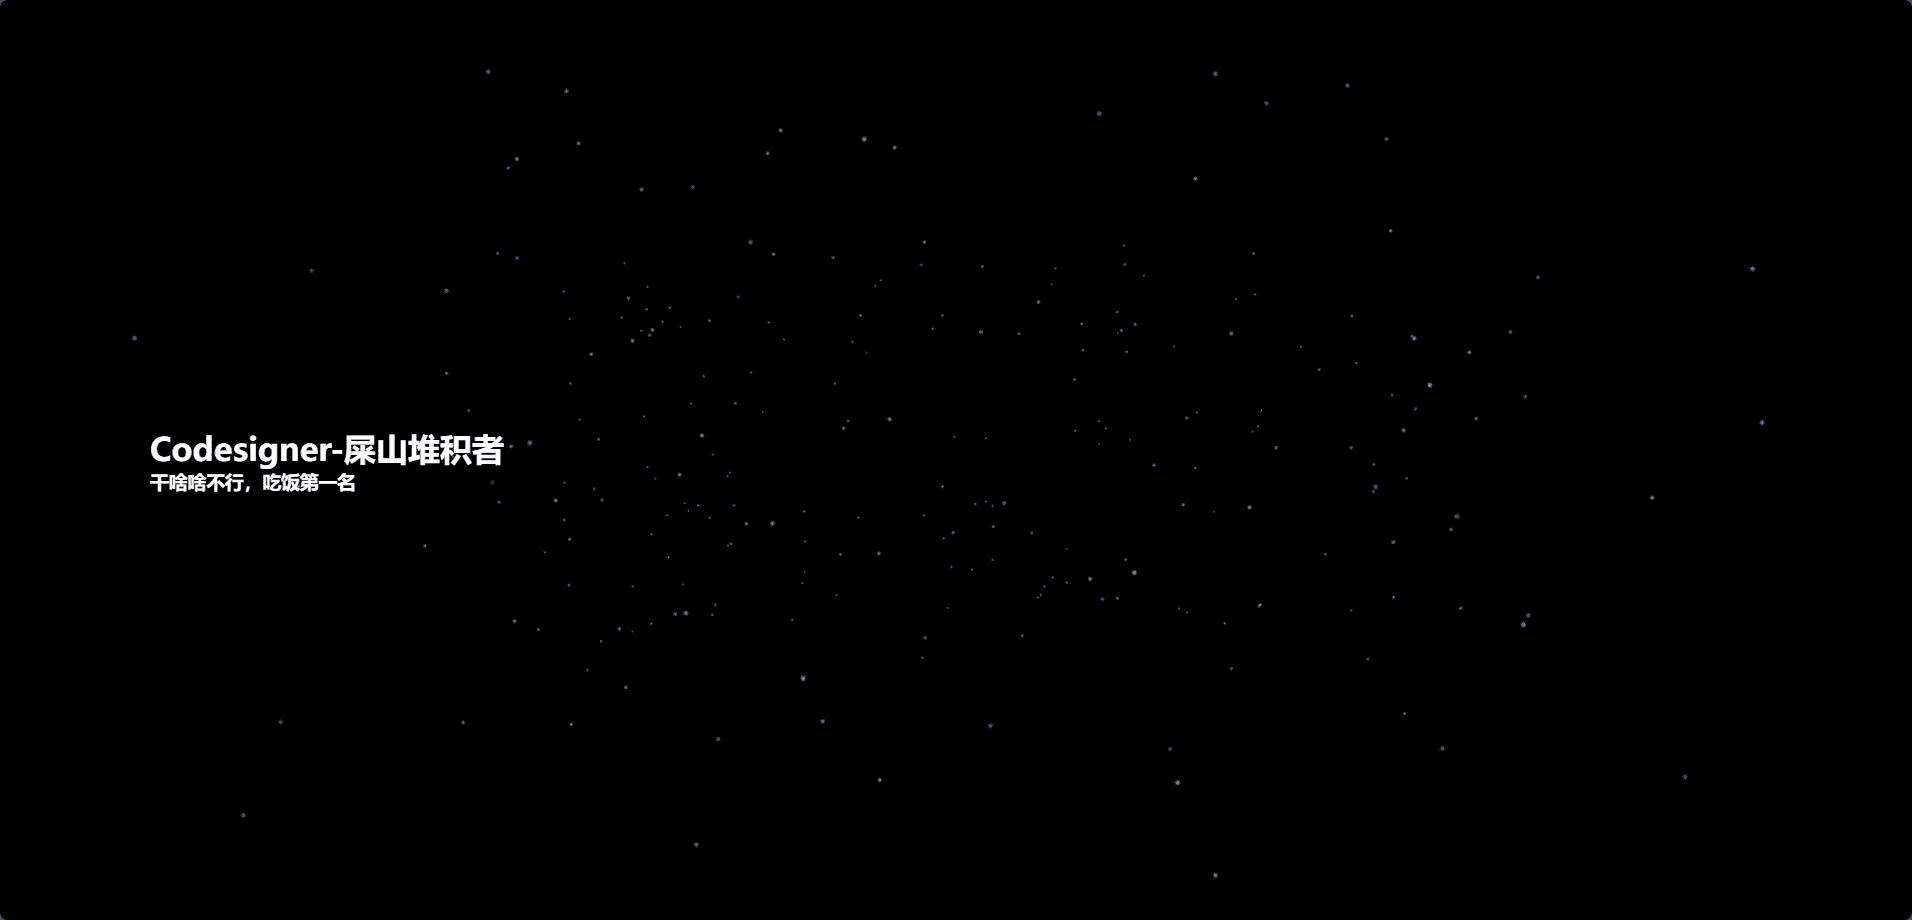
此时的我们的点就稍微好看一点了。
效果图

添加模型点

接下来我们要实现生成给模型描边的点数据,首先我们要导入模型,这个比较简单,我不多阐述

模型导入

1
2
3
4
5
6
7
8
9
10
11
12
13
14
15
16
17
18
19
20
21
22
23
24
25
26
27
28
29
30
31
32
33
// 导入gltf加载器
import { GLTFLoader } from "three/examples/jsm/loaders/GLTFLoader.js";
// 导入draco解码器
import { DRACOLoader } from "three/examples/jsm/loaders/DRACOLoader.js";
// 实例化加载器gltf
const gltfLoader = new GLTFLoader();
// 实例化加载器draco,用来解压glb文件
const dracoLoader = new DRACOLoader();
/**
* 设置draco路径,这里需要需要
* 从node_modules\three\examples\jsm(js)\libs文件夹下面拷贝出来,
* 然后放到public文件夹下面,
* 这样才能正常解析
* 新版本Three好像并不需要
* 你加载不出来可以尝试这个方法
*/
dracoLoader.setDecoderPath("./draco/");
// 设置gltf加载器draco解码器
gltfLoader.setDRACOLoader(dracoLoader);
// 加载模型
gltfLoader.load(
// 模型路径
"./model/rocket.glb",
// 加载完成回调
(gltf) => {
const model = gltf.scene;
// scene.add(model);
model.traverse((child) => {
if (child.isMesh) {
}
});
}
);

这里我们需要获取到模型的 mesh 用来生成粒子,创建一个生成模型粒子的类RandomModelPoints.js

创建模型点的类

搭建基本架构

这里的基本架构和之前随机生成空间中的点是一样的

1
2
3
4
5
6
7
8
9
10
11
12
13
14
15
16
17
18
19
20
21
22
23
24
25
26
27
28
29
30
31
32
// 导入threejs
import * as THREE from "three";

class RandomModelPoints extends THREE.Points {
constructor(mesh, number = 5000) {
super();
this.name = "RandomModelPoints";
const geometry = mesh.geometry;
const material = mesh.material;
// 纹理贴图
const textureLoader = new THREE.TextureLoader();

const particlesTexture = textureLoader.load("./texture/particles/1.png");

this.geometry = this.generatePoints(geometry, material, number);

// 创建点的材质
this.material = new THREE.PointsMaterial({
size: 0.05, // 点的大小
vertexColors: true, // 顶点颜色
transparent: true, // 开启透明度
opacity: 0.8, // 设置透明度
depthWrite: false, // 设置深度写入
blending: THREE.AdditiveBlending, // 设置混合模式(叠加)
sizeAttenuation: true, // 设置距离衰减
map: particlesTexture, // 纹理贴图
alphaMap: particlesTexture, // 透明度贴图
});
}
}

export default RandomModelPoints;

ok,接下来我们着重写一下这个generatePoints方法

generatePoints

首先定义一些参数
1
2
3
4
5
6
7
8
9
10
11
12
13
14
15
16
17
18
19
20
21
22
23
24
25
26
27
28
29
30
// 根据模型生成随机点
generatePoints(geometry, material, numPoints) {
// 创建新的 BufferGeometry 对象用于存储随机点的几何信息
const pointsGeometry = new THREE.BufferGeometry();
// 获取模型的顶点位置属性
const positionAttribute = geometry.getAttribute("position");
// 获取模型的纹理坐标属性(如果有)
const uvAttribute = geometry.getAttribute("uv");
// 获取模型的索引属性(如果有)
const indexAttribute = geometry.getIndex();
// 创建点位置所需要的数据
const positions = new Float32Array(numPoints * 3);
const randomPositions = new Float32Array(numPoints * 3);
// 创建颜色所需要的数据
const colors = new Float32Array(numPoints * 3);
// 创建大小所需要的数据
const sizes = new Float32Array(numPoints);
// 随机方向
const randomDirections = new Float32Array(numPoints * 3);
// 随机速度
const randomSpeeds = new Float32Array(numPoints);

// 获取材质的纹理贴图
const texture = material.map;
let faceIndex, a, b, c, uvA, uvB, uvC;

// Cache canvas and context
let textureData = null;
let textureWidth = 0, textureHeight = 0;
}
得到纹理数据

这里通过绘制 canvas 来得到纹理数据

1
2
3
4
5
6
7
8
9
10
11
12
13
14
15
// 如果有纹理贴图
if (texture) {
// 创建临时画布
const canvas = document.createElement("canvas");
textureWidth = texture.image.width;
textureHeight = texture.image.height;
canvas.width = textureWidth;
canvas.height = textureHeight;
// 获取画布上下文
const context = canvas.getContext("2d");
// 在画布上绘制纹理图像
context.drawImage(texture.image, 0, 0, textureWidth, textureHeight);
// 获取画布的图像数据
textureData = context.getImageData(0, 0, textureWidth, textureHeight).data;
}
获取三角面

我们都知道模型都是通过一个个的三角形搭建起来的,所以我们需要获取它的三角面

1
2
3
4
5
6
7
8
9
10
11
12
13
14
15
16
17
18
19
20
21
22
23
24
25
26
27
28
29
30
31
32
33
34
35
// 循环生成随机点
for (let i = 0; i < numPoints; i++) {
// 如果模型有索引属性
if (indexAttribute) {
// 随机选择一个三角形面的索引
faceIndex = Math.floor(Math.random() * (indexAttribute.count / 3)) * 3;
// 根据索引从顶点位置属性中获取三角形的第一个顶点坐标
a = new THREE.Vector3().fromBufferAttribute(
positionAttribute,
indexAttribute.getX(faceIndex)
);
// 根据索引从顶点位置属性中获取三角形的第二个顶点坐标
b = new THREE.Vector3().fromBufferAttribute(
positionAttribute,
indexAttribute.getX(faceIndex + 1)
);
// 根据索引从顶点位置属性中获取三角形的第三个顶点坐标
c = new THREE.Vector3().fromBufferAttribute(
positionAttribute,
indexAttribute.getX(faceIndex + 2)
);
} else {
// 如果没有索引属性,随机选择一个三角形
faceIndex = Math.floor(Math.random() * (positionAttribute.count / 3)) * 3;
a = new THREE.Vector3().fromBufferAttribute(positionAttribute, faceIndex);
b = new THREE.Vector3().fromBufferAttribute(
positionAttribute,
faceIndex + 1
);
c = new THREE.Vector3().fromBufferAttribute(
positionAttribute,
faceIndex + 2
);
}
}
根据三角形的三个点位置随机生成一个三角形内部的点数据

我们通过上面的方法已经得到了三角面的三个点,接下来我们要去三角面里面得到一个随机点

1
2
3
4
5
6
7
8
9
10
11
12
13
14
15
16
17
18
19
20
21
22
23
24
25
26
27
// 在三角形内部生成一个随机点
const randomPoint = this.getRandomPointInTriangle(a, b, c);
// 将随机点的坐标存储在 positions 数组中
positions[i * 3] = randomPoint.x;
positions[i * 3 + 1] = randomPoint.y;
positions[i * 3 + 2] = randomPoint.z;

// 生成随机的初始位置
randomPositions[i * 3] = (Math.random() - 0.5) * 10;
randomPositions[i * 3 + 1] = (Math.random() - 0.5) * 10;
randomPositions[i * 3 + 2] = (Math.random() - 0.5) * 10;

// 生成随机速度
randomSpeeds[i] = Math.random() * 0.5 + 0.1;
// 生成随机方向向量并归一化
let randomDirection = new THREE.Vector3(
Math.random() * 4 - 2, // X 方向 -1 到 1 之间的随机数
Math.random() * 4 - 2, // Y 方向 -1 到 1 之间的随机数
Math.random() * 4 - 2 // Z 方向 -1 到 1 之间的随机数
).normalize();
// 将随机方向向量的分量存储在 randomDirections 数组中
randomDirections[i * 3] = randomDirection.x;
randomDirections[i * 3 + 1] = randomDirection.y;
randomDirections[i * 3 + 2] = randomDirection.z;

// 生成随机的点大小
sizes[i] = Math.random() ** 2;
getRandomPointInTriangle
1
2
3
4
5
6
7
8
9
10
11
12
13
14
15
// 在三角形内部生成随机点
getRandomPointInTriangle(a, b, c) {
// 生成两个随机数
const r1 = Math.random();
const r2 = Math.random();
const sqrtR1 = Math.sqrt(r1);

// 计算三角形内随机点的坐标
const x = (1 - sqrtR1) * a.x + sqrtR1 * (1 - r2) * b.x + sqrtR1 * r2 * c.x;
const y = (1 - sqrtR1) * a.y + sqrtR1 * (1 - r2) * b.y + sqrtR1 * r2 * c.y;
const z = (1 - sqrtR1) * a.z + sqrtR1 * (1 - r2) * b.z + sqrtR1 * r2 * c.z;

// 返回随机点的坐标
return new THREE.Vector3(x, y, z);
}

这里触及了几何知识,大概原因如下,理解不了就直接把这个函数记住,以后要用的话直接用,也不用刻意理解,我们学习还是很注重不求甚解的。

原理
  1. 随机数的作用:
    r1r2是两个在 0 到 1 之间的随机数。通过使用随机数,可以在不同的调用中产生不同的点,从而实现随机分布在三角形内。
    r1取平方根得到sqrtR1,这一步进一步增加了随机性的多样性。
  2. 计算公式分析:
    对于三角形内任意一点P(x,y,z),可以通过线性插值的方式来表示。假设有三角形的三个顶点A(a.x,a.y,a.z)B(b.x,b.y,b.z)C(c.x,c.y,c.z)
    首先,将三角形的一条边AB看成由AB的线性插值,即对于参数t,有AB(t) = A + t*(B - A)
    同样,将边AC看成由AC的线性插值,对于参数s,有AC(s) = A + s*(C - A)
    现在要在三角形ABC内找到一点P,可以将P表示为在ABAC上的线性插值,即P = AB(u) + v*(AC(u) - AB(u)),其中uv是两个参数。
    u = sqrtR1,v = r2,代入上述公式进行推导:
    AB(u) = A + u*(B - A) = A + sqrtR1*(B - A) = A*(1 - sqrtR1) + sqrtR1*B
    AC(u) = A + u*(C - A) = A + sqrtR1*(C - A)
    P = AB(u) + v*(AC(u) - AB(u)) = A*(1 - sqrtR1) + sqrtR1*B + r2*(A*(sqrtR1 - 1) + sqrtR1*C - A*(1 - sqrtR1) - sqrtR1*B) = A*(1 - sqrtR1) + sqrtR1*(1 - r2)*B + sqrtR1*r2*C
    这就得到了函数中的计算公式,即x = (1 - sqrtR1) * a.x + sqrtR1 * (1 - r2) * b.x + sqrtR1 * r2 * c.x等。
  3. 数学性质保证:
    由于sqrtR1r2都在01之间,并且通过线性插值的方式组合了三角形的三个顶点坐标,所以生成的点必然在三角形内部。
    如果sqrtR1r2的取值范围超出了01,那么生成的点可能会在三角形外部。但由于随机数的性质和限制,使得生成的点在三角形内部的概率较高。
处理颜色
1
2
3
4
5
6
7
8
9
10
11
12
13
14
15
16
17
18
19
20
21
22
23
24
25
26
27
28
29
30
31
32
33
34
// 处理颜色
if (texture && uvAttribute) {
// 如果有纹理贴图和纹理坐标属性,获取三角形的纹理坐标
uvA = new THREE.Vector2().fromBufferAttribute(
uvAttribute,
indexAttribute ? indexAttribute.getX(faceIndex) : faceIndex
);
uvB = new THREE.Vector2().fromBufferAttribute(
uvAttribute,
indexAttribute ? indexAttribute.getX(faceIndex + 1) : faceIndex + 1
);
uvC = new THREE.Vector2().fromBufferAttribute(
uvAttribute,
indexAttribute ? indexAttribute.getX(faceIndex + 2) : faceIndex + 2
);
// 在三角形的纹理坐标内部生成一个随机纹理坐标
const randomUV = this.getRandomPointInTriangle(uvA, uvB, uvC);
// 从纹理数据中获取对应随机纹理坐标的颜色
const color = this.getColorFromTexture(
textureData,
textureWidth,
textureHeight,
randomUV
);
// 将颜色分量存储在 colors 数组中
colors[i * 3] = color.r;
colors[i * 3 + 1] = color.g;
colors[i * 3 + 2] = color.b;
} else {
// 如果没有纹理贴图或纹理坐标属性,生成默认随机颜色
colors[i * 3] = Math.random() * 0.5;
colors[i * 3 + 1] = Math.random() * 0.5;
colors[i * 3 + 2] = 0.5 + Math.random() * 0.5;
}
getColorFromTexture

上面用到了这个方法,这里讲解一下这个方法

1
2
3
4
5
6
7
8
9
10
11
12
13
14
15
16
17
18
19
20
21
22
23
getColorFromTexture(textureData, width, height, uv) {
// 计算纹理坐标在纹理中的实际位置
const u = uv.x % 1;
const v = uv.y % 1;

// 根据纹理坐标计算在纹理中的像素坐标
const x = Math.floor(u * width);
const y = Math.floor(v * height);

// 对像素坐标进行边界检查
const clampedX = Math.max(0, Math.min(x, width - 1));
const clampedY = Math.max(0, Math.min(y, height - 1));

// 计算在纹理数据中的偏移量
const offset = (clampedY * width + clampedX) * 4;
// 提取纹理数据中的红、绿、蓝三个通道的值并归一化
const r = textureData[offset] / 255;
const g = textureData[offset + 1] / 255;
const b = textureData[offset + 2] / 255;

// 返回颜色对象
return new THREE.Color(r, g, b);
}
最后设置一下属性
1
2
3
4
5
6
7
8
9
10
11
12
13
14
15
16
17
18
19
20
21
22
23
24
25
26
27
// 将随机点的位置属性设置为 pointsGeometry 的属性
pointsGeometry.setAttribute(
"position",
new THREE.BufferAttribute(positions, 3)
);
// 将随机点的颜色属性设置为 pointsGeometry 的属性
pointsGeometry.setAttribute("color", new THREE.BufferAttribute(colors, 3));
// 将随机点的大小属性设置为 pointsGeometry 的属性
pointsGeometry.setAttribute("size", new THREE.BufferAttribute(sizes, 1));
// 将随机点的随机位置属性设置为 pointsGeometry 的属性
pointsGeometry.setAttribute(
"randomPosition",
new THREE.BufferAttribute(randomPositions, 3)
);
// 将随机点的随机方向属性设置为 pointsGeometry 的属性
pointsGeometry.setAttribute(
"randomDirection",
new THREE.BufferAttribute(randomDirections, 3)
);
// 将随机点的随机速度属性设置为 pointsGeometry 的属性
pointsGeometry.setAttribute(
"randomSpeed",
new THREE.BufferAttribute(randomSpeeds, 1)
);

// 返回生成的点的几何信息
return pointsGeometry;
完整代码
1
2
3
4
5
6
7
8
9
10
11
12
13
14
15
16
17
18
19
20
21
22
23
24
25
26
27
28
29
30
31
32
33
34
35
36
37
38
39
40
41
42
43
44
45
46
47
48
49
50
51
52
53
54
55
56
57
58
59
60
61
62
63
64
65
66
67
68
69
70
71
72
73
74
75
76
77
78
79
80
81
82
83
84
85
86
87
88
89
90
91
92
93
94
95
96
97
98
99
100
101
102
103
104
105
106
107
108
109
110
111
112
113
114
115
116
117
118
119
120
121
122
123
124
125
126
127
128
129
130
131
132
133
134
135
136
137
138
139
140
141
142
143
144
145
146
147
148
149
150
151
152
153
154
155
156
157
158
159
160
161
162
163
164
165
166
167
168
169
170
171
172
173
174
175
176
177
178
179
180
181
182
183
184
185
186
187
188
189
190
191
192
193
194
195
196
197
198
199
200
201
202
203
204
205
206
207
208
209
210
211
212
213
214
215
216
217
218
219
220
221
222
223
224
225
226
227
228
229
230
231
232
233
234
235
236
237
238
239
240
241
242
243
244
245
246
247
248
249
250
251
252
253
254
255
256
// 导入threejs
import * as THREE from "three";

// 根据模型创建随机点集合体
class RandomModelPoints extends THREE.Points {
constructor(mesh, number = 5000) {
super();
this.name = "RandomModelPoints";
const geometry = mesh.geometry;
const material = mesh.material;

this.geometry = this.generatePoints(geometry, material, number);

// 纹理贴图
const textureLoader = new THREE.TextureLoader();

const particlesTexture = textureLoader.load("./texture/particles/1.png");

// 创建点的材质
this.material = new THREE.PointsMaterial({
size: 0.05, // 点的大小
vertexColors: true, // 顶点颜色
transparent: true, // 开启透明度
opacity: 0.8, // 设置透明度
depthWrite: false, // 设置深度写入
blending: THREE.AdditiveBlending, // 设置混合模式(叠加)
sizeAttenuation: true, // 设置距离衰减
map: particlesTexture, // 纹理贴图
alphaMap: particlesTexture, // 透明度贴图
});
}
// 根据模型生成随机点
generatePoints(geometry, material, numPoints) {
// 创建新的 BufferGeometry 对象用于存储随机点的几何信息
const pointsGeometry = new THREE.BufferGeometry();
// 获取模型的顶点位置属性
const positionAttribute = geometry.getAttribute("position");
// 获取模型的纹理坐标属性(如果有)
const uvAttribute = geometry.getAttribute("uv");
// 获取模型的索引属性(如果有)
const indexAttribute = geometry.getIndex();
// 创建点位置所需要的数据
const positions = new Float32Array(numPoints * 3);
const randomPositions = new Float32Array(numPoints * 3);
// 创建颜色所需要的数据
const colors = new Float32Array(numPoints * 3);
// 创建大小所需要的数据
const sizes = new Float32Array(numPoints);
// 随机方向
const randomDirections = new Float32Array(numPoints * 3);
// 随机速度
const randomSpeeds = new Float32Array(numPoints);

// 获取材质的纹理贴图
const texture = material.map;
let faceIndex, a, b, c, uvA, uvB, uvC;

// Cache canvas and context
let textureData = null;
let textureWidth = 0,
textureHeight = 0;

// 如果有纹理贴图
if (texture) {
// 创建临时画布
const canvas = document.createElement("canvas");
textureWidth = texture.image.width;
textureHeight = texture.image.height;
canvas.width = textureWidth;
canvas.height = textureHeight;
// 获取画布上下文
const context = canvas.getContext("2d");
// 在画布上绘制纹理图像
context.drawImage(texture.image, 0, 0, textureWidth, textureHeight);
// 获取画布的图像数据
textureData = context.getImageData(
0,
0,
textureWidth,
textureHeight
).data;
}

// 循环生成随机点
for (let i = 0; i < numPoints; i++) {
// 如果模型有索引属性
if (indexAttribute) {
// 随机选择一个三角形面的索引
faceIndex = Math.floor(Math.random() * (indexAttribute.count / 3)) * 3;
// 根据索引从顶点位置属性中获取三角形的第一个顶点坐标
a = new THREE.Vector3().fromBufferAttribute(
positionAttribute,
indexAttribute.getX(faceIndex)
);
// 根据索引从顶点位置属性中获取三角形的第二个顶点坐标
b = new THREE.Vector3().fromBufferAttribute(
positionAttribute,
indexAttribute.getX(faceIndex + 1)
);
// 根据索引从顶点位置属性中获取三角形的第三个顶点坐标
c = new THREE.Vector3().fromBufferAttribute(
positionAttribute,
indexAttribute.getX(faceIndex + 2)
);
} else {
// 如果没有索引属性,随机选择一个三角形
faceIndex =
Math.floor(Math.random() * (positionAttribute.count / 3)) * 3;
a = new THREE.Vector3().fromBufferAttribute(
positionAttribute,
faceIndex
);
b = new THREE.Vector3().fromBufferAttribute(
positionAttribute,
faceIndex + 1
);
c = new THREE.Vector3().fromBufferAttribute(
positionAttribute,
faceIndex + 2
);
}

// 在三角形内部生成一个随机点
const randomPoint = this.getRandomPointInTriangle(a, b, c);
// 将随机点的坐标存储在 positions 数组中
positions[i * 3] = randomPoint.x;
positions[i * 3 + 1] = randomPoint.y;
positions[i * 3 + 2] = randomPoint.z;

// 生成随机的初始位置
randomPositions[i * 3] = (Math.random() - 0.5) * 10;
randomPositions[i * 3 + 1] = (Math.random() - 0.5) * 10;
randomPositions[i * 3 + 2] = (Math.random() - 0.5) * 10;

// 生成随机速度
randomSpeeds[i] = Math.random() * 0.5 + 0.1;
// 生成随机方向向量并归一化
let randomDirection = new THREE.Vector3(
Math.random() * 4 - 2, // X 方向 -1 到 1 之间的随机数
Math.random() * 4 - 2, // Y 方向 -1 到 1 之间的随机数
Math.random() * 4 - 2 // Z 方向 -1 到 1 之间的随机数
).normalize();
// 将随机方向向量的分量存储在 randomDirections 数组中
randomDirections[i * 3] = randomDirection.x;
randomDirections[i * 3 + 1] = randomDirection.y;
randomDirections[i * 3 + 2] = randomDirection.z;

// 生成随机的点大小
sizes[i] = Math.random() ** 2;

// 处理颜色
if (texture && uvAttribute) {
// 如果有纹理贴图和纹理坐标属性,获取三角形的纹理坐标
uvA = new THREE.Vector2().fromBufferAttribute(
uvAttribute,
indexAttribute ? indexAttribute.getX(faceIndex) : faceIndex
);
uvB = new THREE.Vector2().fromBufferAttribute(
uvAttribute,
indexAttribute ? indexAttribute.getX(faceIndex + 1) : faceIndex + 1
);
uvC = new THREE.Vector2().fromBufferAttribute(
uvAttribute,
indexAttribute ? indexAttribute.getX(faceIndex + 2) : faceIndex + 2
);
// 在三角形的纹理坐标内部生成一个随机纹理坐标
const randomUV = this.getRandomPointInTriangle(uvA, uvB, uvC);
// 从纹理数据中获取对应随机纹理坐标的颜色
const color = this.getColorFromTexture(
textureData,
textureWidth,
textureHeight,
randomUV
);
// 将颜色分量存储在 colors 数组中
colors[i * 3] = color.r;
colors[i * 3 + 1] = color.g;
colors[i * 3 + 2] = color.b;
} else {
// 如果没有纹理贴图或纹理坐标属性,生成默认随机颜色
colors[i * 3] = Math.random() * 0.5;
colors[i * 3 + 1] = Math.random() * 0.5;
colors[i * 3 + 2] = 0.5 + Math.random() * 0.5;
}
}

// 将随机点的位置属性设置为 pointsGeometry 的属性
pointsGeometry.setAttribute(
"position",
new THREE.BufferAttribute(positions, 3)
);
// 将随机点的颜色属性设置为 pointsGeometry 的属性
pointsGeometry.setAttribute("color", new THREE.BufferAttribute(colors, 3));
// 将随机点的大小属性设置为 pointsGeometry 的属性
pointsGeometry.setAttribute("size", new THREE.BufferAttribute(sizes, 1));
// 将随机点的随机位置属性设置为 pointsGeometry 的属性
pointsGeometry.setAttribute(
"randomPosition",
new THREE.BufferAttribute(randomPositions, 3)
);
// 将随机点的随机方向属性设置为 pointsGeometry 的属性
pointsGeometry.setAttribute(
"randomDirection",
new THREE.BufferAttribute(randomDirections, 3)
);
// 将随机点的随机速度属性设置为 pointsGeometry 的属性
pointsGeometry.setAttribute(
"randomSpeed",
new THREE.BufferAttribute(randomSpeeds, 1)
);

// 返回生成的点的几何信息
return pointsGeometry;
}
// 从纹理数据中获取颜色
getColorFromTexture(textureData, width, height, uv) {
// 计算纹理坐标在纹理中的实际位置
const u = uv.x % 1;
const v = uv.y % 1;

// 根据纹理坐标计算在纹理中的像素坐标
const x = Math.floor(u * width);
const y = Math.floor(v * height);

// 对像素坐标进行边界检查
const clampedX = Math.max(0, Math.min(x, width - 1));
const clampedY = Math.max(0, Math.min(y, height - 1));

// 计算在纹理数据中的偏移量
const offset = (clampedY * width + clampedX) * 4;
// 提取纹理数据中的红、绿、蓝三个通道的值并归一化
const r = textureData[offset] / 255;
const g = textureData[offset + 1] / 255;
const b = textureData[offset + 2] / 255;

// 返回颜色对象
return new THREE.Color(r, g, b);
}
// 在三角形内部生成随机点
getRandomPointInTriangle(a, b, c) {
// 生成两个随机数
const r1 = Math.random();
const r2 = Math.random();
const sqrtR1 = Math.sqrt(r1);

// 计算三角形内随机点的坐标
const x = (1 - sqrtR1) * a.x + sqrtR1 * (1 - r2) * b.x + sqrtR1 * r2 * c.x;
const y = (1 - sqrtR1) * a.y + sqrtR1 * (1 - r2) * b.y + sqrtR1 * r2 * c.y;
const z = (1 - sqrtR1) * a.z + sqrtR1 * (1 - r2) * b.z + sqrtR1 * r2 * c.z;

// 返回随机点的坐标
return new THREE.Vector3(x, y, z);
}
}

export default RandomModelPoints;

导入模型之后使用这个类

1
2
3
4
5
6
7
import RandomSpacePoints from "./mesh/RandomSpacePoints.js";
model.traverse((child) => {
if (child.isMesh) {
const points = new RandomModelPoints(child, 8000);
scene.add(points);
}
});

效果图

使用 onBeforeCompile 修改着色器

此时其实我们的 size 属性是没有生效的,这里我们修改一下材质

1
2
3
4
5
6
7
8
9
10
11
12
13
14
15
16
17
18
19
20
21
22
geometry.setAttribute("vSize", new THREE.BufferAttribute(sizes, 1));
// 创建点的材质
const material = new THREE.PointsMaterial({
size: 0.05, // 点的大小
vertexColors: true, // 顶点颜色
transparent: true, // 开启透明度
opacity: 0.8, // 设置透明度
depthWrite: false, // 设置深度写入
blending: THREE.AdditiveBlending, // 设置混合模式(叠加)
sizeAttenuation: true, // 设置距离衰减
map: particlesTexture, // 纹理贴图
alphaMap: particlesTexture, // 透明度贴图
onBeforeCompile: (shader) => {
shader.vertexShader = `
attribute float vSize;
${shader.vertexShader}
`.replace(`gl_PointSize = size;`, `gl_PointSize = size * vSize;`);
shader.fragmentShader = `
${shader.fragmentShader}
`;
},
});

添加多个模型

上面我们讲完了一个模型,接下来,我们不是有 300vh 的页面吗,给每个 100vh 加上一个模型,生成点位数据

生成点位数据

这里我把前面的let points改成了let spacePoints方便理解,然后就是添加模型即可,设置一下模型的位置

1
2
3
4
5
6
7
8
9
10
11
12
13
14
15
16
17
18
19
20
21
22
23
24
25
26
27
28
29
30
31
32
33
34
35
36
37
38
39
40
41
42
43
44
45
46
47
48
49
50
51
52
53
54
55
56
57
58
59
60
61
62
63
64
65
66
67
68
69
70
71
72
73
74
75
76
77
78
// 创建空间粒子
let spacePoints = new RandomSpacePoints(250);
scene.add(spacePoints);

// 实例化加载器gltf
const gltfLoader = new GLTFLoader();
// 实例化加载器draco,用来解压glb文件
const dracoLoader = new DRACOLoader();
/**
* 设置draco路径,这里需要需要
* 从node_modules\three\examples\jsm(js)\libs文件夹下面拷贝出来,
* 然后放到public文件夹下面,
* 这样才能正常解析
* 新版本Three好像并不需要
* 你加载不出来可以尝试这个方法
*/
dracoLoader.setDecoderPath("./draco/");
// 设置gltf加载器draco解码器
gltfLoader.setDRACOLoader(dracoLoader);
// 加载模型
gltfLoader.load(
// 模型路径
"./model/rocket.glb",
// 加载完成回调
(gltf) => {
const model = gltf.scene;
// scene.add(model);
model.traverse((child) => {
if (child.isMesh) {
const points = new RandomModelPoints(child, 8000);
// scene.add(points);
if (points) {
points.position.x = 1;
scene.add(points);
}
}
});
}
);

gltfLoader.load(
"./model/earth.glb",
// 加载完成回调
(gltf) => {
const model = gltf.scene;
// 提取模型的几何体信息
model.traverse((child) => {
if (child.isMesh) {
const points = new RandomModelPoints(child, 8000);
if (points) {
points.position.x = -1;
points.position.y = -5;
// models.push(points)
scene.add(points);
}
}
});
}
);

gltfLoader.load(
"./model/duck.glb",
// 加载完成回调
(gltf) => {
const model = gltf.scene;
// 提取模型的几何体信息
model.traverse((child) => {
if (child.isMesh) {
const points = new RandomModelPoints(child, 8000);
if (points) {
points.position.x = 1;
points.position.y = -10;
scene.add(points);
}
}
});
}
);

修改相机位置

1
2
3
4
5
6
7
8
9
10
11
12
13
14
15
16
17
18
// 持续渲染,让相机场景动起来
function render() {
// lerp(x,y,t) 对两个值 x 和 y 进行线性插值,t 是插值系数,范围在 [0, 1] 之间。
let cameraY = THREE.MathUtils.lerp(
camera.position.y,
-currentPage.value * 0.5,
0.05
);
camera.position.y = cameraY;
camera.lookAt(0, cameraY, 0);
spacePoints.position.y = cameraY;
// 使用渲染器通过相机将场景渲染进来
renderer.render(scene, camera);
// 渲染下一帧的时候就会调用render函数
requestAnimationFrame(render);
}

render();

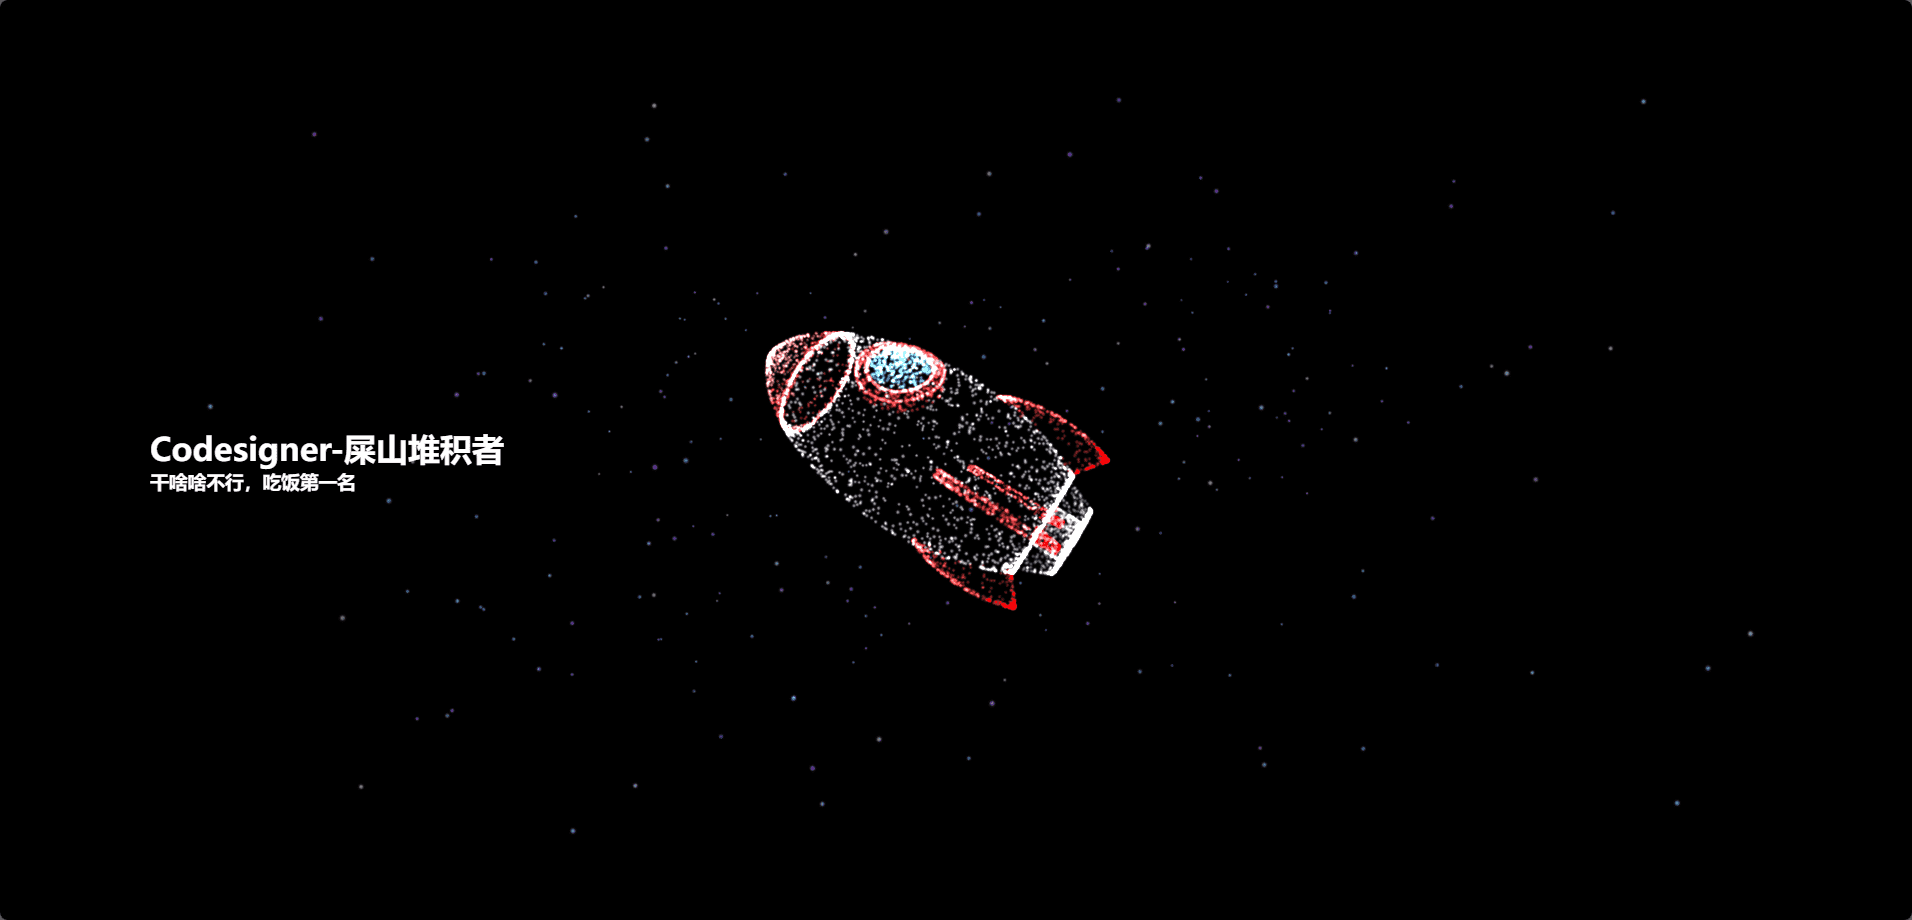
此时效果如下

添加粒子运动

空间随机粒子添加漂浮动画

我们先给空间中的随机粒子添加漂浮动画

定义基本结构

1
2
3
4
5
6
7
8
9
10
11
12
13
14
15
// 导入threejs
import * as THREE from "three";

export default function particlesAnimate(
mesh, //你要变成动态粒子的物体
clock //统一的计时器
) {
const pointsGeometry = mesh.geometry;
const material = mesh.material;
// 偏移量
let offsetRadius = 0.3;
const points = new THREE.Points(pointsGeometry, material);

return points;
}

定义这样一个方法,将基本结构如下,这样我们就可以在 main.js 中调用

1
2
3
4
import particlesAnimate from "./mesh/ParticlesAnimate.js";
// 创建粒子
let spacePoints = particlesAnimate(new RandomSpacePoints(250, scene), clock);
scene.add(spacePoints);

添加动画

接下来,我们只需要对pointsGeometry进行操作即可,这里我给偏移量做了区分,因为模型的点不用动太多。

1
2
3
4
5
6
7
8
9
10
11
12
13
14
15
16
17
18
19
20
21
22
23
24
25
26
27
28
29
30
31
32
33
34
35
36
37
38
39
40
41
42
43
44
45
46
47
48
49
50
51
52
53
54
55
56
57
58
59
60
61
62
63
64
65
66
67
68
69
70
71
72
73
74
75
76
77
78
79
80
81
82
83
84
85
86
87
88
89
90
91
92
93
94
95
96
97
98
99
100
101
102
103
104
// 导入threejs
import * as THREE from "three";

export default function particlesAnimate(
mesh, //你要变成动态粒子的物体
clock //统一的计时器
) {
const pointsGeometry = mesh.geometry;
const material = mesh.material;
// 偏移量
let offsetRadius = mesh.name === "RandomSpacePoints" ? 0.3 : 0.02;

const points = new THREE.Points(pointsGeometry, material);
// 将初始位置存储下来,用于后续的动画计算
let initialPositions = pointsGeometry.attributes.position.array.slice();
let initialColors = pointsGeometry.attributes.color.array.slice();

// 渲染循环函数中更新粒子动画
function animateParticles() {
const elapsedTime = clock.getElapsedTime(); // 获取自从时钟启动后的总时间
const positions = pointsGeometry.attributes.position.array; // 获取粒子的位置数据
const colors = pointsGeometry.attributes.color.array; // 获取粒子颜色数据
const randomDirections = pointsGeometry.attributes.randomDirection // 随机方向
? pointsGeometry.attributes.randomDirection.array
: undefined;
const randomSpeeds = pointsGeometry.attributes.randomSpeed // 随机速度
? pointsGeometry.attributes.randomSpeed.array
: undefined;
// 粒子数组
const referPositions = new Float32Array(
pointsGeometry.attributes.position.array.length
);
for (let i = 0; i < positions.length; i += 3) {
// 获取初始位置
const initialX = initialPositions[i];
const initialY = initialPositions[i + 1];
const initialZ = initialPositions[i + 2];
// 获取当前粒子的运动方向和速度
const direction = {
x: randomDirections[i / 3],
y: randomDirections[i / 3 + 1],
z: randomDirections[i / 3 + 2],
};
const speed = randomSpeeds[i / 3];

// 根据时间和速度生成随机摆动动画
const offsetX =
Math.sin(elapsedTime * speed + initialX) * direction.x * offsetRadius;
const offsetY =
Math.sin(elapsedTime * speed + initialY) * direction.y * offsetRadius;
const offsetZ =
Math.sin(elapsedTime * speed + initialZ) * direction.z * offsetRadius;

// 更新粒子的位置
referPositions[i] = initialX + offsetX;
referPositions[i + 1] = initialY + offsetY;
referPositions[i + 2] = initialZ + offsetZ;
let stepLength = 0.1;
let currentPosition;
currentPosition = {
x: referPositions[i],
y: referPositions[i + 1],
z: referPositions[i + 2],
};

positions[i] = THREE.MathUtils.lerp(
positions[i],
currentPosition.x,
stepLength
);

positions[i + 1] = THREE.MathUtils.lerp(
positions[i + 1],
currentPosition.y,
stepLength
);

positions[i + 2] = THREE.MathUtils.lerp(
positions[i + 2],
currentPosition.z,
stepLength
);

// 根据时间和速度生成随机颜色
colors[i] =
initialColors[i] +
Math.sin(elapsedTime * speed + initialX + initialColors[i]) * 0.1;
colors[i + 1] =
initialColors[i + 1] +
Math.sin(elapsedTime * speed + initialY + initialColors[i + 1]) * 0.1;
colors[i + 2] =
initialColors[i + 2] +
Math.sin(elapsedTime * speed + initialZ + initialColors[i + 2]) * 0.1;
}

// 通知Three.js更新粒子的几何体
pointsGeometry.attributes.position.needsUpdate = true;
pointsGeometry.attributes.color.needsUpdate = true;
requestAnimationFrame(animateParticles);
}
animateParticles();

return points;
}

此时效果如下

添加模型粒子炸裂动画

我们已经完成了漂浮动画的实现,接下来,我们不是还有一个randomPositions的属性没有使用吗,在创建模型粒子的时候创建的,这个就是为了炸裂动画使用的,我们只需将代码简单修改,并传入当前页currentPage

1
2
3
4
5
6
7
8
9
10
11
12
13
14
15
16
17
18
19
20
21
22
23
24
const randomPositions = pointsGeometry.attributes.randomPosition
? pointsGeometry.attributes.randomPosition.array
: undefined; // 随机初始位置
if (randomPositions != undefined) {
currentPosition = {
x:
referPositions[i] +
randomPositions[i] * Math.sin((currentPage.value % 10) * Math.PI * 0.1),
y:
referPositions[i + 1] +
randomPositions[i + 1] *
Math.sin((currentPage.value % 10) * Math.PI * 0.1),
z:
referPositions[i + 2] +
randomPositions[i + 2] *
Math.sin((currentPage.value % 10) * Math.PI * 0.1),
};
} else {
currentPosition = {
x: referPositions[i],
y: referPositions[i + 1],
z: referPositions[i + 2],
};
}

此时,我们即可得到对应的模型粒子炸裂动画,效果如下。

添加扰流动画

最后,我们给我们的模型粒子添加一个扰流动画,就是鼠标放上去,粒子会稍微扩散一点的动画

在 main.js 设置一些检测鼠标划过的参数

1
2
3
4
5
6
7
8
9
10
11
12
13
14
15
16
17
18
19
20
21
22
23
// 创建射线
const raycaster = new THREE.Raycaster();
const mouse = new THREE.Vector2();
const currentMouse = new THREE.Vector2();

let params = [
clock,
currentMouse,
mouse,
raycaster,
camera,
scene,
plane,
currentPage,
];

window.addEventListener("mousemove", onMouseMove);

function onMouseMove(event) {
// 将鼠标的屏幕坐标转换为归一化设备坐标
mouse.x = (event.clientX / window.innerWidth) * 2 - 1;
mouse.y = -(event.clientY / window.innerHeight) * 2 + 1;
}

生成动画的时候将参数传进去

然后我们在生成动画的时候把参数传进去,如下:

1
const points = particlesAnimate(new RandomModelPoints(child, 8000), ...params);

对生成动画的方法进行修改

这里只写一下添加的代码

1
2
3
4
5
6
7
8
9
10
11
12
13
14
15
16
17
18
19
20
21
22
23
24
25
26
27
28
29
30
31
32
33
34
35
36
37
38
39
40
41
42
43
44
45
46
47
48
49
50
51
52
53
54
55
56
57
58
59
60
61
62
63
64
65
66
67
68
69
70
71
72
73
74
75
76
77
78
79
80
81
82
83
84
85
86
87
88
89
90
91
92
93
94
95
96
97
98
99
100
101
102
103
104
105
106
107
108
109
110
111
112
113
114
115
116
117
118
119
120
121
122
123
124
125
126
127
128
129
130
131
132
133
134
135
136
137
138
139
140
141
142
export default function particlesAnimate(
mesh, //你要变成动态粒子的物体
...res
) {
const [
clock,
currentMouse,
mouse,
raycaster,
camera,
scene,
plane,
currentPage,
] = res;

// .....

// 鼠标的影响幅度
let mouseOffset = 0.2;
//鼠标影响距离
let distanceScale = 0.5;

let initialSizes = pointsGeometry.attributes.vSize.array.slice();

// 渲染循环函数中更新粒子动画
function animateParticles() {
// ...
const sizes = pointsGeometry.attributes.vSize.array; // 获取粒子大小数据

// ...
// 真实鼠标位置
currentMouse.x = THREE.MathUtils.lerp(currentMouse.x, mouse.x, 0.05);
currentMouse.y = THREE.MathUtils.lerp(currentMouse.y, mouse.y, 0.05);
// 点稍微旋转一下(旋转模型)
points.rotation.x =
Math.sin(elapsedTime * 0.2) * 0.2 - currentMouse.x * 0.2 * mouseOffset;
points.rotation.z =
Math.sin(elapsedTime * 0.2) * 0.1 - currentMouse.y * 0.2 * mouseOffset;

// 更新 Raycaster 的方向和位置
raycaster.setFromCamera(mouse, camera);

// 获取与点的交叉信息
const intersects = raycaster.intersectObject(plane);

for (let i = 0; i < positions.length; i += 3) {
// ...
// 默认粒子大小为 1
let targetSize = 1;

// ...

// 如果鼠标附近有顶点,将它们放大并四散
if (intersects.length > 0) {
const intersectPoint = intersects[0].point; // 获取鼠标的交点位置
const distance = new THREE.Vector2(
initialX + points.position.x,
initialY + points.position.y
).distanceTo(new THREE.Vector2(intersectPoint.x, intersectPoint.y));

if (distance < distanceScale) {
// 距离阈值,根据需要调整
targetSize = 2; // 放大粒子

// let targetLength = 1000*(distanceScale*0.5-distance)*(distanceScale*0.5-distance);
let targetLength = 0.1;
// 增加四散效果
positions[i] = THREE.MathUtils.lerp(
positions[i],
currentPosition.x +
(currentPosition.x - (intersectPoint.x - points.position.x)) *
targetLength,
stepLength
);
positions[i + 1] = THREE.MathUtils.lerp(
positions[i + 1],
currentPosition.y +
(currentPosition.y - (intersectPoint.y - points.position.y)) *
targetLength,
stepLength
);
positions[i + 2] = THREE.MathUtils.lerp(
positions[i + 2],
currentPosition.z +
(currentPosition.z - (intersectPoint.z - points.position.z)) *
targetLength,
stepLength
);
sizes[i / 3] = THREE.MathUtils.lerp(
sizes[i / 3],
initialSizes[i / 3] * targetSize,
0.03
);
} else {
positions[i] = THREE.MathUtils.lerp(
positions[i],
currentPosition.x,
stepLength
);
positions[i + 1] = THREE.MathUtils.lerp(
positions[i + 1],
currentPosition.y,
stepLength
);
positions[i + 2] = THREE.MathUtils.lerp(
positions[i + 2],
currentPosition.z,
stepLength
);
sizes[i / 3] = THREE.MathUtils.lerp(
sizes[i / 3],
initialSizes[i / 3],
0.03
);
}
}
}
pointsGeometry.attributes.color.needsUpdate = true;
pointsGeometry.attributes.vSize.needsUpdate = true; // 标记需要更新
}

完整动画代码

1
2
3
4
5
6
7
8
9
10
11
12
13
14
15
16
17
18
19
20
21
22
23
24
25
26
27
28
29
30
31
32
33
34
35
36
37
38
39
40
41
42
43
44
45
46
47
48
49
50
51
52
53
54
55
56
57
58
59
60
61
62
63
64
65
66
67
68
69
70
71
72
73
74
75
76
77
78
79
80
81
82
83
84
85
86
87
88
89
90
91
92
93
94
95
96
97
98
99
100
101
102
103
104
105
106
107
108
109
110
111
112
113
114
115
116
117
118
119
120
121
122
123
124
125
126
127
128
129
130
131
132
133
134
135
136
137
138
139
140
141
142
143
144
145
146
147
148
149
150
151
152
153
154
155
156
157
158
159
160
161
162
163
164
165
166
167
168
169
170
171
172
173
174
175
176
177
178
179
180
181
182
183
184
185
186
187
188
189
190
191
192
193
194
195
196
197
198
199
200
201
202
203
204
205
206
207
208
209
210
211
212
213
214
215
216
217
218
219
220
221
222
223
224
225
226
227
228
// 导入threejs
import * as THREE from "three";

export default function particlesAnimate(
mesh, //你要变成动态粒子的物体
...res
) {
const [
clock,
currentMouse,
mouse,
raycaster,
camera,
scene,
plane,
currentPage,
] = res;
const pointsGeometry = mesh.geometry;
const material = mesh.material;
// 偏移量
let offsetRadius = mesh.name === "RandomSpacePoints" ? 0.3 : 0.02;

// 鼠标的影响幅度
let mouseOffset = 0.2;
//鼠标影响距离
let distanceScale = 0.5

const points = new THREE.Points(pointsGeometry, material);
// 将初始位置存储下来,用于后续的动画计算
let initialPositions = pointsGeometry.attributes.position.array.slice();
let initialColors = pointsGeometry.attributes.color.array.slice();
let initialSizes = pointsGeometry.attributes.vSize.array.slice();

// 渲染循环函数中更新粒子动画
function animateParticles() {
const elapsedTime = clock.getElapsedTime(); // 获取自从时钟启动后的总时间
const positions = pointsGeometry.attributes.position.array; // 获取粒子的位置数据
const colors = pointsGeometry.attributes.color.array; // 获取粒子颜色数据
const sizes = pointsGeometry.attributes.vSize.array; // 获取粒子大小数据
const randomDirections = pointsGeometry.attributes.randomDirection // 随机方向
? pointsGeometry.attributes.randomDirection.array
: undefined;
const randomSpeeds = pointsGeometry.attributes.randomSpeed // 随机速度
? pointsGeometry.attributes.randomSpeed.array
: undefined;
const randomPositions = pointsGeometry.attributes.randomPosition
? pointsGeometry.attributes.randomPosition.array
: undefined; // 随机初始位置

// 真实鼠标位置
currentMouse.x = THREE.MathUtils.lerp(currentMouse.x, mouse.x, 0.05);
currentMouse.y = THREE.MathUtils.lerp(currentMouse.y, mouse.y, 0.05);
// 点稍微旋转一下(旋转模型)
points.rotation.x =
Math.sin(elapsedTime * 0.2) * 0.2 - currentMouse.x * 0.2 * mouseOffset;
points.rotation.z =
Math.sin(elapsedTime * 0.2) * 0.1 - currentMouse.y * 0.2 * mouseOffset;

// 更新 Raycaster 的方向和位置
raycaster.setFromCamera(mouse, camera);

// 获取与点的交叉信息
const intersects = raycaster.intersectObject(plane);

// 粒子数组
const referPositions = new Float32Array(
pointsGeometry.attributes.position.array.length
);
for (let i = 0; i < positions.length; i += 3) {
// 获取初始位置
const initialX = initialPositions[i];
const initialY = initialPositions[i + 1];
const initialZ = initialPositions[i + 2];
// 获取当前粒子的运动方向和速度
const direction = {
x: randomDirections[i / 3],
y: randomDirections[i / 3 + 1],
z: randomDirections[i / 3 + 2],
};
const speed = randomSpeeds[i / 3];

// 根据时间和速度生成随机摆动动画
const offsetX =
Math.sin(elapsedTime * speed + initialX) * direction.x * offsetRadius;
const offsetY =
Math.sin(elapsedTime * speed + initialY) * direction.y * offsetRadius;
const offsetZ =
Math.sin(elapsedTime * speed + initialZ) * direction.z * offsetRadius;

// 更新粒子的位置
referPositions[i] = initialX + offsetX;
referPositions[i + 1] = initialY + offsetY;
referPositions[i + 2] = initialZ + offsetZ;
// 默认粒子大小为 1
let targetSize = 1;
let stepLength = 0.1;
let currentPosition;

if (randomPositions != undefined) {
currentPosition = {
x:
referPositions[i] +
randomPositions[i] *
Math.sin((currentPage.value % 10) * Math.PI * 0.1),
y:
referPositions[i + 1] +
randomPositions[i + 1] *
Math.sin((currentPage.value % 10) * Math.PI * 0.1),
z:
referPositions[i + 2] +
randomPositions[i + 2] *
Math.sin((currentPage.value % 10) * Math.PI * 0.1),
};
} else {
currentPosition = {
x: referPositions[i],
y: referPositions[i + 1],
z: referPositions[i + 2],
};
}

// 如果鼠标附近有顶点,将它们放大并四散
if (intersects.length > 0) {
const intersectPoint = intersects[0].point; // 获取鼠标的交点位置
const distance = new THREE.Vector2(
initialX + points.position.x,
initialY + points.position.y
).distanceTo(new THREE.Vector2(intersectPoint.x, intersectPoint.y));

if (distance < distanceScale) {
// 距离阈值,根据需要调整
targetSize = 2; // 放大粒子

let targetLength = 0.1;
// 增加四散效果
positions[i] = THREE.MathUtils.lerp(
positions[i],
currentPosition.x +
(currentPosition.x - (intersectPoint.x - points.position.x)) *
targetLength,
stepLength
);
positions[i + 1] = THREE.MathUtils.lerp(
positions[i + 1],
currentPosition.y +
(currentPosition.y - (intersectPoint.y - points.position.y)) *
targetLength,
stepLength
);
positions[i + 2] = THREE.MathUtils.lerp(
positions[i + 2],
currentPosition.z +
(currentPosition.z - (intersectPoint.z - points.position.z)) *
targetLength,
stepLength
);
sizes[i / 3] = THREE.MathUtils.lerp(
sizes[i / 3],
initialSizes[i / 3] * targetSize,
0.03
);
} else {
positions[i] = THREE.MathUtils.lerp(
positions[i],
currentPosition.x,
stepLength
);
positions[i + 1] = THREE.MathUtils.lerp(
positions[i + 1],
currentPosition.y,
stepLength
);
positions[i + 2] = THREE.MathUtils.lerp(
positions[i + 2],
currentPosition.z,
stepLength
);
sizes[i / 3] = THREE.MathUtils.lerp(
sizes[i / 3],
initialSizes[i / 3],
0.03
);
}
} else {
positions[i] = THREE.MathUtils.lerp(
positions[i],
currentPosition.x,
stepLength
);
positions[i + 1] = THREE.MathUtils.lerp(
positions[i + 1],
currentPosition.y,
stepLength
);
positions[i + 2] = THREE.MathUtils.lerp(
positions[i + 2],
currentPosition.z,
stepLength
);
sizes[i / 3] = THREE.MathUtils.lerp(
sizes[i / 3],
initialSizes[i / 3],
0.03
);
}

// 根据时间和速度生成随机颜色
colors[i] =
initialColors[i] +
Math.sin(elapsedTime * speed + initialX + initialColors[i]) * 0.1;
colors[i + 1] =
initialColors[i + 1] +
Math.sin(elapsedTime * speed + initialY + initialColors[i + 1]) * 0.1;
colors[i + 2] =
initialColors[i + 2] +
Math.sin(elapsedTime * speed + initialZ + initialColors[i + 2]) * 0.1;
}

// 通知Three.js更新粒子的几何体
pointsGeometry.attributes.position.needsUpdate = true;
pointsGeometry.attributes.color.needsUpdate = true;
pointsGeometry.attributes.vSize.needsUpdate = true; // 标记需要更新
requestAnimationFrame(animateParticles);
}
animateParticles();

return points;
}

最终效果

到这里,我们就已经完成了这个小案例了,让我们看看最终效果

结语

我把代码放到了我的gitee上面,大家如果需要的话可以去拉取一下。本篇文章就到这里了,更多内容敬请期待,债见。

上一篇:
记录一下Bug
下一篇:
【可视化学习】93-从入门到放弃WebGL(二十二)